Grinding Stone

Flagstone Floor Before After Restoration Morecambe

Old Bitumen Covered Flagstone Floor Restored in Morecambe

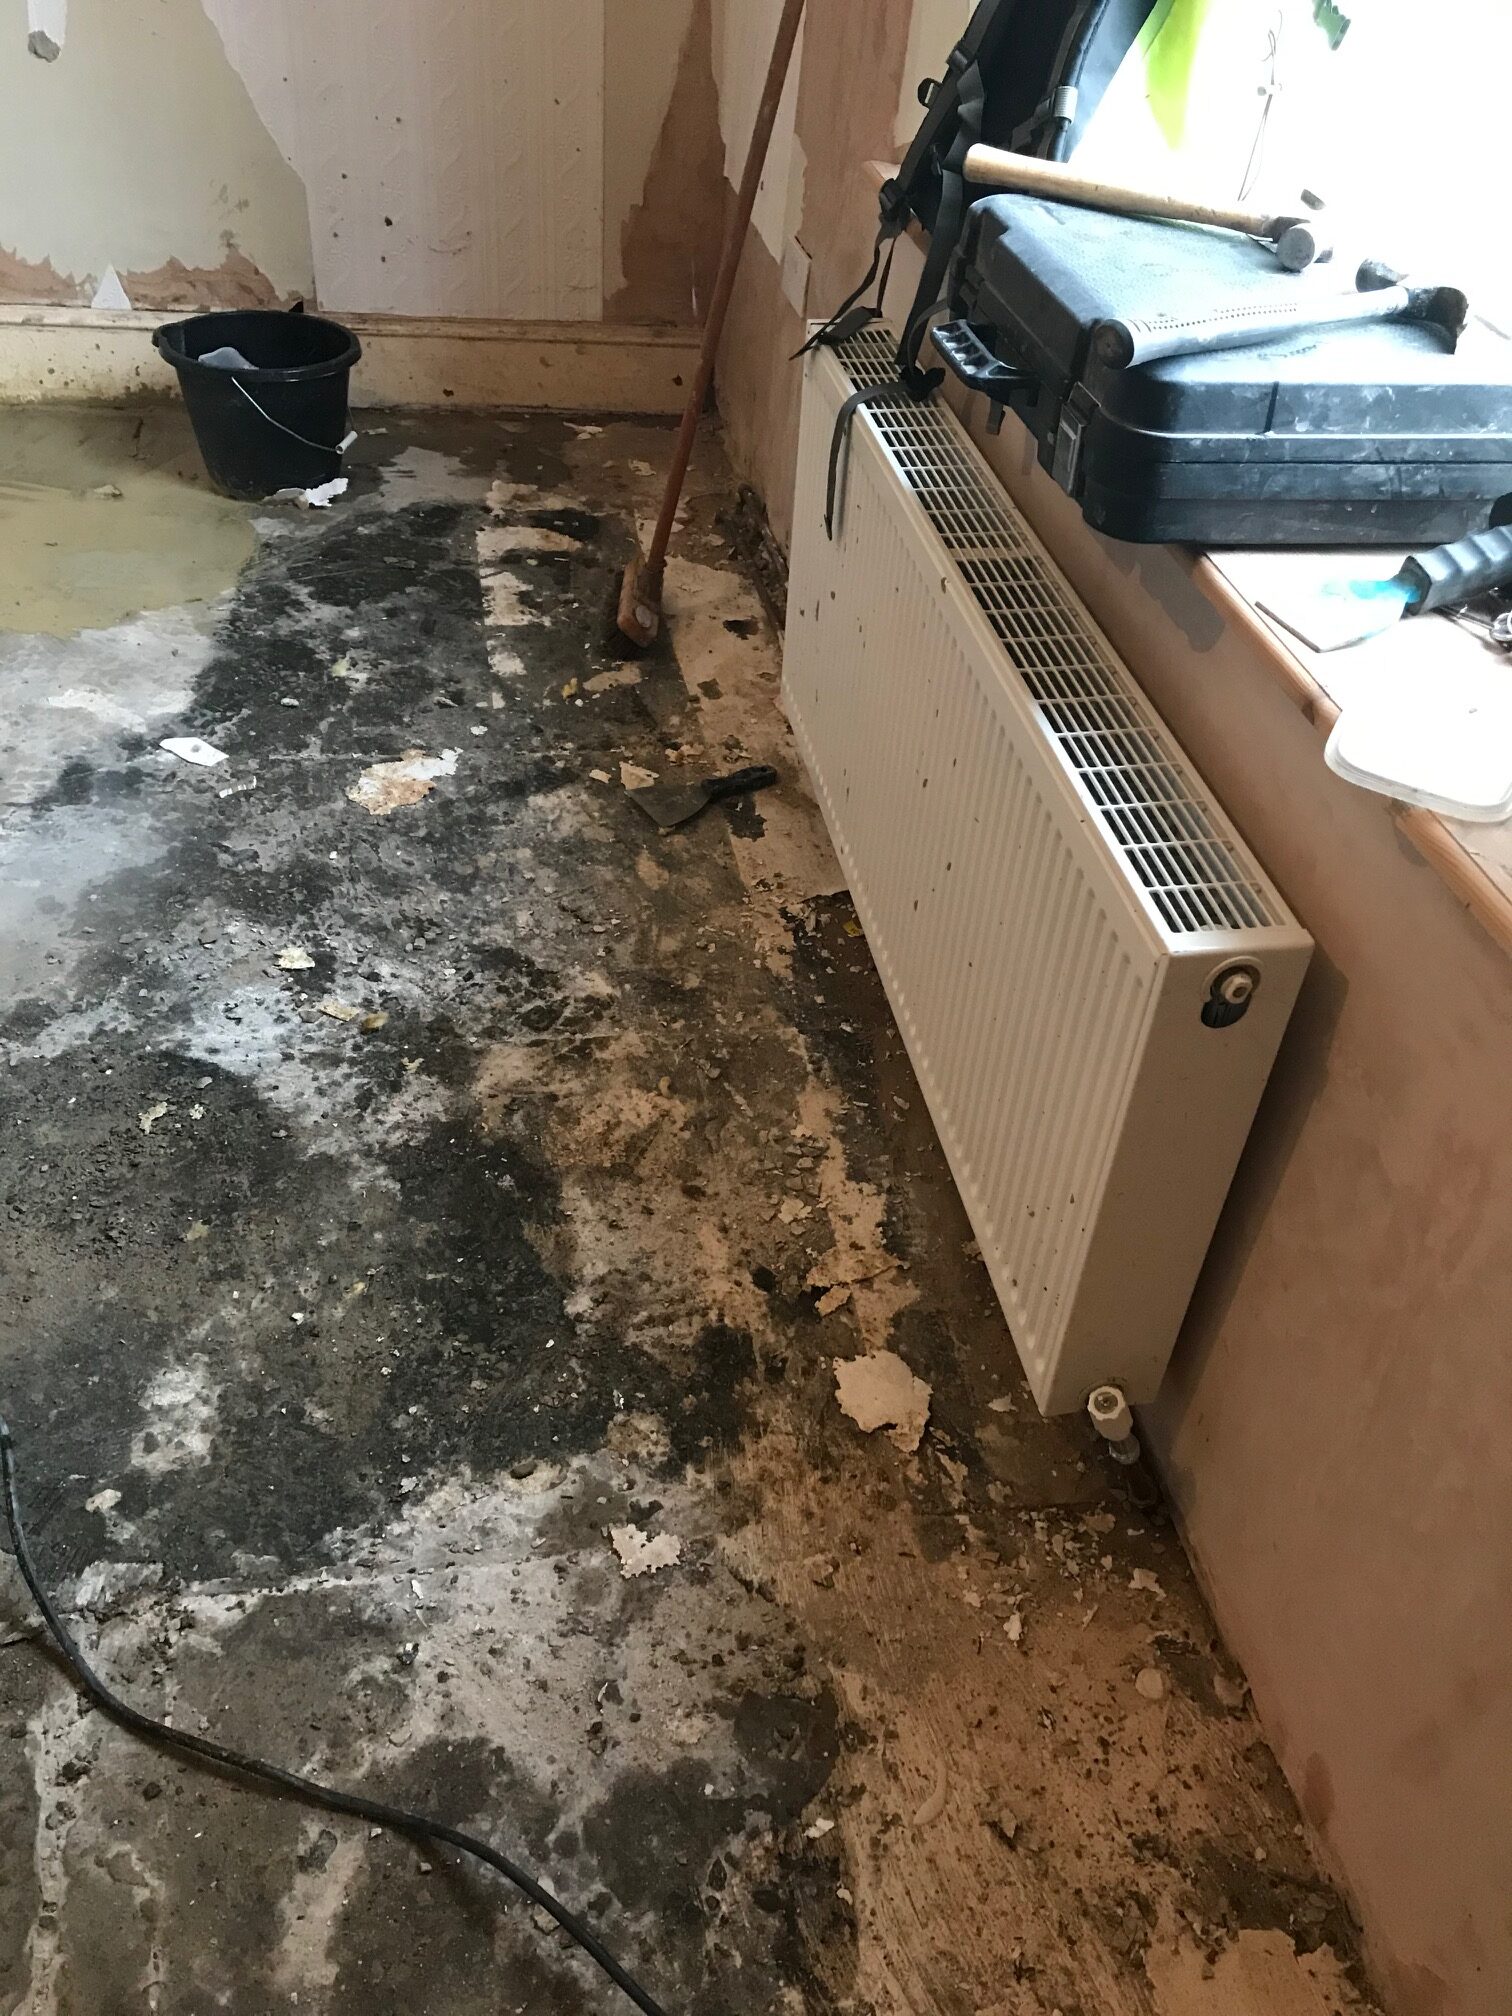
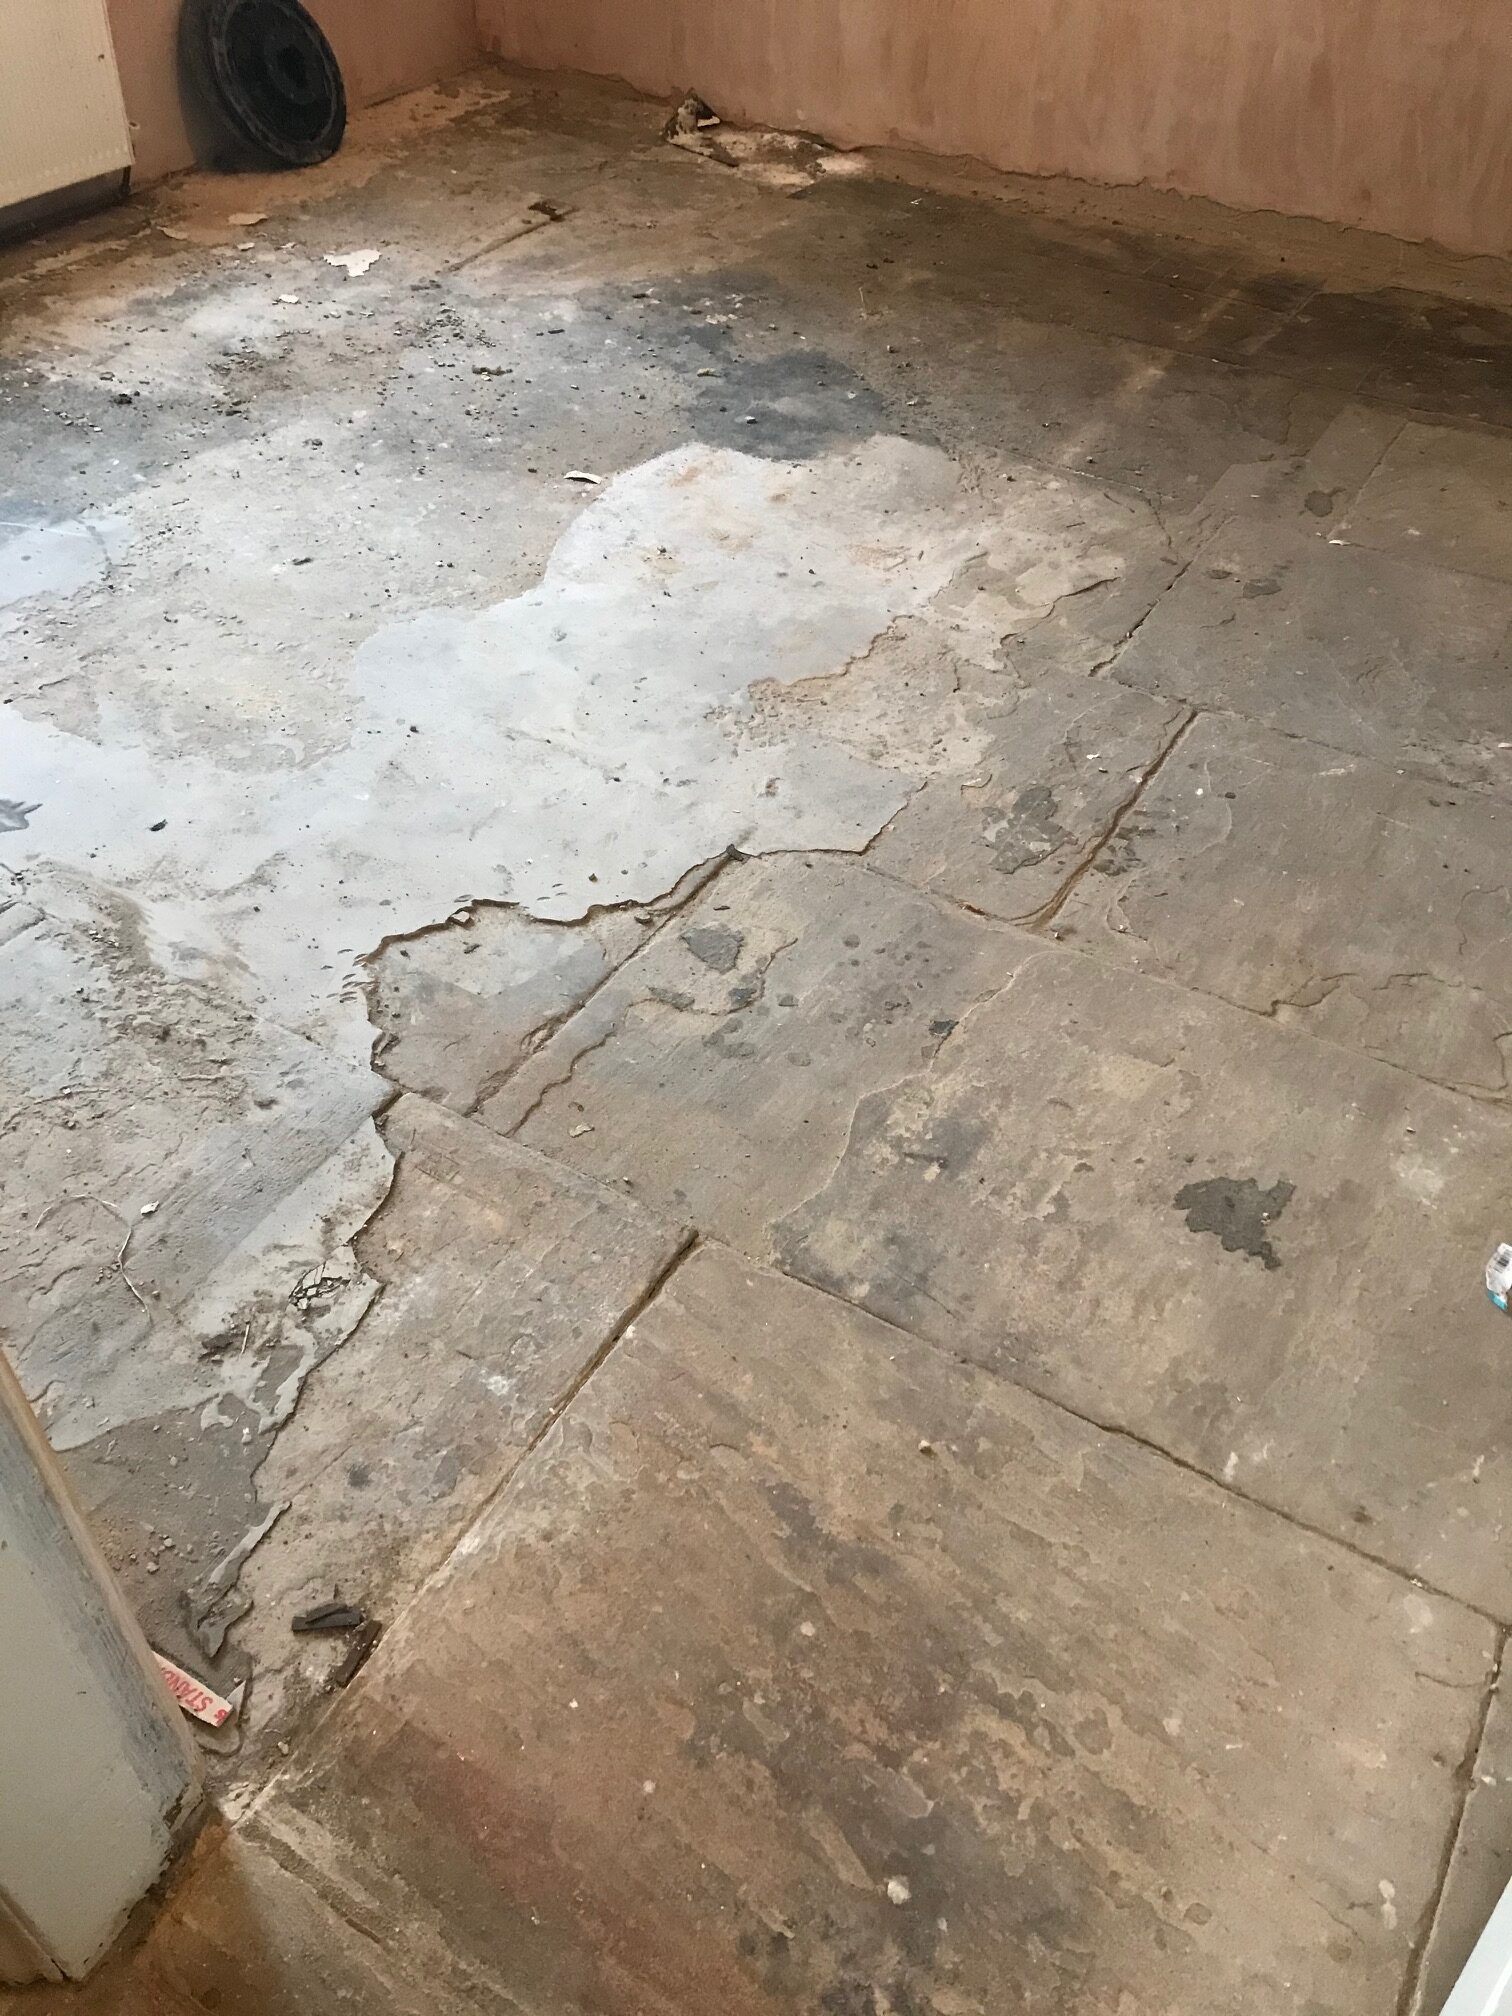
Late last year I was asked to survey a Flagstone floor in Morecambe which appeared to be beyond restoration. The floor had a long history and at some point in its past was covered with carpet which had been secured onto self-levelling cement with bitumen. All the companies that had visited before we got there said nothing could be done with it and recommended replacing the carpet or covering it with vinyl. As mentioned, it had been previously covered with carpet however this is an old floor and damp had been rising though the floor causing the carpet to rot. My client didn’t want to entertain that as a solution and so kept on looking for a company that could restore the stone.
Flagstone Floor Before Restoration Morecambe Removing Self-Levelling Compound and Bitumen from Flagstones in Morecambe

Old houses like this one do not have a damp proof membrane installed under the floor and moisture rising through the stone needs to be allowed to evaporate or you will find damp spreads outwards towards the walls leading to rising damp. In this case I suspect the bitumen which acts as a water barrier had either failed or damp was coming up the wall and into the carpet and underlay. Certainly, in our experience, if you have an old natural stone floor like this it is best not to cover it with anything more than a rug.

Having inspected the floor, I recommended restoring the appearance of the flagstones by grinding the surface down a few millimetres to reveal new stone. We can do this using several different grades of coarse diamond encrusted diamond pads, a process we call Milling.

Cleaning/Repairing a Flagstone Tiled Hallway Floor

After being given instructions to restore the floor we returned on the schedule date and began by removing as much of the loose cement and bitumen by hand using hand tools.

Removing Self-Levelling Compound and Bitumen from Flagstones in Morecambe

milling the floor using a very coarse 50-Grit pad fitted with DRB segments (Diamond Resin Blocks). Cutting the surface of the stone like this is hard work and requires the use of a weighted floor buffer to apply the pads. The process is lubricated with water and generates a lot of slurry which is extracted off the floor with a wet vacuum. The 50-grit pad was followed with a 100-grit DRB pad and then 200-grit DRB pad which start the slow process of refining the surface. It’s a two-man job so I brought a colleague along, whilst one was milling the other could take a rest and help with the clean-up.

The milling did a great job of removing the Black Bitumen, Self-Levelling compound and old paint revealing the true beauty ` and colour of the Flagstones, in fact the stone had quite a variance of colour which was lovely to see coming through. Half the pointing was missing so after milling the stone we moved onto replacing what was left of the old pointing and replacing with a modern breathable product.

We called back the next day to finish the stone cleaning by further renovating the stone surface using finer grades of diamond encrusted burnishing pads of 400 and 800-grit. Again, you need to water to lubricate the process and rinse the slurry of the floor with water after each pad, then extract with a wet vacuum. This does leave the floor damp, so once we had finished it was left to dry out for a few days, old floors without a damp proof membrane can take longer to dry and especially so in the Winter months.

Flagstone Floor After Restoration Morecambe

Sealing a Flagstone Tiled Hallway Floor

Returning a few days later the stone was first checked with a damp meter to check it had dried out before sealing. The moisture readings were fine, so it was then sealed with a couple of coats of Tile Doctor Colour Grow which penetrates deep into the stone protecting it from within and enhancing the natural colours in the process.

Flagstone Floor After Restoration Morecambe

The flagstone floor was completely transformed by the process and our client was over the moon with the result. In fact, they have asked us back to do the same in the Kitchen as the vinyl in there has since been torn up and revealed the same stone.


Professional Restoration of a Flagstone Tiled Hallway in Lancashire

Old Bitumen Covered Flagstone Floor Restored in Morecambe Read More »

Textured Indian Sandstone Before After Grinding Smooth Barnoldswick

Rough Textured Indian Sandstone Grinded Smooth in Barnoldswick

The pictures below show a Rough Textured Indian Sandstone floor installed in the Kitchen and Hallway at a property in Bernoldswick which is a small town just outside the Yorkshire Dales national park. The client called us out to have a look at their floor which was very dirty. They were undecided as to what to do with it and were even considering ripping it up and putting a more practical floor down. This Sandstone has a rough texture which traps dirt and can shred mops making it very difficult to maintain so it’s not surprising that the client was close to giving up on it.

Textured Indian Sandstone Before Cleaning Barnoldswick

Initially we were asked just to deep clean and seal the Stone, but I realised that wouldn’t resolve the problem completely, so I offered a service we call Milling. This is a process involves applying coarse diamond pads with special machinery to remove a good chunk of the rough texture (about 80 to 85% ). It would leave the stone with a much smoother finish which is easier to keep clean, easier to seal and a lot easier to maintain in the future.

Textured Indian Sandstone Before Cleaning Barnoldswick Textured Indian Sandstone Before Cleaning Barnoldswick

After a demonstration was done and a price given for either a clean and seal or to Mill first followed by a clean and seal the customer opted for the latter. This would also prove significantly cheaper than ripping up the floor, hiring a skip to take away the stone, then self-levelling the concrete to get it ready for the new floor, not to mention the cost of the new floor covering.

Cleaning and Milling an Indian Sandstone Tiled Kitchen and Hallway Floor

Milling the stone involves the use of a set of thee milling pads of different grades (50, 100 and 200 grit) which are applied in sequence. You start with the coarse and abrasive 50 grit milling pad and follow this by smoothing this surface with the finer 100 and 200 diamond grit milling pads. Water is used to lubricate and capture the dust which is created during the process resulting in a slurry which needs to be rinsed away and extracted with a wet vacuum between each pad. The process requires the use of a solid weighted rotary machine and a fair bit of muscle power to guide it.

As you can see from the pictures the difference is immense but what you can’t tell from these photos is how smooth the stone feels to the touch as its the rough texture of Sandstone that catches all the dirt and makes it hard to clean, even after it has been cleaned and sealed professionally.

To refine the surface of the Sandstone even further the Milling process is followed by the application of finer grade Burnishing pads, again applied with water and the soil rinsed off between each pad. This process uses no chemical cleaning products only water, Diamond pads and machinery.

Sealing an Indian Sandstone Tiled Kitchen and Hallway Floor

After allowing the stone to fully dry out overnight we finished the job with several coats of Tile Doctor Colour Grow which is a colour enhancing impregnating sealer that protects the stone from within. It gave the stone a nice low-key matt colour enhanced finish that really showed off the character in the stone.

Textured Indian Sandstone After Cleaning Barnoldswick Textured Indian Sandstone After Cleaning Barnoldswick

The client was over the moon with the result and were so pleased they had not ripped up the floor!

Textured Indian Sandstone After Cleaning Barnoldswick


Professional Restoration of Indian Sandstone Floor in Lancashire

Rough Textured Indian Sandstone Grinded Smooth in Barnoldswick Read More »

Scroll to Top