Terracotta Tile Cleaning

Welcome to my Work History archive where you will find detailed examples of the cleaning and renovation of Terracotta tiles carried out in Lancashire

Cleaning and Renovating Terracotta Tiles

Terracotta tiles have been around in certain parts of the world for over two millennia, in fact the word Terracotta means burned earth. The ancient Romans used a variety of terracotta tiles in their villas and palaces for many centuries. Terracotta tiles are thicker than most modern tiles giving them strength and durability.

The one big downside to Terracotta is the fact that it has no glaze on the surface and being very porous can soon pick up and store muck and dirt very quickly. If you have ever owned a Terracotta floor before you will be able to relate to this problem however the answer is to ensure you have the correct sealer in place.

Traditionally Wax was used to protect terracotta tiles however with the advent of modern purpose made sealers we don’t recommend it. Not only is it troublesome to remove but it scratches easily and we have seen situations in kitchens where dirt and oil trapped in the wax turns black and becomes very unsightly.

For sealing Terracotta we actually recommend Tile Doctor Seal and Go which works well on clay tiles such as Terracotta and is also water based so doesn’t give off a smell as it dries. When applying a sealer always make sure the floor is dry first as applying a sealer to a damp floor can lead to inconsistent results. Because of this we typically clean and seal Terracotta floors over two days so we can clean on day one and then apply the sealer on day two having let the floor dry off overnight.

Below you will find detailed examples of work we have carried out in the past, it should give you some idea of what’s involved and what can be achieved with the right techniques and products.


Mexican Terracotta Tiled kitchen Before and After Renovation Penwortham

Stripping Wax from Mexican Terracotta Kitchen Tiles in Penwortham

My client from Penwortham, on the outskirts of Preston on the south bank of the River Ribble contacted me about their Mexican Terracotta kitchen floor as you can see from the photographs below was in a bit of a state.

Mexican Terracotta Floor Penwortham Before Cleaning
On the pictures you will see numerous white marks which have happened due to the use of bleach-based supermarket cleaning products on the tiles. The bleach has upset the original wax polish and over time layer after layer of new polish has been applied to try and hide it, but they had also continued to use the wrong cleaner, so the problem simply became worse. The floor was otherwise in good condition with very little damage, although the grout had also discoloured and needed deep cleaning.

Mexican Terracotta Floor Penwortham Before Cleaning

Stripping Wax off a Mexican Terracotta Tiles

Luckily Tile Doctor have recently brought out a new product called Tile Doctor Wax Away which is specifically formulated to remove layers and layers of compacted wax polish. It was the first time we had used it on a situation this bad before to it was in for a good test. I’m please to say Wax Away didn’t disappoint and is designed to melts the formula that makes the wax stick together. So, with the aid of a stiff deck brush the product was scrubbed into the floor and then extracted off the floor with an industrial wet vacuum.

Mexican Terracotta Floor Penwortham During Cleaning
With the old layers of wax removed the white markings that were spoiling the look of the surface disappeared. Stubborn areas had to be retreated but once all the wax slurry was removed using the wet vacuum you could see the improvement in the floor.

The grout was then cleaned using a Tile Doctor Pro-Clean scrubbed into the grout line using a stiff brush, one done the soiled cleaning solution was rinsed off the floor with water and extracted using the wet vacuum. The only thing we couldn’t fix was the damage done to the grout by the bleaching agent which hydrates grout and turns it white. It often cracks the grout as well with long term usage as in this case. We did offer to apply a grout colourant over this once the sealer had fully dried, but this was an added cost the client didn’t want to bare which was understandable. This is a service we could return in the future to complete if the client wished.

Sealing Mexican Terracotta Kitchen Floor

Once cleaned, we fully rinsed with water to remove any chemicals and left the kitchen floor to dry out overnight. Returning the following morning to seal the floor. Before starting the sealing process however I wanted to be sure the floor was indeed dry, so I ran a few checked with a moisture meter in different spots. Once satisfied we moved on to the sealing process.

Terracotta tiles being made of clay are very porous and so seven coats of sealer were applied before it was fully sealed. We used Tile Doctor Seal and Go for this, it’s an excellent choice for Terracotta as it brings out the true hue and texture of the clay as well as adding a nice subtle shine. The new sealer will make the floor much easier to maintain than the old wax polish they had previously been using.

Mexican Terracotta Floor Penwortham After Cleaning
For regular cleaning of sealed floors, we recommend using Tile Doctor Ph Neutral Tile Cleaner. Most supermarket cleaning products are acidic which will prematurely degrade the sealer over time.

As you can see from the after photos the floor was left looking much cleaner and brighter and the horrible white marks were no where to be seen. The client was very happy with the final result.

Mexican Terracotta Floor Penwortham After Cleaning
 

Professional Clean and Seal of a Mexican Terracotta Tiled Floor in Lancashire

Stripping Wax from Mexican Terracotta Kitchen Tiles in Penwortham Read More »

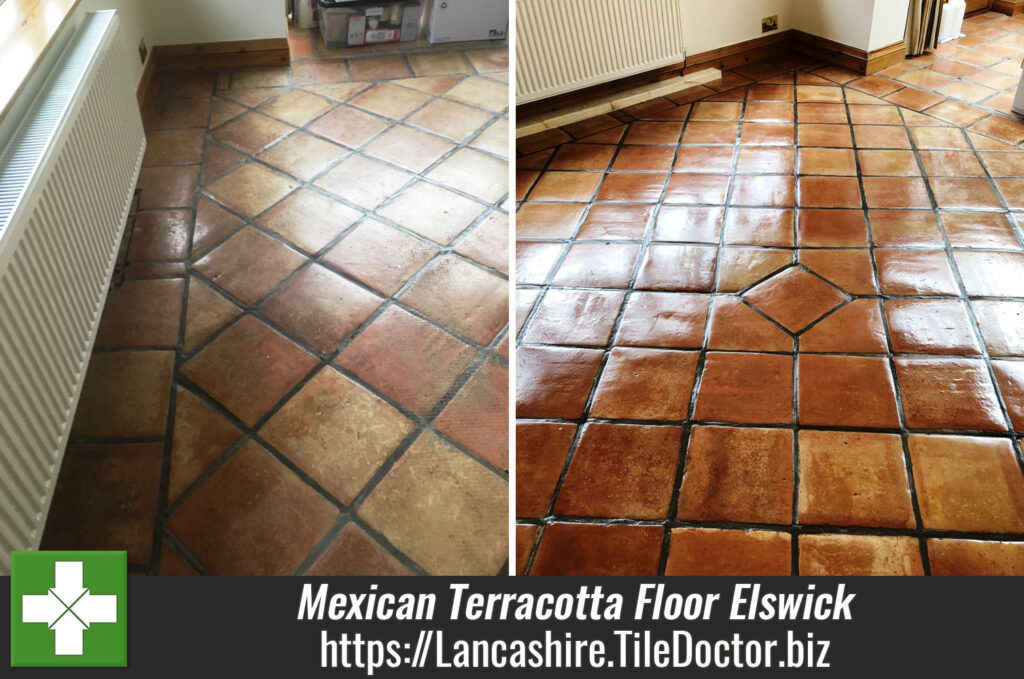
Mexican Terracotta Before and After Cleaning Sealing Elswick

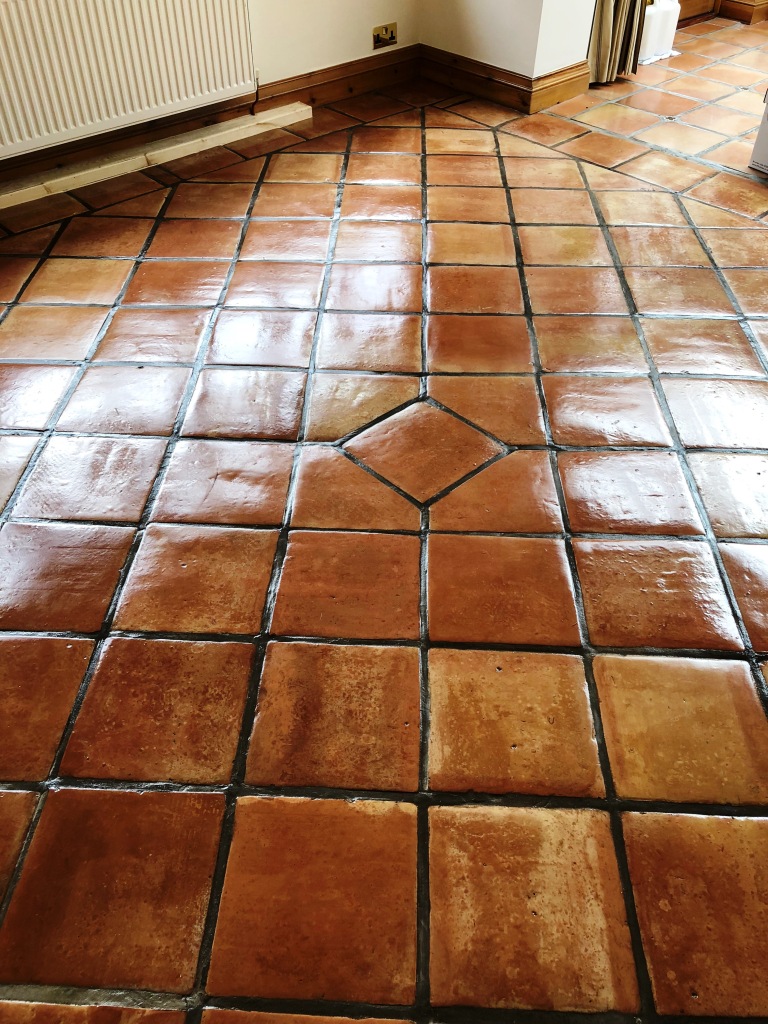
Carpet Covered Mexican Terracotta Floor Restored in Elswick

Mexican Terracotta is quite a difficult tile to deal with, mainly due to the fact it is very porous clay and partly fired, unlike a Spanish or French equivalent which is fully fired and a lot less porous as a result. Although difficult to maintain they are full of character and colour so it’s understandable why they are so popular.

Mexican Terracotta Before Cleaning Elswick
This particular Mexican Terracotta floor was installed in the kitchen and garden room of a house in Elswick near Preston around twenty years prior. The house had recently changed hands and the new owner wanted the floor in the garden room renovating, it had been covered with a carpet in the past and had now lost all its colour due to ingrained dirt.

Mexican Terracotta Before Cleaning Elswick Mexican Terracotta Before Cleaning Elswick

Cleaning Mexican Terracotta Tiles

You can see from some of the photographs that the tiles were quite grubby, so I knew we would have to give this floor a really deep clean to get the dirt out. I felt the best way forward would be to apply Tile Doctor Oxy Gel to the Terracotta and leave it to soak in. This product is a very strong gel version of Tile Doctor Pro-Clean, our popular tile and grout cleaner and needs a lot of dwell time to break down fully what was left of the sealer, carpet adhesive and extract the dirt from the pores of the clay.

The product was then worked into the tile and grout using a black scrubbing pad fitted to a rotary floor buffer running at a slow speed. This action worked as predicted and the now soiled cleaning solution was extracted from the floor using a wet vacuum. A lot of rinsing with water was required after this to remove all the dirt and traces of product from the tiles. I wanted to ensure all traces of the alkaline cleaning solution were rinsed from the pores of the clay, if we left any of this in the clay it could cause issues with the new sealer.

Sealing Mexican Terracotta Tiles

The floor was left to fully dry out which can take some time with Terracotta so after returning to seal the floor damp meter readings were taken first so we could be sure it had dried completely. This is essential because excess moisture can cloud the sealer and damage its performance.

Our choice of sealer was Tile Doctor Seal and Go, which provides excellent surface protection along with an aesthetically pleasing deep sheen finish that the customer wanted. The sealer is also water based so you don’t get that solvent smell as it dries.

Mexican Terracotta Before Cleaning Elswick
As you can see from the photographs, the result was fantastic, and it just goes to show even a twenty-year-old Terracotta floor can be rejuvenated and make it look like almost new.

Excellent results on terracotta tiled floor that had had carpet laid on top so was covered with glue and pretty dirty! Wouldn’t hesitate to use them again.
Caroline M, Nr Preston

Mexican Terracotta Before Cleaning Elswick
 

Professional Mexican Terracotta Tile Renovation in Lancashire

Carpet Covered Mexican Terracotta Floor Restored in Elswick Read More »
Mexican Terracotta Floor Restoration Ormskirk

Cracked Mexican Terracotta Kitchen Tiles Restored in Ormskirk

Cracks can appear in tiles for several different reasons, but in all cases, they spoil the overall appearance of the floor. I was contacted just before Christmas by a customer in the market town of Ormskirk with a significant problem with cracking in their warm and rustic Mexican Terracotta tiles, particularly in and around doorways. The area was quite large at 85 square yards and covered multiple rooms. In general, the tiles were also in need with a deep clean and fresh seal.

Mexican Terracotta Kitchen Floor Ormskirk Before Cleaning
After inspecting the tiles first-hand, I determined that the cracking was most likely due to the addition of an extension: the concrete floors were laid at separate intervals, causing some expansion and contraction issues. The effects are similar to shifting Tectonic plates in the Earth’s crust, if not so drastic (the tiles just tend to crack, rather than causing an earthquake!).

After agreeing on a quote for the work, I set about putting the situation right.

Repairing Cracked Mexican Terracotta Tiles

The more laborious and costly answer to the problem of damaged tiles would be to replace them with new ones, but we have found that implementing an expansion joint in the areas where the concrete floors touch each other is more effective.

Mexican Terracotta Kitchen Floor Ormskirk Showing Cracked Grout
We have done this before many times, using flexible adhesive and grout to fill the cracks and counteract any further movement between the different concrete floors. This repair work was carried or over two days, in order to allow time for the adhesive and then grout to set.

Cleaning Mexican Terracotta Tiles

By the third day the tile repairs were complete, so we started cleaning the whole tiled area. We usually carry out repairs before cleaning to improve the chance of the repair blending in with the existing tile.

You can see from some of the photographs above that the tiles had started to get quite grubby and were proving difficult to keep clean. To clean and remove the old sealer we applied a diluted solution of Tile Doctor Remove and Go to the tiles allowing it soak into the pores for ten minutes before scrubbing it in with a rotary machine fitted with a black pad. The floor was rinsed with water and the resultant slurry was extracted using a wet vacuum.

The next step was to give the grout lines a thorough scrub with a strong solution of Tile Doctor Pro-Clean, which is a reliable alkaline cleaner that works well on grout and tile. The dirty cleaning solution was then extracted with a wet vacuum and the whole floor rinsed with more water to remove any trace of cleaning product. The wet vacuum was then used again to get the floor as dry as possible before leaving for the day.

Mexican Terracotta Kitchen Floor Ormskirk After Cleaning

Sealing Mexican Terracotta Tiles

On the fourth day, we returned to seal the floor, but not before checking first with a damp meter that it had dried completely. This is essential because excess moisture can cloud the sealer and damage its performance.

Mexican Terracotta Kitchen Floor Ormskirk After Repair and Cleaning
Our choice of sealer was Tile Doctor Seal and Go, which provides excellent surface protection along with an aesthetically pleasing deep sheen finish.

Mexican Terracotta Kitchen Floor Ormskirk After and Sealing
As you can see from the photographs above, the result was fantastic. The customer was amazed by the improvement and very pleased that the difficult cracking problem had been resolved. Another satisfied customer!

Mexican Terracotta Kitchen Floor Ormskirk After and Sealing
 

Professional Mexican Terracotta Tile Renovation in Lancashire

Cracked Mexican Terracotta Kitchen Tiles Restored in Ormskirk Read More »

Black Terracotta in Pendle Before and After Cleaning and Sealing

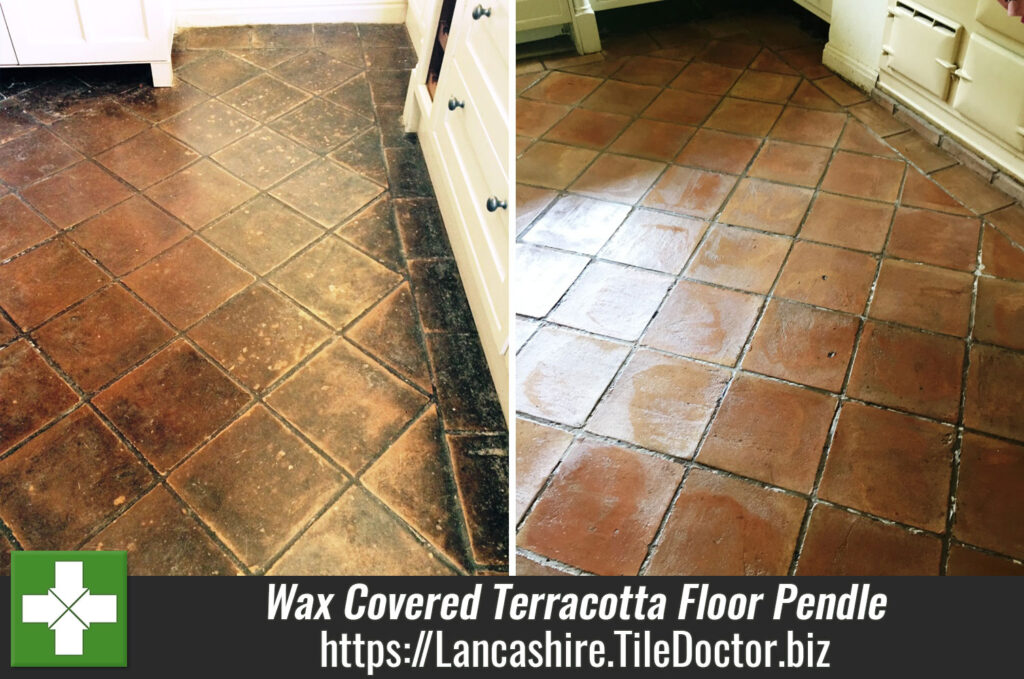
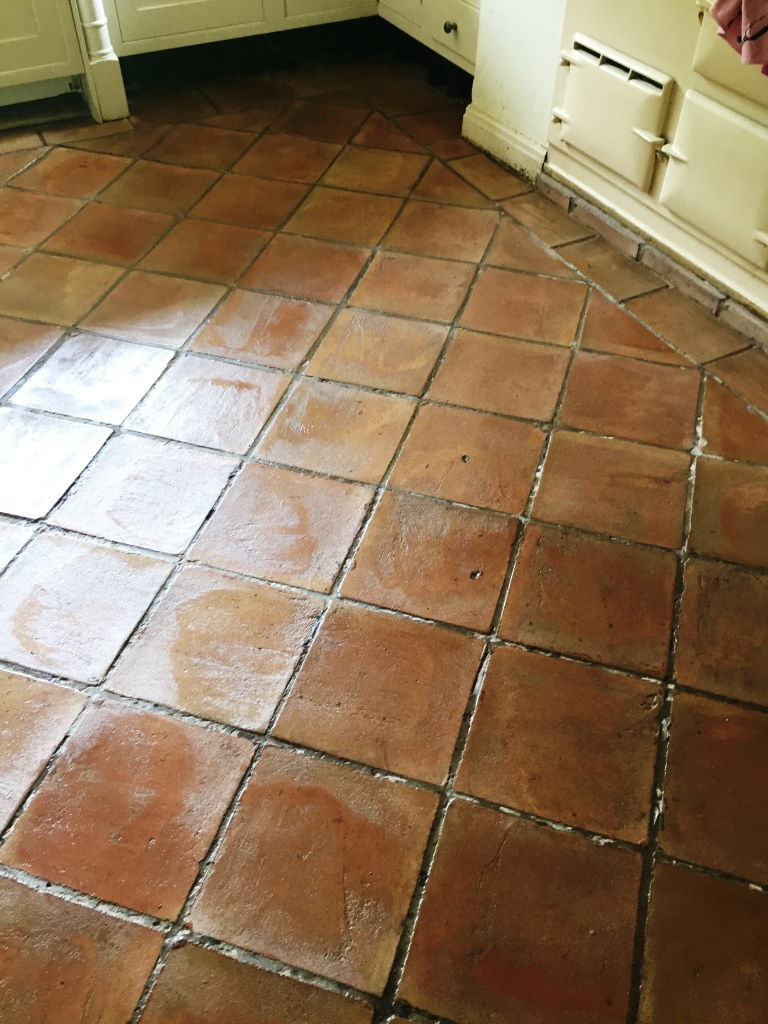
Wax Covered Terracotta Tiled Floor Restored to New in Pendle

These Terracotta tiles, located at a property in the town of Pendle, Lancashire had the unique circumstances of being covered by a thick layer of wax which had turned black over the years. Anyone from the Lancs area will have heard of the famous Pendle Witch Trials, and we would need to channel some serious magic to successfully remove the unsightly wax.

The wax had been settled on the tiles for many years, proving difficult to remove even for a seasoned tile cleaning professional, especially since Terracotta has a high porosity and therefore allows the muck to become more easily ingrained. We had to employ all of our years of experience to get the job done. Here’s how we did it.

Black Terracotta in Pendle Before Cleaning Black Terracotta in Pendle Before Cleaning

Cleaning a Wax Covered Terracotta Tiled Floor

Our main product of choice when dealing with the heavy wax build-up was the strong alkaline gel cleaner, Tile Doctor Oxy-Gel. Oxy-Gel is a stripper and degreaser that functions very similarly to our liquid alkaline cleaner, Tile Doctor Pro Clean, the main difference being that Oxy-Gel is in gel form, making it usable on vertical and sloped surfaces.

The thicker consistency of Oxy-Gel would make for a better foil for the thick buildup of wax: we applied it to the tiles and worked it in using a series of buffing pads fitted to a buffing machine. We also employed the assistance of a steaming machine that helped to soften the wax and make it easier to break down. A lot of rinsing with clean water was required, and several wet-vax machines were used to remove the excess cleaning residue, but it quickly became clear that we had finally achieved the result the customer was hoping for.

Black Terracotta in Pendle After Cleaning Before Sealing

Sealing a Terracotta Tiled Floor

As was to be expected, the new unveiled tiles were very dull and lifeless, having not been sealed properly for a number of years. To restore the colour and lustre to the tiles we opted to use two different sealers. The first was one coat of Tile Doctor Colour Grow, an impregnating sealer which penetrates into the pores of the Terracotta to block dirt from becoming trapped. It also contains colour intensifying properties which really brought out the natural reddish shades in the stone.

The second was Tile Doctor Seal and Go, which differs from its impregnating counterpart in that it is a topical sealer. This means that it forms a layer of protection of the surface of the tiles, as opposed to in the pores of the stone. Seal and Go eliminates the need for two-step sealing by providing both a protective layer and a durable, aesthetic sheen finish in the same product.

As you can see from the last two photographs, this combination of sealers really helped in getting these Terracotta tiles looking at their best again after years of neglect under the layer of black wax. We left our very happy customer with some advice to only use pH neutral cleaners for aftercare as general maintenance producers, including bleaches and washing up liquids can reduce the life of the sealer.

Black Terracotta in Pendle After Cleaning and Sealing Black Terracotta in Pendle After Cleaning and Sealing


Professional Restoration of a Wax Covered Terracotta Kitchen Floor in Lancashire

Wax Covered Terracotta Tiled Floor Restored to New in Pendle Read More »

Grout Colouring Preston After

Grout Cleaning and Colouring for a Ceramic Terracotta Tiled Floor in Preston

Well maintained grout is fundamental to achieving a great looking tiled floor, whatever your choice of tile or stone. Even if the tiles themselves are in reasonably good condition, dirty and damaged grout lines can really upset the overall appearance of the floor.

Such was the case with this Ceramic Terracotta tiled floor in the bustling Lancashire town of Preston. The property owner recently had a new kitchen installed, but chose not to have new tiles fitted since the original tiles (dating back a good 15 years) were still in fantastic physical condition, with no chips or breaks. This is quite surprising considering that the kitchen is typically one of the main areas of traffic in any house however Ceramic and Porcelain tiles are very durable.

The grout, however, told a different story: it was very dirty and even missing in parts. Over the years it had come away and was replaced with new grout, however, this had left the whole floor with a displeasing patchy finish. Upon closer inspection it also became clear that the tiles themselves could do with a deep clean. I stepped in to discuss what could be done to improve the appearance of the floor and recommended a deep clean and grout colouring.

Grout Colouring Preston Before

Cleaning Ceramic Terracotta Tiles and Grout

Tile Doctor Pro Clean, a versatile high alkaline cleaner, was my choice of product for removing the dirt from the tiles. I applied it liberally across the floor before scrubbing it in with a scrubbing pad fitted to a rotary machine. Pro Clean is a go-to product for the removal of dirt, stains and other muck on most kinds of natural stone floor, and is capable of dealing with small amounts of soil to heavy buildup.

Once the tiles had been cleaned I turned special attention to the grout. I cleaned it with a product called Grout Colourant Pre-Treatment Cleaner, which is slightly acidic to break down ingrained dirt and tackle inherent grout smears, while ensuring that grout colourant bonds to the grout once it is applied.

Colouring Grout for Ceramic Terracotta a Tiles

The job took two days to complete as it was quite a large floor stretching into several rooms. The floor also needed to dry off overnight once I had completed the cleaning process, so I decided to call back the next day once it had dried completely. Upon my return I proceeded to colour the freshly cleaned grout by applying one coat of natural grey colourant. Sometimes two coats might be required for blending purposes, but not on this occasion.

The customer was very happy with the results. She had, in fact, thought of ripping up the old tiles as part of the kitchen restoration, but she decided not to since she really likes the tiles. A restoration by the Lancashire Tile Doctor was the appropriate and much less expensive choice!

Grout Colouring Preston After
 

Professional Grout Cleaning and Colouring of a Ceramic Floor in Lancashire

Grout Cleaning and Colouring for a Ceramic Terracotta Tiled Floor in Preston Read More »

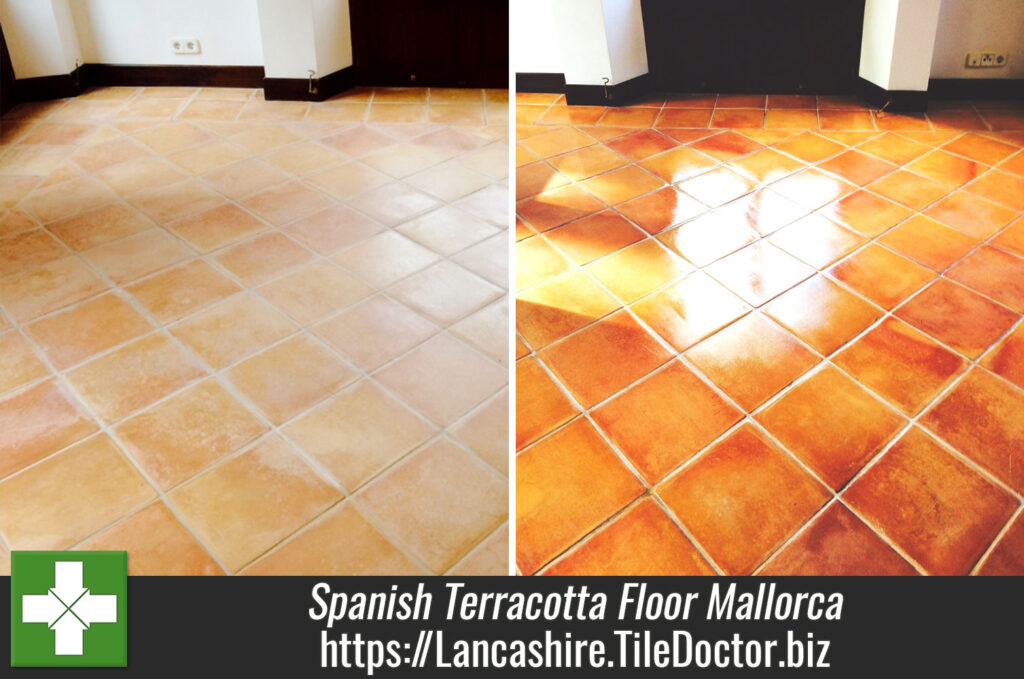
Terracotta Tiled Floor Mallorca After Sealing

Spanish Terracotta Floor Cleaned and Sealed in Mallorca

As Tile Doctor operates in Europe as well as mainland UK we have to be ready for certain logistical challenges i.e. flying over to Mallorca to help a customer who has had a number of issues cleaning and sealing their Terracotta floor tiles at their residence on the island.  Naturally you would have thought a local firm would have been able to resolve these issues, unfortunately it seems this is not the case and we were asked to step in.

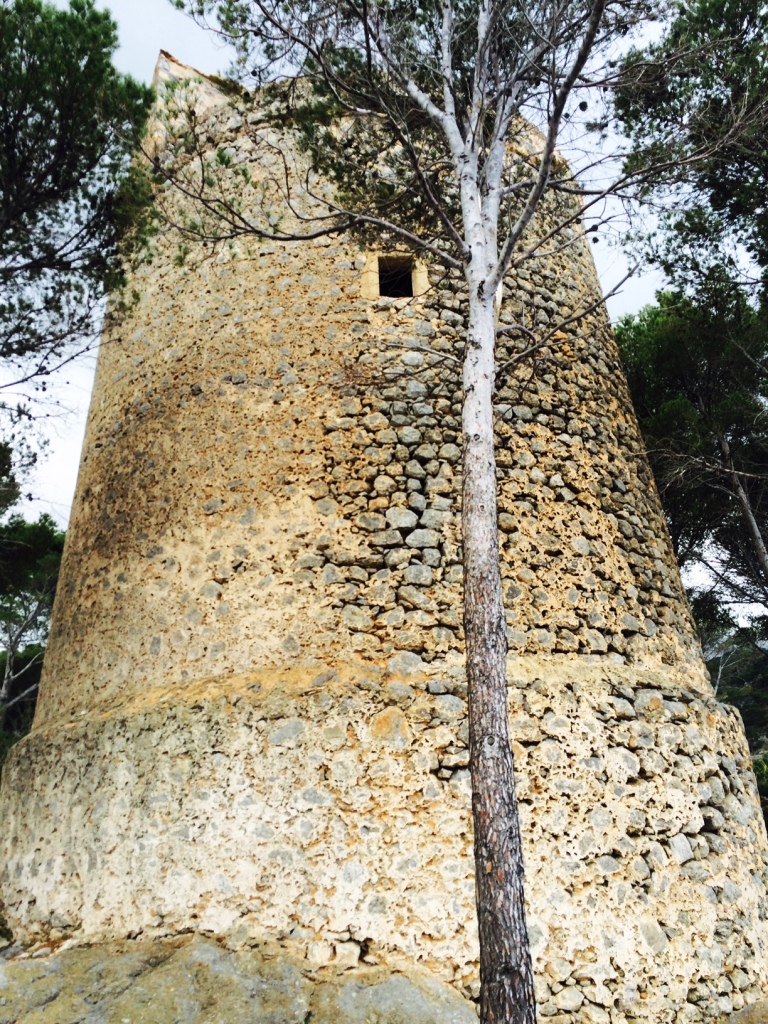
Terracotta-Tiled-Floor-Mallorca-View-from-Property Terracotta-Tiled-Floor-Mallorca-Picture-of-Castle

As is it was not economical to ship our machinery to the island the customer sourced the necessary machinery locally.

Stripping Old Sealer and Cleaning Terracotta Tiles

On this occasion we used a new product called Tile Doctor Oxy-Gel which is a gel based version of the popular Tile Doctor Pro-Clean.  It is applied neat to the tile and then left to dwell for fifteen minutes or so and then using a black buffing pad attached to a buffing machine we then stripped the old sealer very effectively with this method adding water as required, the soiled solution was then extracted from the floor using a wet Vax.  Then we proceeded to rinse the floor with more water and repeat this process until all of the new Oxy-Gel and dirty water , this is called Neutralisation, if this isn’t done sufficiently then the chemical left in the clay can impact on the clay when it is sealed.

Terracotta-Tiled-Floor-Mallorca-Before-Cleaning

Sealing Victorian Tiles

The Terracotta was left to dry overnight and then a damp test was conducted after which it was dry enough to apply 1 coat for Tile Doctor Colour Grow which is a breathable Impregnating Sealer and add colour to the Clay, this was polished off and left to dry for a couple of hours before we applied several coats of Tile Doctor Seal and Go, which then gave the Tiles a sheen and lifted the colours even more as you can see from the picture’s.

Terracotta-Tiled-Floor-Mallorca-After-Sealing

The customer was advised to use Tile Doctor Neutral Cleaner which we brought with us from the U.K.

This was only a 2 day visit to help with the issues with the floor, more time was needed to do all of the tiles in the house of which their was several rooms, the customer was of the mind to do the rest of the floor themselves which was the understanding before we flew out, this was a cost saving exercise on behalf of the customer of which we were happy to oblige as long as our expenses were met.

Maintaining Terracotta Floor Tiles in Mallorca

Spanish Terracotta Floor Cleaned and Sealed in Mallorca Read More »

Terracotta conservatory floor after cleaning Garstang

Heavily Worn Terracotta Tiled Conservatory Restored in Garstang

This Terracotta tiled floor was installed in the conservatory of a house in the old market town of Garstang, Lancashire, famous for being the world’s first ever ‘Fairtrade Town’.

There were quite a few problems with this floor; for one, my client had not re-sealed the tiles in many years and had therefore allowed the existing seal to become very worn and almost completely ineffectual. This had subsequently allowed the floor to become very dirty and marked with white blotches. These white blotches had occurred where the fertilizer held in decorative plant pots had started to eat away at the sealer.

Terracotta conservatory floor Before cleaning Garstang

Cleaning a dirty Terracotta Tiled Floor

The tiles were cleaned with a strong solution of Tile Doctor Pro-Clean, which is a strong alkaline cleaner. The solution was liberally applied to the floor and left to dwell for a short period, allowing time for the cleaner to seep into the pores of the Terracotta and lift the ingrained dirt to the surface. The solution was then agitated using a black scrubbing pad fitted to a heavy rotary machine, making a marked difference to the appearance of the tiles within a matter of minutes.

Terracotta conservatory floor Before cleaning Garstang
Tile Doctor Acid Gel was then used to spot treat the white marks, the acid content in the product breaks down the alkaline salts that had developed, left behind by the leaked plant fertilizer.

The entire floor was then rinsed several times to remove the soiled cleaning residue and the excess moisture was extracted using a wet-vac machine.

Terracotta conservatory floor after cleaning Garstang

Sealing a Terracotta tiled floor

The Terracotta tiles were left to dry for an entire week as there was no evident damp proof membrane in place at the property. I used damp testers to approximate when the tiles would be dry enough to seal, which was very important as any excess moisture can upset the performance of the sealer.

My first choice of sealer was Tile Doctor Colour Grow, an impregnating sealer that also intensifies the natural colours in the stone. A single coat of Colour Grow was applied, before I opted to follow this up with six coats of Tile Doctor Seal & Go, which provides a very robust surface seal and also helped to give the Terracotta the aesthetically pleasing my client had requested.

Terracotta conservatory floor after cleaning Garstang
Before leaving the property with its newly restored Terracotta tiled conservatory, I made sure to give my client some tile maintenance advice. Needless to say, she was very pleased with the results.

Professional Terracotta Tile Restoration in Lancashire

Heavily Worn Terracotta Tiled Conservatory Restored in Garstang Read More »

Terracotta Floor After Cleaning Fullwood

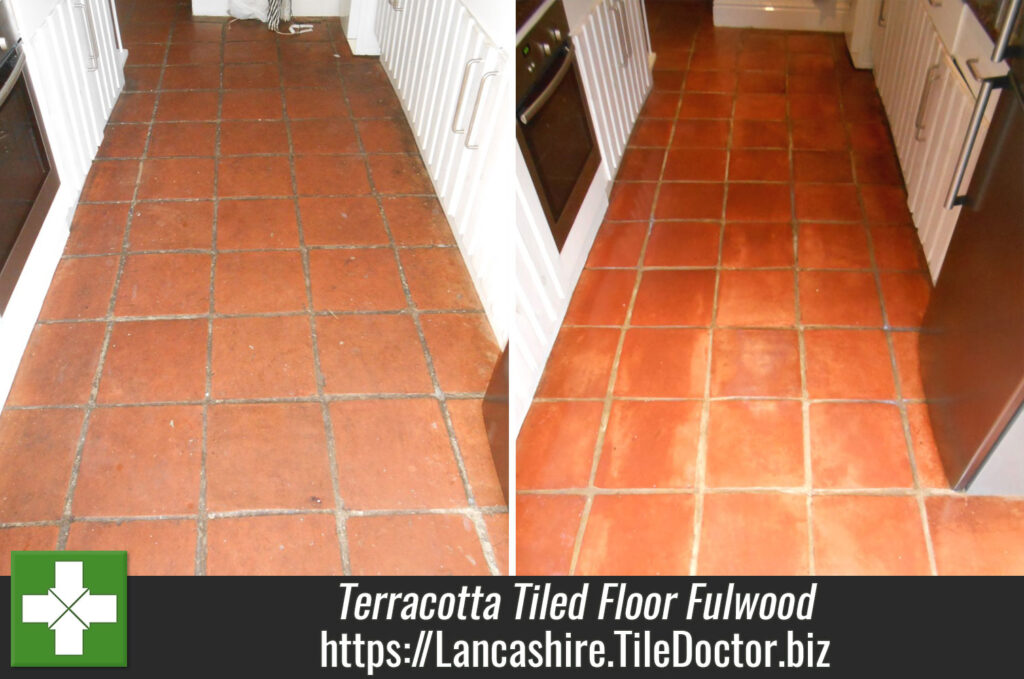
Badly Neglected Terracotta Tiled Floor Restored in Fulwood

Not too long ago, I visited a house in the town of Fulwood in Preston, Lancashire. My client had a Terracotta tiled floor which had been neglected for many years and in their attempt to improve it had unfortunately been given some very poor advice by tile retailers, all of whom sold him different products, and each of which was unsuitable. Using these different products in succession had resulted in the depreciation of the floor’s texture and smoothness, in turn making the clay difficult to clean and maintain.

As per my usual process I ran a small test clean to demonstrate what could be done to improve the floor and I was commissioned to restore the floor back to its former glory.

Terracotta Floor Before Cleaning Fullwood

Cleaning a badly neglected Terracotta floor

I started by mixing a strong cleaning solution consisting of one part Tile Doctor Pro-Clean to three parts water. The solution was applied to the floor and left it to dwell for a short period. The high alkaline cleaner seeps into the pores of the tile getting underneath and lifting out the ingrained dirt and breaking down the old sealers. Then, I agitated the floor using a scrubbing pad fitted to a rotary floor machine before using a wet vacuum to suck up the resulting soiled solution.

There were a few paint marks dotted across the floor, but these were not noticeable until after I had given the Terracotta a deep clean. To remove the paint marks I used Tile Doctor Remove & Go, which is specially formulated to break down paint stains, adhesives and coatings. This product was used in combination with a steamer which, when applied directly to the tiles, helped to lift the paint out. Following this, I rinsed the entire floor a couple of times to remove any trace of cleaning product, and vacuumed up the excess moisture.

Sealing a Terracotta floor

It’s always best to let the floor dry completely prior to sealing as applying sealer to a damp floor will affect the sealer. I left the house to allow this to take place overnight returning the next day. To get the best out of the Terracotta I sealed the floor using one coat of Tile Doctor Colour Grow, which is an impregnating sealer that soaks into the pores of the tile and acts as both as a bonding sealer enhancing the natural colours and darkening the clay (as requested by my client).

After the coat of Colour Grow had dried, I applied a further seven coats of Tile Doctor Seal & Go, which achieves a nice, low sheen Satin finish. Before leaving my happy client to enjoy his newly restored Terracotta floor, I made sure to provide some professional cleaning and long-term maintenance advice.

Terracotta Floor After Cleaning Fullwood
 

Neglected Terracotta Tiles Professionally Cleaned and in Lancashire

Badly Neglected Terracotta Tiled Floor Restored in Fulwood Read More »

Terracotta Floor After Cleaning and Sealing

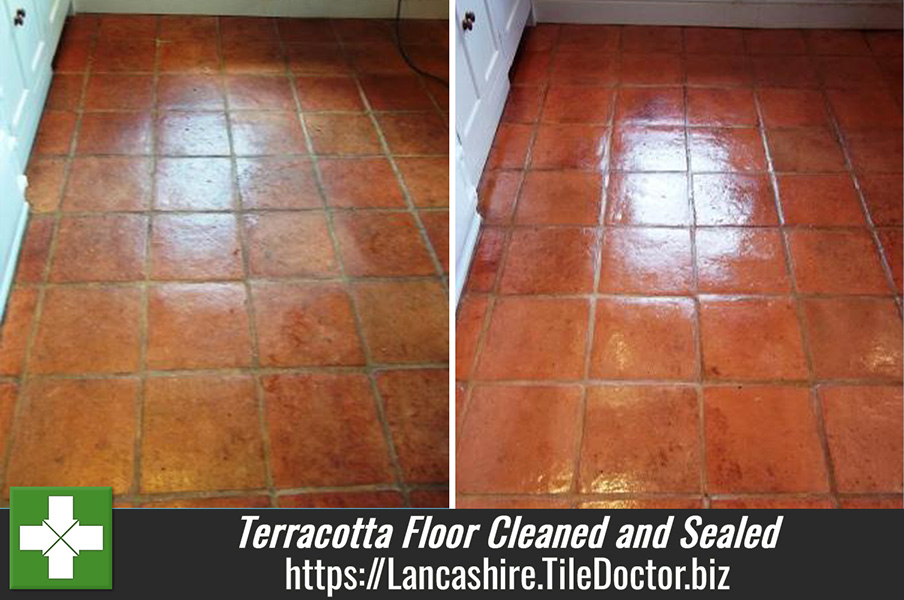
Terracotta Floor Cleaned and Sealed

Terracotta Tiles cleaned With Tile Doctor Pro-clean and 2 Black Buffing pads, there were some awkward stains in corners and such so I used Remove and Go and some Nano-scrub cleaner on these, but only after they had been pre-wetted first otherwise Remove and Go is hard to get out of the clay.

Terracotta Floor Before Cleaning and Sealing

Lots of Rinsing with water, left to dry overnight and came back the next day to Seal, turned the heating up, opened a couple of small windows front and back to allow for some Airflow and then started to apply 9 coats of Seal and Go with a Paint pad, this took all day, so quite a bit of waiting around, good time to catch up on my paperwork in the van in between sealer drying times.

Terracotta Floor After Cleaning and Sealing


Terracotta Floor Cleaned and Sealed Read More »

=================================

Lancashire Tile Doctor

================================= Read More »
Scroll to Top