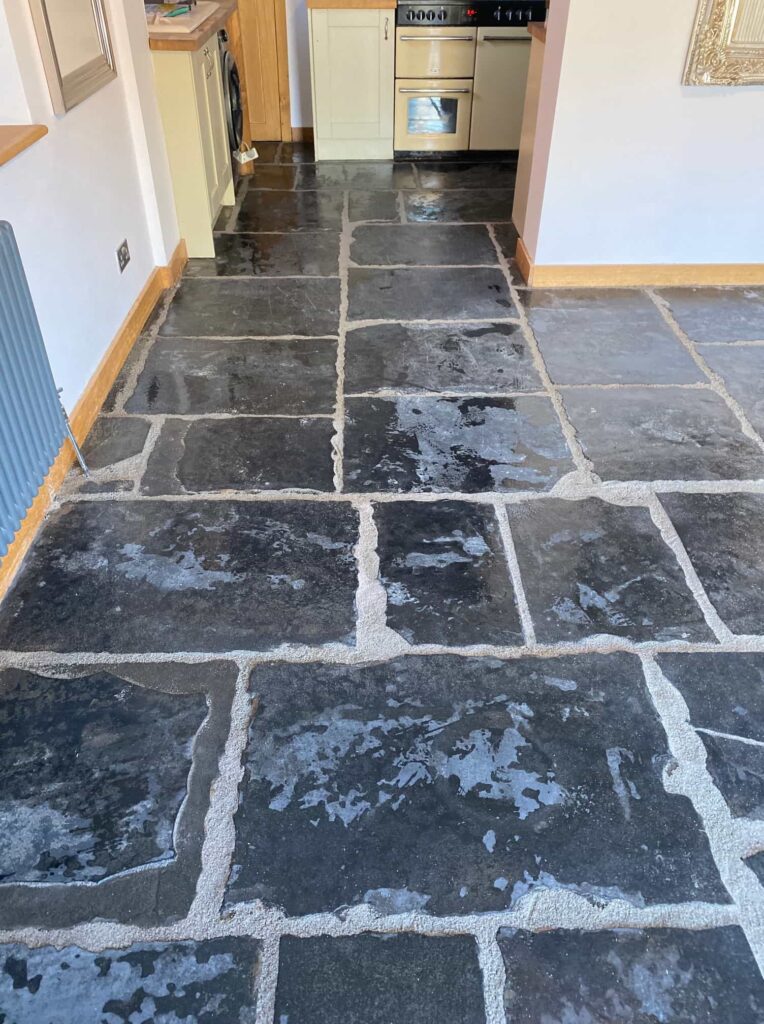
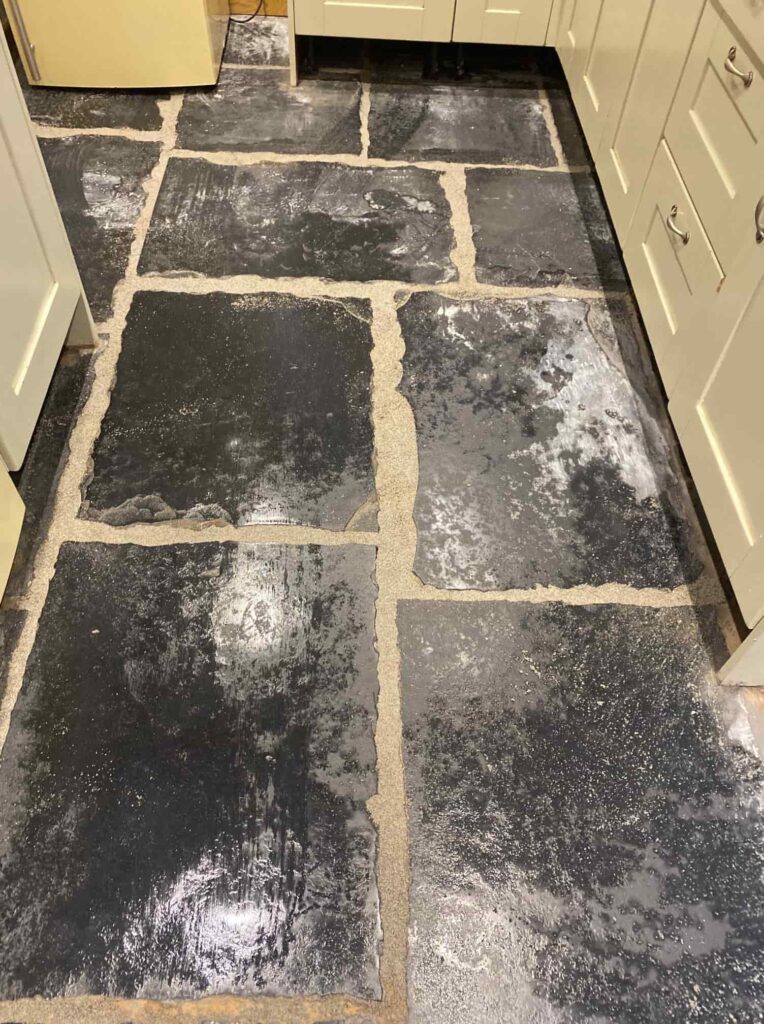
This customer from Lancaster contacted us about cleaning and sealing what they thought was a Blue Slate kitchen floor. Having spoke to them over the phone I arranged to pop over and survey the floor to get a better understanding of the work that needed to be done. Lancaster is a few miles South of our base in Carnforth and I’m always passing though.
Having visited the property I was able to confirm that the floor wasn’t Slate but Black Limestone which is notoriously high maintenance due to its acid sensitivity. I mentioned this and they were quite surprised as it had only been laid a few years earlier and it was sold as Black Slate. The two materials do look identical, but if you drop a small amount of something acidic on Black Limestone the stone fizzes and turns Grey and White.

The big problem with Black Limestone is unlike Slate its very porous, this is why you see Slate being used for roof tiling and is still popular covering even to this day. Also, its very acid sensitive, so even Tea, Coffee, Juice, or Wine can mark it, so although popular in gardens it’s certainly not a stone we would recommend for use in a kitchen or bathroom.
Another problem you have is Black Limestone contains natural oils and it’s the oil that gives it that beautiful black colour. Once the oil is washed out of the stone over time or through the use of acidic cleaning products it leaves the stone looking grey and unattractive. This can be resolved however using an oil-based sealer but it is more expensive than a regular stone sealer.

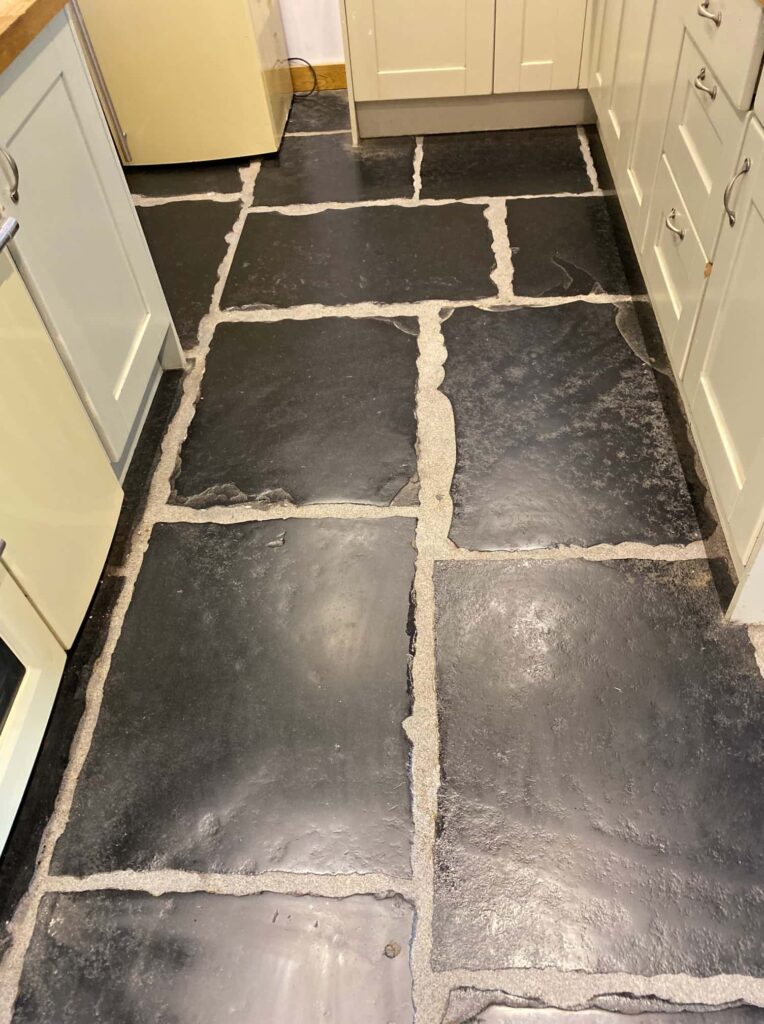
This stone is still workable though, so it’s not all bad news, with the right treatment it can look as good as the day it was laid (if not better) so I came up with a renovation plan that would do exactly that. They were happy to have the work done so we scheduled a date for the work to start.
Cleaning a Black Slate Floor Tiled Kitchen Floor
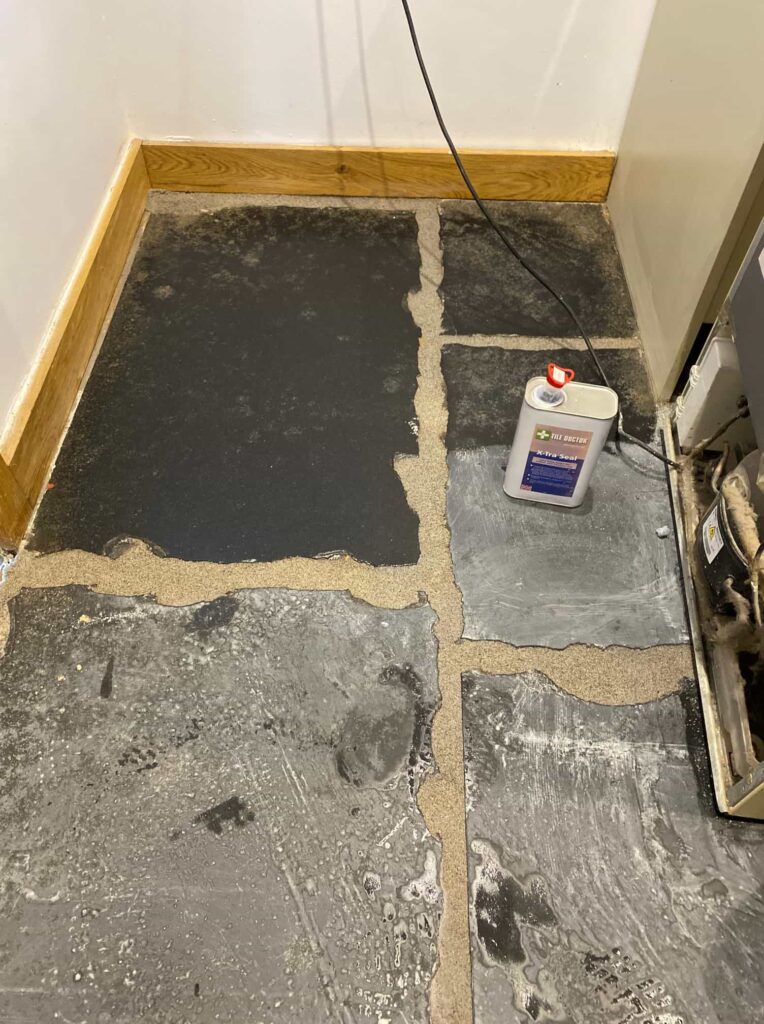
We find the best way to renovate floors like this is to use coarse diamond pads that can cut into the stone remove any surface damage, contaminates, old sealers and generally leave the stone very clean.
With this floor I started with a very coarse 50-grit DRB pad which is run several times over each stone using only water to lubricate the process. The process generates a lot of soiling and loose sediment that has to be rinsed off the floor with water and then extracted with a wet vacuum. Once this is done the process is repeated with a 100 and then 200-grit pad which together effectively re-hone the stone and remove any scratches caused by the previous pad. A dilution of Remove and Go was also used with the 200-grit pad to ensure the tiles were clean and any remaining sealer not caught by the pads had been removed.
The last step on the first day was to re-point the stone tiles where needed to remove failed and crumbling mortar. This was then left to set hard overnight so we could continue with the renovation the next day.
On day two we followed up the renovation of the stone by moving onto finer Burnishing pads starting with a 400-grit diamond pad applied in the same way and rinsing and extracting afterwards. This was followed by the application of an 800 and then 1500-grit pad to further refine and improve the stone.
Sealing a Black Slate Tiled Kitchen Floor
The following day the Black Limestone was sealed with a coat of Tile Doctor X-Tra seal which is the Oil based sealer I mentioned earlier. It brings out the true colour of this stone and the seal leaves a sheen appearance to give a very appealing finish. We find one coat is usually enough for this sealer as it’s a lot thicker that other sealers.

Before leaving I talked through aftercare cleaning with two buckets and the importance of using a pH Neutral cleaning product. We recommend avoiding steam cleaners and not to use cheap bleach or acidic cleaning products which can damage the sealer with repeated use.

We always encourage feedback from customers, and I’m pleased to be able to quote the following message they left on our feedback system:


When cleaning Floor tiles with a mop we recommend using two buckets, one containing a neutral pH cleaning fluid such as Tile Doctor Neutral Tile Cleaner or Stone Soap and the second where you rinse your mop afterwards, otherwise you will contaminate your cleaning fluid with dirt every time you rinse.