
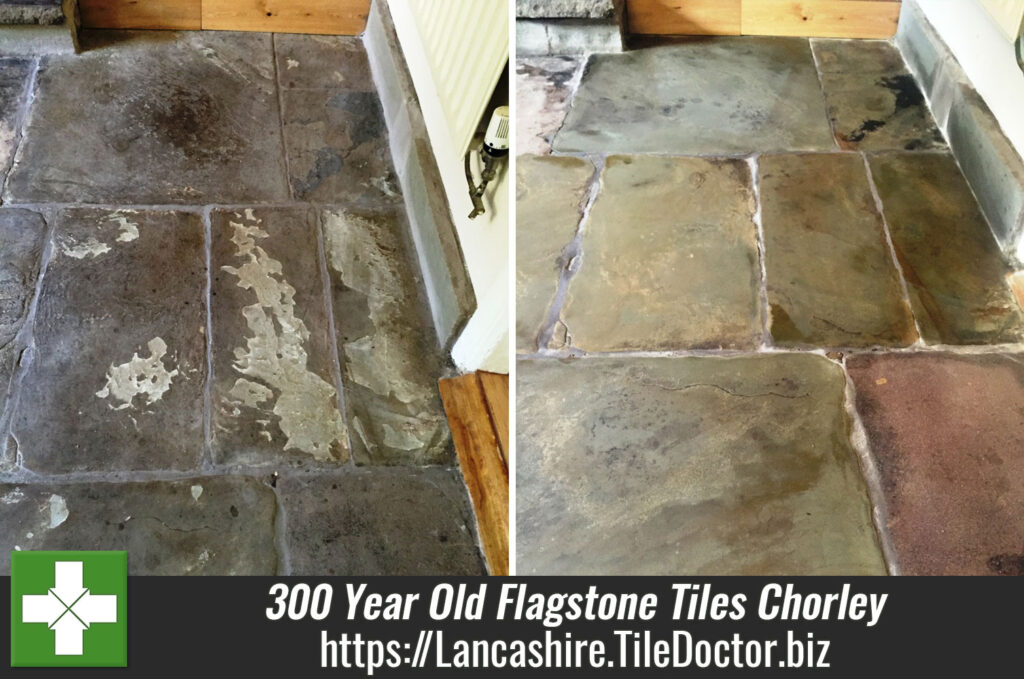
300 Year Old Flagstone Tiles Treated for Shaling Issues in Chorley
This Flagstone tiled floor at a cottage in the market town of Chorley was suffering from significant shaling issues, which came as no surprise when I heard that the stone was laid nearly 300 years ago. The floor is an original feature of the property, but over recent years it had started to flake and become very rough, making it very difficult to keep clean, uncomfortable to live with, and not very pleasing to look at.
The process is natural to the Flagstone, and some people are quick to assume nothing can be done to counter it. In fact, the cleaning company that the property owner had recruited was only able to give the stone a basic mop, and had suggested having the entire floor replaced. The property owner was about to give up on the floor, but instead contacted Tile Doctor to see what could be done.
 |
 |
Milling a Flagstone Floor with Shaling Issues
At Tile Doctor, we have created a process known as Milling, which involves smoothing out the rough surface of the stone, making it easier to keep clean. To do this we attached several diamond encrusted disc shaped milling pads of varying coarse grits to a rotary machine before running the machine over the floor, effectively grinding down the stone to remove the rough and leave the worn floor polished and looking at its best again.
I used plain water to periodically wash away any residue from the Milling, and soaked up the excess moisture with a wet-bad machine. With the floor surface now serviceable, the customer’s preferred cleaning company can mop it effectively without the mops being shredded by the jagged and uneven stone!
Sealing a Flagstone Tiled Floor
To further ensure that the Flagstone would be easy to keep clean it would need to be sealed with an appropriate sealer. Once the floor had been allowed to dry fully, I applied two coats of Tile Doctor Colour Grow, an impregnating sealer which provides a matte, colour-enhancing finish. As you can see from the before and after photographs, this really brought out the natural shades in the Flagstone.
As a fully breathable sealer which allows for Vapour Moisture Transmission (VMT), Colour Grow is the best product for an old floor like this one which does not have a Damp Proof Membrane (DMP) fitted. Whereas a lot of other similar sealers will not suffice, Colour Grow is ideal in this particular situation.
 |
 |
The results were fantastic, and the customer is really pleased that they will no longer have to replace the tiles. The appearance and condition of the Flagstone had been improved so much that most people would not believe it had been laid nearly three centuries ago!
Restoring a Flaking Flagstone Floor in Lancashire
300 Year Old Flagstone Tiles Treated for Shaling Issues in Chorley Read More »


