floor tiles

Red And Black Victorian Tiled Floor Dorchester Pattern Restoration Lancaster

Dorchester Pattern Victorian Tiled Hallway Floor Restoration in Lancaster

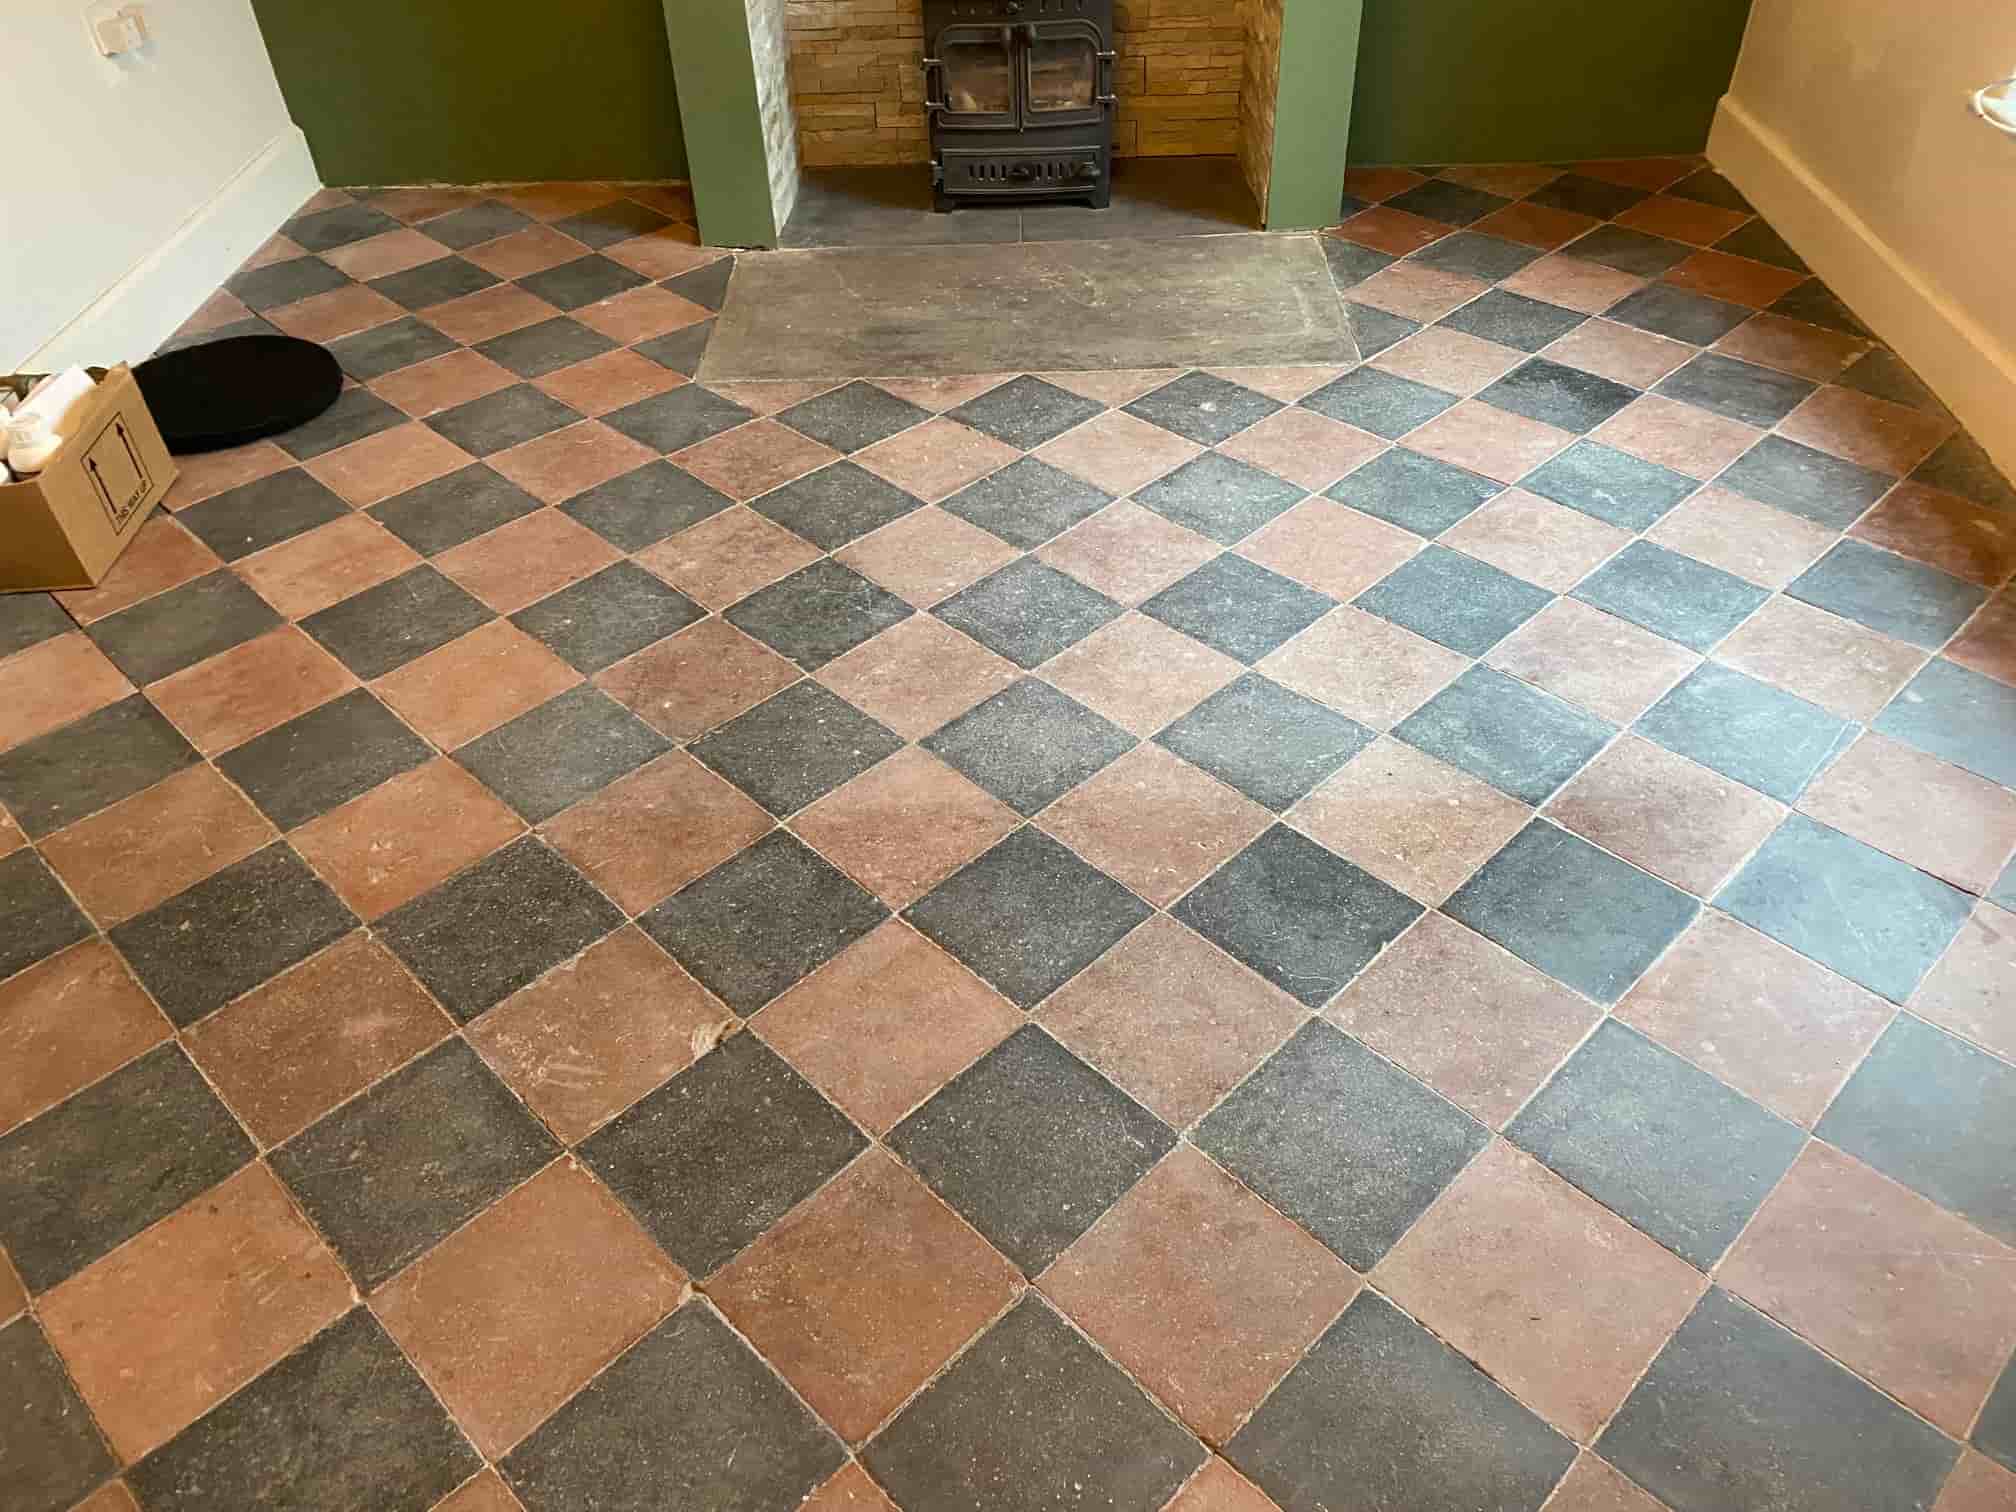
This is a Red and Black Victorian tiled floor laid in a Dorchester pattern at a property in Lancaster. The owner has only just bought the property which dates to the 1890s and this floor had previously been covered in carpet which had started to smell and leave a pungent aroma in the air.

Red And Black Victorian Tiled Floor Dorchester Pattern Before Cleaning Lancaster

Once the carpet had been removed and the Victorian floor allowed to breathe and dry out the smell disappeared. This is the right course of action with old floors which were laid without a damp proof membrane, floors of this age need to breathe and allow moisture to rise through the tile and evaporate at the surface, carpets and underlay prevent this.

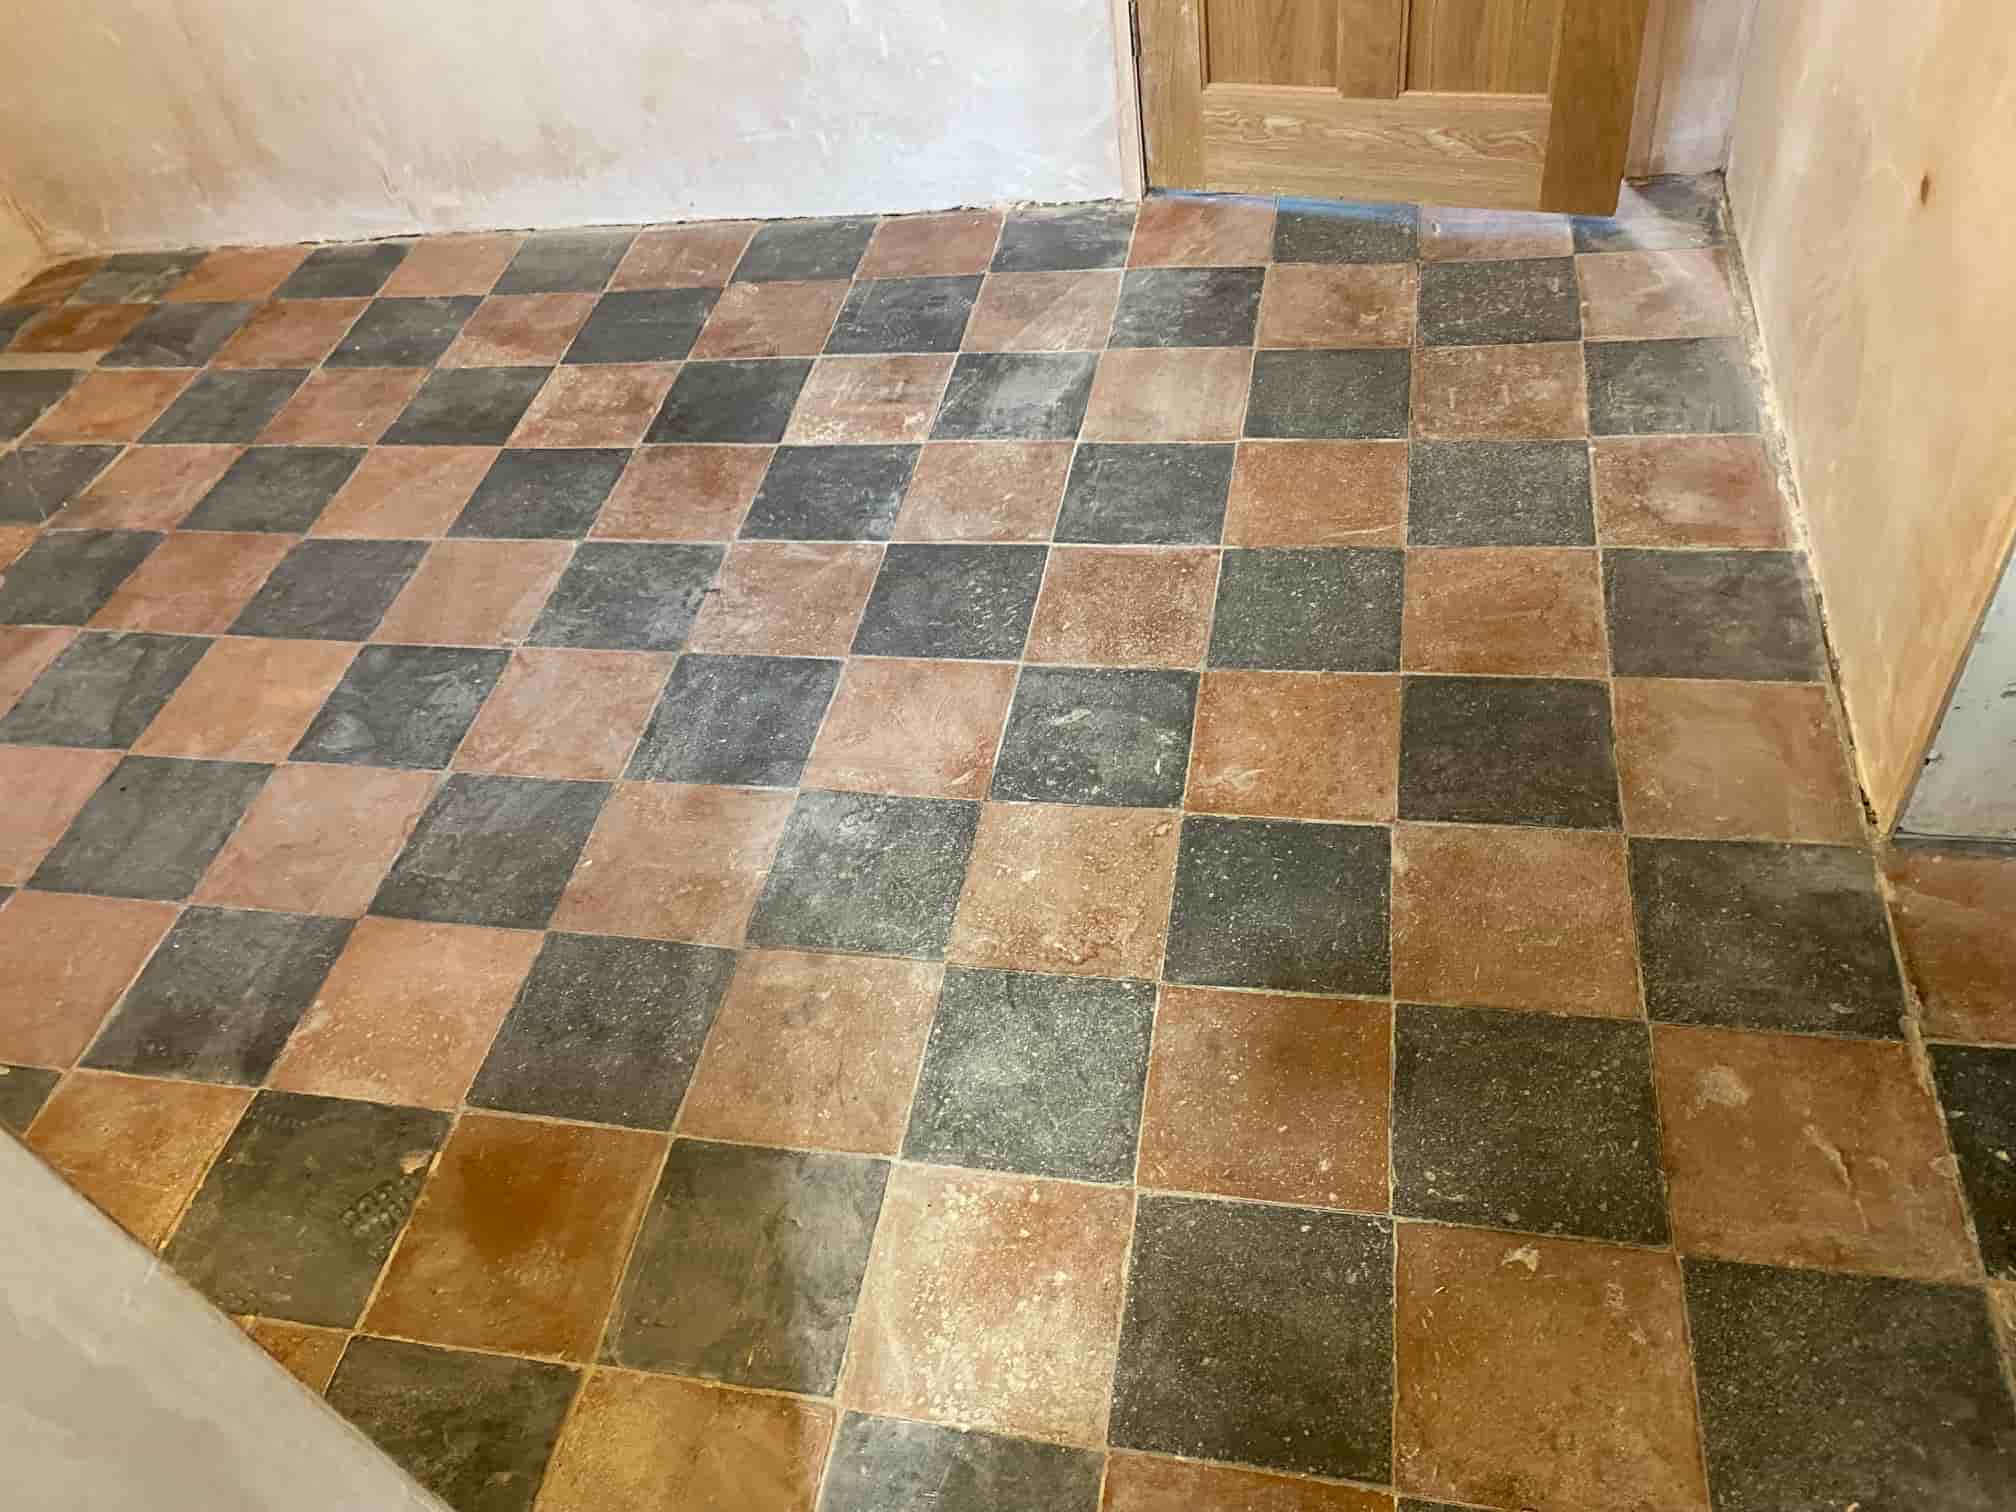
Red And Black Victorian Tiled Floor Dorchester Pattern Before Cleaning Lancaster

The damp issues had resulted in efflorescent salts being deposited on the surface of some of the tiles and this is an important consideration when cleaning the floor. Salts and damp go together, so the more water we use the more salts will come through after the floor has been cleaned. Additionally using an alkaline cleaner such as Tile Doctor Pro Clean or Remove and Go this will further increase the alkalinity of the floor and cause yet more salt issues so a different approach is required.

Cleaning a Victorian Tiled Hallway Floor

Naturally I didn’t want to exacerbate the moisture problems by using liquid products to clean the floor, so I used a low, moisture cleaning technique. This involves applying Tile Doctor Acid Gel as the main cleaning agent and working it in with a 200-grit milling pad fitted to a rotary machine. The gel keeps the moisture level low, and it is a very effective cleaning product and being an acid will neutralise the salts in the floor and keep the pH level at the correct balance. Once done the floor was briefly rinsed with water and all the soils extracted with a wet vacuum.
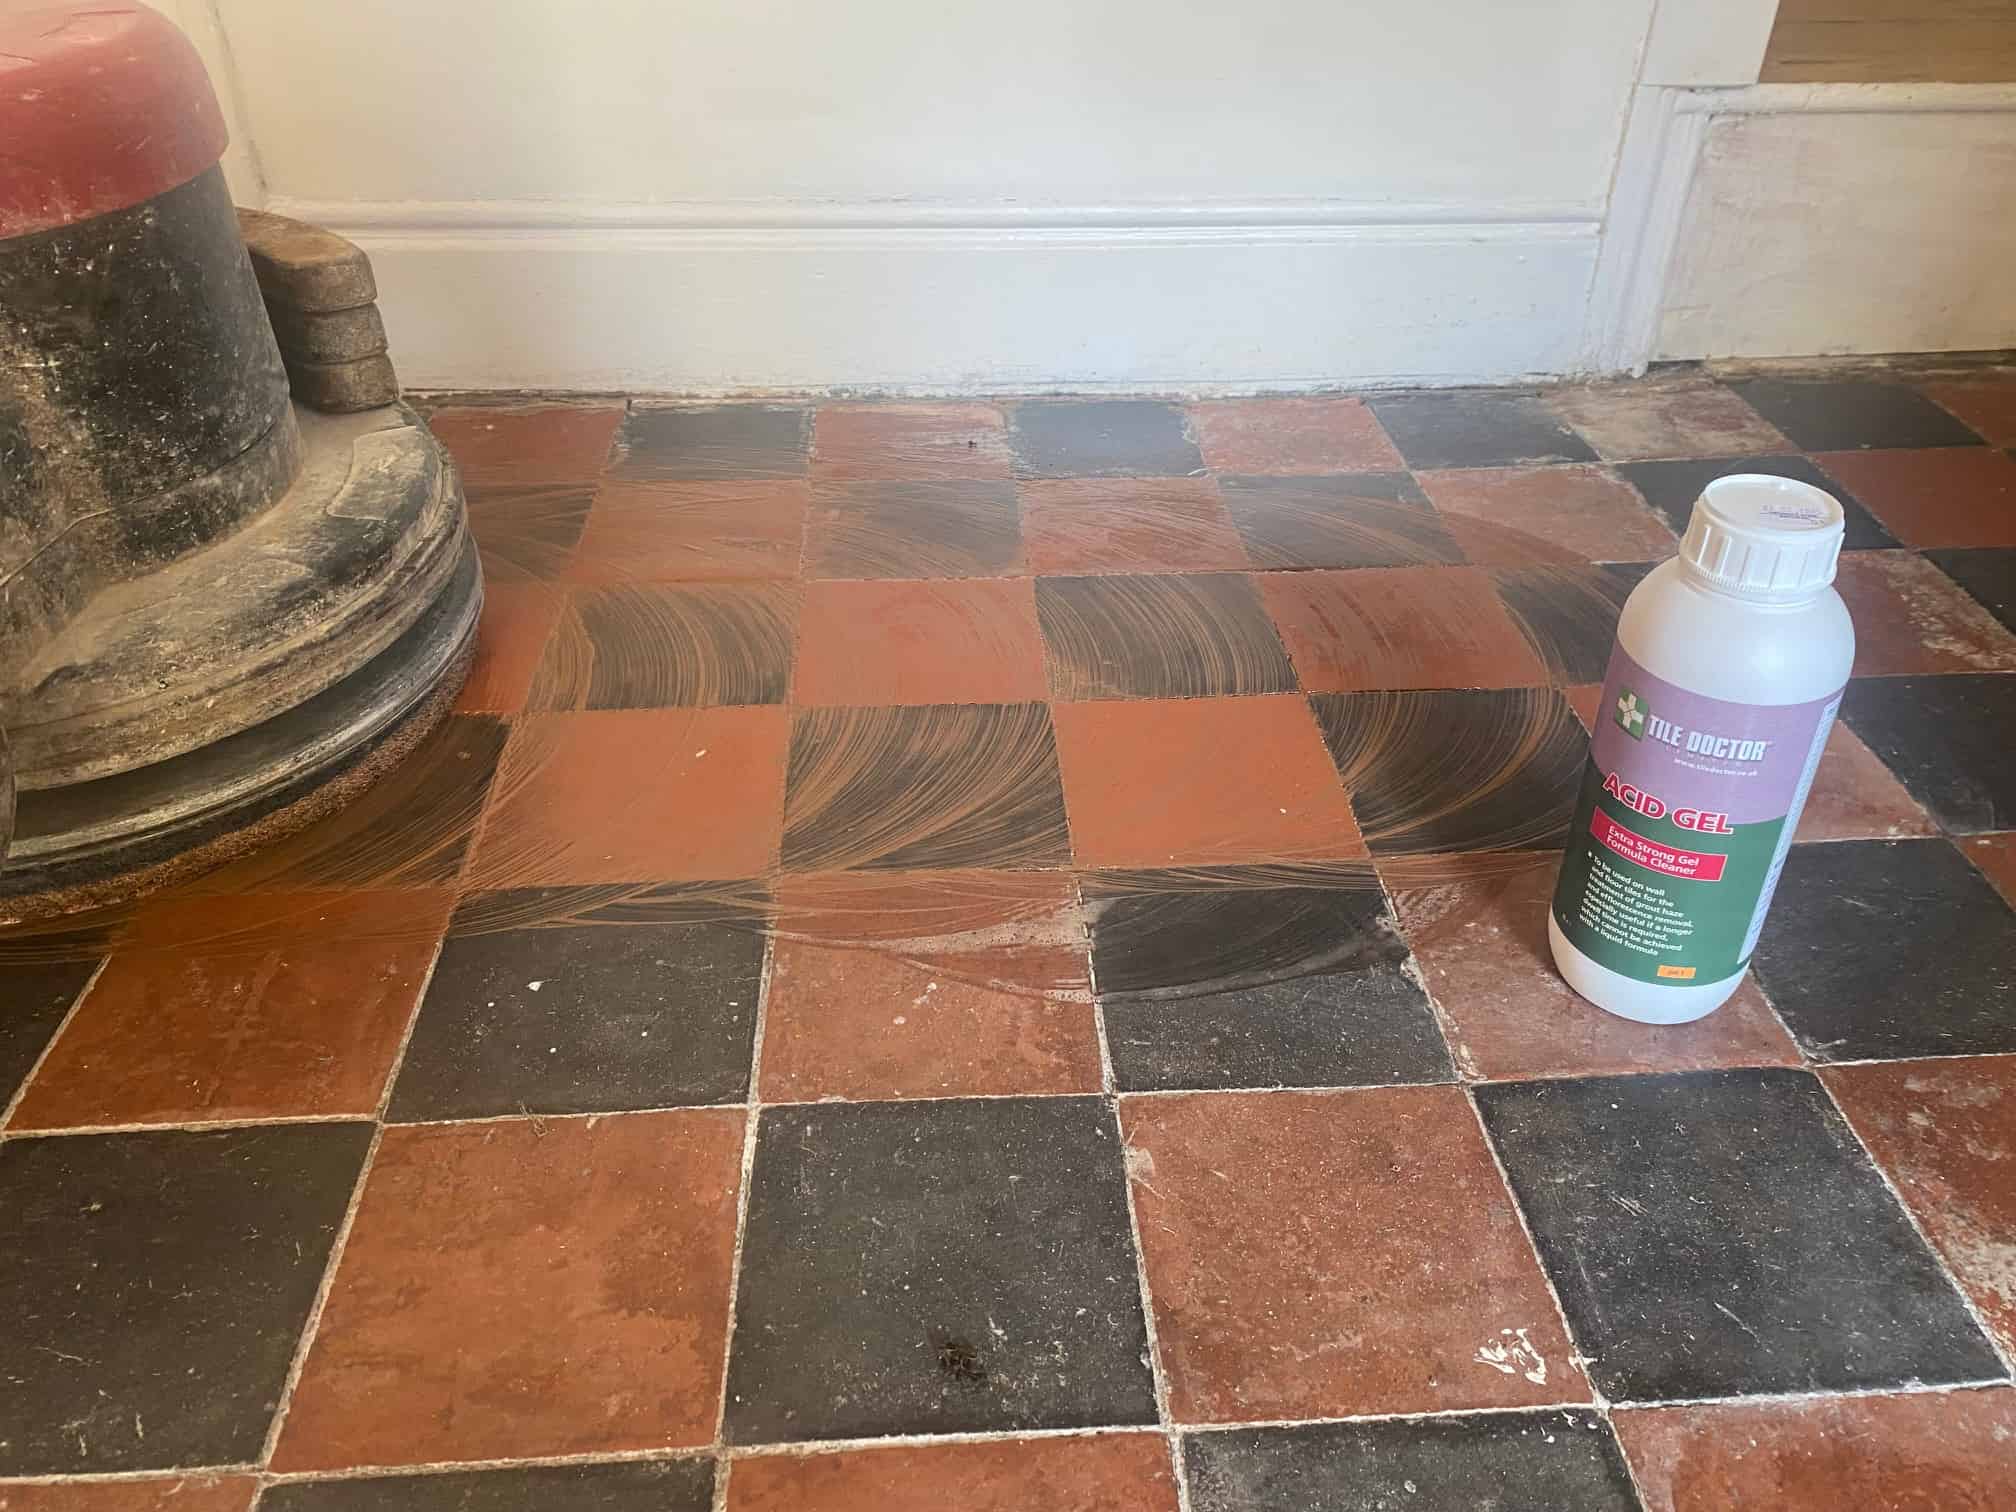
Red And Black Victorian Tiled Floor Dorchester Pattern During Cleaning Lancaster

The floor was left to dry off overnight then I called back the following day to see how it had faired. There were some areas where efflorescent salts had appeared, so I spot treated these areas with more Acid Gel and then scrubbed and rinsed with water using the wet vacuum again to remove as much moisture as possible. You will see on the photos how soft the salt was and I was able to scrape it off without too much difficulty, however if left untreated this salt would harden into a crystalline structure and become more difficult to remove.

Red And Black Victorian Tiled Floor Dorchester Pattern Efflorescencent Salt Removal Lancaster

Sealing a Victorian Tiled Hallway Floor

To make sure the sealer would cope with the damp floor I applied a thin coat of Tile Doctor X-Tra Seal to several areas before leaving. The decision on which type of sealer to apply was influenced by the damp issues as the moisture needs to be able to evaporate at the surface, so it is important to select a fully breathable sealer.

Red And Black Victorian Tiled Floor Dorchester Pattern After Cleaning Lancaster

I called back the following day and the floor was more settled, and the sealer had fully cured, the client gave his thumbs up and we continued sealing the floor with one coat of Tile Doctor X-Tra Seal which is fully breathable.

Red And Black Victorian Tiled Floor Dorchester Pattern After Cleaning Lancaster

Once completed the floor was transformed and worked well with other period features in the property. For aftercare cleaning I recommended the use of a Neutral PH cleaning product such as Tile Doctor Neutral Clean.


Professional Restoration of a Victorian Tiled Hallway in Lancashire

Dorchester Pattern Victorian Tiled Hallway Floor Restoration in Lancaster Read More »

Red and Black Victorian Tiled Floor Renovated in Lytham St Annes Lancashire

Traditional Black and Red Victorian Floor Renovated in Lytham St Annes

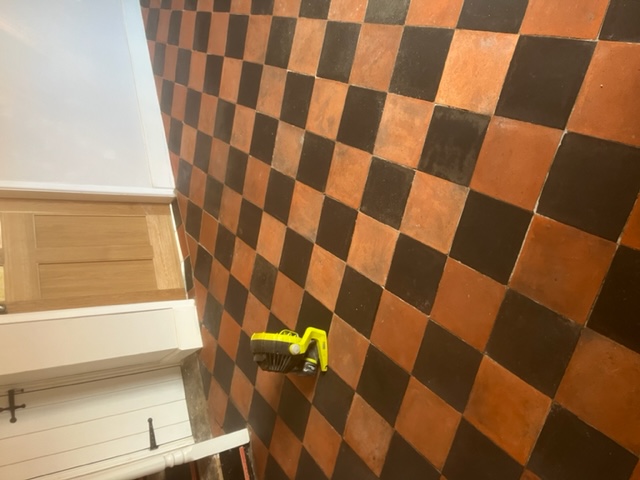
This property in Lytham St Annes had a large area of Black and Red Victorian floor tiles in the front room, dining room and scullery. The building dates to 1870, so the floor is likely to be over 150 years old which is a true testament to how well Victorian’s made and constructed materials even with the most basic of methods compared to modern times.

Red and Black Victorian Tiled Floor Before Cleaning Lytham St Annes

After inspecting the floor, I could see some of the tiles had characterful chips and marks in them, in fact none of them were perfect but I was confident they would still respond well to a deep clean and fresh seal. Having agreed a price and having discussed sealer options a date was scheduled for the work to commence.

Red and Black Victorian Tiled Floor Before Cleaning Lytham St Annes

Cleaning a Victorian Tiled Scullery, Front and Dining Room Floor

I was wary that such an old floor as this would not have a damp proof membrane and because of the sandy nature of Lytham’s geology I suspect was laid directly onto a sand base. Using a lot of water on a floor like this can result in long drying times and could exacerbate efflorescence issues. I therefore opted for a low moisture cleaning method that uses gel-based products.

To start we applied neat Tile Doctor Oxy-Gel which is an alkaline cleaning product safe for use on tile and grout. After being scrubbed into each tile with a black pad fitted to a rotary machine the soiling was then removed using a wet vacuum. It’s necessary to add a little water at this point as it makes extraction with the vacuum easier.

Once done the process was quickly repeated using Tile Doctor Acid Gel to give the floor an acid rinse. This process serves to clean up the floor further, removing old grout smears and countering alkaline salts latent in the tile that may lead to efflorescence later. Using an acid-based product at this point also neutralises the ph level of the floor following the use of an alkaline cleaner earlier.

The floor was then left to dry off overnight and went through the sealing options with the client, these particular tiles were laid directly on a sand base which was quite common back in the 1800s in Lytham as it’s just a bed of sand in that area of the country.

Sealing a Victorian Tiled Scullery, Front and Dining Room Floor

The next day we called back to seal the tiles and started by taking several moisture readings across the floors using a damp meter. The low moisture cleaning system method had worked and all the readings were with tolerance.

Three coats of Tile Doctor Colour Grow were then applied to the tiles allowing approximately thirty minutes between coats. Colour Grow was ideal for these tiles as its fully breathable and with a built-on colour enhancer it helped the red and black tiles stand out. A fully breathable sealer is necessary for a floor without a damp proof membrane as it will allow moisture from the sub floor to rise through the tile and evaporate at the surface, using a non-breathable product will result in moisture building up under the floor until it reaches out the walls potentially leading to rising damp.

Red and Black Victorian Tiled Floor After Cleaning Sealing Lytham St Annes

The floor was transformed by our efforts and before leaving I recommended that for regular cleaning, they use a ph neutral cleaning product such as Tile Doctor Neutral Cleaner, many of the tile cleaning products you find in supermarkets today are bleach based and simply too strong for the sealer.

Red and Black Victorian Tiled Floor After Cleaning Sealing Lytham St Annes


Professional Restoration of a Victorian Tiled Flooring in Lancashire

Traditional Black and Red Victorian Floor Renovated in Lytham St Annes Read More »

Marble Tiled Floor Before After Renovation Bamber Bridge

Classic Black and White Marble Floor Renovated in Bamber Bridge

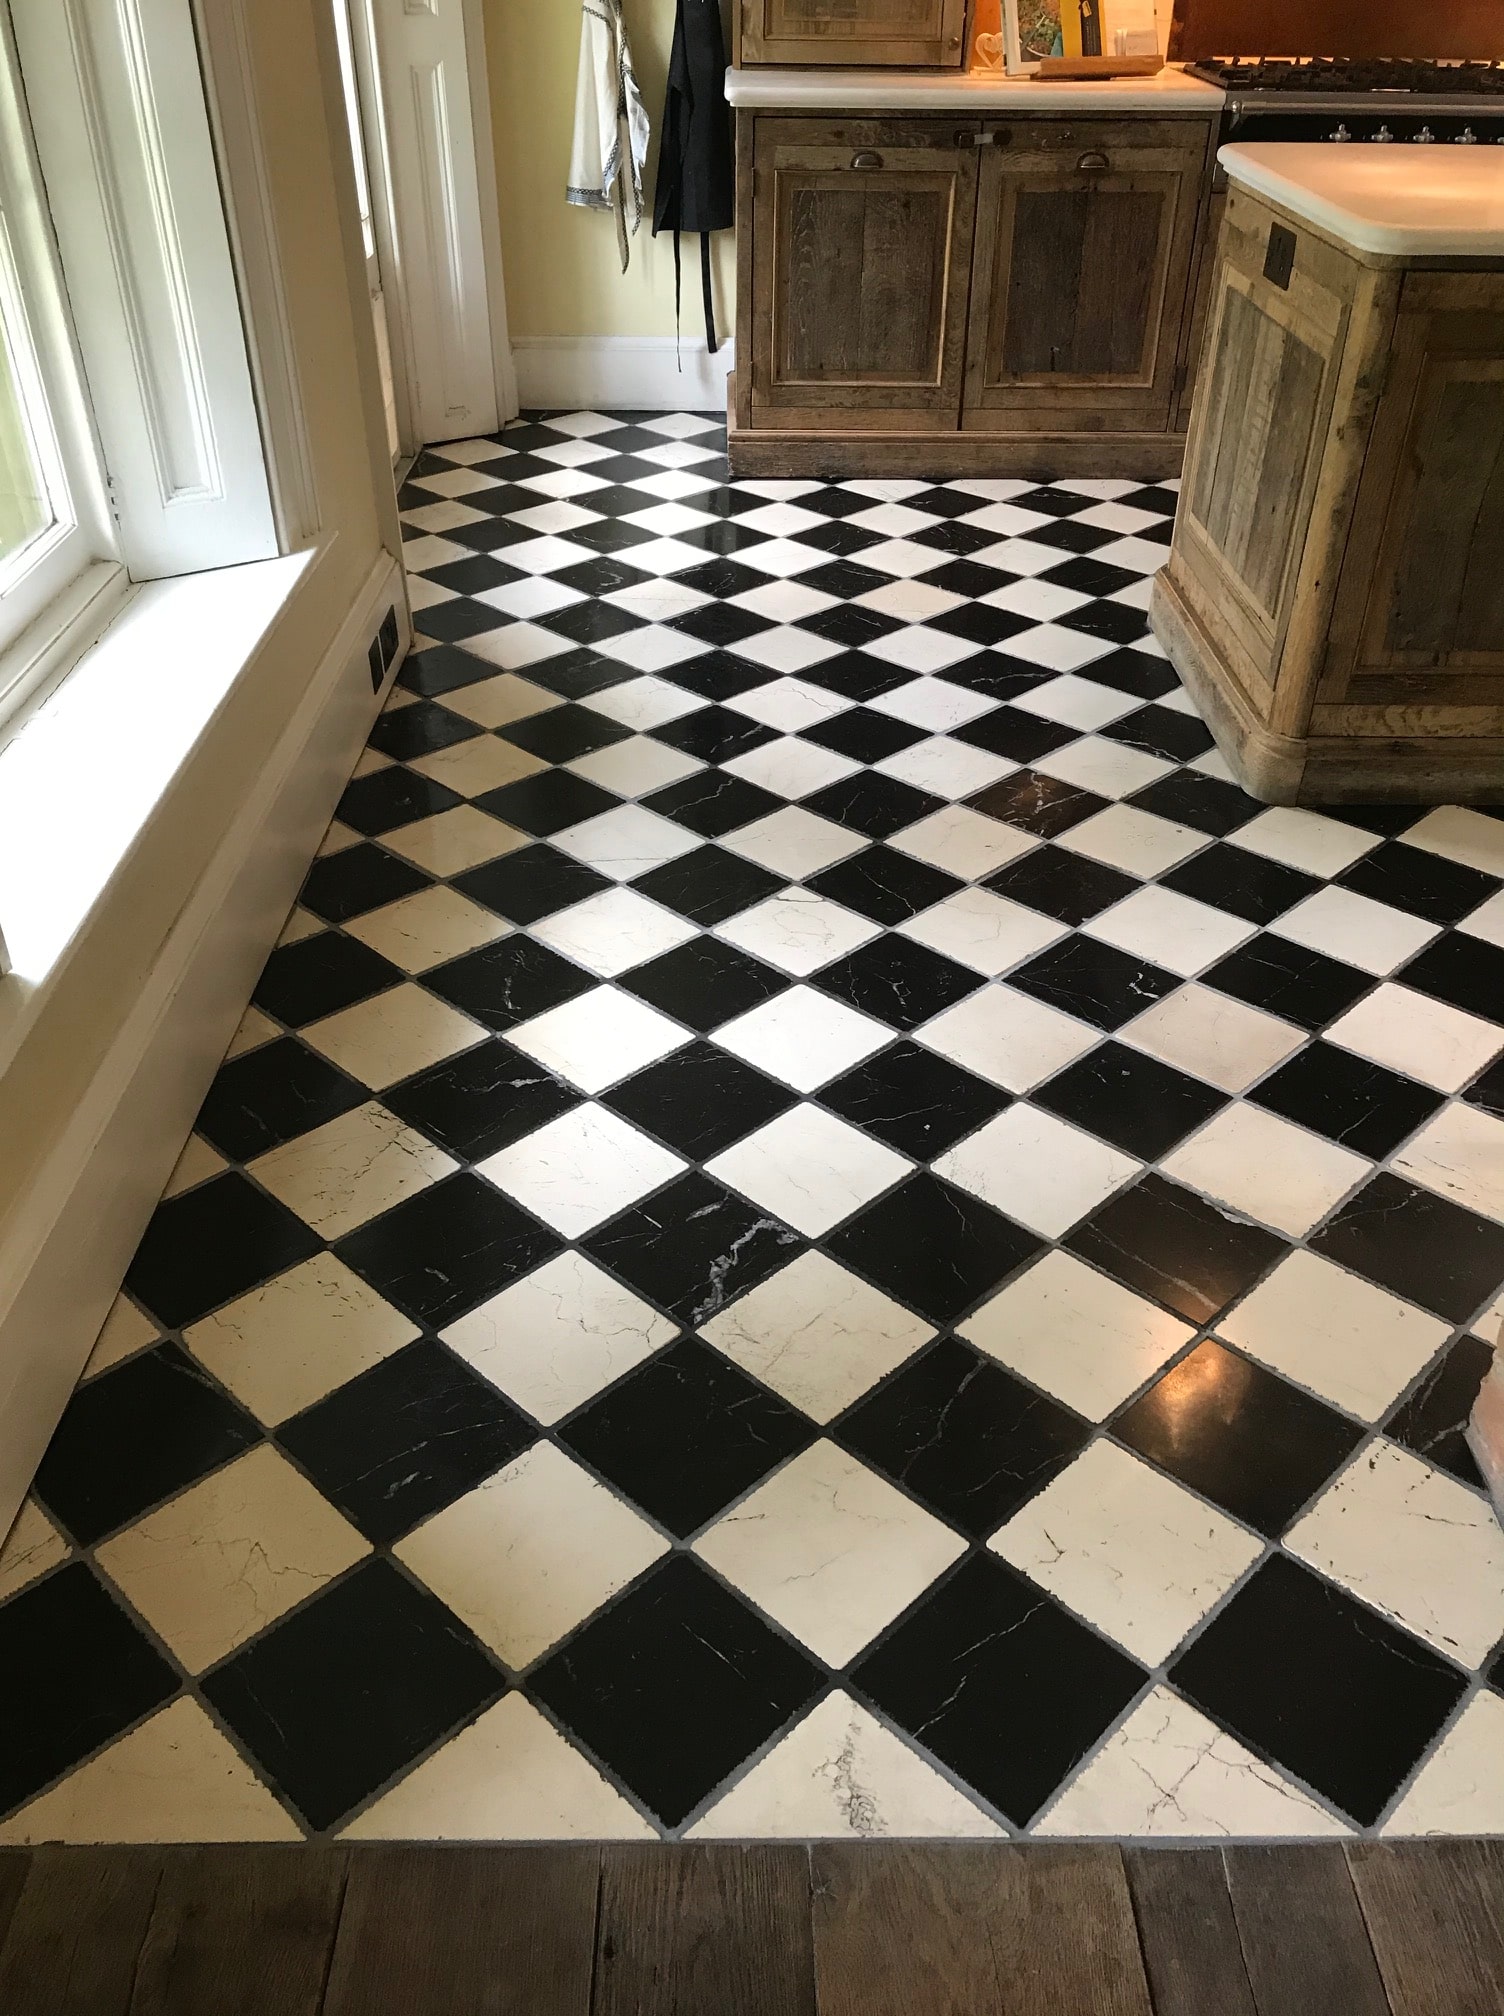
The tiles shown in the photographs below are classic distressed Black and White Italian Marble installed in the kitchen of a property in Bamber Bridge which is South of Preston. Some of the tiles had an issue with loose grout which I suspect was due to the suspended wooden floor and a small amount of movement had resulted in the grout cracking.

Classic Black and White Marble Kitchen Floor Before Renovation Bamber Bridge

Ideally more support would be needed under the floor to prevent this, in the meantime however I recommended removing the grout and replacing with a flexible grout product that could cope with the movement. The tiles also needed a clean, polish and reseal so it made sense to address the issue with the grout as part of the work.

Cleaning and Re-grouting a Marble Tiled Kitchen Floor

Working as a two-man team we started by cleaning the floor with a set of diamond burnishing pads starting with a coarse 400-grit, followed by 800 and 1500 grit. Water was used to lubricate the process and the floor was rinsed with water between pads with the fine slurry generated by the process extracted using a wet vacuum. These pads remove ingrained dirt and then slowly refine the appearance of the Marble building up its polished appearance in the process.

The next step was to rake out all the grout which as discussed was compromised and needed replacing. We had to be very careful when removing the grout due to the electric heating mat under the floor, any damage to that would require ripping the floor up. With the old grout removed and the floor cleaned the floor was then grouted using Mapei Ultra-colour which is a flexible and fully waterproof grout more than suitable for this situation.

Between us we managed to pack a lot into day one which was tough, however with the hardest tasks out of the way day two should be a lot easier.

Classic Black and White Marble Kitchen Floor During Grouting Bamber Bridge

Sealing a Marble Tiled Kitchen Floor

Day two started with an initial clean making sure to remove any excess grout smeared on the surface that can affect the look of the tile if not removed. This was followed by the application of the last of the set of burnishing pads which is a 3,000-grit pad that really brings up the polish on the marble. You only need a small amount of water sprayed onto the floor when applying this last pad so by late morning the floor was dry and ready for sealing. The customer wanted a better sheen appearance than they previously had, fortunately we find the Diamond burnishing pads do this well, they also tighten up the pores of the stone as well which means less sealer is needed.

The floor was then sealed with Tile Doctor Colour Grow which is an impregnating sealer that improves colour and soaks into the stone occupying the pores and thereby preventing dirt from becoming ingrained. Once complete the floor looked great and the client was very happy.

Classic Black and White Marble Kitchen Floor After Cleaning Bamber Bridge Classic Black and White Marble Kitchen Floor After Renovation Bamber Bridge

Sealers and Polish do wear down with use over time so before leaving I discussed our annual maintenance plan option which will ensure the appearance of the Marble floor always looks good. The plan involves returning once a year to further polish the floor with a high-grade burnishing pad and to add more sealer if required. We also discussed the use of Tile Doctor Stone Soap for regular cleaning, it is a pH neutral cleaner which is ideal for stone floors like Marble which are acid sensitive.

Classic Black and White Marble Kitchen Floor After Grouting Renovation Bamber Bridge


Professional Restoration of a Marble Tiled Kitchen in Lancashire

Classic Black and White Marble Floor Renovated in Bamber Bridge Read More »

Mexican Terracotta Before and After Cleaning Sealing Elswick

Carpet Covered Mexican Terracotta Floor Restored in Elswick

Mexican Terracotta is quite a difficult tile to deal with, mainly due to the fact it is very porous clay and partly fired, unlike a Spanish or French equivalent which is fully fired and a lot less porous as a result. Although difficult to maintain they are full of character and colour so it’s understandable why they are so popular.

Mexican Terracotta Before Cleaning Elswick
This particular Mexican Terracotta floor was installed in the kitchen and garden room of a house in Elswick near Preston around twenty years prior. The house had recently changed hands and the new owner wanted the floor in the garden room renovating, it had been covered with a carpet in the past and had now lost all its colour due to ingrained dirt.

Mexican Terracotta Before Cleaning Elswick Mexican Terracotta Before Cleaning Elswick

Cleaning Mexican Terracotta Tiles

You can see from some of the photographs that the tiles were quite grubby, so I knew we would have to give this floor a really deep clean to get the dirt out. I felt the best way forward would be to apply Tile Doctor Oxy Gel to the Terracotta and leave it to soak in. This product is a very strong gel version of Tile Doctor Pro-Clean, our popular tile and grout cleaner and needs a lot of dwell time to break down fully what was left of the sealer, carpet adhesive and extract the dirt from the pores of the clay.

The product was then worked into the tile and grout using a black scrubbing pad fitted to a rotary floor buffer running at a slow speed. This action worked as predicted and the now soiled cleaning solution was extracted from the floor using a wet vacuum. A lot of rinsing with water was required after this to remove all the dirt and traces of product from the tiles. I wanted to ensure all traces of the alkaline cleaning solution were rinsed from the pores of the clay, if we left any of this in the clay it could cause issues with the new sealer.

Sealing Mexican Terracotta Tiles

The floor was left to fully dry out which can take some time with Terracotta so after returning to seal the floor damp meter readings were taken first so we could be sure it had dried completely. This is essential because excess moisture can cloud the sealer and damage its performance.

Our choice of sealer was Tile Doctor Seal and Go, which provides excellent surface protection along with an aesthetically pleasing deep sheen finish that the customer wanted. The sealer is also water based so you don’t get that solvent smell as it dries.

Mexican Terracotta Before Cleaning Elswick
As you can see from the photographs, the result was fantastic, and it just goes to show even a twenty-year-old Terracotta floor can be rejuvenated and make it look like almost new.

Excellent results on terracotta tiled floor that had had carpet laid on top so was covered with glue and pretty dirty! Wouldn’t hesitate to use them again.
Caroline M, Nr Preston

Mexican Terracotta Before Cleaning Elswick
 

Professional Mexican Terracotta Tile Renovation in Lancashire

Carpet Covered Mexican Terracotta Floor Restored in Elswick Read More »

Grout colouring Preston Ceramic Wall Tile After

Grout Cleaning and Colouring 25m2 of Tiles in Preston

Oddly Enough I had sold these Ceramic tiles to the customer in Preston when I used to work at a local Tile Shop many years prior. I had also been back to clean and seal the grout on his floor tiles originally in 2007 and then again in January 2010 when we used a Grout Colourant on them. It’s nice to get called back like this as it shows they appreciate the service you provide; for this visit the request was to freshen up the floor tiles and also the Ceramic Kitchen wall tile and Grout which had become ingrained with Grease from the cooker.

Grout colouring Preston Ceramic Wall Tile Before

Cleaning Tile and Grout

The total area was approximately 25m2 and it took me a day and half to give the Tile and Grout a deep clean. For the most part I used Tile Doctor Pro-Clean but for the wall tiles where Grout Colourant has been applied I used Tile Doctor OxyPro which is a ready to use Tile and Grout cleaner that comes in a spray bottle, when applying any liquid to a wall its best to mix it with air in a spray bottle as this makes it lighter and helps it stick and soak into the to the tile and grout as opposed to running down it. It was noticeable that the grout colour was mainly intact and it had just needed a good clean on the whole apart from maybe near the cooker which I topped up with new Grout colour in the original shade.

Applying Grout Colourant

Once everything had been rinsed and the grout had dried I was able to apply the grout colourant using my colour applicator (toothbrush). You have to be fairly methodical doing this so it can take a while, you can remove excess colourant by spraying plain water and scrubbing with a white pad (don’t used a coloured pad as you can transfer the dye from the coloured pad to the surface).

Grout colouring Preston Ceramic Wall Tile After
 

Cleaning and Colouring of Grouts in Lancashire

Grout Cleaning and Colouring 25m2 of Tiles in Preston Read More »

Scroll to Top