sandstone tiles

Flagstone Floor Restoration Lytham St Annes

Original Flagstone Tiled Floor Restoration in Lytham St Annes

The client said when he moved into this house in Lytham St Annes late last year that this room had a really bad smell of damp. The Flagstone floor was covered in carpet and he had the impression that the previous owner’s cat had been known to use it as place to pee!

Flagstone Floor Before Restoration Lytham St Annes

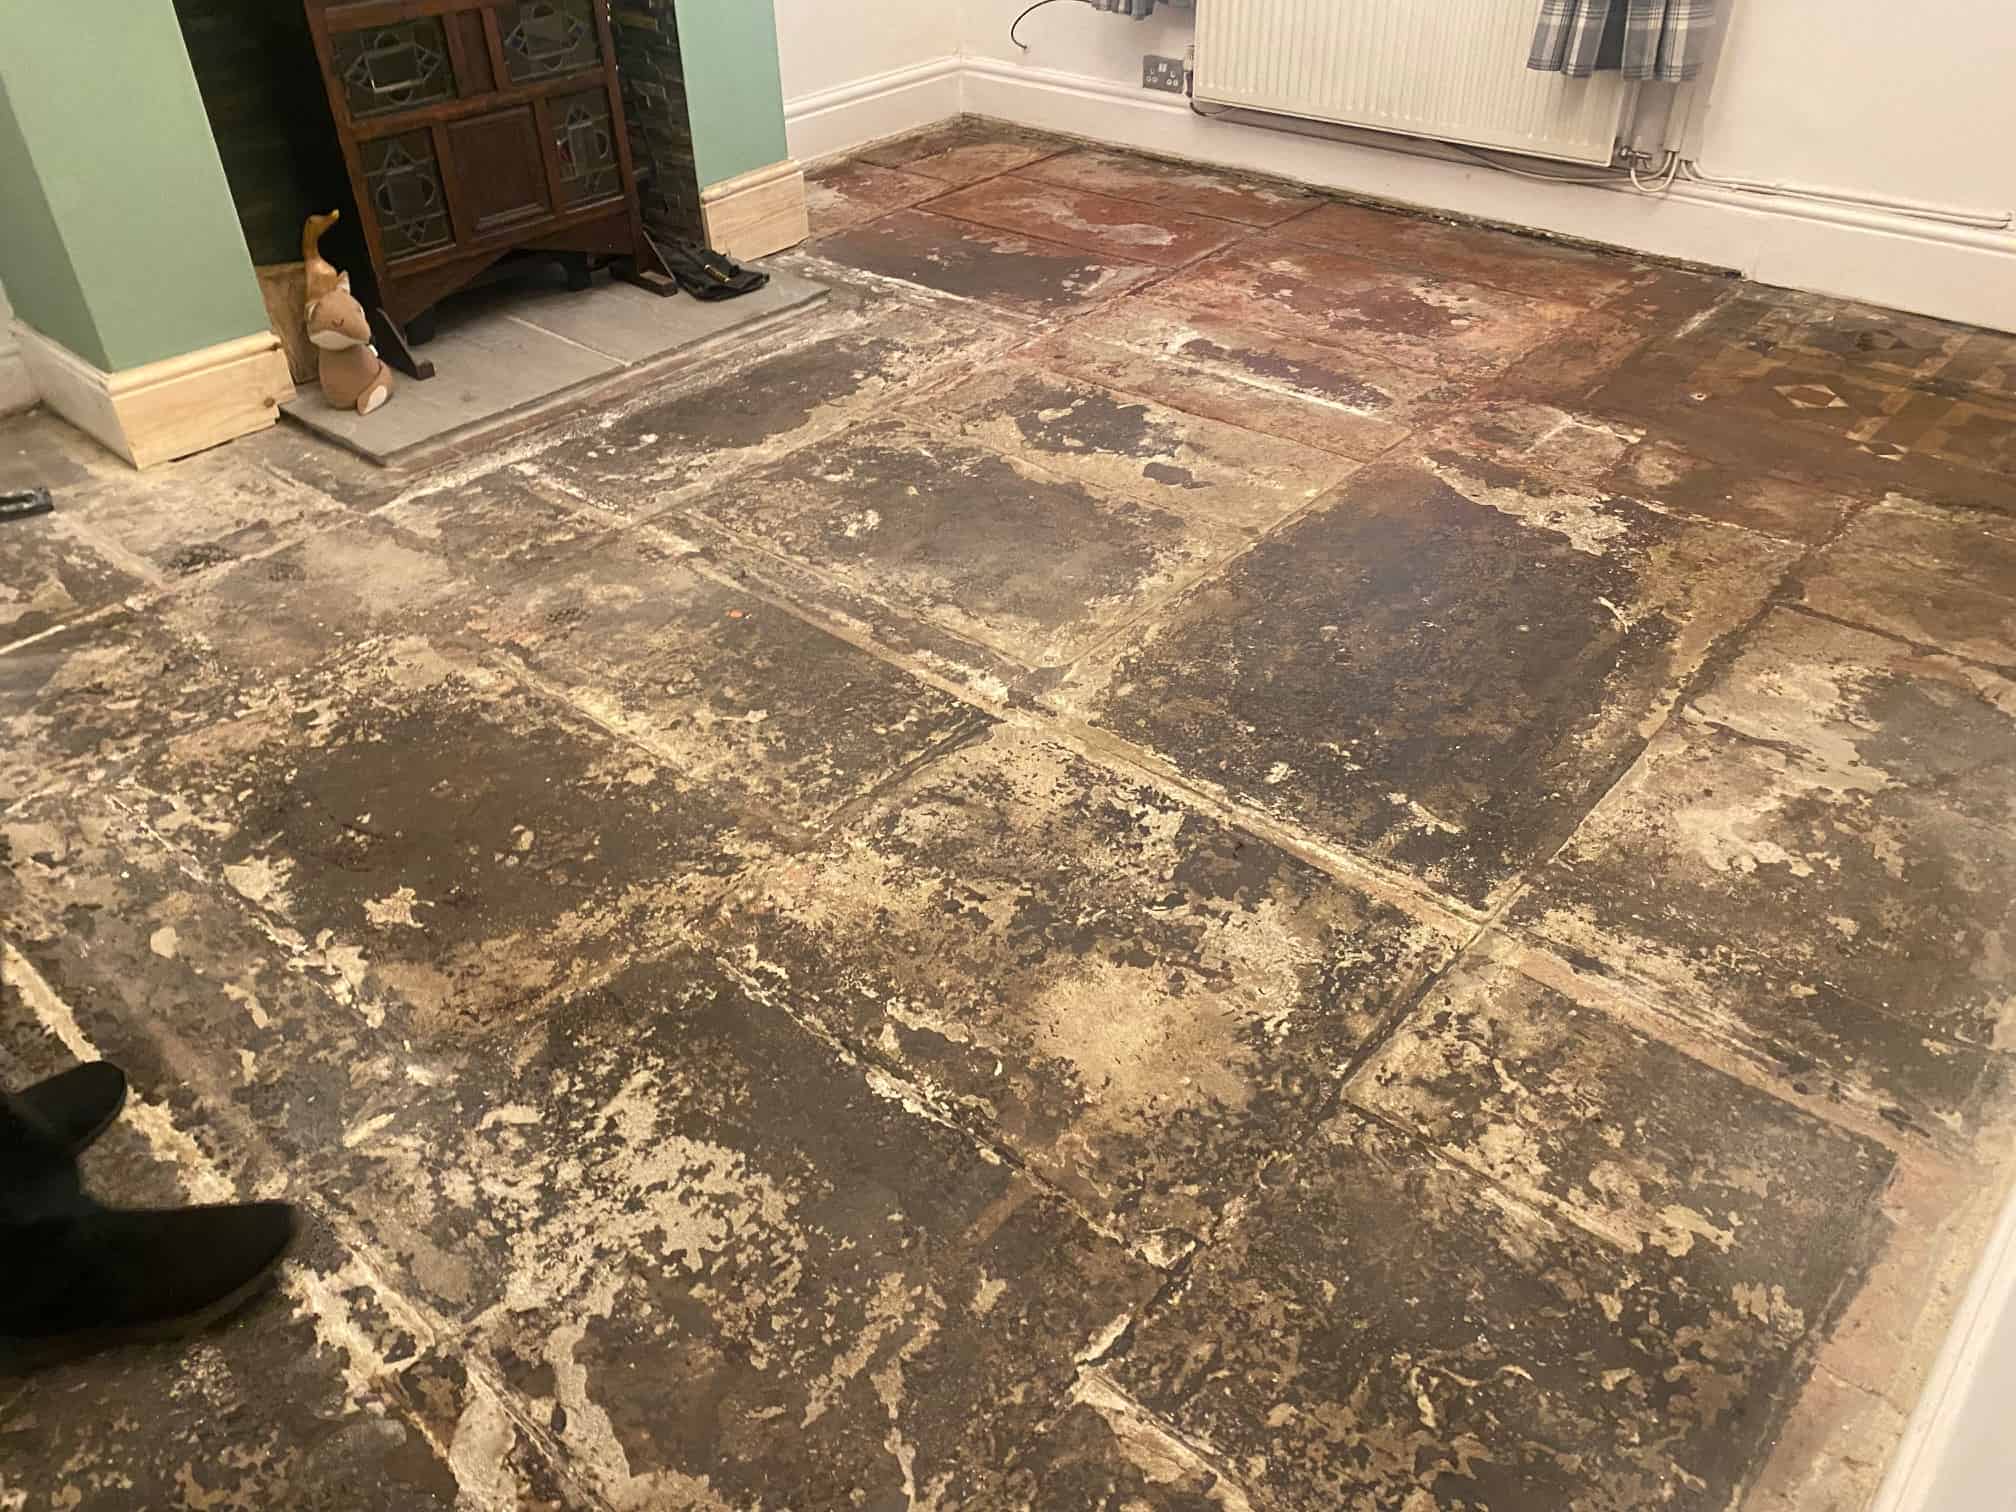
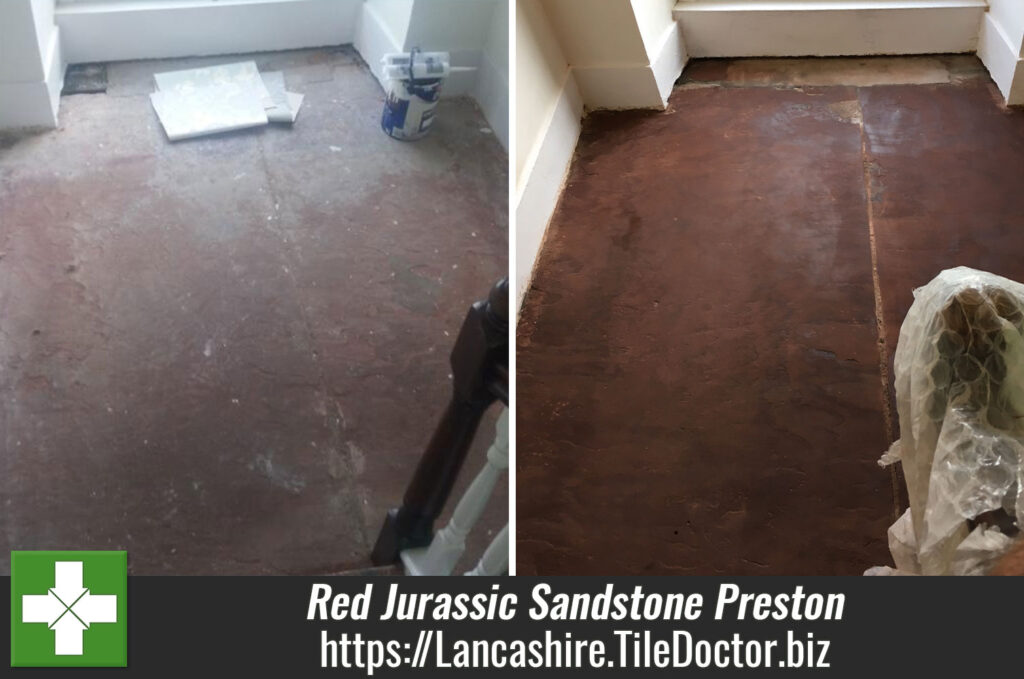
The smell was rank and probably bad for your health so he decided to remove the carpet and the thick underlay underneath. Under that there was some old Vinyl flooring which all came out to reveal the original flagstone floor. As you can see from the pictures it was in a poor state covered in red and white paint, bits of bitumen here and there and the pointing had been lost in several areas of the floor. Additionally, all those layers over the stone would have prevented any moisture from naturally evaporating at the surface thereby resulting in damp.

Flagstone Floor Before Restoration Lytham St Annes Flagstone Floor Before Restoration Lytham St Annes

The client had seen what we could do on our website and sent us some pictures of his floor which covered approximately 16m2. I priced for milling the flagstone as a deep clean would not resolve the shaling issues on its own and only a good mill of the stone would do that. Also, it needed all the pointing that was still in place knocking out and new flexible breathable pointing put back in place.

Cleaning and Repairing a Flagstone Tiled Hallway Floor

Milling stone is not a low-cost option, but it is a lot more cost effective than pulling up the whole floor and putting in a modern subfloor. Milling involves using a weighted buffing machine fitted with different grits and grades of coarse Diamond encrusted pads which cut into the surface of the stone to reveal new stone underneath, you then apply finer pads to hone and refine the surface.

In this case I used a set of Tile Doctor Milling Pads applied in sequence starting with 50-grit, 100-grit and then 200-grit. Water is used to lubricate the process and keep the dust down, it’s also important to rinse the stone off after each pad and extract the slurry that is generated with a wet vacuum.

The floor was then cleaned with Tile Doctor Remove and Go allowing the product to soak in for ten minutes to loosen deep seated paint staining. The Tile Doctor Remove and Go was then worked in with another 200-grit pad before another rinse and extract again with the wet vacuum.

Older floors like this were installed before the invention of the damp proof membrane so moisture is always a concern. To counter any issues that might develop later such as Efflorescence the last step in the cleaning process was to give the floor an acid rinse using Tile Doctor Grout Clean-up, this neutralises any latent salts trapped in the subfloor.

Sealing a Flagstone Tiled Hallway Floor

The milling, re-pointing and cleaning work took two days and we returned for a third day to apply a breathable sealer called Tile Doctor X-Tra Seal. This product is fully breathable and a great choice for any floors where damp can be a problem as it will allow for moisture to rise through the stone and evaporate at the surface. Being oil-based it also adds character to natural stone and adds an appealing low satin finish.

Flagstone Floor After Restoration Lytham St Annes Flagstone Floor After Restoration Lytham St Annes

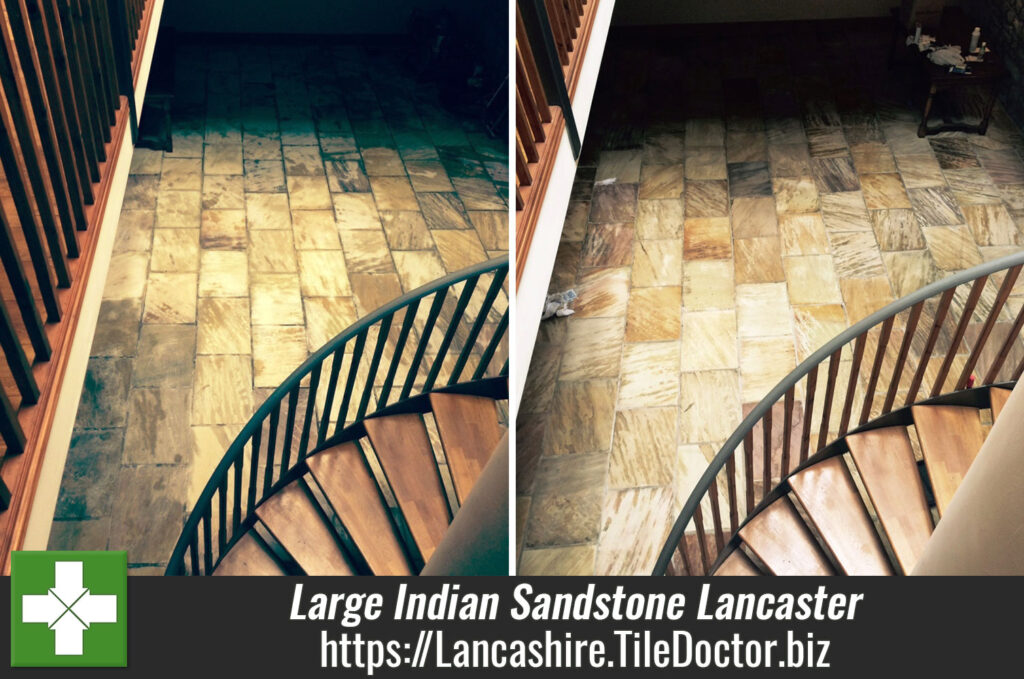
The whole process completely transformed the appearance of the flagstone floor and really suits the property which was a late Victorian four-story house with a basement. Original features like this are very sought after so it makes sense to restore them as it will add value.

Flagstone Floor After Restoration Lytham St Annes

An additional advantage of the milling process is it also reduces the roughness of the stone surface makes it smoother and easier to clean. On the topic of cleaning its worth mentioning that you should never use a strong bleach-based tile cleaning product on a sealed floor as it will erode the sealer prematurely. For a floor like this you need to use a product like Tile Doctor Neutral Cleaner which is a mild but effective cleaning product designed for use on sealed tile and stone.


Professional Restoration of a Flagstone Floor in Lancashire

Original Flagstone Tiled Floor Restoration in Lytham St Annes Read More »

Red Jurassic Sandstone Landing Before and After Sealing

Restoring Red Jurassic Sandstone Steps and Landing in Preston

We often get called out when other trades with less experience in stone cleaning fail to make a difference which was the case with these Red Jurassic Sandstone Stone steps at a house in Preston which had been stained with paint splashes and years of grime. The customer had tried several solutions to restore these steps including having a go themselves buy applying some Chemicals from a local Tile Shop, however again this didn’t achieve the results the customer wanted so they called us after we were recommended to them.

Red jurassic sandstone steps before Red jurassic sandstone landing before cleaning

Burnishing Red Jurassic Sandstone

I took a look at the Sandstone and tested a few methods before deciding to go with a process called Burnishing which involves the application of diamond encrusted burnishing pads. The pads come in a set of four and are applied in sequence from Coarse, through medium, fine and super fine; you need to use a little water to lubricate as you go and also rinse with water between the application of each pad. Naturally due to the tight space I couldn’t use a set of full size pads, only he smaller 6 inch pads which fit a small hand buffer.

Red jurassic sandstone steps after burnishing

Sealing an Indian Sandstone Tiled Floor

The floor was left to dry off overnight and then I returned the next day to seal the whole floor with two coats of our impregnating sealer Tile Doctor Colour Grow. The sealer fills the pores of the stone to prevent ingrained dirt and stains, while also emphasising the natural colours in the stone.

Red jurassic sandstone steps after sealing Red jurassic sandstone landing after sealing

The full process successfully restored the red colour in the Sandstone and have come up quite well considering they are over 300 years old.

Professional Restoration of Old Sandstone Steps Lancashire

Restoring Red Jurassic Sandstone Steps and Landing in Preston Read More »

Indian sandstone floor Lancashire after restoration

Milling and Sealing a Large Indian Sandstone Tiled Floor Near Lancaster

Here we have a six year old Indian Sandstone tiled floor located a property on the outskirts of Lancaster. Measuring 100 metres squared, the very large floor had under floor heating in the concrete sub base. The type of stone used inside the property is what we commonly refer to as ‘patio Sandstone’, a material which is usually used outside because of its very rough texture. It’s not particularly comfortable to walk across in bare feet, hence why many people consider it be impractical for internal flooring.

Indian sandstone floor Lancashire before restoration
Nonetheless, the property owner was keen to make the rough textured floor as feet-friendly as possible for people walking over it. At Tile Doctor we have developed a process known as milling, which utilises diamond encrusted pads combined with a weighted rotary machine to smooth the rough surface, leaving it looking and feeling a lot nicer and more practical to live with. The milling process is only done once, but while the Sandstone will still need cleaning and sealing in the future, it won’t be nearly as difficult as when it was rough.

The job would take over two weeks to complete due to the fact that the existing grout needed to be removed and replaced with a flexible floor grout: a very time consuming process.

Milling an Indian Sandstone Tiled Floor

As mentioned, the surface of the Sandstone was very rough, and so needed to be milled down to make it a lot smoother to look after and make it easy to clean and seal. This was achieved by using Tile Doctor’s 50 Grit diamond encrusted burnishing pads, fitted to a weighed rotary machine and run along the entire surface area of the floor. Through this process the stone became much smoother and more aesthetic – completing one of our main objectives for the customer.

Indian sandstone floor Lancashire during restoration
Next, we started breaking out the already loose and badly applied grout with our grout removal tools. The builder who had installed the floor had used a sand/cement-based grout which wasn’t flexible. As a result, it started to crumble and loosen quite quickly after exposure to the underfloor heating. We removed this and replaced it with a far more flexible grout.

Indian sandstone floor Lancashire during restoration

Sealing an Indian Sandstone Tiled Floor

Once the whole area had been successfully milled and the grout replaced, the Sandstone floor was left to dry out over the weekend. Upon our return to the property, we cleaned off any dust and resin left over from the milling and grouting processes, before leaving it to dry for a further 24 hours.

Indian sandstone floor Lancashire after restoration
The next day we returned to seal the whole floor with two coats of our impregnating sealer Tile Doctor Colour Grow. The sealer fills the pores of the Sandstone to prevent ingrained dirt and stains, while also emphasising the natural colours in the stone. It also provides a robust matte finish, which is what the customer wished for.

Indian sandstone floor Lancashire after restoration
It wasn’t the easiest of processes to get the Indian Sandstone into a condition where it would be both suitable for internal flooring and aesthetically pleasing, but the results proved to be very much worth the time and effort invested. The customer was very pleased with the transformation.

Smoothing, Regrouting and Sealing a Rough Indian Sandstone Tiled Floor in Lancashire

Milling and Sealing a Large Indian Sandstone Tiled Floor Near Lancaster Read More »

Sandstone floor Stodday after

Sandstone floor maintained in Stodday, Lancashire

This sandstone floor was installed in a house in the village of Stodday, Lancashire, the floor was looking dull and if you look closely you should be able to see surface staining, there were also a number of marks the customer was eager for us to deal with.

Sandstone floor in Stodday before Sandstone floor in Stodday before

Cleaning Sandstone

We cleaned the floor using Tile Doctor Pro-Clean diluted with 10 parts warm water and worked in using a Black Scrubbing pad. This action certainly gave the floor a good clean but the marks mentioned earlier were proving stubborn to shift so we tried a stronger product called Remove and Go combined 50/50 with NanoTech UltraClean which add nano sized abrasive particles. We left the resulting formula to soak into the stone for about an hour and then used a steam cleaner to penetrate deep into the pores of the stone and lift out the dirt, this did the trick and so we then removed the cleaning products with a wet vacuum and washed down the floor with clean water to neutralise the floor before sealing and left for the evening so the floor could dry overnight.

Sandstone floor in Stodday after

Sealing a Sandstone Tiled Floor

We came back the next day and tested the floor with a damp meter in a few different locations to make sure no dampness remained in the stone. The sandstone was dry so we proceeded to seal the floor with Tile Doctor Seal and Go which gives a nice low sheen finish, Sandstone is fairly porous so it took five coats of sealer in the end. Seal and Go is a topical sealer and really brings out the true colour of the Stone and also leaves them a lot easier to clean with a mop as it takes a lot of the rough texture out of the stone.

Sandstone floor in Stodday after
 

Sandstone Floor Cleaned and Sealed in Lancashire

Sandstone floor maintained in Stodday, Lancashire Read More »

Scroll to Top