sealing

Victorian Hallway Floor Before After Restoration Lancaster

Yellow and Black Victorian Hallway Floor Tiling Restored in Lancaster

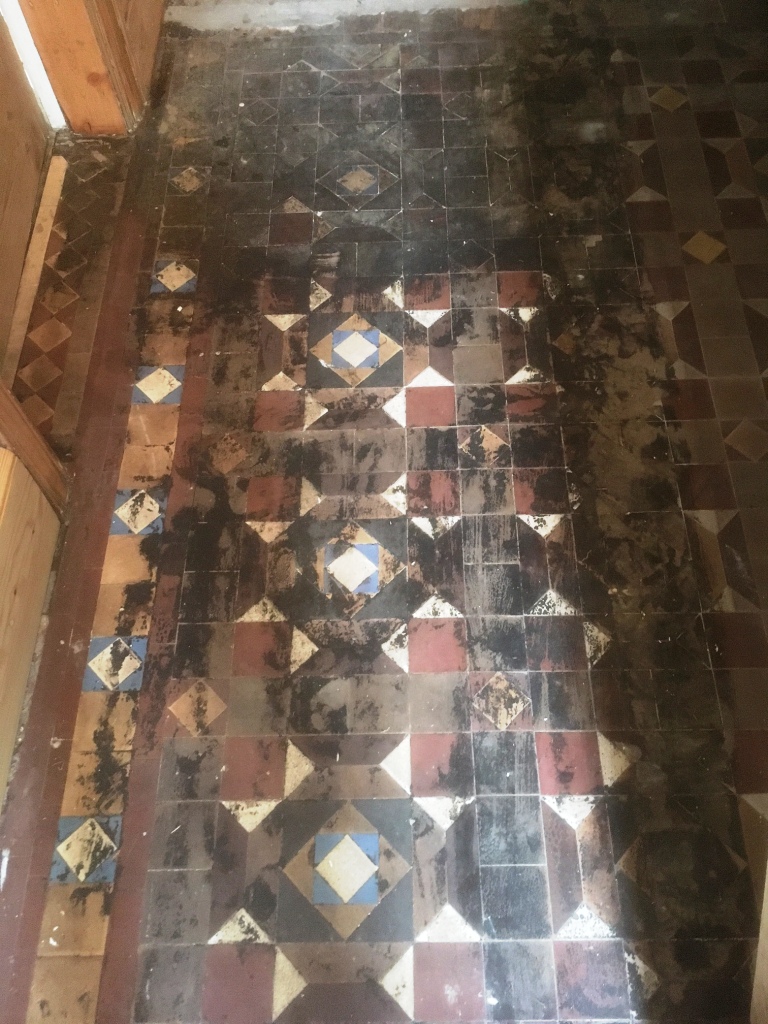
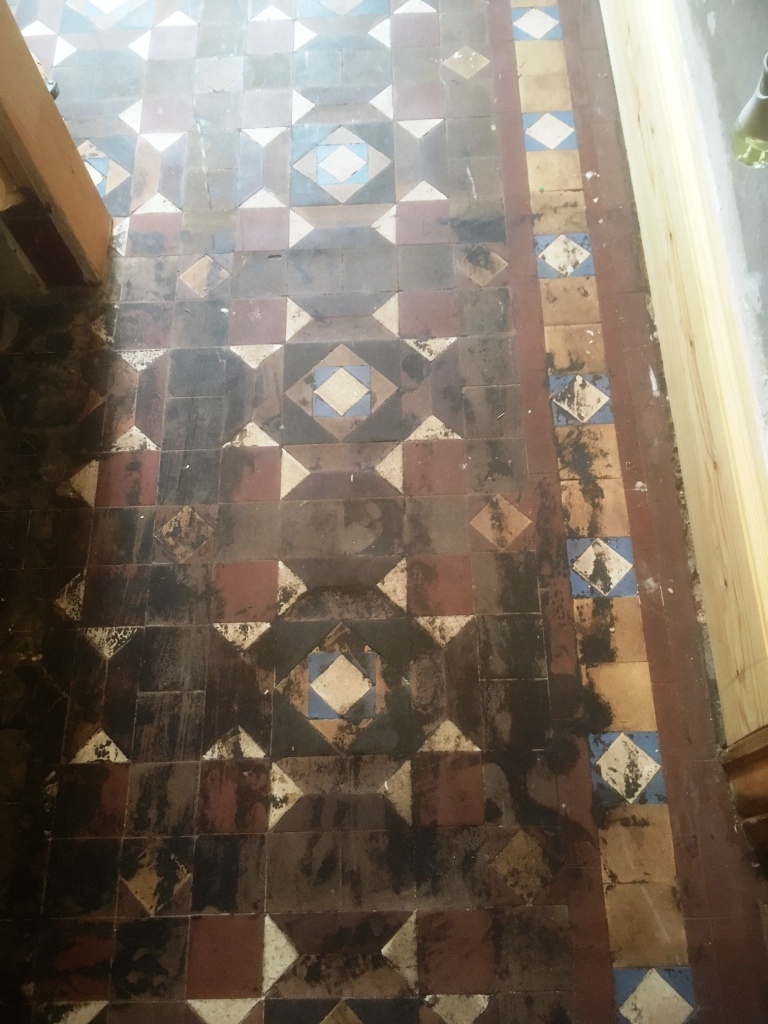
I thought I would share this case history of a Yellow and Black Victorian Tiled floor that we worked on at a large house in Lancaster last year. It’s a great example of the typical problems we face with old Victorian floors, especially around door thresholds where the transition between the different foundation invariable cause problems.

I didn’t know the full history of the floor, but it was now in quite a state and recent renovation work had left the floor unstable with loose and cracked tiles. The tiles needed to be removed and then the damaged subfloor carefully scraped out and replaced. Once that was done the floor would need relaying and then cleaned and sealed so everything would blend in.

After visiting the property and providing a quotation we were given the go ahead and agreed a date to do the work.

Repairing a Yellow and Black Victorian Tiled Hallway Floor

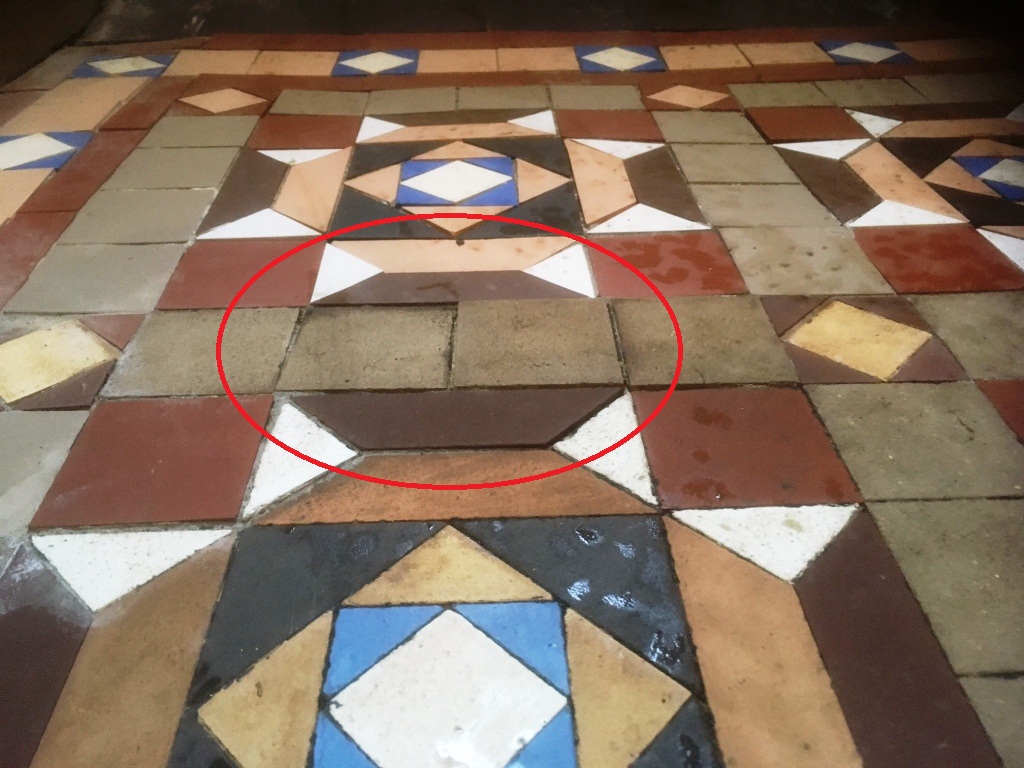
We returned on the agreed date and set about carefully removing the loose and cracked Victorian tiles and put them aside for later use. Some would need replacing however this would not present a problem and they are still widely available, and I have several contacts I can turn to for this.

Yellow and Black Victorian Tile Floor During Restoration Lancaster

Once this was done and the subfloor exposed and cleaned up, I used self-levelling cement to bring the floor level up and in-line with the existing. This now needed to set hard, so the rest of the day was spent cleaning up the tiles we removed earlier with Tile Doctor Grout Clean-up and Pro-clean. Our goal is to reuse as many of the original tiles as possible to preserve the heritage of the floor.

The next day with the new subfloor set it was ready for tiling. This involves laying out the tiles first without adhesive carefully cutting and fitting new tiles as needed to maintain the overall pattern of the floor. Once I was happy the tiles were moved to a board and then fitted with fresh adhesive.

Yellow and Black Victorian Tile Floor During Restoration Lancaster

Deep Cleaning a Victorian Tiled Hallway Floor

I came back on day three with the aim of cleaning the floor so it could be sealed however whilst inspecting my new tiling I was disappointed to discover some were not as level as I had hoped. I had noticed the replacement tiles were not the same thickness as the originals the previous day but I had worked around this by using different levels of adhesive, clearly this plan was not as effective as I had hoped for.

To counter this problem, I used a set of 50-Grit, 100-grit and then 200-grit diamond pads in sequence to mill the floor flat and remove the lippage between them. This is done with water to lubricate the process and a weighted floor buffer. The pads generate a lot of slurry and so you need to rinse this off with more water and extract all the soil after each pad.

I followed this up with various Diamond burnishing pads of increasingly finer grits across the whole floor until we achieved a consistent finish and had the added benefit of getting the whole floor clean. More water is used to rinse the tiles after burnishing and the soil extracted with a wet vacuum as before. Once done and inspected the floor was left to dry off overnight.

Sealing a Large Victorian Tiled Floor

Tile Doctor Colour Grow was applied to enhance the appearance of the tiles and protect them going forward. This product copes well with damp which can always be a problem with old floors like this one with no damp proof membrane present.

Yellow and Black Victorian Tile Floor After Restoration Lancaster

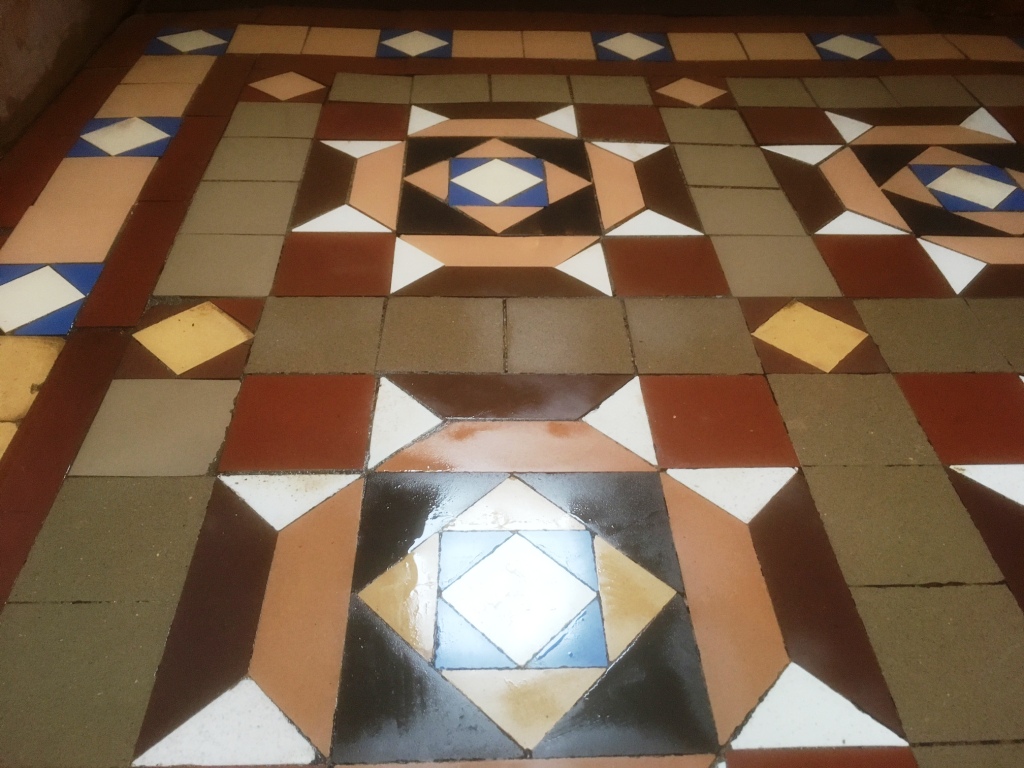
The floor looked amazing when finished and our attention to detail had really paid off, in fact you simply could not tell we had done any tiling work or replaced any tiles. For aftercare I recommend the use of Tile Doctor Neutral Cleaner which is designed for the regular cleaning of sealed tiles.

Yellow and Black Victorian Tile Floor After Restoration Lancaster


Professional Restoration of a Victorian Tiled Hallway in Lancashire

Yellow and Black Victorian Hallway Floor Tiling Restored in Lancaster Read More »

Stone Cross Manor Victorian Tiled Hall Restoration Ulverston

Large Victorian Manor House Hall Floor Restored in Ulverston

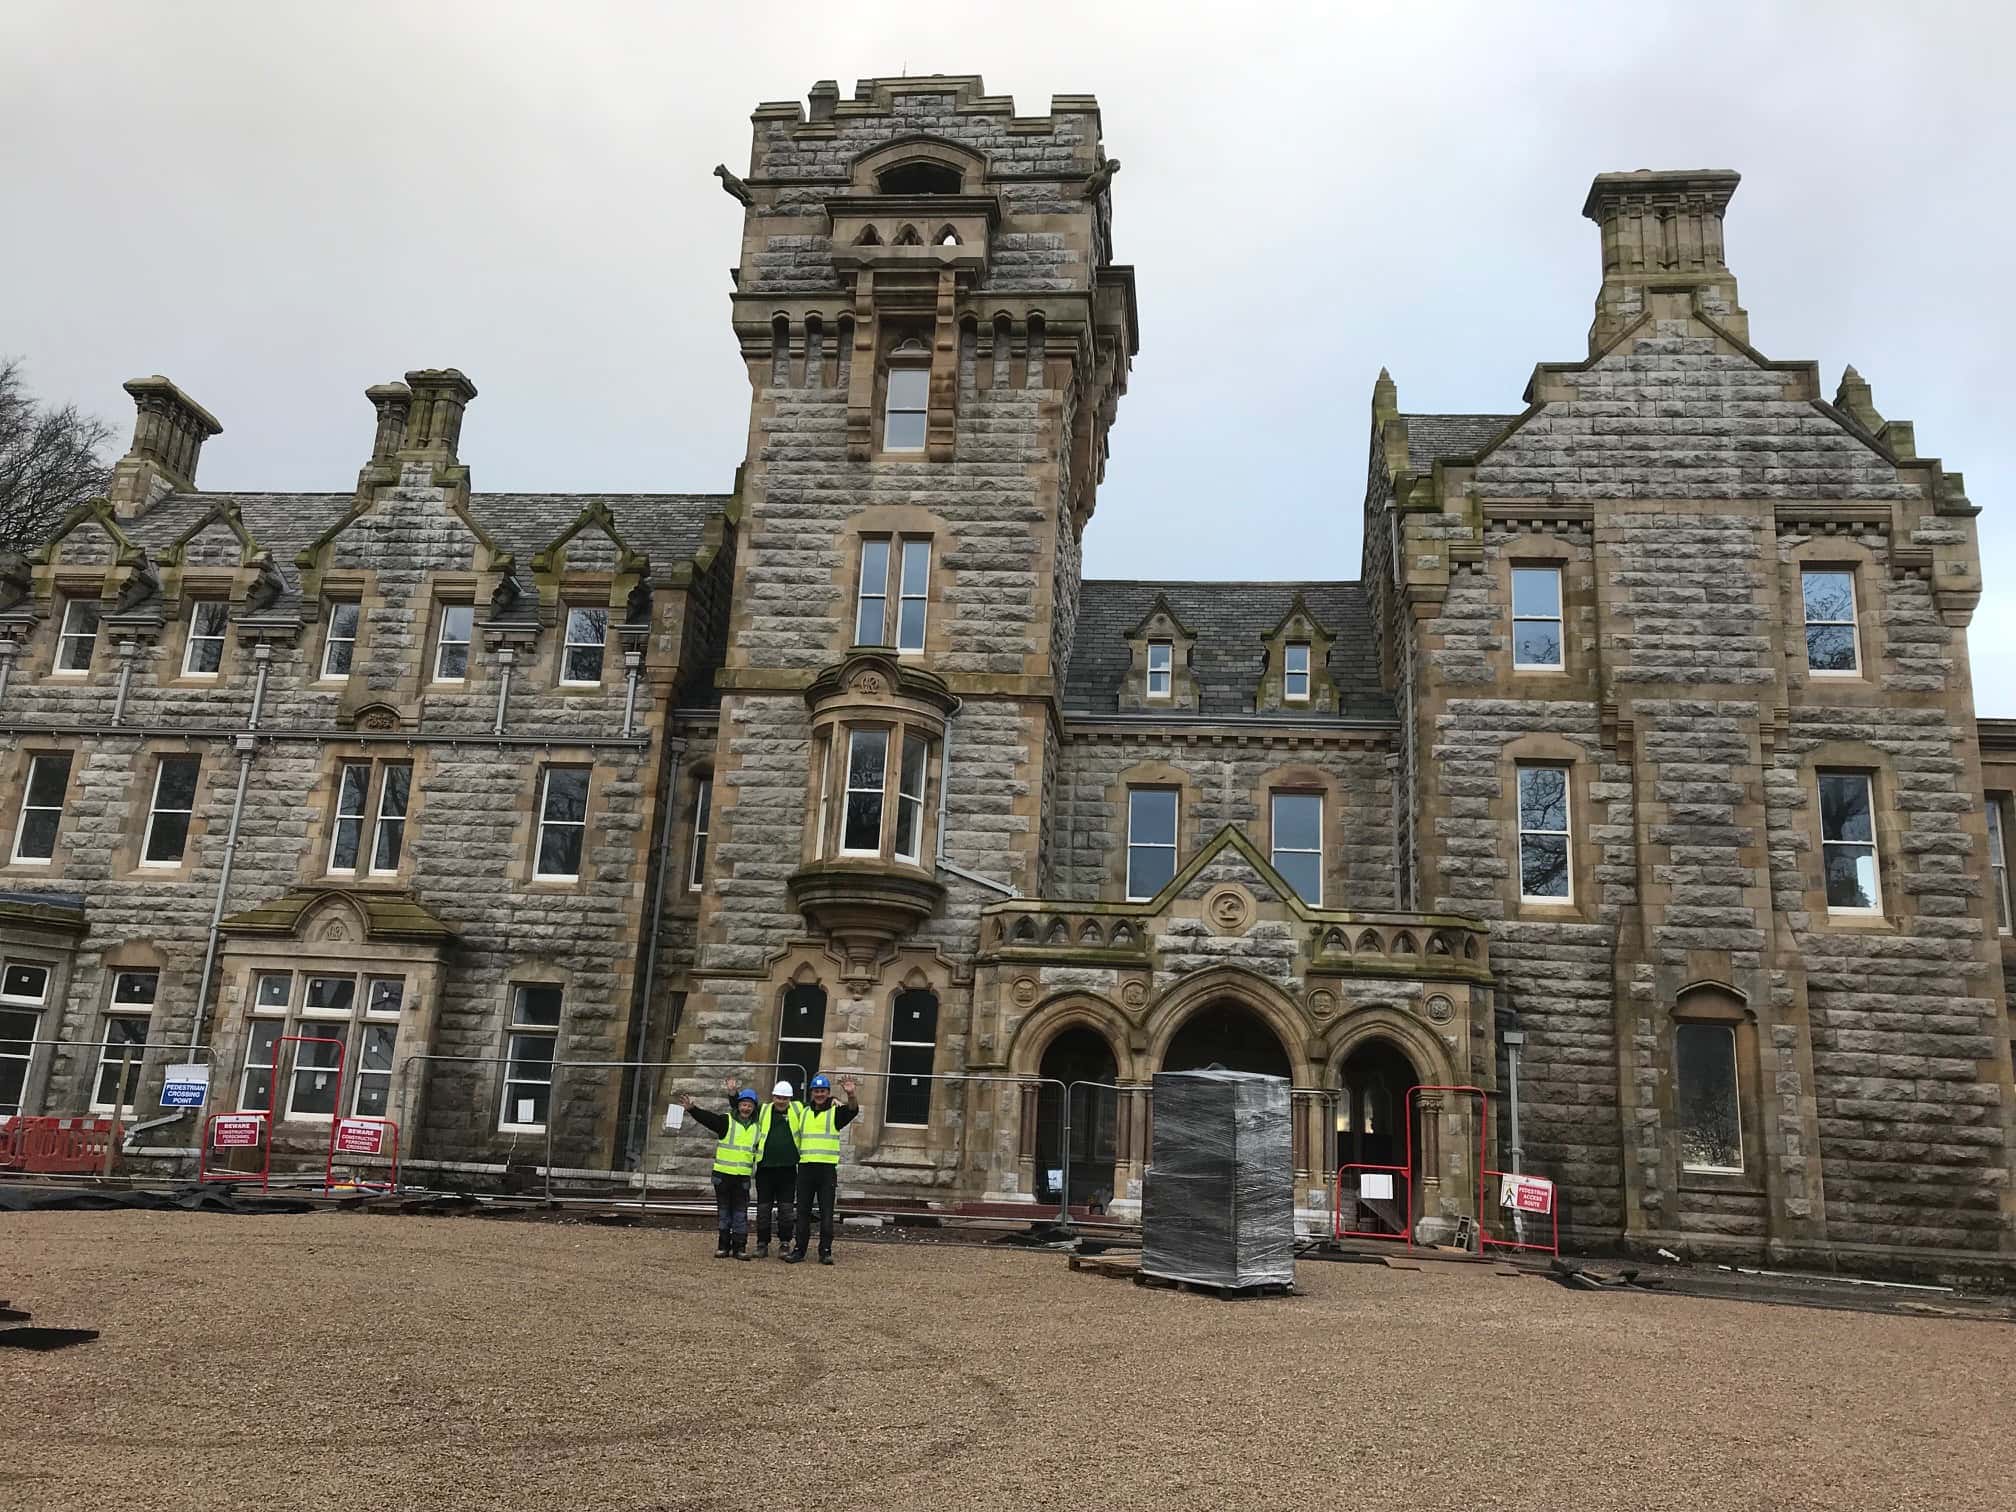
Earlier this year we had the privilege to be involved in the restoration of a large Victorian tiled hall at Stone Cross Manor in Ulverston which is being sympathetically redeveloped into nineteen apartments by Persimmon Homes at a reported cost of £4 million. The magnificent Grade II-listed stately home was built in 1874 for Myles Kennedy who was a Limestone Quarry owner and chairman of an Ironworks.

The property continued to be occupied by the Kennedy family until 1943 when it was requisitioned by the military who then sold it to Lancashire County Council in 1946. The council used it as a boarding school for some decades and allegedly had the central oak staircase removed so the hall could be used to play indoor football. Since that time, it has had different owners and states of disrepair until finally being acquired by Persimmon who contacted us to quote for restoring the floor to its former glory. This would be no easy task and would require plenty of help. However, we are a resourceful bunch and being part of a large network of Tile Doctors means we were able to draft in other Tile Doctors to assist.

Stone Cross Manor Ulverston

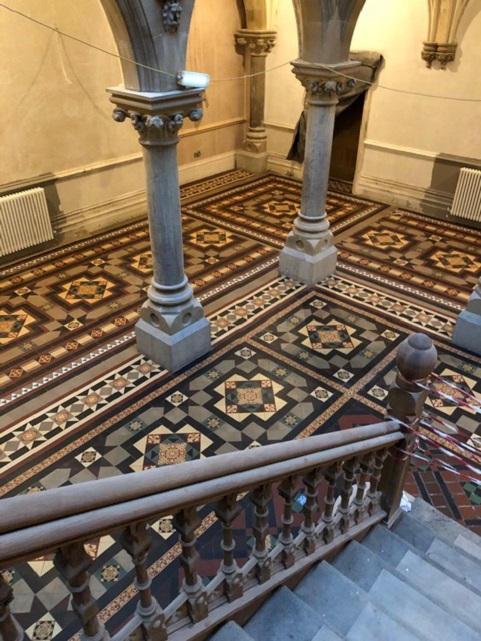
Before we took the job on, I went over to survey the floor and was immediately taken aback by the sheer size and scale of the project. The impressive Victorian hall has now had its large wooden staircase rebuilt and this sits in the centre of a series of architectural stone columns.

The floor was in a sorry state though and it certainly had a story to tell. At some point in its long history sections of the beautiful Victorian tiles had been cut out for the installation of central heating and then back filled with cement. There were also other areas that had been given the same treatment for some inexplicable reason. I suspect that the floor must have been covered in carpet during its later life to hide the mess.

Victorian Tiled Stone Cross Manor Hall Before Restoration Victorian Tiled Stone Cross Manor Hall Before Restoration

The biggest problem was the realisation that with so many tiles missing the only way we could get exact duplicates would be to have them made by a company such as Craven and Dunhill. They are specialist tile manufacturer who date back to 1872 and can reproduce old tiles using the same tones and colours to match the originals. This was a high spec job, so this was the right approach however the price for the moulds and the time needed to manufacture threatened to push the cost of renovating the floor off the scale.

Victorian Tiled Stone Cross Manor Hall Before Restoration

We discussed this with the developer and manged to come to a compromise by reusing tiles from another room in the property. Many of the tiles in that room had been damaged and were beyond restoration however there were enough tiles in good condition to fulfil our requirements in the main hall. They would have to be carefully lifted and cleaned but the tiles matched the colour and tone, size and texture to the main hallway perfectly. When you look at the before and after pictures on this page you will really struggle to see any difference and this is rare on old floor like this, the only exception being the black tiles underneath the radiators where a matching tone wasn’t available.

Rebuilding a Large Victorian Tiled Floor

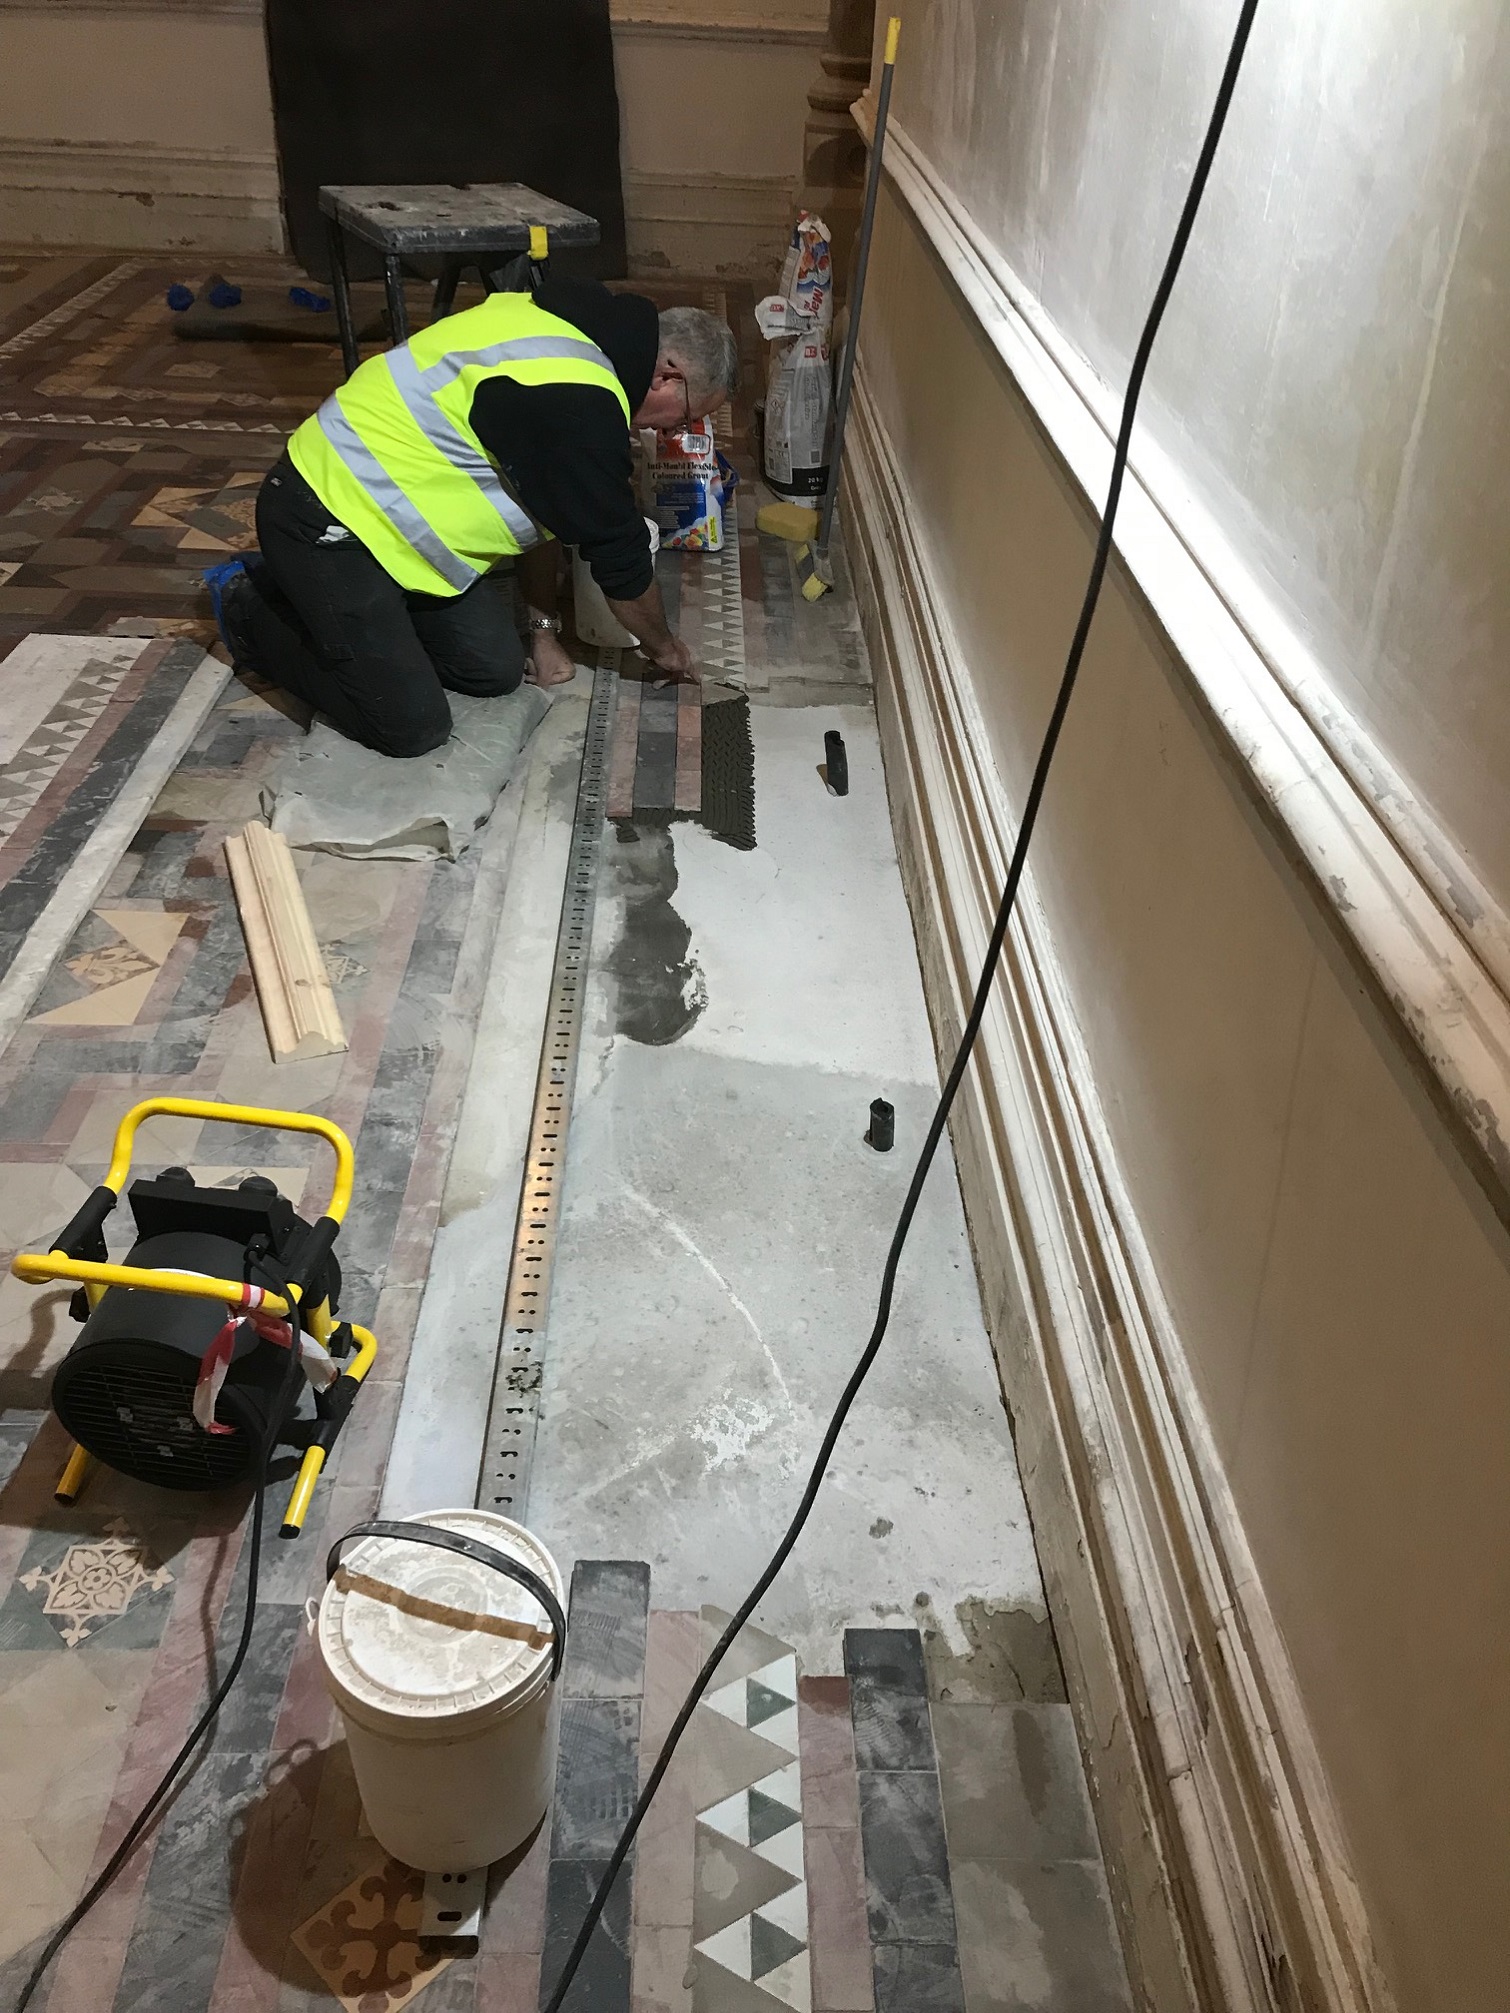
The first week was spent lifting and replacing broken tiles, it was a large floor area of about 120m2 which was set to be the main showpiece of the building, so it had to be right. As part of the floor prep it was also necessary to level parts of the floor with the application of a a self-levelling compound. We brought in Cardiff Tile Doctor Julian Iaconno to run this part of the job, he is an absolute master tiler and one of the best Victorian Tile installers in the country. At one point there was three of us working on the floor in order to keep to schedule.

Victorian Tiled Stone Cross Manor Hall During Restoration Victorian Tiled Stone Cross Manor Hall During Restoration

Deep Cleaning a Large Victorian Tiled Floor

The second week was spent cleaning the floor various Diamond burnishing pads, moving though increasingly finer girts until we achieved the desired finish. We also used a lot of Tile Doctor Grout Clean-up and Pro-clean to remove the old grout and dirt from the recycled tiles. As is always the case on a building site you get a lot of tradesmen who like to have a look at what we have done and walk all over our nice clean tiles, thus leaving dusty footprints everywhere. I must give credit to the Site Foreman for keeping these guys out although best intentioned they weren’t helping with the cleaning process, so all doors were locked off and access was limited to the site foreman and Tile Doctor only.

Victorian Tiled Stone Cross Manor Hall During Restoration Victorian Tiled Stone Cross Manor Hall During Restoration

Sealing a Large Victorian Tiled Floor

The third week was reserved for Sealing the tiles however this dragged on due to issues with the heating which was basically non-existent at the time and not an ideal situation in January. Persimmon went out of the way to chase up the plumbers who had been running behind and got this sorted for us, without heat we would struggle to get the sealer to dry.

Victorian Tiled Floor Stone Cross Manor Hall After Restoration Victorian Tiled Floor Stone Cross Manor Hall After Restoration

We applied a Matt finish sealer called Colour Grow, which copes very well with potential damp issues that can cause problems with old floors with no damp proof course, it’s also excellent at bringing out the colour of Tiles whether Clay or Stone. Four coats of Colour Grow were applied to the Victorian tiles and being such a large floor area, it took a few days to fully seal the floor.

Victorian Tiled Floor Stone Cross Manor Hall After Restoration Victorian Tiled Stone Cross Manor Hall After Restoration

We cannot praise Persimmon enough for the dedication they have shown in the restoration of this historic property which has had a chequered past and will now have a long future.


Professional Restoration of a Victorian Tiled Hallway in Lancashire

Large Victorian Manor House Hall Floor Restored in Ulverston Read More »

Semi Riven Slate floor Before and After Cleaning Hornby

Brazilian Grey/Green Semi-Riven Slate Floor Hornby Kitchen

Rough Slate is notorious for homeowners to maintain as dirt can quickly become trapped in the rough surfaces. The example on this page is that of Brazilian Semi Riven Slate installed in the Kitchen of a house in the village of Hornby, which while naturally cleft from the rock loses none of its texture and style and yet has a much smother appearance than the typical rough Slates from China. Less processing means it’s not quite completely smooth but it is a lot less expensive to buy than say a honed or polished Slate which is more difficult to maintain due to various polishing techniques required to keep up the appearance. Brazilian Slate is in fact one of my favourite slates to clean and also one of the most rewarding of Slates to seal as the sealer really does bring out the colour and character of the stone.

Sealers provide a protective barrier on natural stone floors and without it dirt can penetrate into the pores of the stone making it more and more difficult to clean effectively. Unfortunately on this floor the new homeowners were unaware on what sort of Stone it was and had no idea how to look after it which resulted in the sealer wearing down prematurely and the floor becoming dull and un-inviting.

Semi-Riven Slate floor Before Cleaning Hornby Semi-Riven Slate floor Before Cleaning Hornby

Cleaning Black Semi-Riven Brazilian Slate Tiles

To restore the appearance of the Slate floor we started by taping up the edges of the new kitchen units to protect the wood from splashing. This was followed with an application of a strong dilution of Tile Doctor Pro-clean worked in with a black buffing pad fitted to a buffing machine running at slow speed (working at a slower speed results in less splashing). The pads can struggle to reach the edges and corners so these were cleaned by hand.

Once we had finished on the main floor area we then concentrated on the grout using a steam cleaner and more Pro-clean scrubbed in with a narrow stiff brush.

Last step of the cleaning was to rinse the floor with water to remove any trace of cleaning products from the Slate and then dried off the floor the best we could with our high wattage wet vacuum machine and left the floor to dry off naturally over night.

Sealing Black Semi-Riven Brazilian Slate Tiles

The next day we returned to seal the floor checking first that the floor had completely dried. The customer had requested a matt finish however we have worked on Brazilian Slate many times before and we knew how good they can look with this Satin finish sealer. Naturally its the customers decision so we offered to do a test piece and let them decide if they didn’t like it we would strip off the test piece and apply a Matt finish sealer like Tile Doctor Colour Grow instead.

The floor was dry so a couple of coats of Tile Doctor Seal and Go were applied to one Tile so that they could appreciate how it would look. Luckily the customer agreed with us and so we set about sealing the whole floor with Seal and Go.

To speed up the drying process Air Blowers were installed as we worked and it wasn’t long before the sealer was dry and the customers were able to walk on the floor and inspect every area before we left. I’m please to report that they were over the moon with the floor and my recommendation of sealer.

Semi-Riven Slate floor After Cleaning Hornby Semi-Riven Slate floor After Cleaning Hornby

To maintain the slate tiles going forward we always give our customers a free bottle of Tile Doctor pH neutral tile cleaner, which is a little incentive for them to provide some feedback via our website.

Professional Semi Riven Slate Floor Renovation in Lancashire

Brazilian Grey/Green Semi-Riven Slate Floor Hornby Kitchen Read More »

Victorian Hallway Floor Before and After Restoration in Barrow in Furness

Bitumen Stained Victorian Geometric Hallway Rejuvenated in Barrow in Furness

This old Victorian tiled Hallway floor, laid in a geometric pattern, at a house in Barrow in Furness was a challenging project. The tiles were extremely dirty and also stained with Black Bitumen which has been used as an adhesive, however we have come across these sorts of problems before and so I was confident it could be resolved.

Geometric floor before Restoration Barrow in Furness Geometric floor before Restoration Barrow in Furness

Deep Cleaning an Old Victorian Tiled Floor

I roped in Heidi and my son Lewis who spent a whole day cleaning with chemicals, steam, buffing pads and unfortunately the results were far from satisfactory; the customer wasn’t happy and Heidi wasn’t happy with it either. It was clear that the black bitumen had penetrated deep into the pores of the clay and becoming so embedded that no chemical or technique we were using would shift it fully.

Geometric floor before Restoration Barrow in Furness
To top it off I had gone out earlier to tile the old mat well with matching tiles before we started the cleaning but due to the depth of the floor matt. The matt well was at least 35mm so it was clear I couldn’t use standard floor adhesive. I opted instead for a sand cement mix, similar to what the Victorians would have used originally. This filled up the depth and allowed me to tile and grout the same day, however overnight there was a bit of shrinkage and some of the new tiles settled unevenly.

Geometric floor before Milling Barrow in Furness
I racked my head for a solution to both issues and decided the best course of action would be to Mill the clay tiles to remove the Bitumen and smooth down the uneven effect of my tiling. This is not something we would normally do on a clay tile as this system can leave scratches which potentially would look worse that the dirt. After I had milled the Tiles down with a course pad fitted to a heavy buffing machine and removed all the issues I then counteracted any scratches left over using a higher grit milling pad. This solution fully resolved both issues leaving it ready for the final step of sealing.

Geometric floor After Milling Barrow in Furness

Sealing an Original Victorian Tiled Floor

The floor was left to dry off overnight and we returned the next day to seal the tiles using Tile Doctor Colour Grow, which is a matt finish, fully breathable and colour enhancing sealer which really lifts the colour of the stone or in this case clay tile. Colour Grow is impregnating – meaning that it penetrates the pores of the stone to fill them and prevent trapped dirt and stains. We recommend Colour Grow for both internal and external applications and especially for areas where no damp proof membrane is evident, since the sealer allows for the floor to breathe moisture.

Geometric floor After Restoration Barrow in Furness Geometric floor After Restoration Barrow in Furness

There were plenty of problems to overcome and It took a lot of work but I’m pleased to say the floor was transformed by our efforts and now looks fantastic and I’m sure has added a lot of value to this period property.

Hallway Restoration of Bitumen-Stained Victorian Floor in Barrow in Furness

Bitumen Stained Victorian Geometric Hallway Rejuvenated in Barrow in Furness Read More »

Sandstone Fireplace Preston Before and After Cleaning

Cleaning a Sandstone Fireplace and Victorian Floor Tiles Preston

We often get asked to do a combination of jobs at Tile Doctor so we have to be prepared for the unexpected, like getting asked to clean an old Sandstone fireplace whilst your cleaning a Victorian tiled floor at a house in Preston. We normally charge extra for these types of jobs but it depends how much cleaning is required.

Red and Black Victorian Tiles Preston Before Cleaning
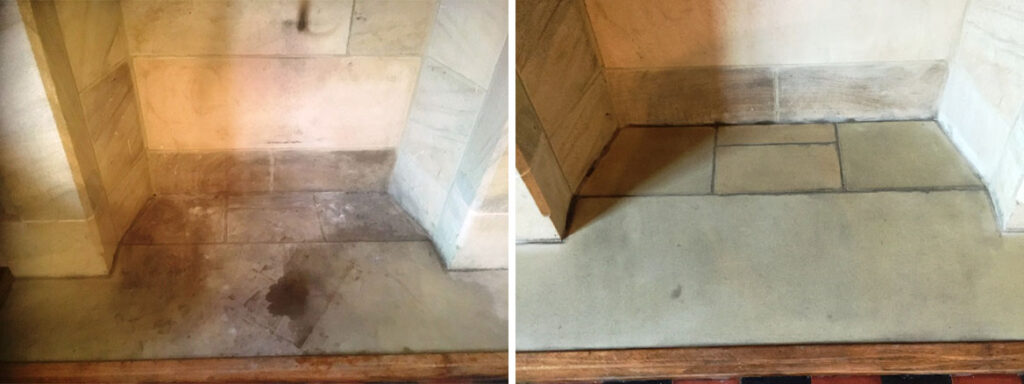
This Fireplace had been in use for a number of years and due to its grainy texture was hard to keep clean, dirt and soot had built up on its surface and there was no sealer visible, either that or it had worn off with the heat.

Sandstone Fireplace Preston Before Cleaning

Cleaning and Sealing a Sandstone Fireplace

To clean the uprights and Hearth I applied Tile Doctor Oxy-Gel which being in Gel form and not a liquid, stays in place increasing dwell times and doesn’t drip where it shouldn’t. In this case I let it soak into the stone for about forty minutes before scrubbing it in with a stiff hand brush and steam. Some marks were still visible after this process so we opted for using handheld Diamond blocks in 50.100.200 and then 400 grit to grind off the staining and restore the surface finish. Using these small handheld blocks takes off some of the heavier texture as well as cleaning the stone at the same time, but is really useful to use where chemicals alone struggle to get the results required. Once fully clean the fireplace was rinsed with water a couple of times and the slurry removed using a wet vacuum. After speed drying the stone with a heat gun it was ready for a couple of coats of Tile Doctor Colour Grow, even we were impressed with the results.

Sandstone Fireplace Preston After Cleaning

Cleaning and Sealing a Victorian Tiled Floor

The Red and Black Victorian Tiles were cleaned with a strong dilution of Tile Doctor Pro-Clean which is very similar to Oxy-Gel only in a liquid form. The product was left to soak into the tiles for about ten minutes before being scrubbed in with a black buffing pad attached to a slow speed buffing machine. I used the wet vacuum again to soak up the residue and stubborn stains were retreated until I was satisfied.

Old Victorian floors rarely have a damp proof membrane installed and so it’s not uncommon for damp to rise-up through the ground and tile resulting in white salt deposits being left on the surface. To prevent this process, which is commonly referred to as Efflorescence, Tile Doctor Acid Gel was applied. The solution is scrubbed into the tiles and then rinsed off with clean water and removed with a wet vacuum ready for sealing.

Victorian Tiles can take a while to dry and in this case I left it two days before returning to apply a breathable sealer to protect the tiles from ingrained dirt and staining. In this case a couple of coats of Tile Doctor Colour Grow were applied. If you recall this was the same sealer we used on the fireplace as the customer wished to bring out the colour and have a Matt finish.

Red and Black Victorian Tiles Preston After Cleaning
 

Professional Restoration of a Sandstone Fireplace and Victorian Floor in Lancashire

Cleaning a Sandstone Fireplace and Victorian Floor Tiles Preston Read More »

Terracotta Tiled Floor Mallorca After Sealing

Spanish Terracotta Floor Cleaned and Sealed in Mallorca

As Tile Doctor operates in Europe as well as mainland UK we have to be ready for certain logistical challenges i.e. flying over to Mallorca to help a customer who has had a number of issues cleaning and sealing their Terracotta floor tiles at their residence on the island.  Naturally you would have thought a local firm would have been able to resolve these issues, unfortunately it seems this is not the case and we were asked to step in.

Terracotta-Tiled-Floor-Mallorca-View-from-Property Terracotta-Tiled-Floor-Mallorca-Picture-of-Castle

As is it was not economical to ship our machinery to the island the customer sourced the necessary machinery locally.

Stripping Old Sealer and Cleaning Terracotta Tiles

On this occasion we used a new product called Tile Doctor Oxy-Gel which is a gel based version of the popular Tile Doctor Pro-Clean.  It is applied neat to the tile and then left to dwell for fifteen minutes or so and then using a black buffing pad attached to a buffing machine we then stripped the old sealer very effectively with this method adding water as required, the soiled solution was then extracted from the floor using a wet Vax.  Then we proceeded to rinse the floor with more water and repeat this process until all of the new Oxy-Gel and dirty water , this is called Neutralisation, if this isn’t done sufficiently then the chemical left in the clay can impact on the clay when it is sealed.

Terracotta-Tiled-Floor-Mallorca-Before-Cleaning

Sealing Victorian Tiles

The Terracotta was left to dry overnight and then a damp test was conducted after which it was dry enough to apply 1 coat for Tile Doctor Colour Grow which is a breathable Impregnating Sealer and add colour to the Clay, this was polished off and left to dry for a couple of hours before we applied several coats of Tile Doctor Seal and Go, which then gave the Tiles a sheen and lifted the colours even more as you can see from the picture’s.

Terracotta-Tiled-Floor-Mallorca-After-Sealing

The customer was advised to use Tile Doctor Neutral Cleaner which we brought with us from the U.K.

This was only a 2 day visit to help with the issues with the floor, more time was needed to do all of the tiles in the house of which their was several rooms, the customer was of the mind to do the rest of the floor themselves which was the understanding before we flew out, this was a cost saving exercise on behalf of the customer of which we were happy to oblige as long as our expenses were met.

Maintaining Terracotta Floor Tiles in Mallorca

Spanish Terracotta Floor Cleaned and Sealed in Mallorca Read More »

Honed Travertine Lancaster After

Resolving Honed Travertine Tiled Floor Installation Problems in Lancashire

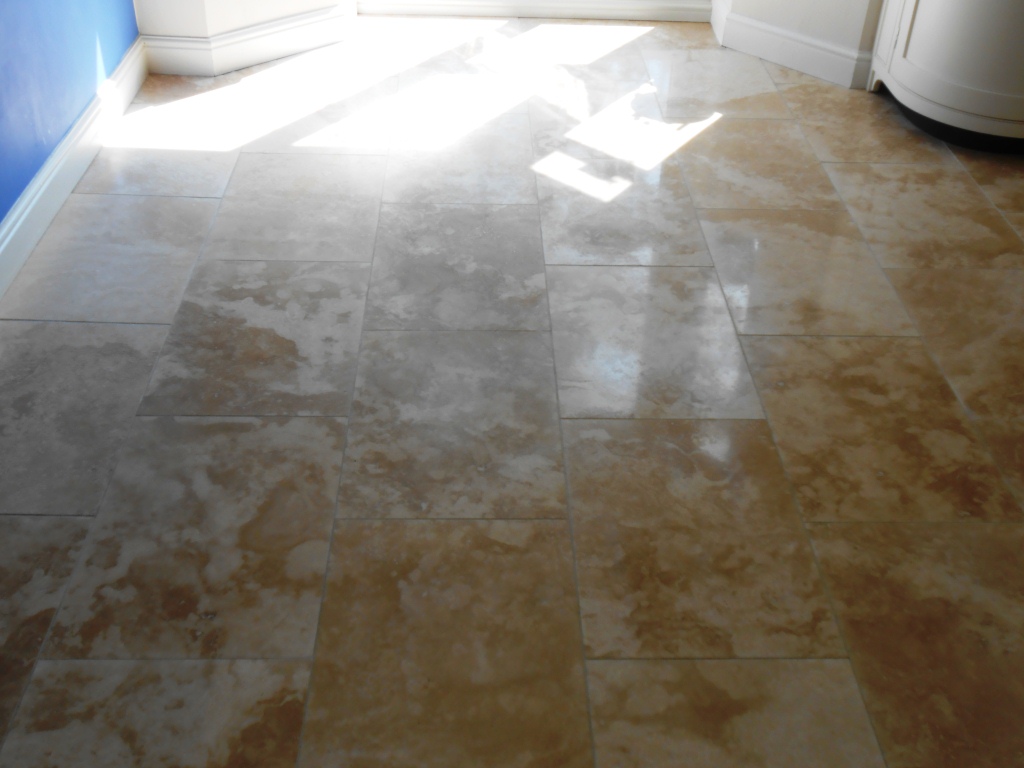
This honed Travertine tiled floor was newly laid by a professional tiler in South Lancaster, unfortunately however the tiler mistook some white lines in the stone as resin post installation and tried very hard to remove them damaging the finish of the stone (it’s quite common for new stone to have this issue). The white marks turned out be in the stone itself and not on the surface, to complicate things further the Travertine had been laid onto electric under floor heating so it would have been tricky to lift and replace the tiles without compromising the expensive heating matts placed underneath the stone.

The customer was left in a dilemma as the suppliers of the stone were blaming the tiler and the tiler the supplier, the only option was to call out Tile Doctor. On inspection and after conducting two cleaning tests we managed to get a result with our burnishing system with no white lines showing after the Travertine had dried out.

Honed Travertine Lancaster Before

Stripping and Re-Polishing Travertine

To get the Travertine looking new again we had to strip back the surface of the tile using a set of Diamond Encrusted burnishing pads fitted to a rotary machine. You start with a coarse stripper pad with water to strip back the surface and then move onto the finer pads to polish the floor. We also use some grinding discs to remove scratches left behind by the kitchen fitters who were clumsy when fitting the kitchen.

Once I was happy that all the problems had been resolved with the Travertine tile we resealed it using two coats of Tile Doctor Colour Grow to get a nice overall finish for the floor. Colour grow is a great sealer to use on natural stone as now only will it offer good stain protection it brings out the colours in the stone.

Honed Travertine Lancaster After
 

Honed Travertine Tiled Floor Problems resolved in Lancaster

Resolving Honed Travertine Tiled Floor Installation Problems in Lancashire Read More »

Silver Pearl Milled Slate Lancaster After Cleaing and ReSealing

Cleaning and Milling Silver Pearl Pearlescent Slate floor in Lancaster

Previously I had solved a lippage problem on this customers Limestone kitchen floor where the tiler had laid the tiles unevenly and they had asked me to remove and level the edges which we can do with diamond encrusted burnishing pads. I sorted that out and they asked me back to look at their Conservatory floor as well which was a Silver Black Pearlescent Slate, again laid with lippage but the slate had also been oiled prior to sealing causing it to loose all its Silver colouring making it look black all over. It was at this point the customer shared the whole story of how the floor had been laid when she had been away on her holidays and had trusted the Tiler to do a good job; unfortunately he hadn’t and was unable to correct the problem. The floor was left in a sad and sorry state for a number of years and the owner unhappy with the floor had to cover most of the floor in rugs so she wouldn’t trip on the lippage. It probably would have stayed that way until one day they noticed my Tile Doctor Van in a Lancaster car park where they stopped me so to get my business card.

Silver-Pearl-Milled-Slate-Lancaster-Before-Cleaing.jpg
So a few days later I called round to assess the problem and came up with a solution; I offered to Mill the whole floor with Diamond segments using burnishing pads and just to prove my faith in this system to help solve her floor issues, I moved the settee away and proceeded to Mill a small section, after rinsing with water and Vaxing the waste up, the customer was delighted with the results, not only had the rough lippage disappeared but she could see the Silver Pearlescent colour shine through the Black Slate, which is exactly why she bought the Tiles. We think the Tiler oiled the floor to darken it so you couldn’t see what a bad job he had done on laying the tiles, unfortunately this didn’t stop people tripping over them.

The great thing about milling a stone tile is it actually improves the look not diminish it, unlike wood the more it’s worked at the better it will look. I spent an extra day on this floor to get it right for the customer and the results were very satisfying for us both especially after I had put down several coats of Tile Doctor Seal and Go on The Slate to lift the colours in the stone and also add a sheen to the tiles as well.

Silver-Pearl-Milled-Slate-Lancaster-After-Cleaing-and-ReSealing.jpg
I always mention to my customers the importance of using a nuetral cleaner like PH Neutral cleaning product for aftercare cleaning and not to use a bleach based cleaning product like flash, Domestos etc, or even Washing up Liquid which is slightly Acidic; all these will damage a stone sealer given time and diminish it’s protective qualities.

Cleaning and Milling Silver Pearl Pearlescent Slate floor in Lancaster Read More »

Milled Sandstone Floor Lancaster After

Rough Sandstone floor milled in Lancaster

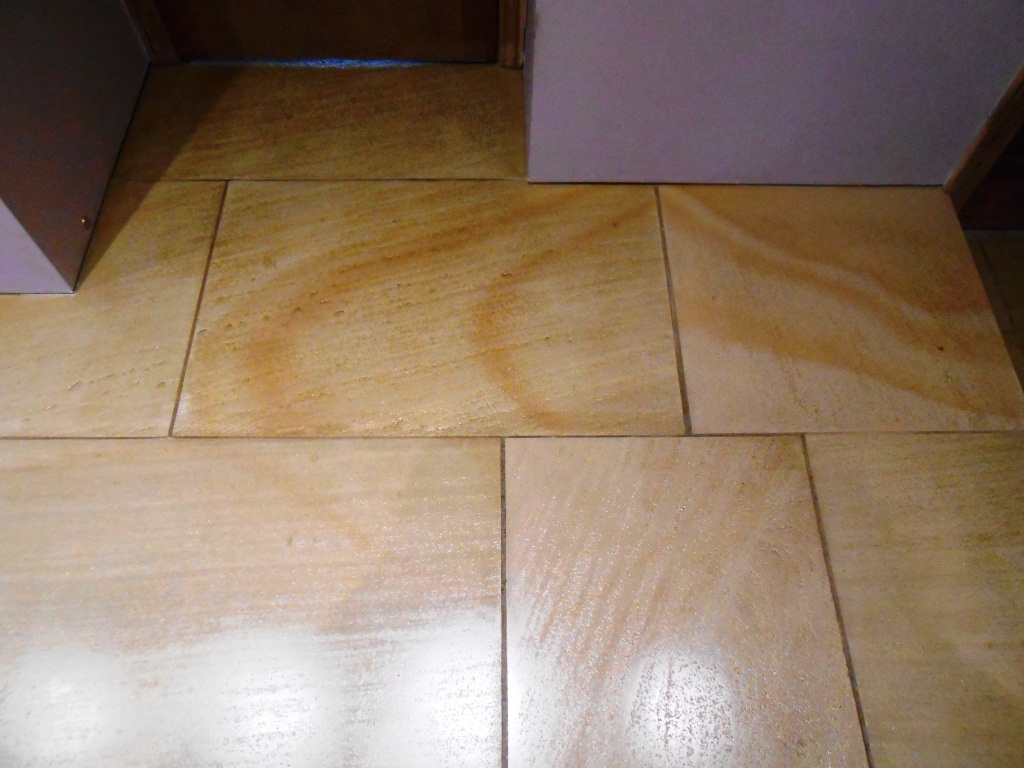
Sandstone is generally a rough textured surface requiring regular cleaning and sealing to keep it looking good, I’ve also known customers to complain that the rough texture can shred mops during regular cleaning. This Sandstone tiled floor installed in a house in Lancaster was no different and so with the owner’s approval we decided to gently grind the sandstone to produce a smoother more manageable surface. At Tile Doctor we refer to this process as Milling and it’s especially useful for flattening a raised surface between tiles often called lippage.

Sandstone Floor Lancaster Before Milling Sandstone Floor Lancaster Before Milling

Milling and Sealing a Sandstone Tiled Floor

As far as I know Milling was developed at Tile Doctor to basically smooth down a rough textured surface to make it easy to clean, seal and maintain; it’s a one off process and is akin to sanding down a rough piece of wood with sandpaper. We don’t use sandpaper for this purpose but diamond encrusted burnishing pads which like sandpaper come in different levels of coarseness. Milling actually reveals more of the character in the surface of the stone which is further enhanced during sealing for which recommend the use of a matt finish sealer such as Tile Doctor Colour Grow or if there is still a bit of texture in the stone we recommend the use of a topical sealer such as Tile Doctor Seal and Go which also leaves a nice low sheen finish.

Milled Sandstone Floor Lancaster After Milled Sandstone Floor Lancaster After

The customer was on holiday when the work was done but was so pleased with the effect of the milled Sandstone floor she rang me up personally to say thanks and left the comment below on the Tile Doctor feedback system, she was experiencing a lot of trouble cleaning this floor and we managed to resolve that and still keep the texture and character of this beautiful floor.

“Total transformation of our floor. Can’t quite believe the results. No mess and an amazing result. Thank you v much
D. Rix, Lancaster”

Smoothing a Rough Textured Sandstone Floor in Lancashire

Rough Sandstone floor milled in Lancaster Read More »

Black Quarry Tiles After

Dennis Ruabon Quarry Tiles cleaned and sealed in Low Bentham

Customer had these Dennis Ruabon Quarry Tiles fitted over 20 years ago in the WC of his house in Low Bentham, various cleaning and sealing products have been used since however this left a build-up of contamination on the Tiles which was detrimental to their aesthetic appeal and also left a noticeable residue smell.

Black Quarry Tiles Before Black Quarry Tiles Before

Cleaning Quarry Tiles

To clean the Tiles and strip off previous sealing coatings we used Tile Doctor Pro-clean diluted 1 to 10 with warm water. This was left to dwell on the floor for a while before being worked into the tile using and black buffer pad fitted to a rotary buffing machine. The whole area was cleaned in this manner along with a stiff hand brush to get into the grout lines and a wet vacuum which was used to suck up the dirty residue before the floor was rinsed down with cold water. The wet vacuum was used again to remove the water, one tile was loose so this was re-fixed and the floor left to dry.

Sealing Quarry Tiles

Once the floor was fully dry we applied two coats of Tile Doctor Colour Grow which will protect it going forward and also helps to bring out the colour in the tile whilst maintaining a more natural appearance. There were some stubborn stains and discolouration on the tiles that could not be treated however I think you will agree it is much improved and you will have to take my word for this but it also smells better

Black Quarry Tiles After Black Quarry Tiles After

Before leaving we left the customer with a bottle of Tile Doctor Neutral cleaner, this product is recommended for sealed floors due to its very low PH formula; there are a number of acidic floor cleaning products available which should not be used with stone or sealed floors as the acid will eat into the seal or stone surface over time reducing its life.

Restoring old Quarry tiles floor in Lancashire

Dennis Ruabon Quarry Tiles cleaned and sealed in Low Bentham Read More »

Sandstone floor Stodday after

Sandstone floor maintained in Stodday, Lancashire

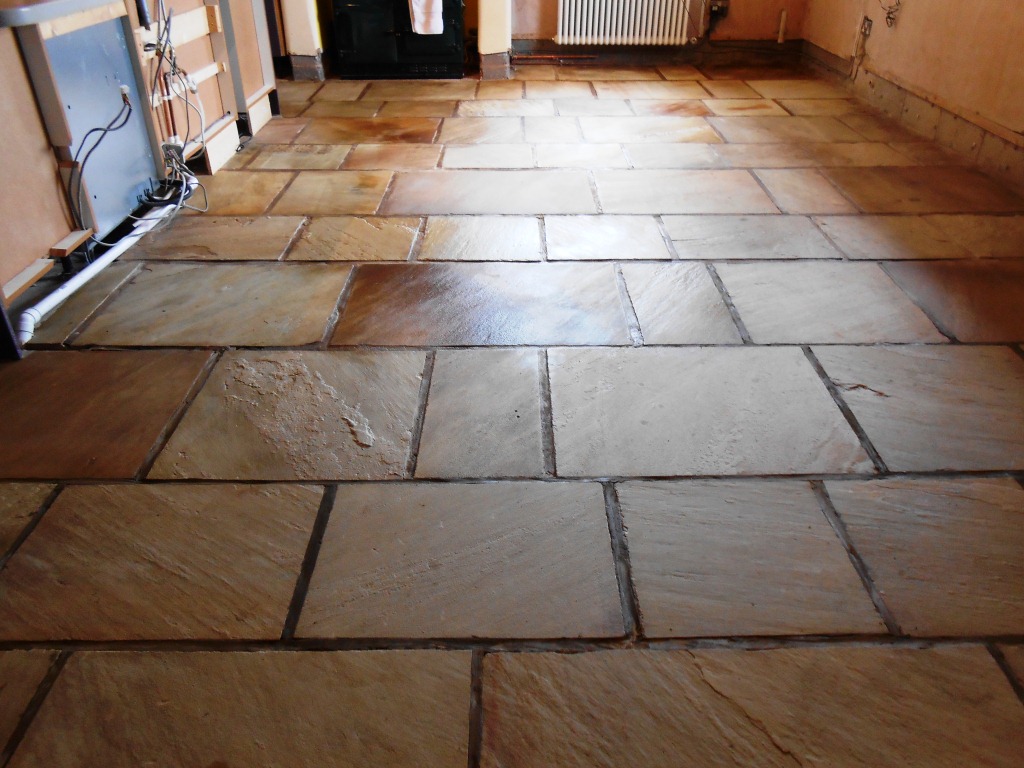
This sandstone floor was installed in a house in the village of Stodday, Lancashire, the floor was looking dull and if you look closely you should be able to see surface staining, there were also a number of marks the customer was eager for us to deal with.

Sandstone floor in Stodday before Sandstone floor in Stodday before

Cleaning Sandstone

We cleaned the floor using Tile Doctor Pro-Clean diluted with 10 parts warm water and worked in using a Black Scrubbing pad. This action certainly gave the floor a good clean but the marks mentioned earlier were proving stubborn to shift so we tried a stronger product called Remove and Go combined 50/50 with NanoTech UltraClean which add nano sized abrasive particles. We left the resulting formula to soak into the stone for about an hour and then used a steam cleaner to penetrate deep into the pores of the stone and lift out the dirt, this did the trick and so we then removed the cleaning products with a wet vacuum and washed down the floor with clean water to neutralise the floor before sealing and left for the evening so the floor could dry overnight.

Sandstone floor in Stodday after

Sealing a Sandstone Tiled Floor

We came back the next day and tested the floor with a damp meter in a few different locations to make sure no dampness remained in the stone. The sandstone was dry so we proceeded to seal the floor with Tile Doctor Seal and Go which gives a nice low sheen finish, Sandstone is fairly porous so it took five coats of sealer in the end. Seal and Go is a topical sealer and really brings out the true colour of the Stone and also leaves them a lot easier to clean with a mop as it takes a lot of the rough texture out of the stone.

Sandstone floor in Stodday after
 

Sandstone Floor Cleaned and Sealed in Lancashire

Sandstone floor maintained in Stodday, Lancashire Read More »
Scroll to Top