Work by Category

Russell-Taylor-Lancashire-Tile-Doctor

Welcome to my Work History archive where you will find detailed examples of Tile, Grout and Stone Cleaning and Renovation work carried out through Lancashire.

To make things easier to find I have organised the posts by the most popular types of Tile and Stone. I also renovate other materials so if you’re looking for something else do get in touch as it’s highly likely we have the solution.

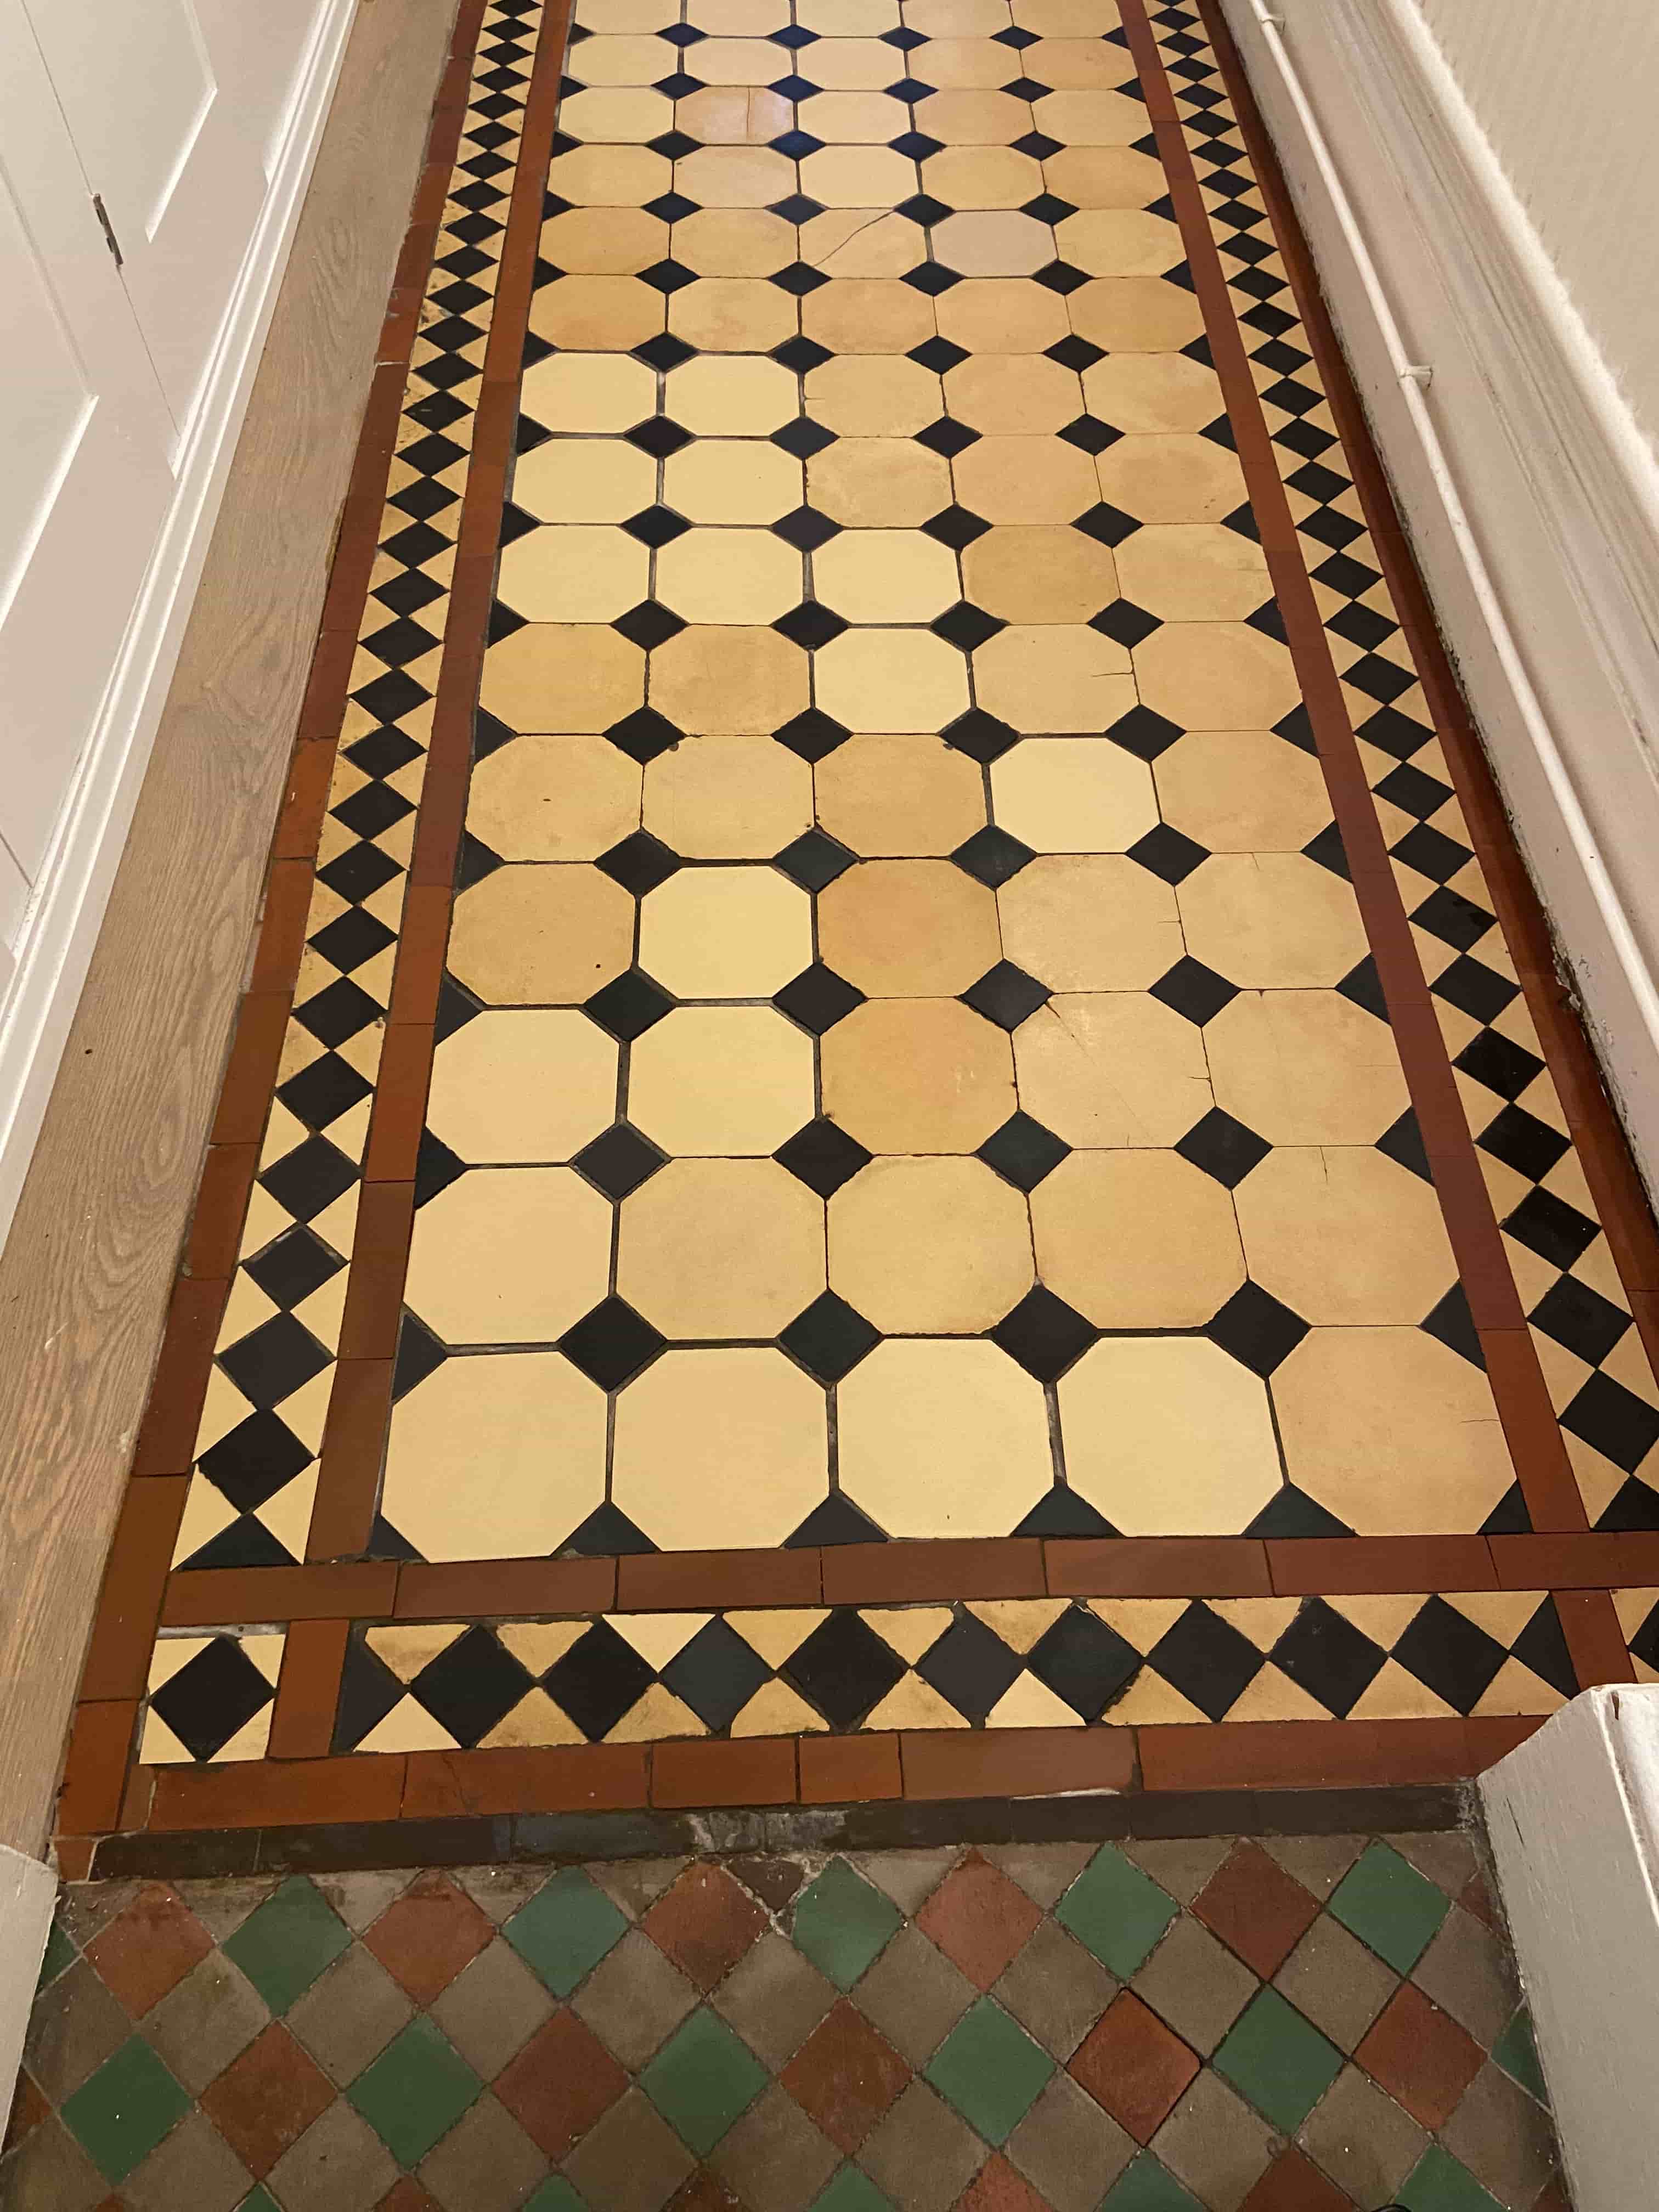
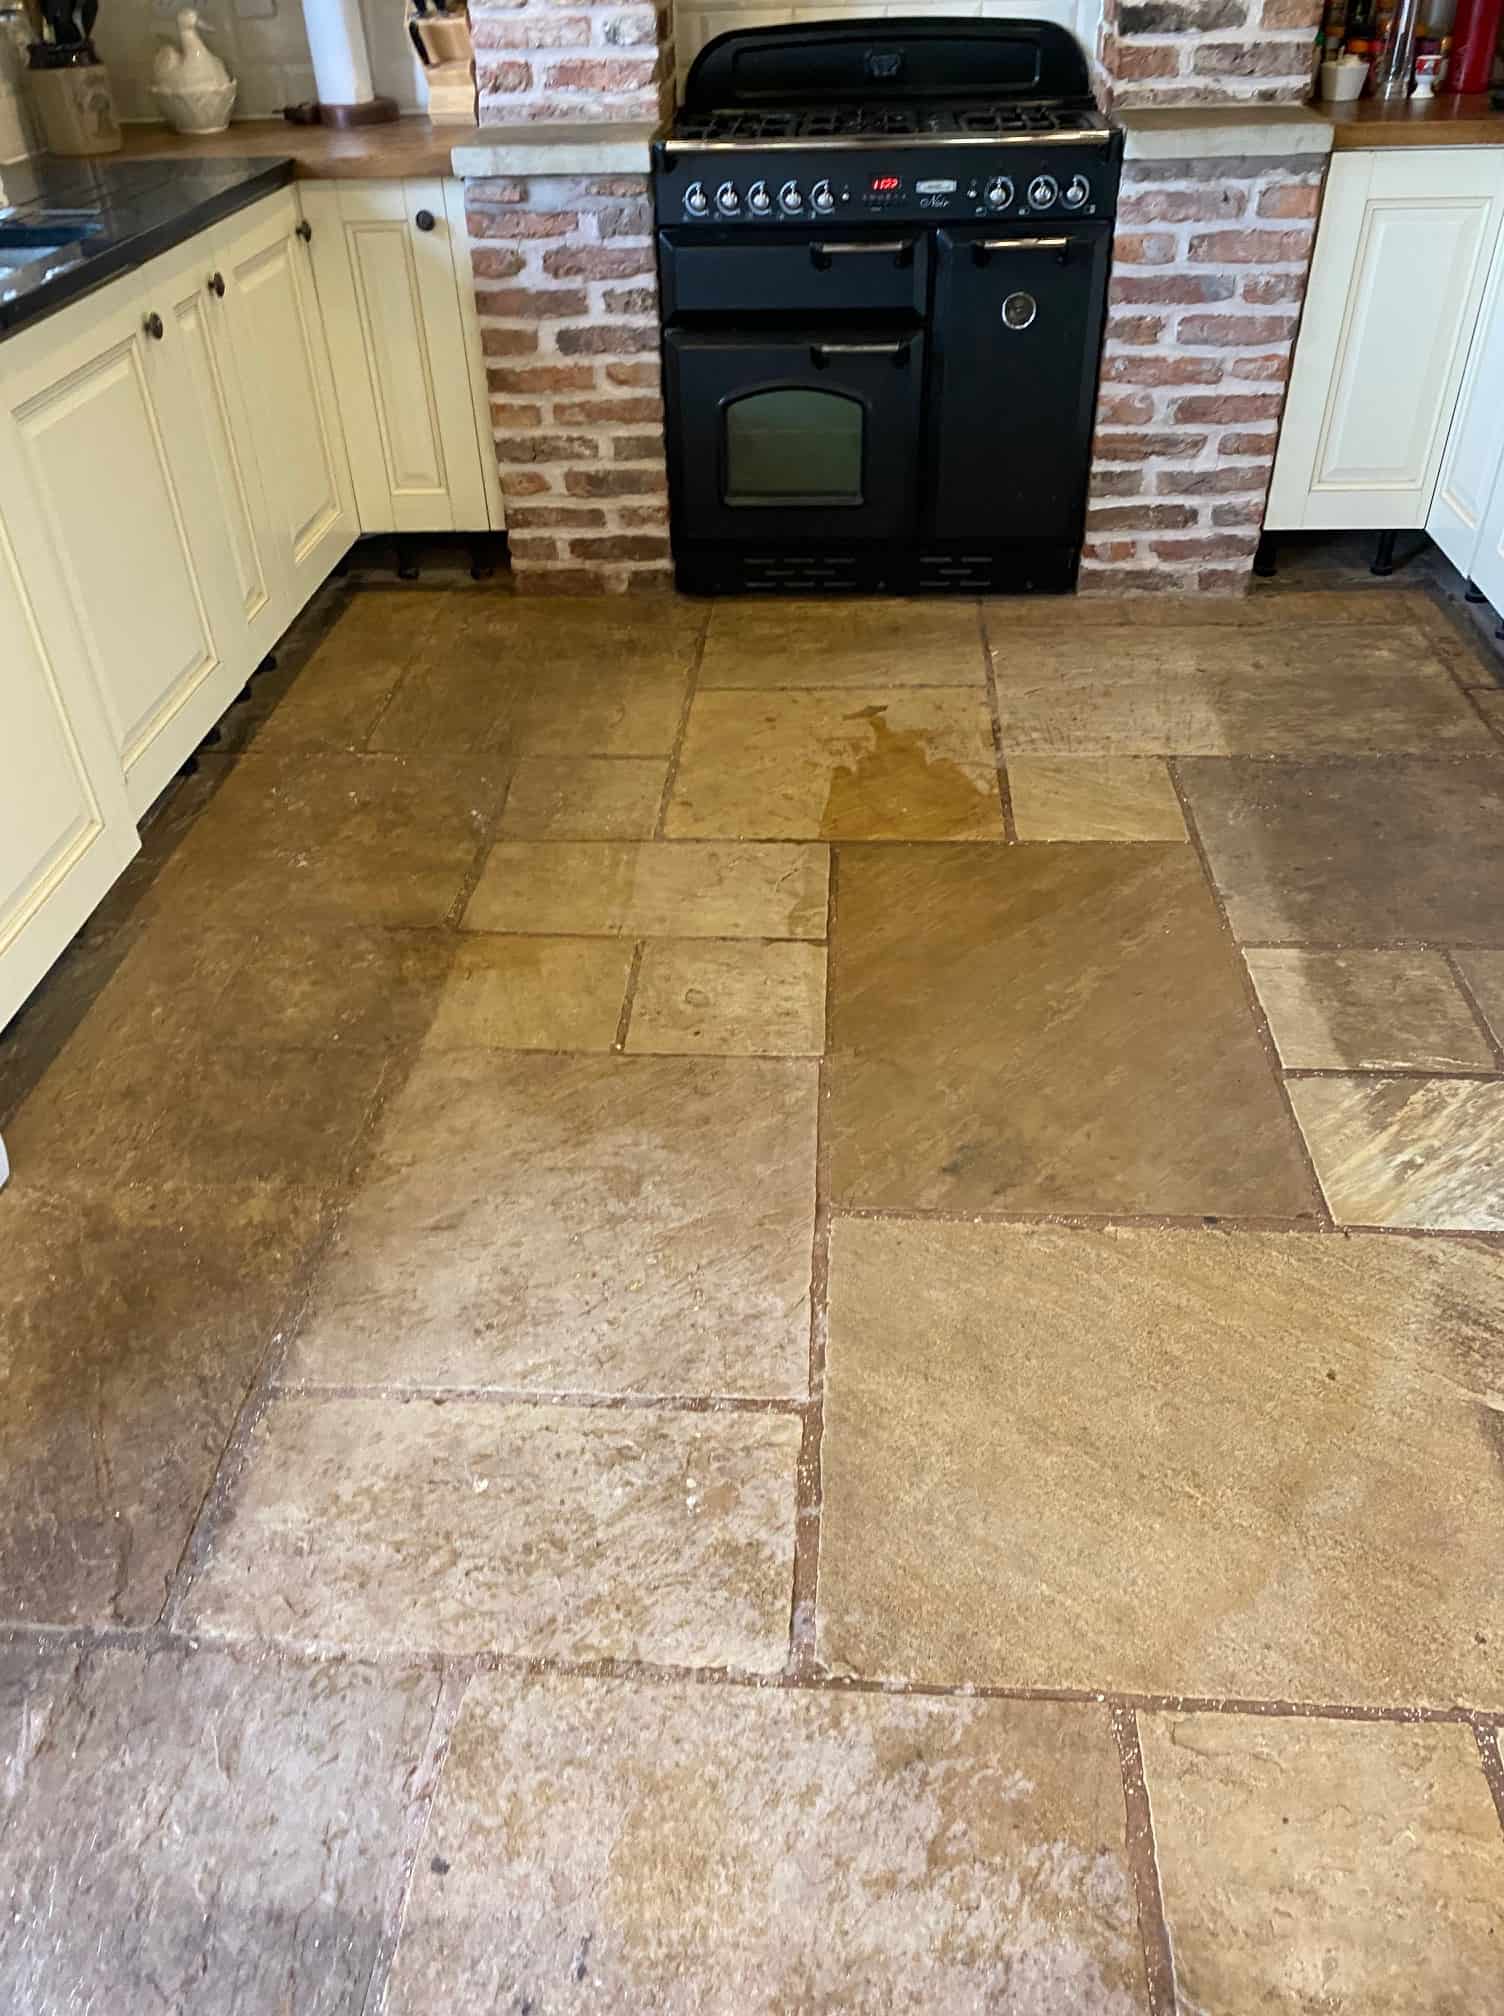
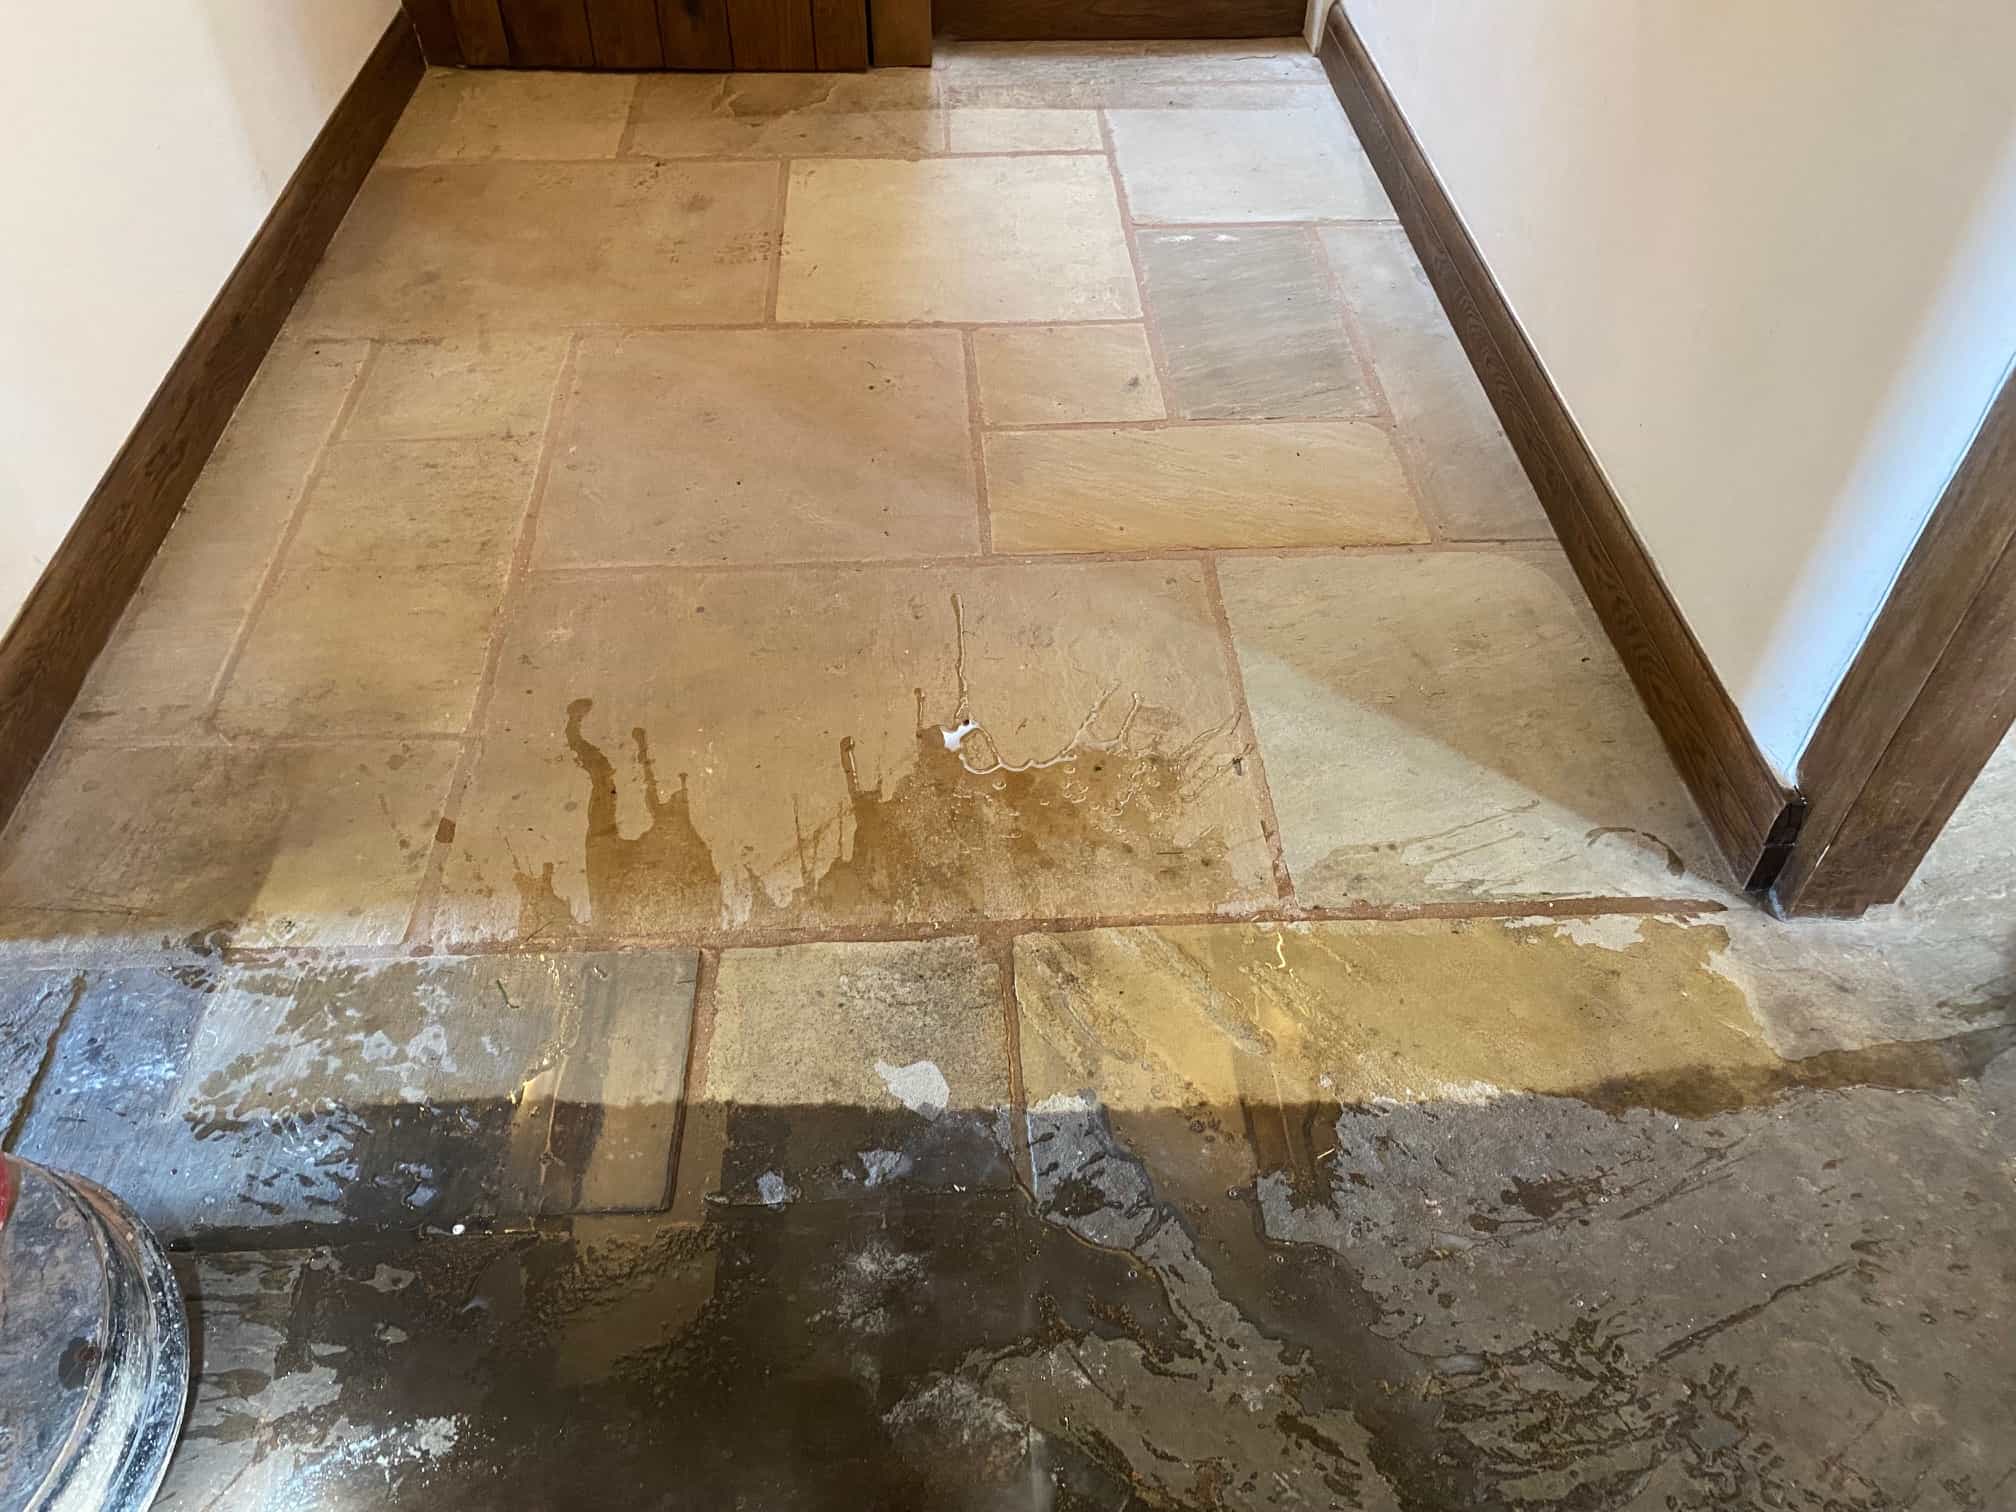
Popular requests include Ceramic Tile, Encaustic Cement, Fireplaces, Flagstone Pavers, Grout Cleaning, Limestone, Marble, Porcelain Tile, Quarry Tile, Sandstone, Slate, Terracotta Tile, Terrazzo Floors, Travertine, Victorian Flooring and Vinyl Floors.

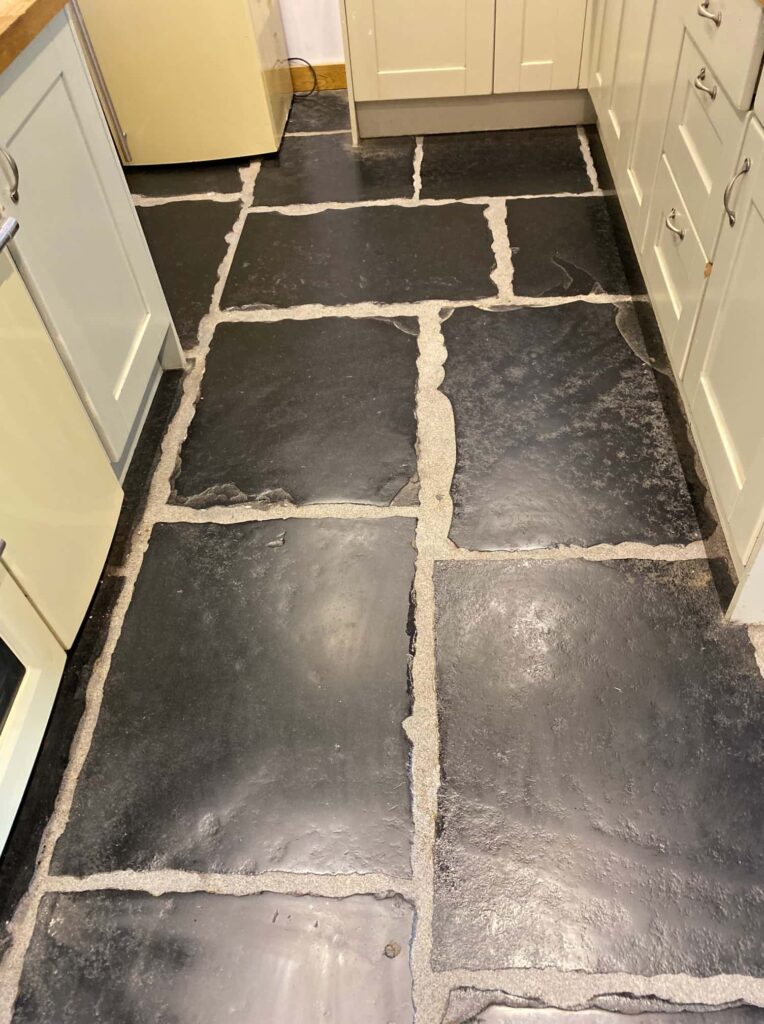
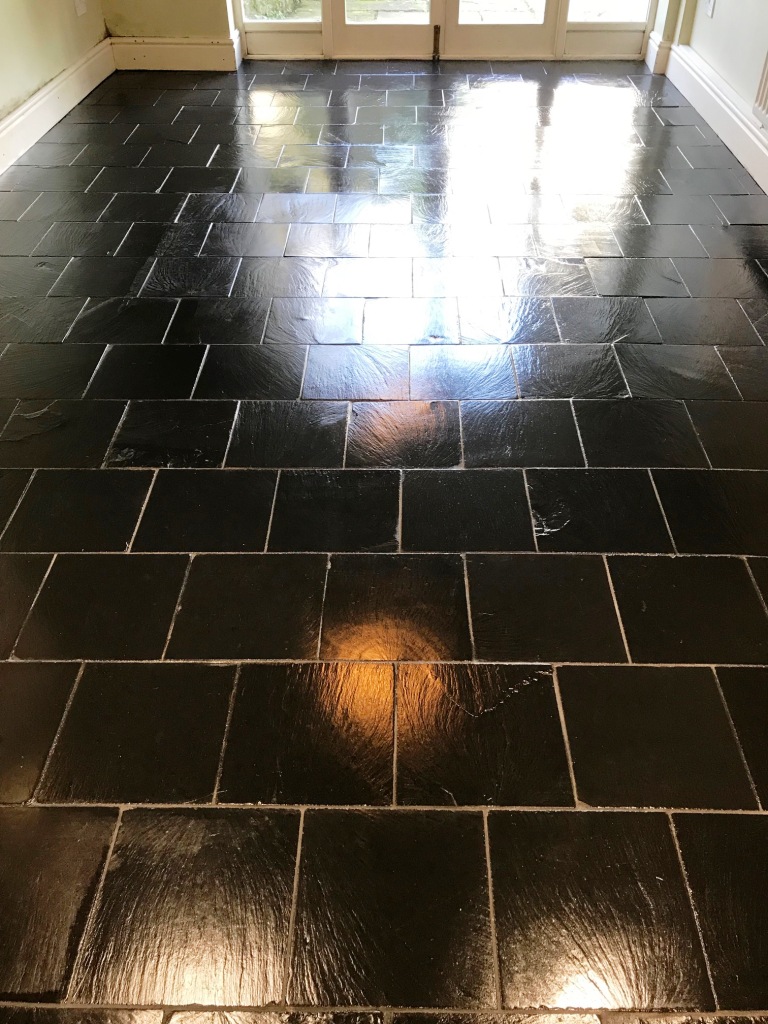
Black Limestone Floor Renovation in Lancaster

Clean and Seal of a Black Limestone Kitchen Floor in Lancaster

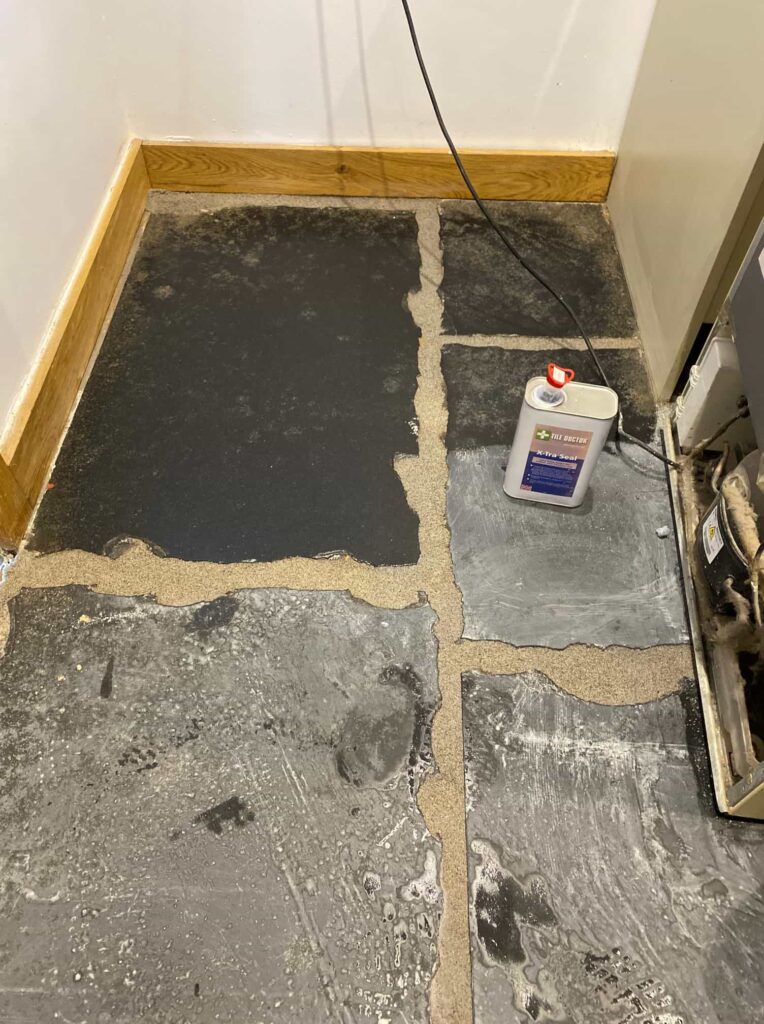
This customer from Lancaster contacted us about cleaning and sealing what they thought was a Blue Slate kitchen floor. Having spoke to them over the phone I arranged to pop over and survey the floor to get a better understanding of the work that needed to be done. Lancaster is a few miles South of our base in Carnforth and I’m always passing though.

Having visited the property I was able to confirm that the floor wasn’t Slate but Black Limestone which is notoriously high maintenance due to its acid sensitivity. I mentioned this and they were quite surprised as it had only been laid a few years earlier and it was sold as Black Slate. The two materials do look identical, but if you drop a small amount of something acidic on Black Limestone the stone fizzes and turns Grey and White.

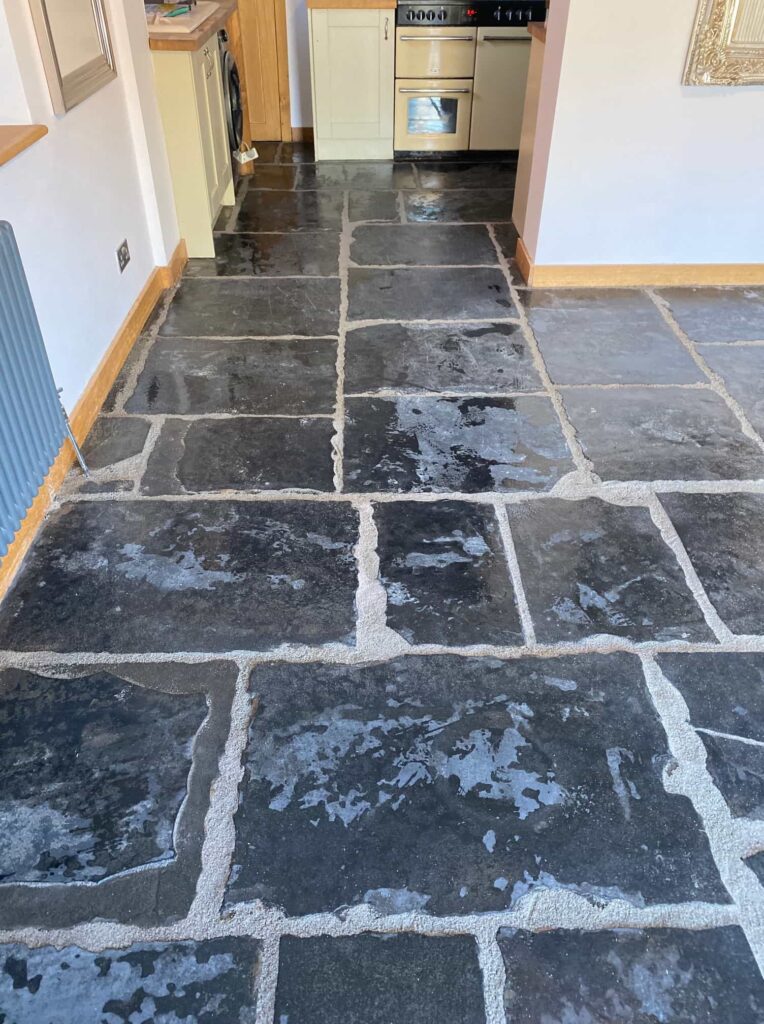
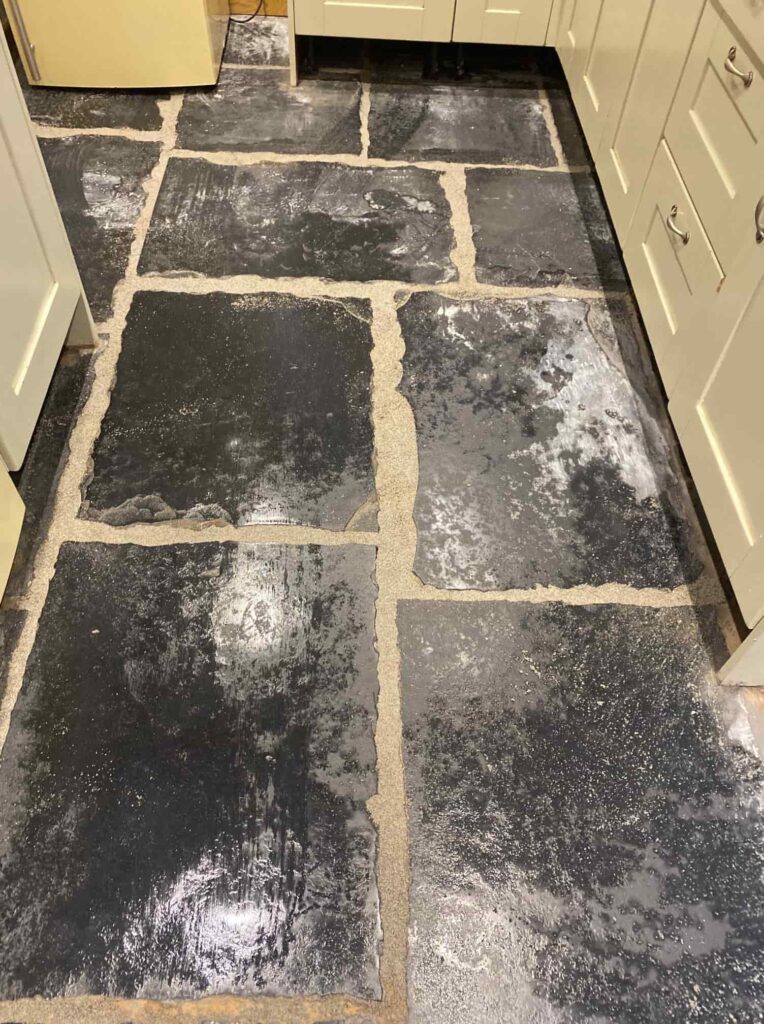
Black Limestone Kitchen Floor Before Cleaning Lancaster

The big problem with Black Limestone is unlike Slate its very porous, this is why you see Slate being used for roof tiling and is still popular covering even to this day. Also, its very acid sensitive, so even Tea, Coffee, Juice, or Wine can mark it, so although popular in gardens it’s certainly not a stone we would recommend for use in a kitchen or bathroom.
Another problem you have is Black Limestone contains natural oils and it’s the oil that gives it that beautiful black colour. Once the oil is washed out of the stone over time or through the use of acidic cleaning products it leaves the stone looking grey and unattractive. This can be resolved however using an oil-based sealer but it is more expensive than a regular stone sealer.

Black Limestone Kitchen Floor Before Cleaning Lancaster

This stone is still workable though, so it’s not all bad news, with the right treatment it can look as good as the day it was laid (if not better) so I came up with a renovation plan that would do exactly that. They were happy to have the work done so we scheduled a date for the work to start.

Cleaning a Black Slate Floor Tiled Kitchen Floor

We find the best way to renovate floors like this is to use coarse diamond pads that can cut into the stone remove any surface damage, contaminates, old sealers and generally leave the stone very clean.

With this floor I started with a very coarse 50-grit DRB pad which is run several times over each stone using only water to lubricate the process. The process generates a lot of soiling and loose sediment that has to be rinsed off the floor with water and then extracted with a wet vacuum. Once this is done the process is repeated with a 100 and then 200-grit pad which together effectively re-hone the stone and remove any scratches caused by the previous pad. A dilution of Remove and Go was also used with the 200-grit pad to ensure the tiles were clean and any remaining sealer not caught by the pads had been removed.

The last step on the first day was to re-point the stone tiles where needed to remove failed and crumbling mortar. This was then left to set hard overnight so we could continue with the renovation the next day.

On day two we followed up the renovation of the stone by moving onto finer Burnishing pads starting with a 400-grit diamond pad applied in the same way and rinsing and extracting afterwards. This was followed by the application of an 800 and then 1500-grit pad to further refine and improve the stone.

Sealing a Black Slate Tiled Kitchen Floor

The following day the Black Limestone was sealed with a coat of Tile Doctor X-Tra seal which is the Oil based sealer I mentioned earlier. It brings out the true colour of this stone and the seal leaves a sheen appearance to give a very appealing finish. We find one coat is usually enough for this sealer as it’s a lot thicker that other sealers.

Black Limestone Kitchen Floor During Sealing Lancaster

Before leaving I talked through aftercare cleaning with two buckets and the importance of using a pH Neutral cleaning product. We recommend avoiding steam cleaners and not to use cheap bleach or acidic cleaning products which can damage the sealer with repeated use.

Black Limestone Kitchen Floor After Renovation Lancaster

We always encourage feedback from customers, and I’m pleased to be able to quote the following message they left on our feedback system:

Great service very organised and professional service would highly recommend

Black Limestone Kitchen Floor After Renovation Lancaster


Professional Restoration of a Black Limestone Kitchen Floor in Lancashire

Clean and Seal of a Black Limestone Kitchen Floor in Lancaster Read More »

Terrazzo Floor Renovation Beziers France

Renovating a Large Terrazzo Tiled Floor in Béziers France

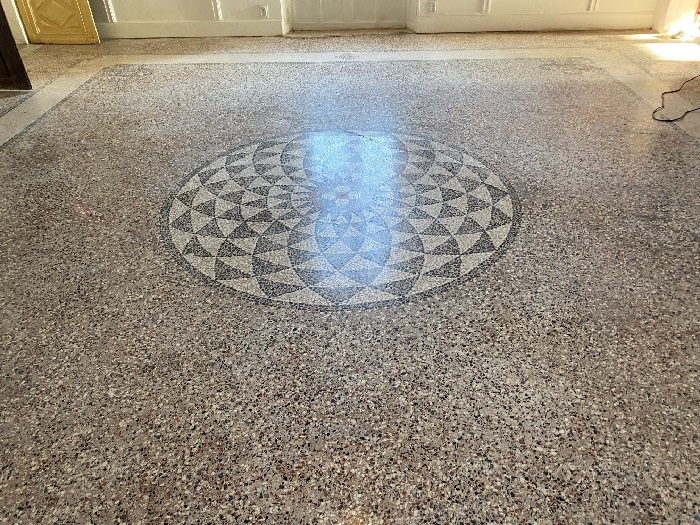
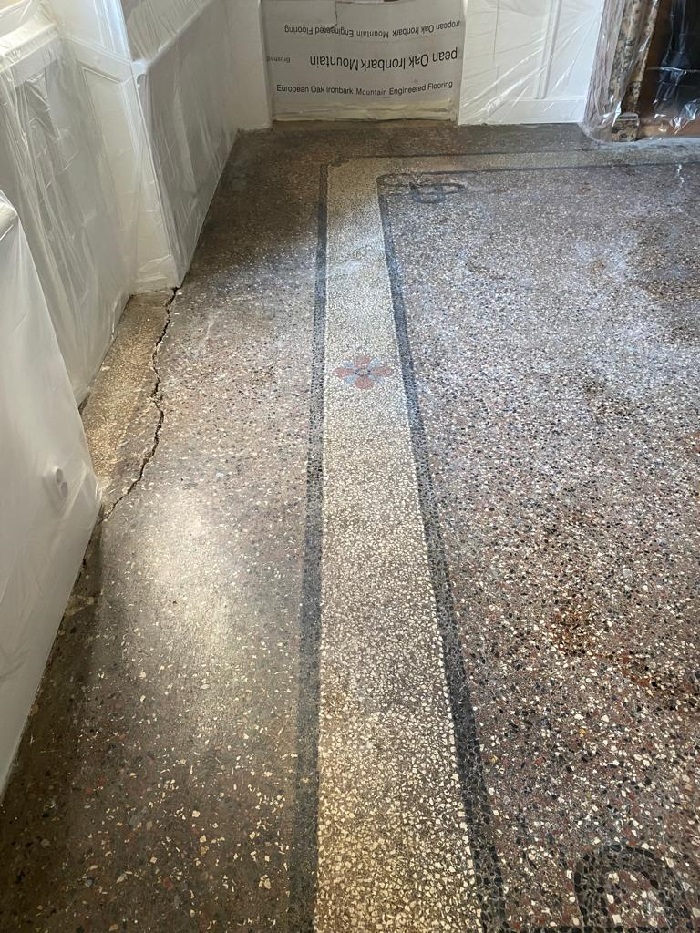
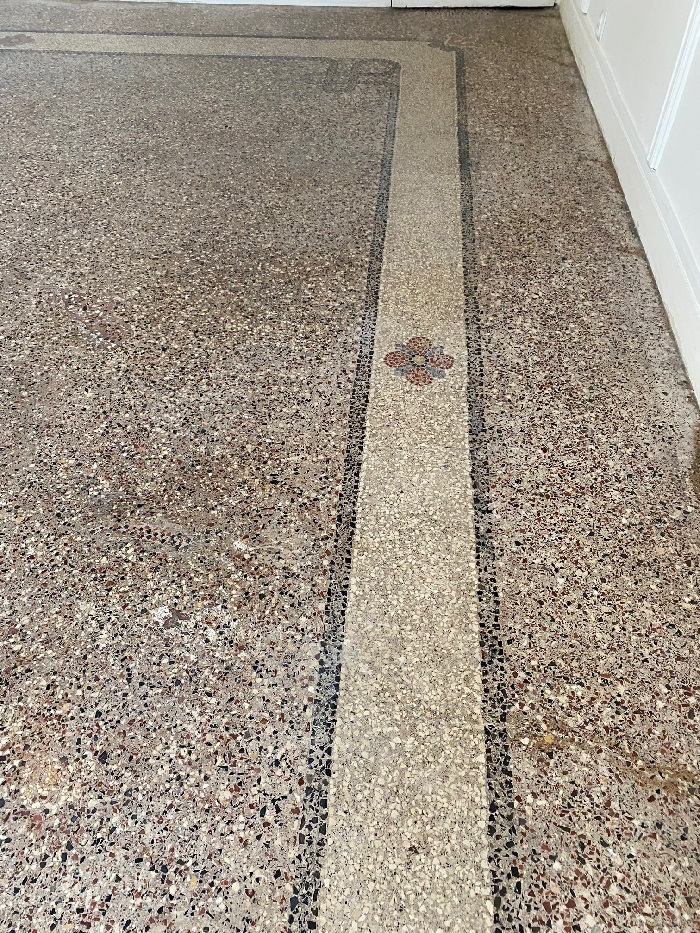
The English owner of a French Chateau contacted Tile Doctor about the hard floors at their property in Béziers in the South of France. There were several floors at the property including Terrazzo, Limestone and Black and White Encaustic tiles all around a hundred years old and in a bad state of repair. There was a lot to cover so for this post we will focus on the Terrazzo flooring.

Terrazzo Floor Before Renovation Beziers France

We have been known to carry out tile renovation work in other counties so we were more than happy to consider a visit to the South of France and help bring the floors back to life. Previous overseas projects have included a hotel restaurant in Addis Ababa, holiday cottages in Ireland and a villa in France.

Luckily for us the customer had invested in some machinery that he had found on eBay but he didn’t have the technical knowledge to do the work and so had decided to seek help. Having discussed each of the floors in detail over the phone and with photographs sent via email I worked out a restoration plan for each floor.

We supplied the products he needed and we were flown down from Manchester to Béziers Cap d’Agde Airport where we were picked up by the client, (very Hollywood). If you have never been to Béziers before it’s well worth a visit, it’s a beautiful area, well laid out, with parks and rivers, an old 12th Century Monastery and the property had great views all around.

Tile Doctor Floor Renovation Bezier

Deep Cleaning and Filling Terrazzo Flooring in Béziers France

On arrival at the property work started with setting up the machinery and conducting some preliminary cleaning tests to work out the best approach. After that however our host insisted on showing us round Béziers, it was a Saturday afternoon and we were in the South of France so why not, they certainly know how to live properly down there.

Terrazzo Floor Before Renovation Beziers France Terrazzo Floor Before Renovation Beziers France

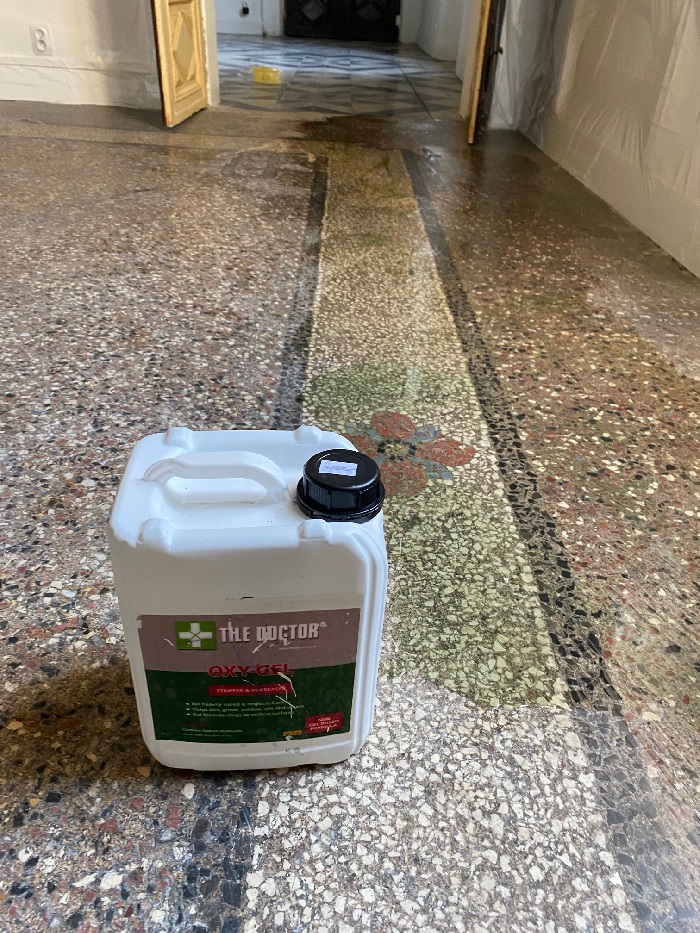
So, work started on the Sunday with the application of a 200-grit Milling pad and Oxy-Gel cleaning solution. I was concerned (due to some hairline cracks in the Terrazzo) that water would seep through into the rooms below (this was a big old townhouse set on four levels) so by using a gel-based product it would be easier to control and the moisture would be kept to a minimum.

Terrazzo Floor During Cleaning Oxy-Gel Beziers France

The resultant soiling was then extracted with a wet vacuum and attention moved to filling the cracks in the Terrazzo with a resin filler. Once the resin had cured the floor was cleaned again, this time with a 200-grit DRB Milling pad which contains diamond segments. The process was lubricated with water and progress was checked underneath several times to ensure the pad was working as expected.

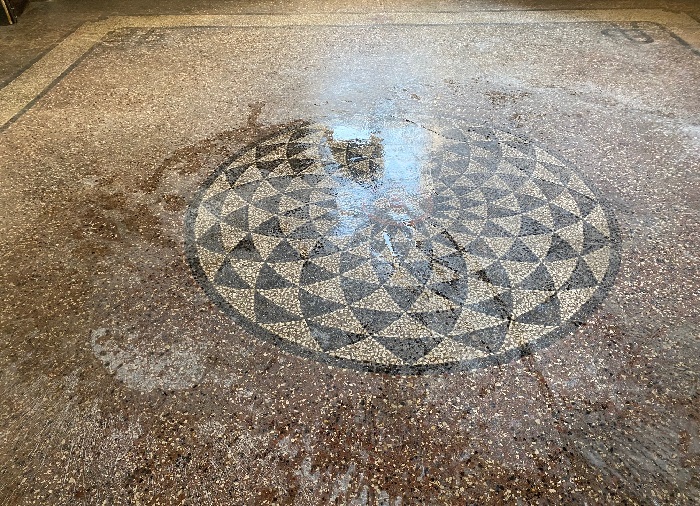
Terrazzo Floor During Renovation Beziers France

Polishing a Terrazzo Floor in Béziers France

This work continued with increasingly finer diamond encrusted burnishing pads starting with a 400-grit Diamond burnishing pad and moving up to an 800-grit and finishing with a 1500-grit pad. Only water was used for lubrication and the soiling was extracted with a wet vacuum after each pad was applied. This method slowly improves the surface of the Terrazzo adding a long-lasting polished appearance.

The floor was left to dry overnight and the following day treated to a spray burnish using a very fine 3000 grit burnishing pad; the pad is applied dry to the floor with only a little amount of water which is sprayed onto the surface.

Sealing Terrazzo Flooring in Béziers France

This final 3000-grit pad leaves the floor dry and allows the floor to be sealed shortly afterwards. The sealer chosen for the Terrazzo was Tile Doctor Colour Grow which is a colour enhancing impregnator which works by soaking into the pores preventing dirt from residing there. Sealing the floors keeps the dirt and other contaminates on the surface where it can be easily removed.

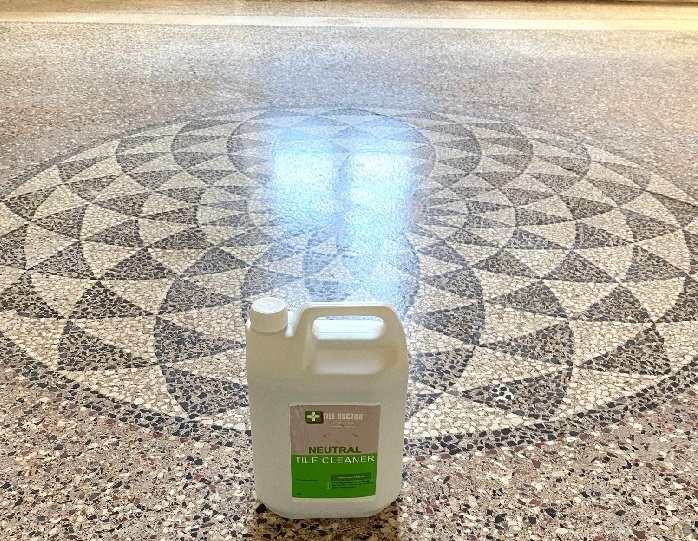
Two coats of Colour Grow were applied and this brought out the lovely pink tones in the Terrazzo which together with the polished appearance really transformed the appearance of the floor.

Terrazzo Floor After Cleaning Beziers France

For aftercare cleaning I got the customer to purchase a five-litre bottle of Tile Doctor Neutral Cleaner along with the other products. You must be careful what you clean sealed floors with as many products contain bleach and are simply too strong resulting in the premature degradation of the sealer.

We spent the whole week at the property and as well as working on the other floors did find time to do some more sightseeing before flying back the following weekend.


Professional Renovation of a Terrazzo Flooring in France

Renovating a Large Terrazzo Tiled Floor in Béziers France Read More »

Red And Black Victorian Tiled Floor Dorchester Pattern Restoration Lancaster

Dorchester Pattern Victorian Tiled Hallway Floor Restoration in Lancaster

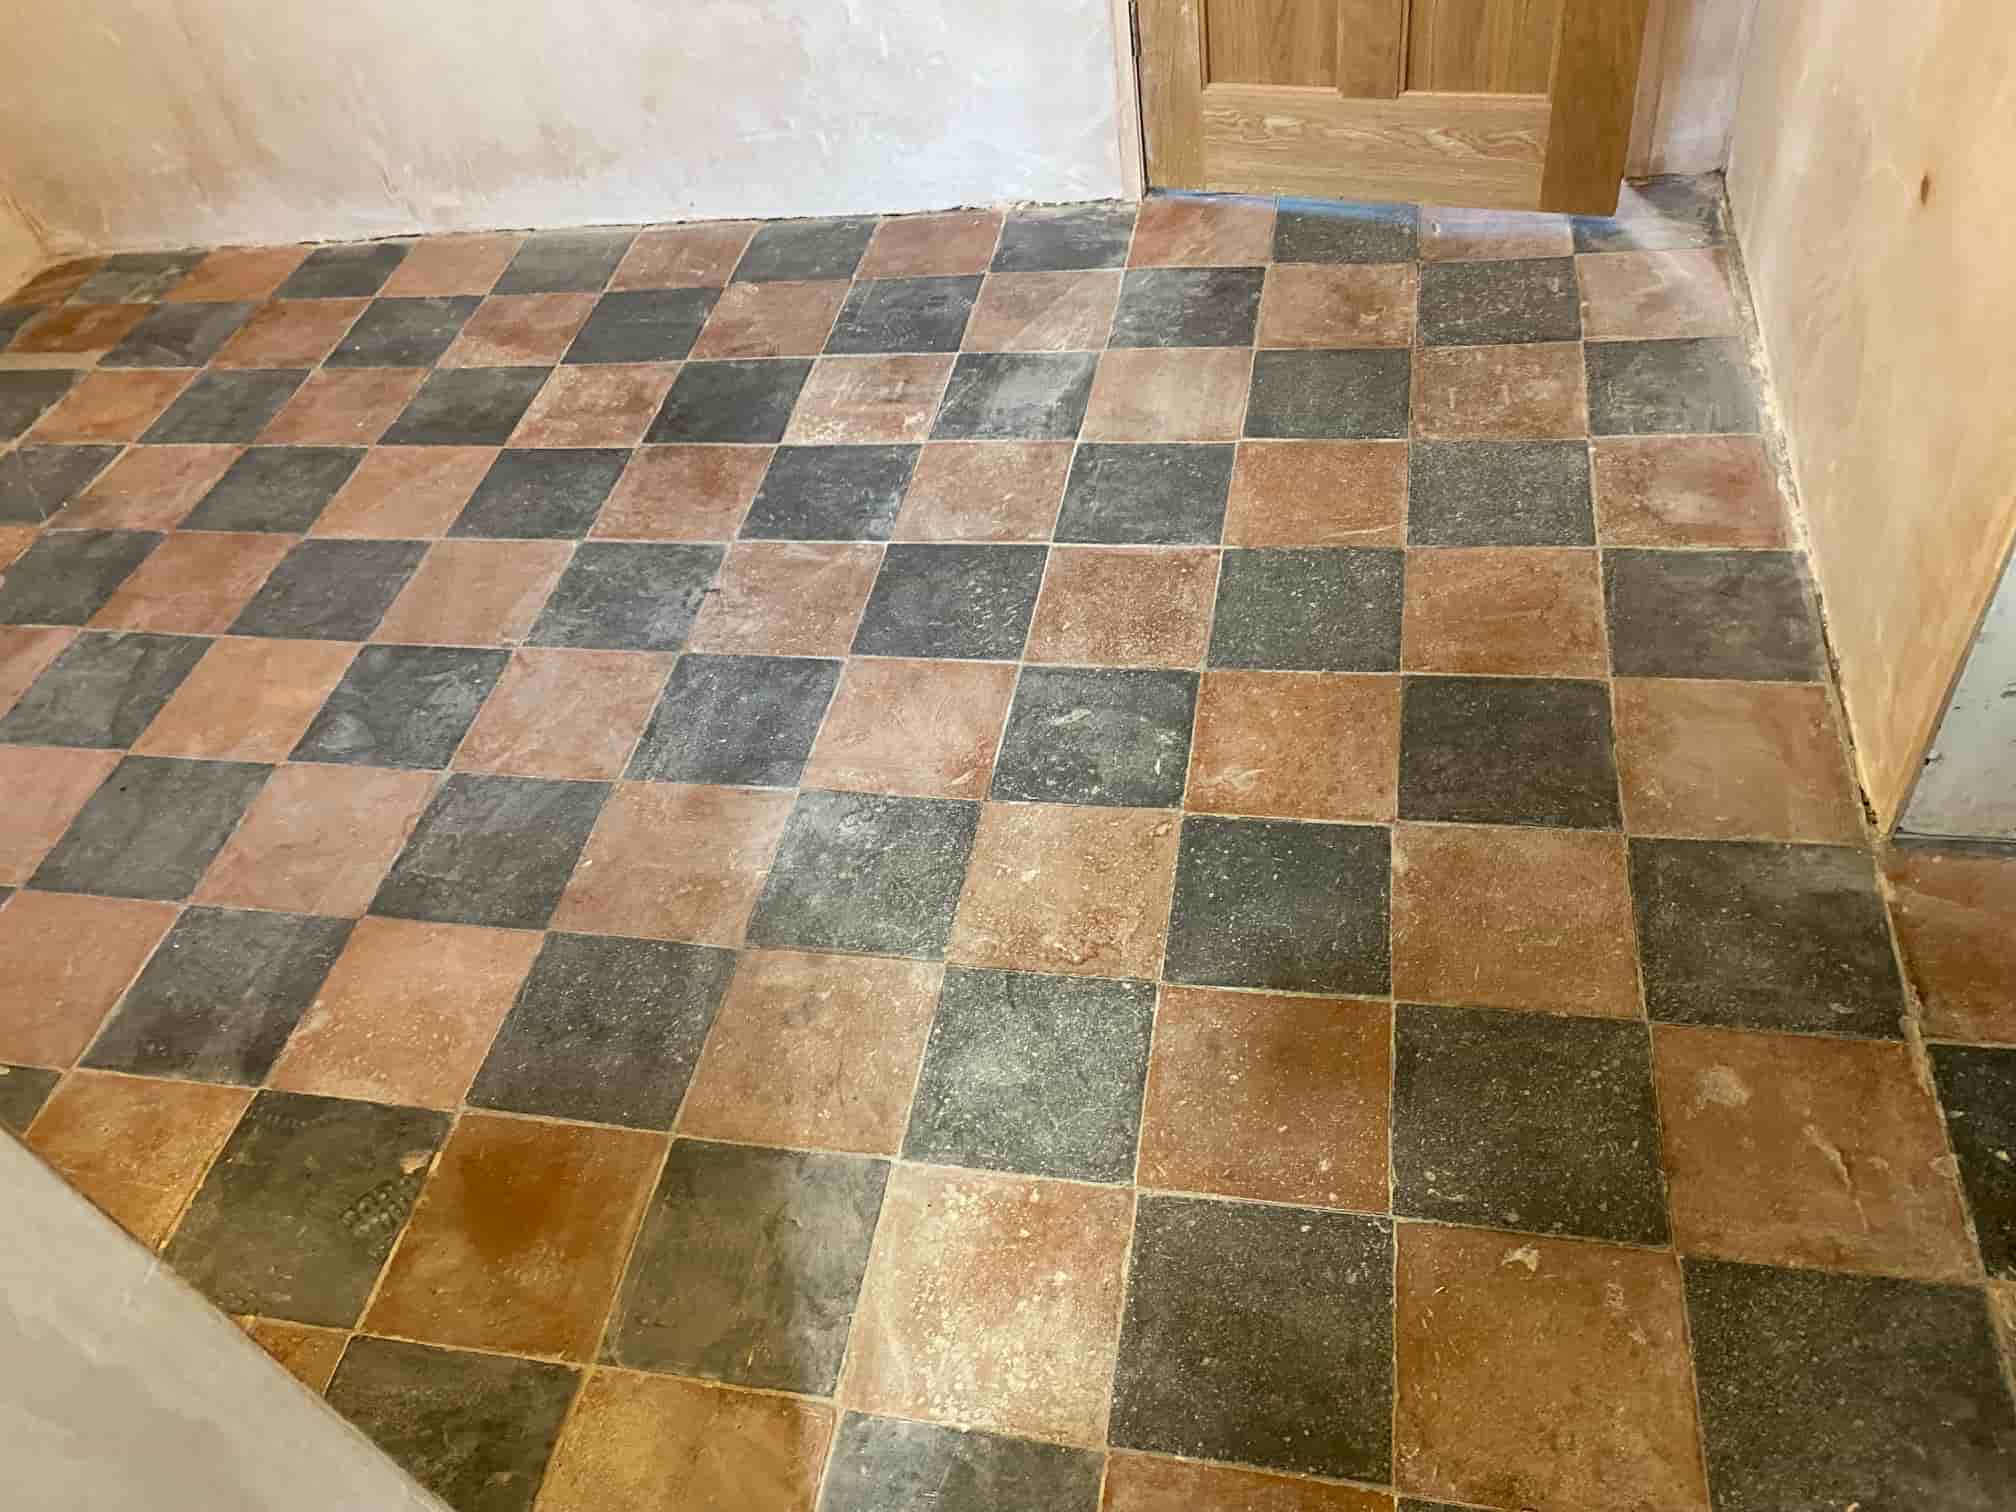
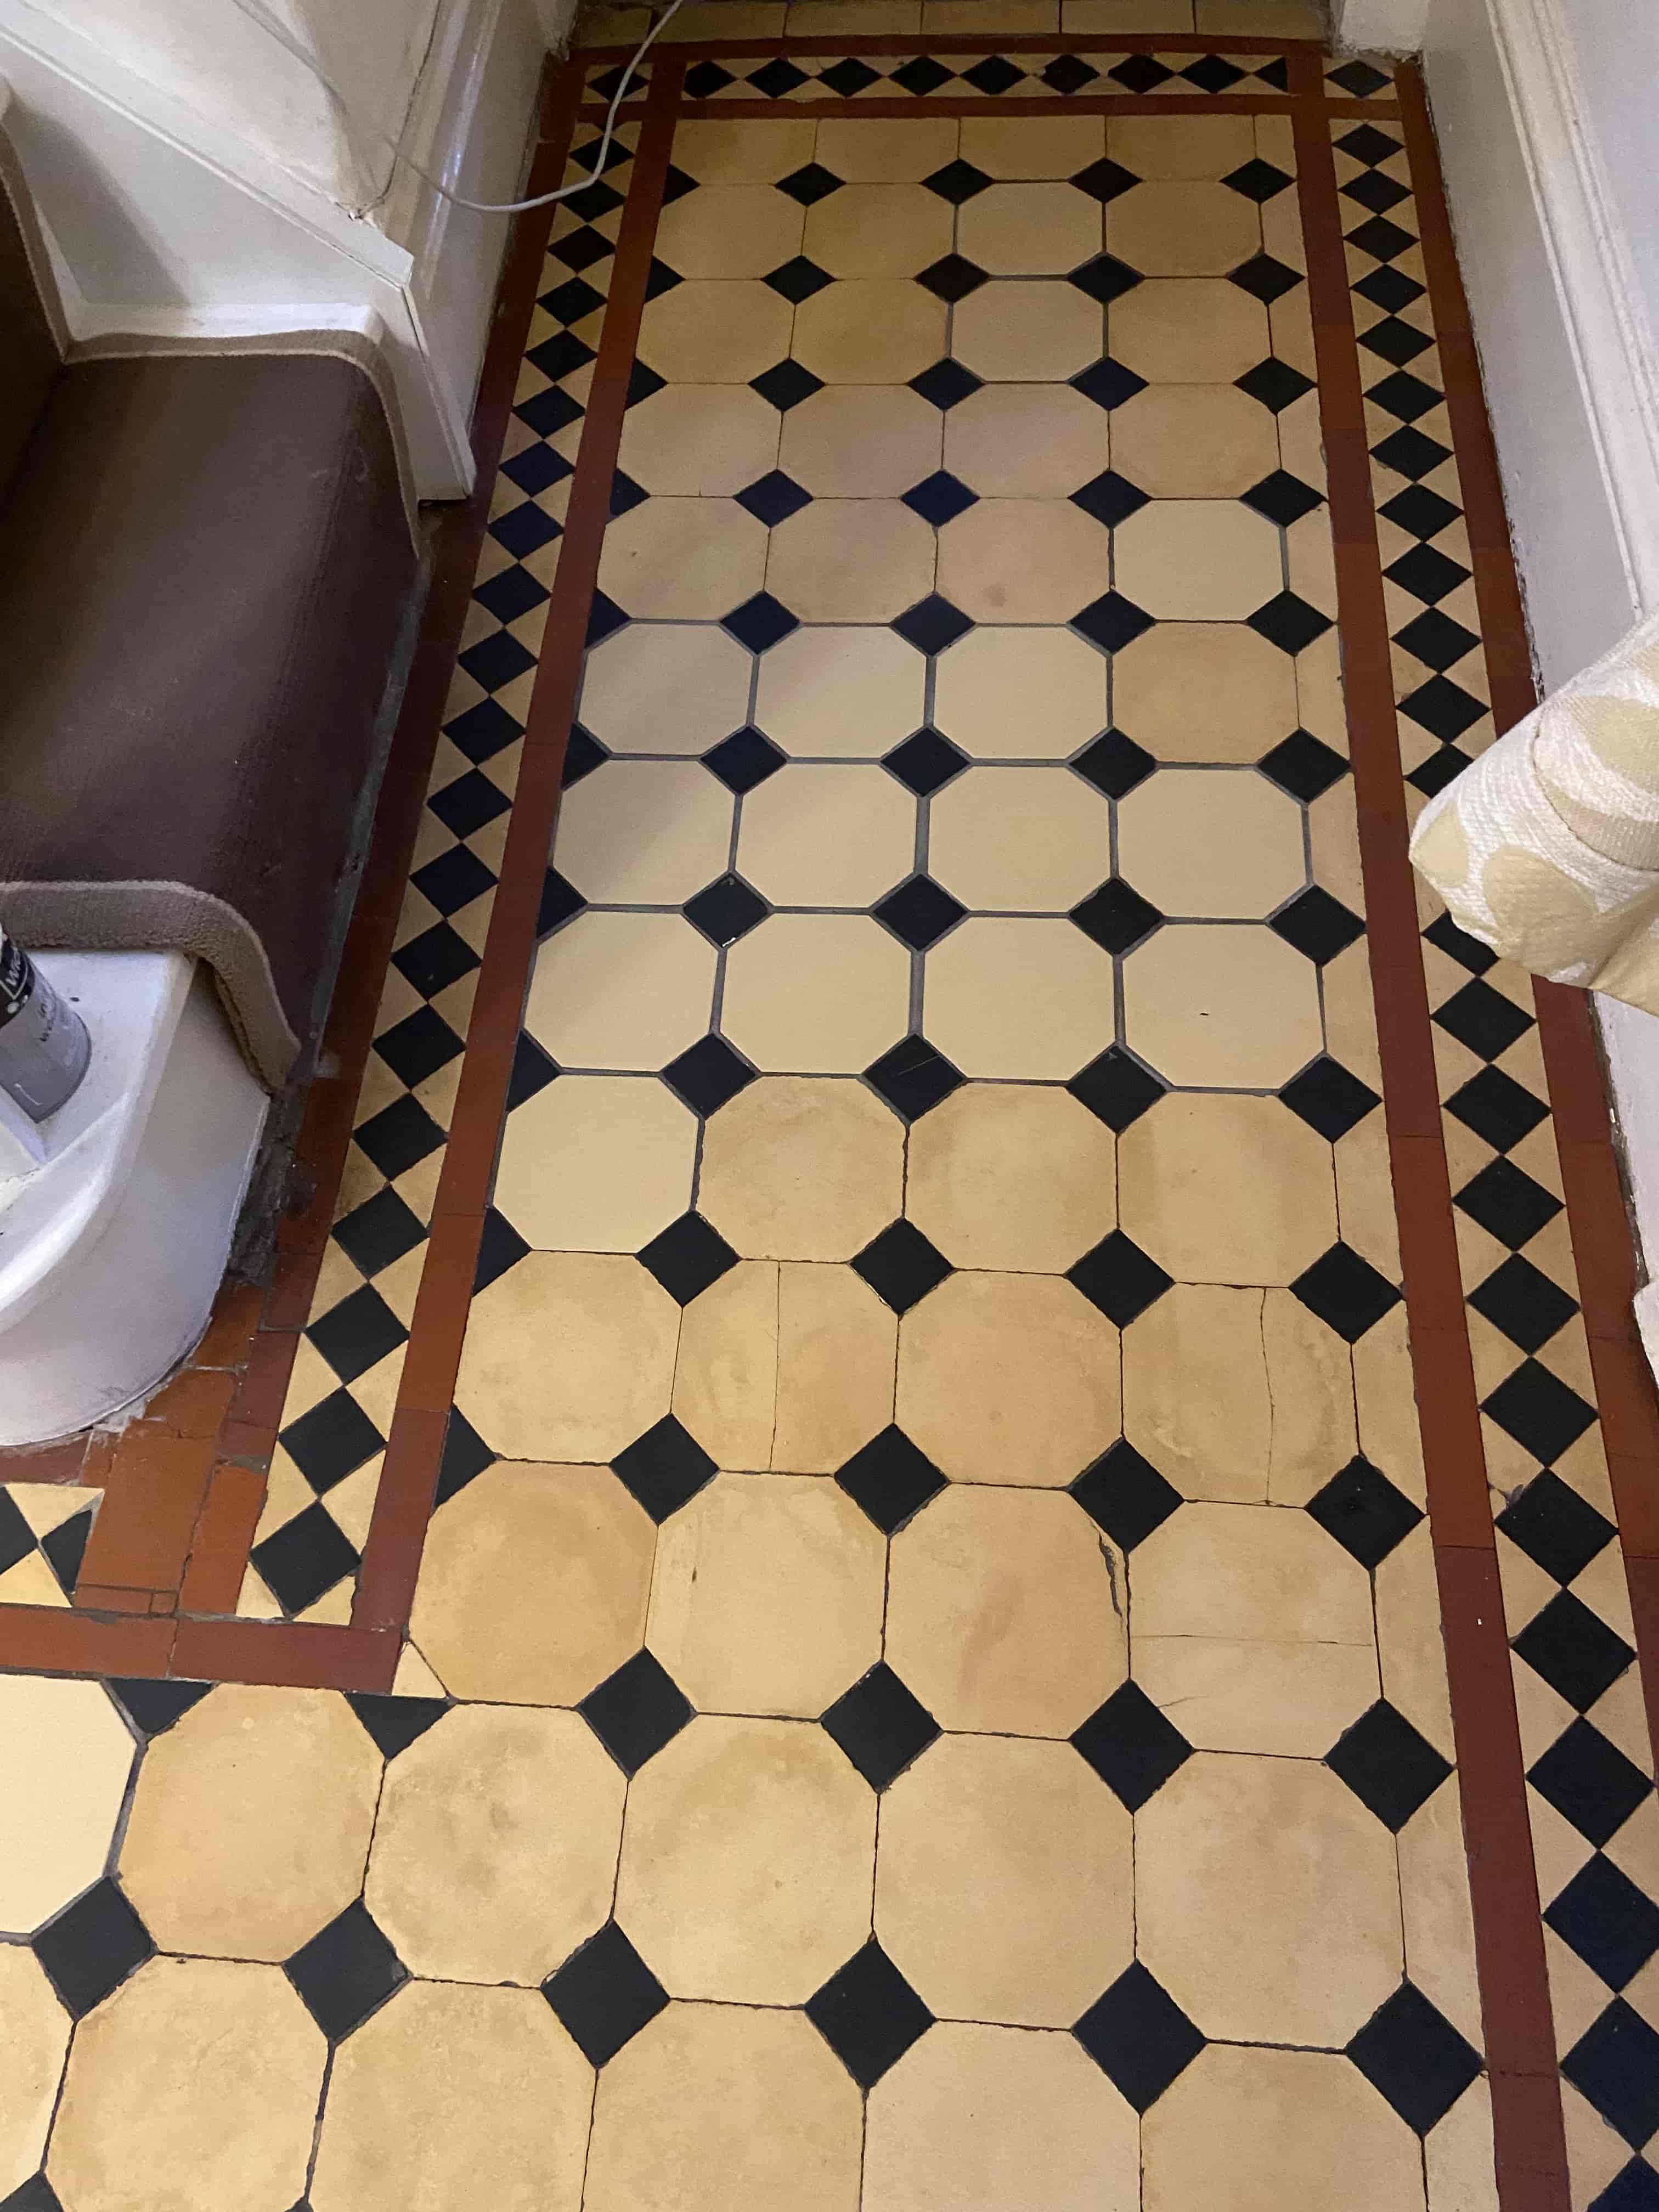
This is a Red and Black Victorian tiled floor laid in a Dorchester pattern at a property in Lancaster. The owner has only just bought the property which dates to the 1890s and this floor had previously been covered in carpet which had started to smell and leave a pungent aroma in the air.

Red And Black Victorian Tiled Floor Dorchester Pattern Before Cleaning Lancaster

Once the carpet had been removed and the Victorian floor allowed to breathe and dry out the smell disappeared. This is the right course of action with old floors which were laid without a damp proof membrane, floors of this age need to breathe and allow moisture to rise through the tile and evaporate at the surface, carpets and underlay prevent this.

Red And Black Victorian Tiled Floor Dorchester Pattern Before Cleaning Lancaster

The damp issues had resulted in efflorescent salts being deposited on the surface of some of the tiles and this is an important consideration when cleaning the floor. Salts and damp go together, so the more water we use the more salts will come through after the floor has been cleaned. Additionally using an alkaline cleaner such as Tile Doctor Pro Clean or Remove and Go this will further increase the alkalinity of the floor and cause yet more salt issues so a different approach is required.

Cleaning a Victorian Tiled Hallway Floor

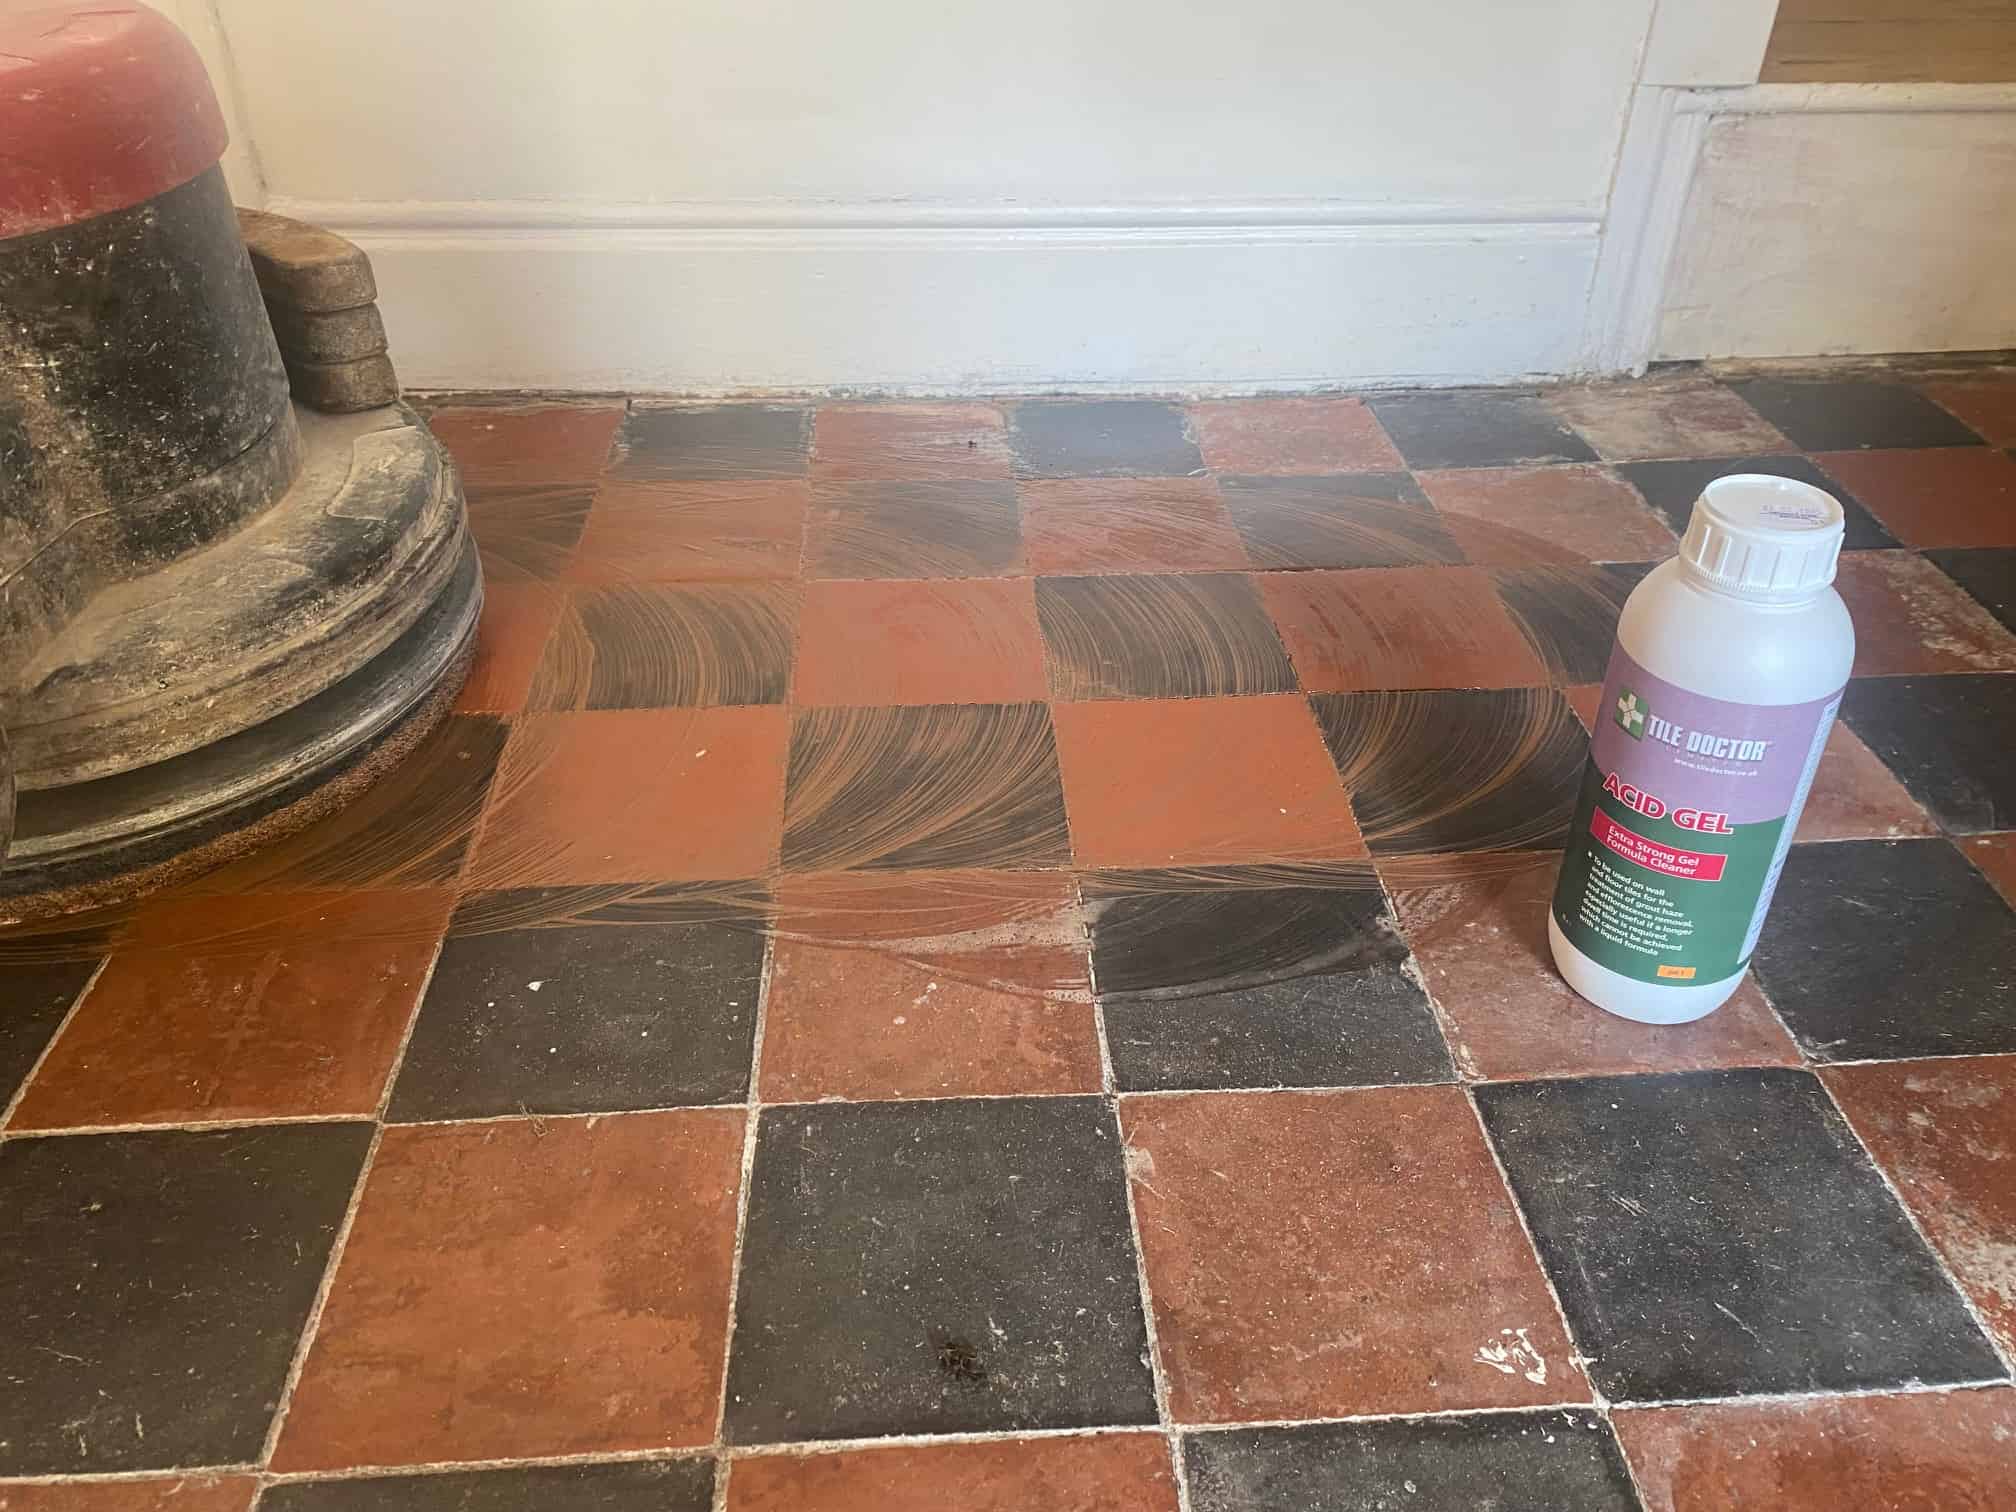
Naturally I didn’t want to exacerbate the moisture problems by using liquid products to clean the floor, so I used a low, moisture cleaning technique. This involves applying Tile Doctor Acid Gel as the main cleaning agent and working it in with a 200-grit milling pad fitted to a rotary machine. The gel keeps the moisture level low, and it is a very effective cleaning product and being an acid will neutralise the salts in the floor and keep the pH level at the correct balance. Once done the floor was briefly rinsed with water and all the soils extracted with a wet vacuum.

Red And Black Victorian Tiled Floor Dorchester Pattern During Cleaning Lancaster

The floor was left to dry off overnight then I called back the following day to see how it had faired. There were some areas where efflorescent salts had appeared, so I spot treated these areas with more Acid Gel and then scrubbed and rinsed with water using the wet vacuum again to remove as much moisture as possible. You will see on the photos how soft the salt was and I was able to scrape it off without too much difficulty, however if left untreated this salt would harden into a crystalline structure and become more difficult to remove.

Red And Black Victorian Tiled Floor Dorchester Pattern Efflorescencent Salt Removal Lancaster

Sealing a Victorian Tiled Hallway Floor

To make sure the sealer would cope with the damp floor I applied a thin coat of Tile Doctor X-Tra Seal to several areas before leaving. The decision on which type of sealer to apply was influenced by the damp issues as the moisture needs to be able to evaporate at the surface, so it is important to select a fully breathable sealer.

Red And Black Victorian Tiled Floor Dorchester Pattern After Cleaning Lancaster

I called back the following day and the floor was more settled, and the sealer had fully cured, the client gave his thumbs up and we continued sealing the floor with one coat of Tile Doctor X-Tra Seal which is fully breathable.

Red And Black Victorian Tiled Floor Dorchester Pattern After Cleaning Lancaster

Once completed the floor was transformed and worked well with other period features in the property. For aftercare cleaning I recommended the use of a Neutral PH cleaning product such as Tile Doctor Neutral Clean.


Professional Restoration of a Victorian Tiled Hallway in Lancashire

Dorchester Pattern Victorian Tiled Hallway Floor Restoration in Lancaster Read More »

Black Caithness Slate After Renovation Gressingham

Caithness Black Slate Floor Restored with Milling Pads in Gressingham

The photos above detail the restoration of Black Caithness Slate pavers at an old cottage in the village of Gressingham on the outskirts of Lancaster. The building was in the process of being completely overhauled and the floor was next on the long renovation to do list.

Black Caithness Slate Pavers Before Cleaning

Caithness Slate from the northern tip of Scotland and is known for its durability and strength however the years had certainly not been kind to this floor and it was in a very bad state.

To restore the appearance of the slate I recommended milling the floor with a set of very coarse pads that would remove a thin layer of stone off the top of the paving slab to reveal new stone underneath. The pointing was also cracked and loose in places so that would also need chopping out and replacing. After milling the stone would also be smoother and once sealed much easier to maintain going forward.

Black Caithness Slate Pavers Before Cleaning Black Caithness Slate Pavers Before Cleaning

I estimated the process would take four days to complete. Happy to go ahead with the quote a date was booked for the work to start.

Resurfacing Caithness Black Slate

On the first two days there were two of us involved to get through milling the stone which is hard work. We used a set of milling pads applied to a weighted floor machine to cut through the stones surface using water for lubrication. This generates a lot of stone dust so a lot of rinsing and extracting needs to happen to remove it.

Milling carried on into day two but by the end we had started knocking out the old pointing which had already failed and wasn’t too difficult to remove. It was one big room with a partition at one end, the building itself was built in the 1870s or at least that’s as much information as the client could find as it was bought in an auction.

Black Caithness Slate Pavers During Renovation Black Caithness Slate Pavers During Renovation

Due to its age, it had no water or electricity, so we had to work off generators whilst a rudimentary system supplied the water. This was not the easiest job for us as the generators were proving difficult to work with as the relays would overload and cut off the power; this happened more than a dozen times just in the first day alone, but we like a challenge.

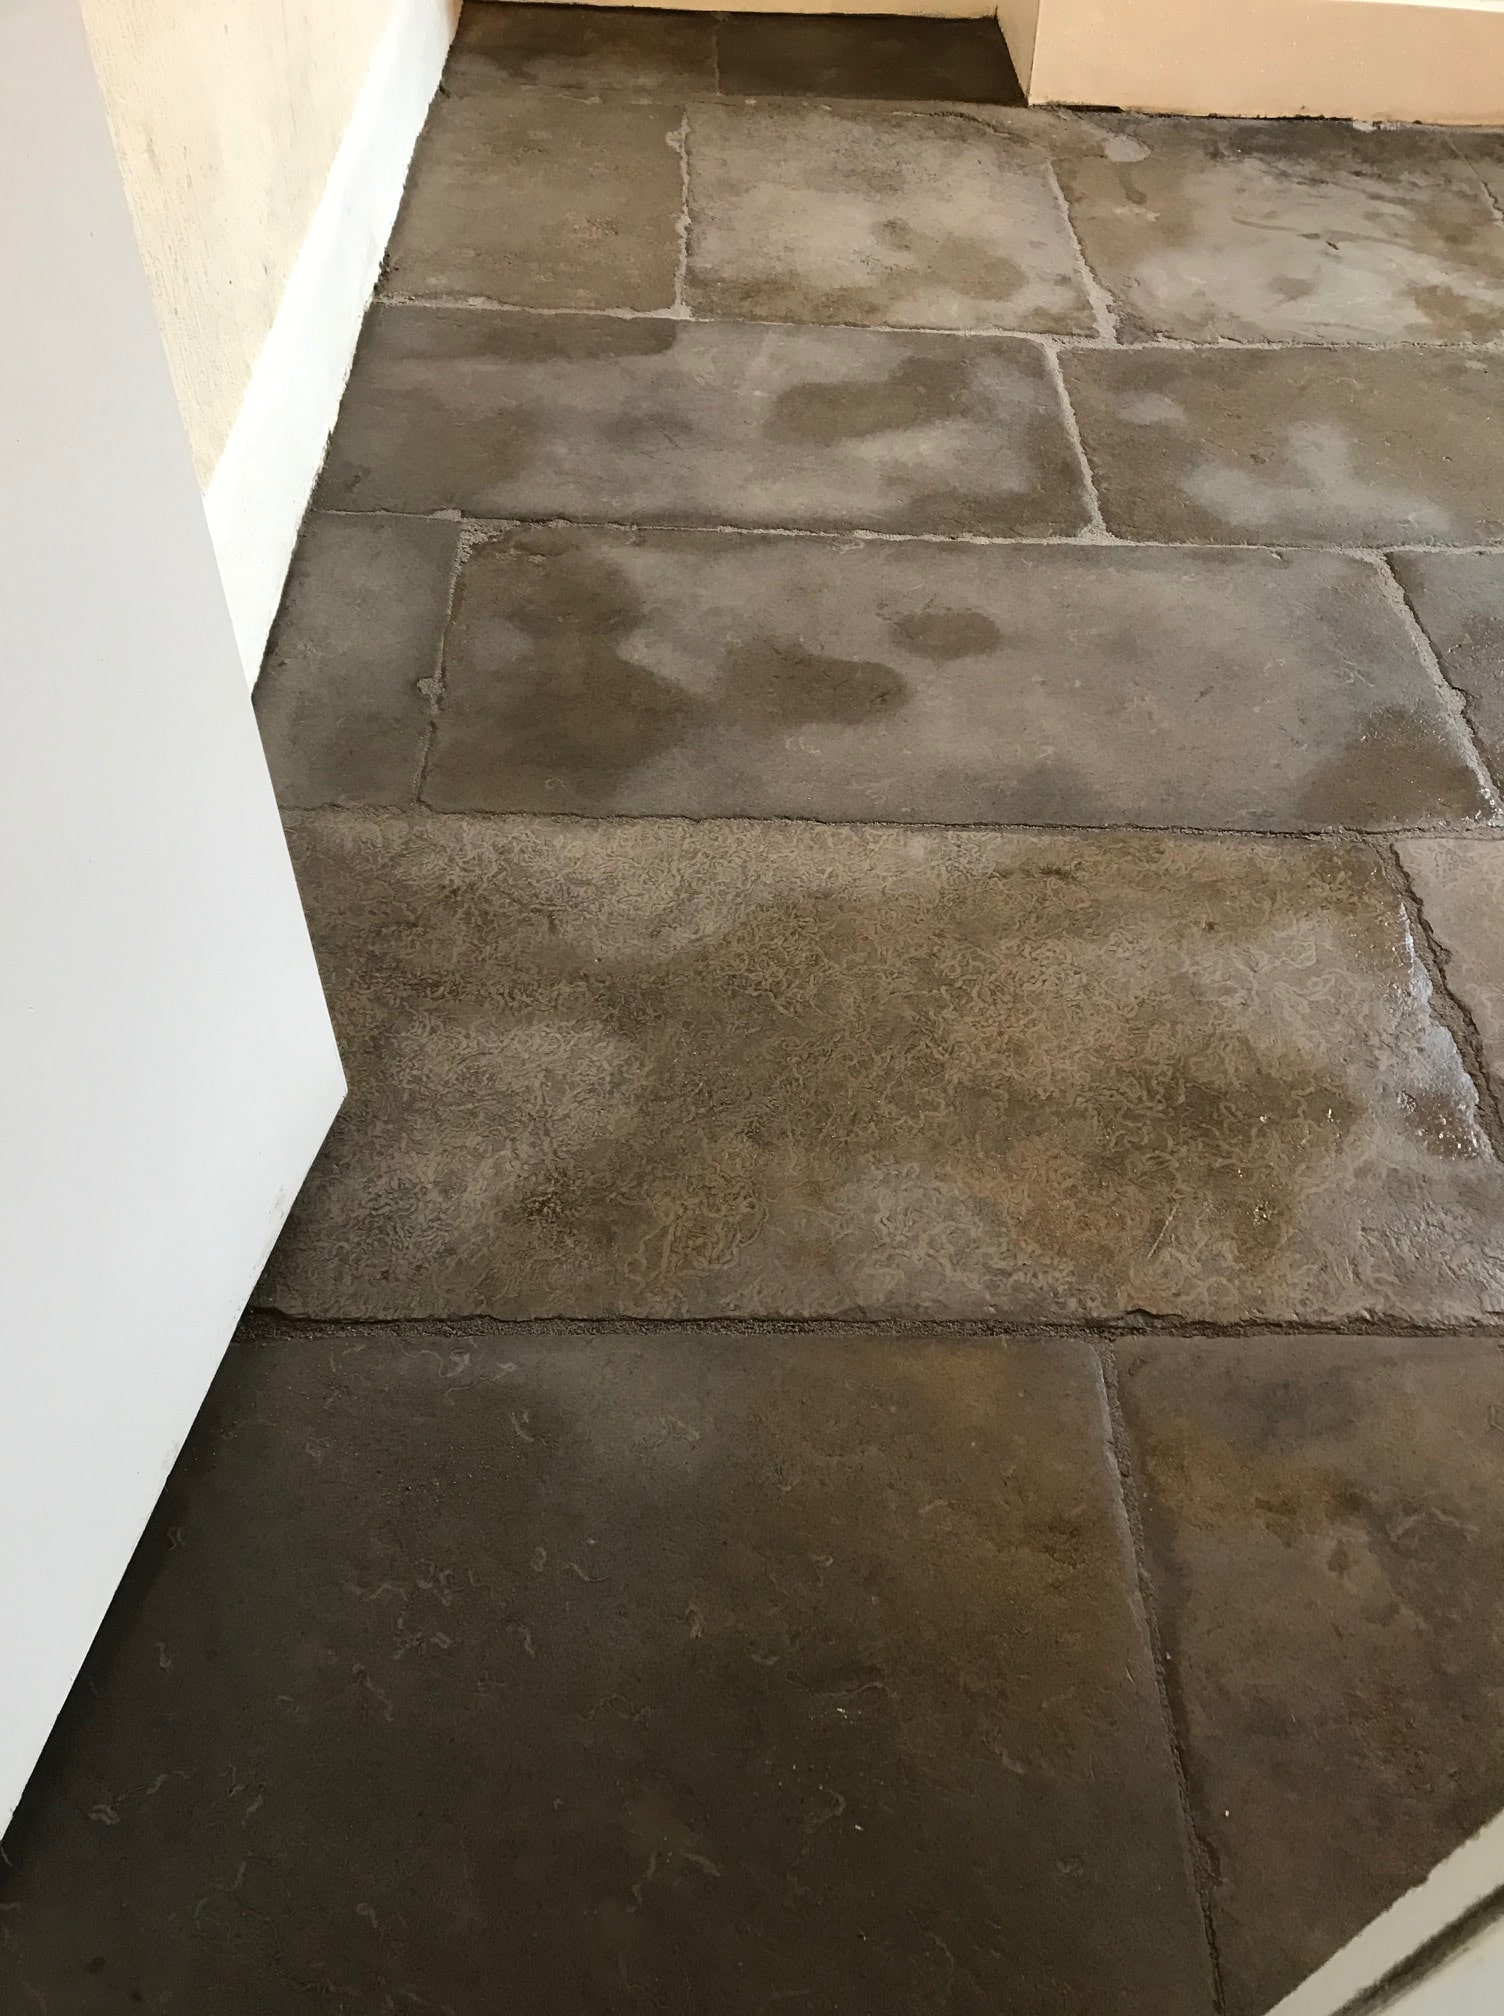
As you will see from the pictures the stone flagstones were transformed. This was not a simple clean and seal job, this is milling back the surface using various diamond grits a heavy weighted buffing machine and patience, and some water. Using a wet system, the milling system won’t leave a house full of dust and the diamond grinding leaves the stone much smoother and a lot cleaner which makes it a lot easier to clean and maintain in the future.

Sealing a Caithness Black Slate Tiled Floor

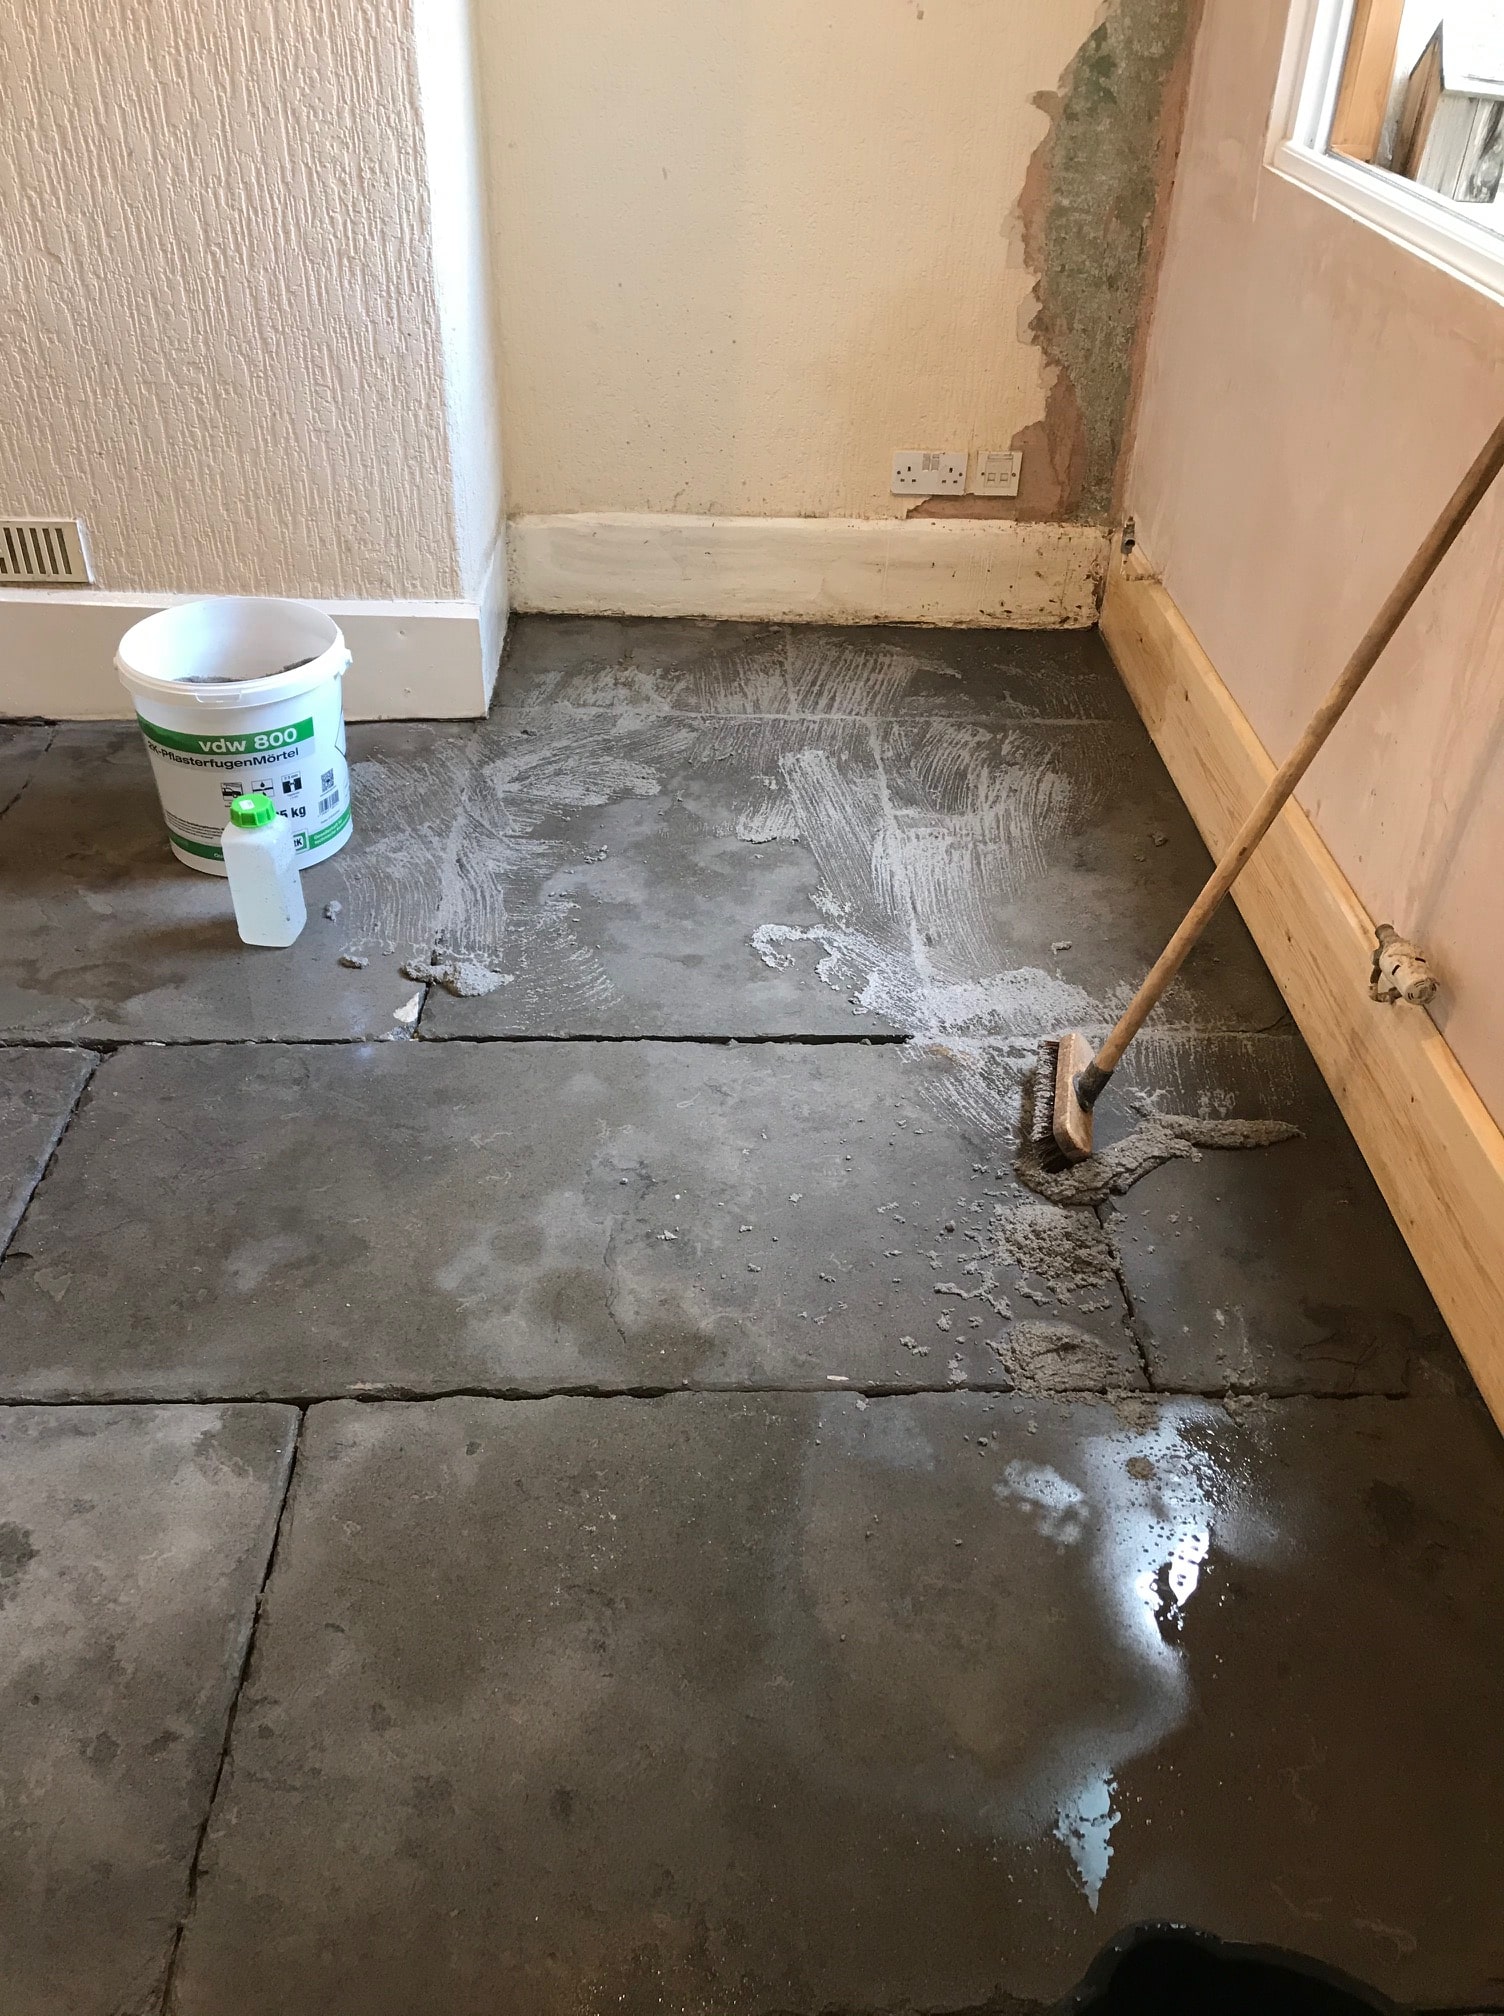
Once the milling was complete and the new flexible breathable pointing was applied for which we like to use a product called VDW 800. We then called back the next day and finished the clean, the floor area was left for another day to dry.

Black Caithness Slate Pavers During Sealing

Once dry, the floor was then sealing using a single coat of Tile Doctor X-Tra seal which is oil-based sealer that really brings out the colour of the Black slate. Additionally, this sealer is fully breathable so it will cope with the damp conditions you find with old floors that don’t have a damp proof membrane and so won’t peel off after a few weeks.

Black Caithness Slate Pavers After Renovation

The client was very happy with the transformation and final finish and invited us back to cover more work in the outbuildings which eventually will join onto the main house. For aftercare cleaning I recommended Tile Doctor Neutral Clean which is an effective tile and grout cleaner that won’t upset the sealer.

Black Caithness Slate Pavers After Renovation Black Caithness Slate Pavers After Renovation


Professional Restoration of a Caithness Black Slate Tiled Floor in Lancashire

Caithness Black Slate Floor Restored with Milling Pads in Gressingham Read More »

Flagstone Floor Restoration Lytham St Annes

Original Flagstone Tiled Floor Restoration in Lytham St Annes

The client said when he moved into this house in Lytham St Annes late last year that this room had a really bad smell of damp. The Flagstone floor was covered in carpet and he had the impression that the previous owner’s cat had been known to use it as place to pee!

Flagstone Floor Before Restoration Lytham St Annes

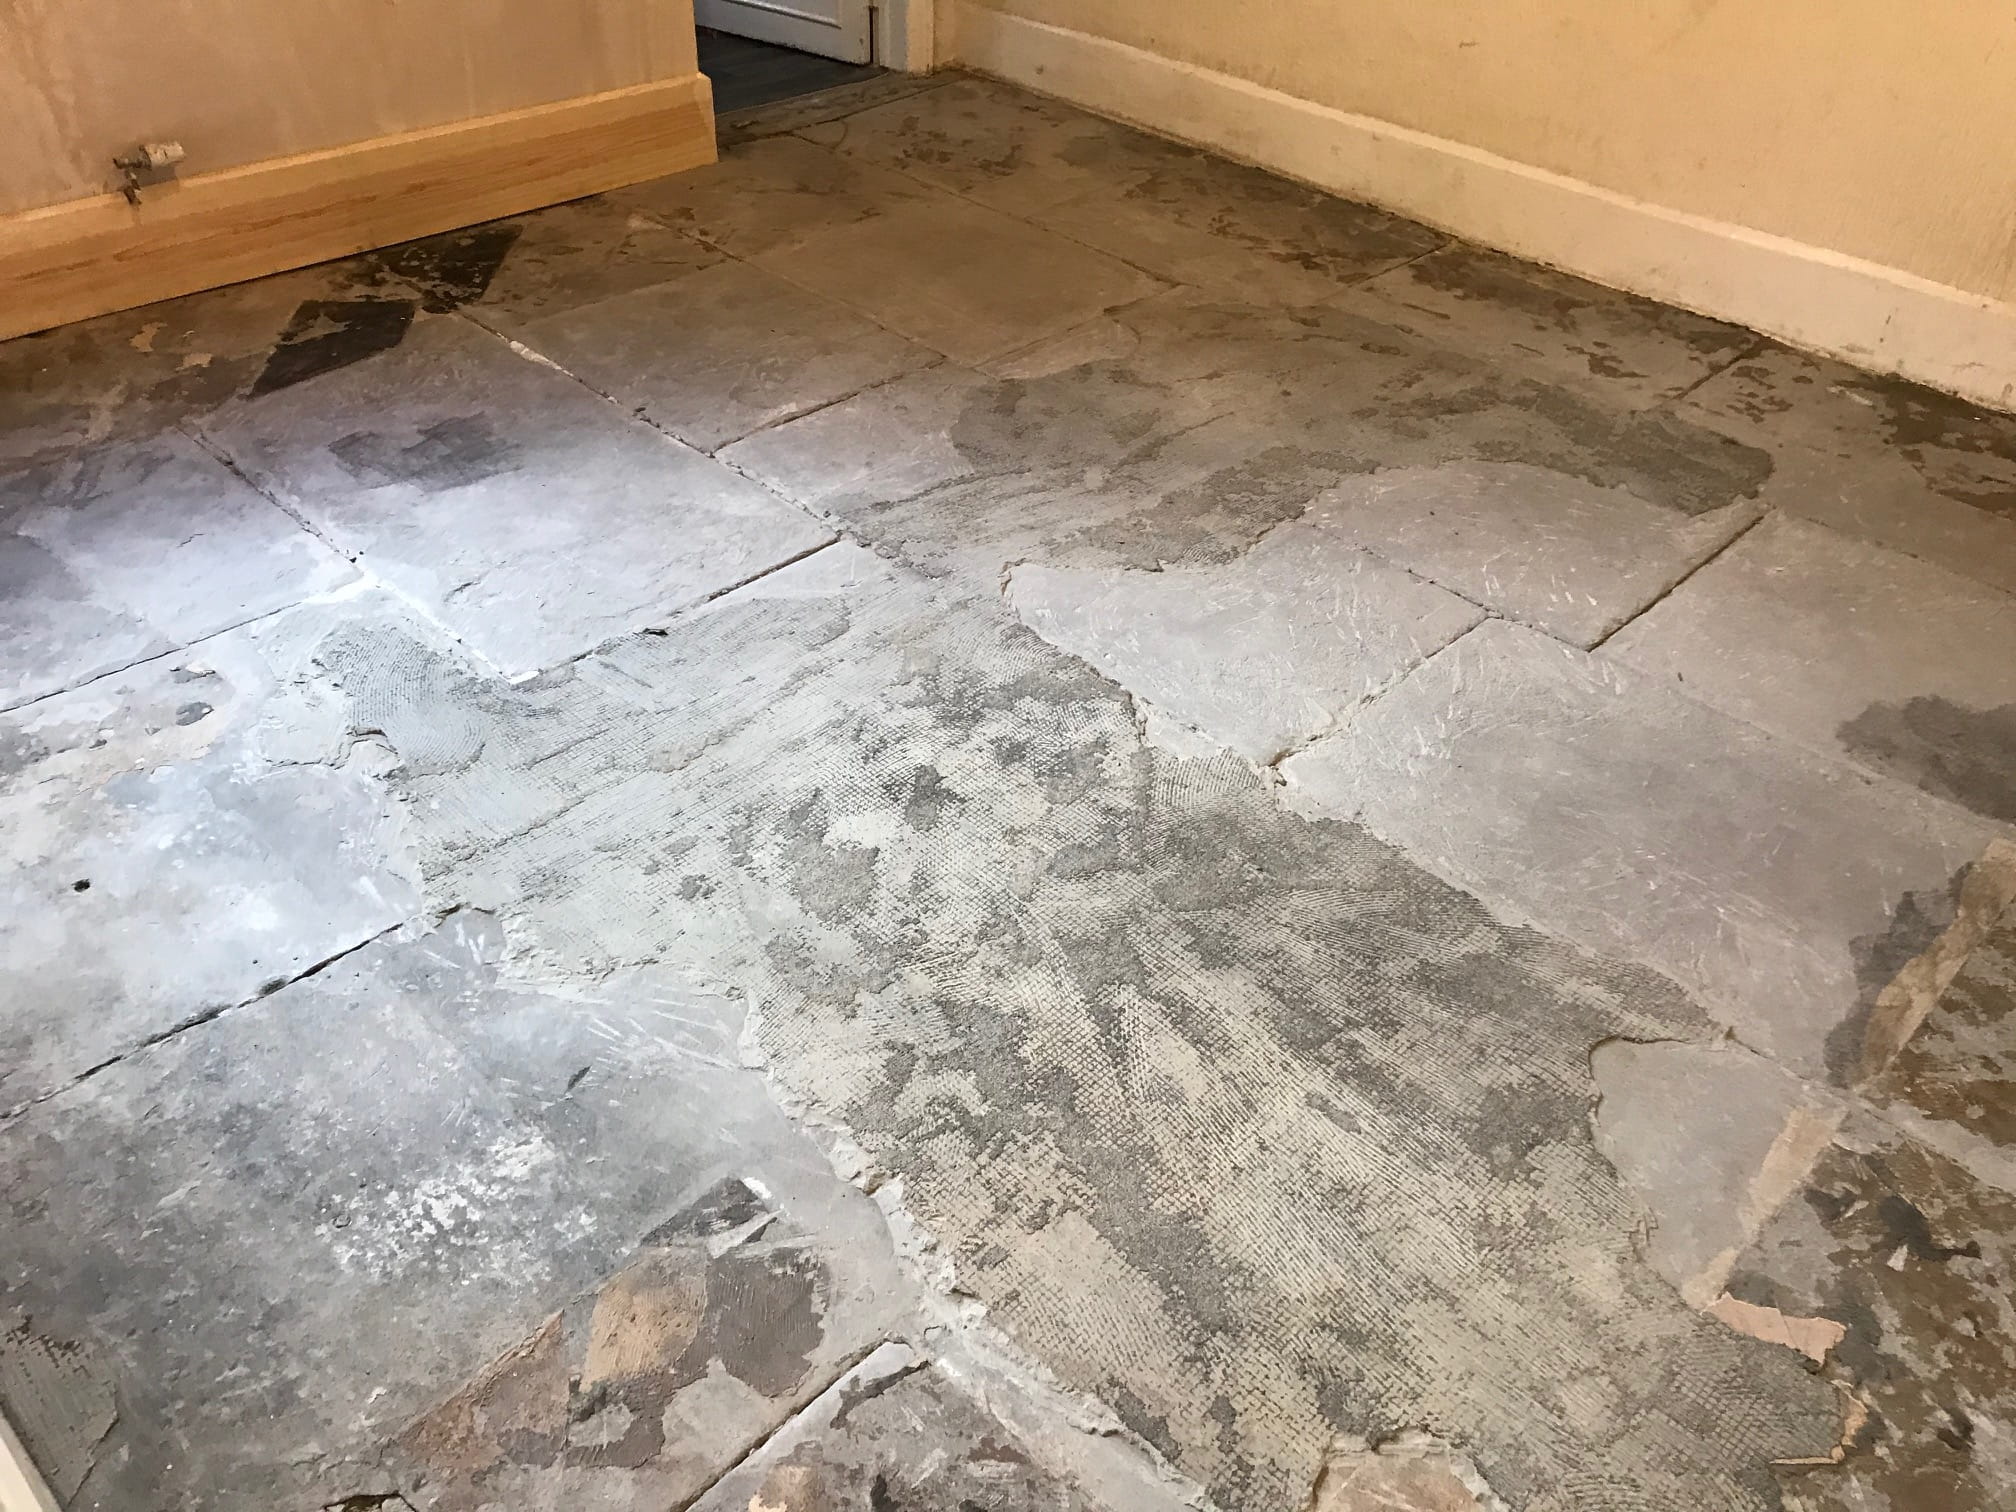
The smell was rank and probably bad for your health so he decided to remove the carpet and the thick underlay underneath. Under that there was some old Vinyl flooring which all came out to reveal the original flagstone floor. As you can see from the pictures it was in a poor state covered in red and white paint, bits of bitumen here and there and the pointing had been lost in several areas of the floor. Additionally, all those layers over the stone would have prevented any moisture from naturally evaporating at the surface thereby resulting in damp.

Flagstone Floor Before Restoration Lytham St Annes Flagstone Floor Before Restoration Lytham St Annes

The client had seen what we could do on our website and sent us some pictures of his floor which covered approximately 16m2. I priced for milling the flagstone as a deep clean would not resolve the shaling issues on its own and only a good mill of the stone would do that. Also, it needed all the pointing that was still in place knocking out and new flexible breathable pointing put back in place.

Cleaning and Repairing a Flagstone Tiled Hallway Floor

Milling stone is not a low-cost option, but it is a lot more cost effective than pulling up the whole floor and putting in a modern subfloor. Milling involves using a weighted buffing machine fitted with different grits and grades of coarse Diamond encrusted pads which cut into the surface of the stone to reveal new stone underneath, you then apply finer pads to hone and refine the surface.

In this case I used a set of Tile Doctor Milling Pads applied in sequence starting with 50-grit, 100-grit and then 200-grit. Water is used to lubricate the process and keep the dust down, it’s also important to rinse the stone off after each pad and extract the slurry that is generated with a wet vacuum.

The floor was then cleaned with Tile Doctor Remove and Go allowing the product to soak in for ten minutes to loosen deep seated paint staining. The Tile Doctor Remove and Go was then worked in with another 200-grit pad before another rinse and extract again with the wet vacuum.

Older floors like this were installed before the invention of the damp proof membrane so moisture is always a concern. To counter any issues that might develop later such as Efflorescence the last step in the cleaning process was to give the floor an acid rinse using Tile Doctor Grout Clean-up, this neutralises any latent salts trapped in the subfloor.

Sealing a Flagstone Tiled Hallway Floor

The milling, re-pointing and cleaning work took two days and we returned for a third day to apply a breathable sealer called Tile Doctor X-Tra Seal. This product is fully breathable and a great choice for any floors where damp can be a problem as it will allow for moisture to rise through the stone and evaporate at the surface. Being oil-based it also adds character to natural stone and adds an appealing low satin finish.

Flagstone Floor After Restoration Lytham St Annes Flagstone Floor After Restoration Lytham St Annes

The whole process completely transformed the appearance of the flagstone floor and really suits the property which was a late Victorian four-story house with a basement. Original features like this are very sought after so it makes sense to restore them as it will add value.

Flagstone Floor After Restoration Lytham St Annes

An additional advantage of the milling process is it also reduces the roughness of the stone surface makes it smoother and easier to clean. On the topic of cleaning its worth mentioning that you should never use a strong bleach-based tile cleaning product on a sealed floor as it will erode the sealer prematurely. For a floor like this you need to use a product like Tile Doctor Neutral Cleaner which is a mild but effective cleaning product designed for use on sealed tile and stone.


Professional Restoration of a Flagstone Floor in Lancashire

Original Flagstone Tiled Floor Restoration in Lytham St Annes Read More »

Indian Sandstone Kitchen Floor Renovation Garstang

Rough Indian Sandstone Floor Milled and Restored in Garstang

Due to the textured nature of the Indian Sandstone tiles installed their kitchen, this client from Garstang was having trouble keeping their stone floor clean. Having decided enough was enough they contacted Tile Doctor to see what could be done to rectify the problem.

I went over to survey the floor and could see dirt was being trapped in the riven surface of the Sandstone and any sealer put there to protect the stone had long since worn off. I find the best solution for rough stone floors like these is to mill the stone with coarse diamond pads thereby removing the grubby surface layer and revealing a new surface underneath. This action also flattens the stone to remove the roughness and makes it easier to maintain.

Indian Sandstone Kitchen Floor Before Cleaning Garstang

I provided a price for milling the stone, cleaning up the grout lines and then applying a new sealer to protect it going forward. Happy with the price, the client arranged to purchase the required products, and we booked in a date for the work to commence. It was only a small 5 m2 area so I was happy that it could be done by one Tile Doctor over a couple of days.

Cleaning and Restoring an Indian Sandstone Tiled Kitchen Floor

To mill the Sandstone, we use a couple of very coarse milling pads of different grades which are applied to the stone with water for lubrication. The pads are fitted to a rotary floor machine to which extra weight is added to ensure a good contact with the stone. The floor was rinsed with water as I progressed, and the soiling generated was extracted with a wet vacuum.

Indian Sandstone Kitchen Floor During Cleaning Garstang

Circular pads do struggle to maintain contact with the edges and especially corners so this is done manually using a set of hand-held diamond blocks. I also scrubbed the grout lines with Tile Doctor Pro-Clean to get the lines as clean as possible.

It’s worth noting that Indian Sandstone is full of iron and a lot harder to mill compared to English Sandstone, Flagstone, and Slate etc. As a result, it took most of the first day to complete this stage.

Sealing an Indian Sandstone Tiled Kitchen Floor

Once milled and cleaned I left the sandstone to dry off overnight and then called back the next day to apply the sealer. For this floor we went with Tile Doctor X-Tra Seal which is a breathable oil-based sealer that contains a colour enhancing formula to improve the general appearance of the stone.

Indian Sandstone Kitchen Floor After Cleaning Garstang

What might not be noticeable from the pictures is the smoothness of the stone after it’s been milled, this makes it a lot easier to clean and makes it a lot less absorbent to dirt and muck etc.

The fresh sealer will maintain its appearance for many many years to come and maybe in another 100 years it will need to be milled again.

Indian Sandstone Kitchen Floor After Cleaning Garstang

It always helps to use the right product when cleaning stone after it’s been sealed, so we dropped off a bottle of pH Neutral Cleaner for the client which we call Tile Doctor Neutral Tile Cleaner. This will ensure easy maintenance without damaging the sealer.


Professional Restoration of an Indian Sandstone Tiled Kitchen in Lancashire

Rough Indian Sandstone Floor Milled and Restored in Garstang Read More »

Quarry Tiled Floor Renovation Caton Lancaster

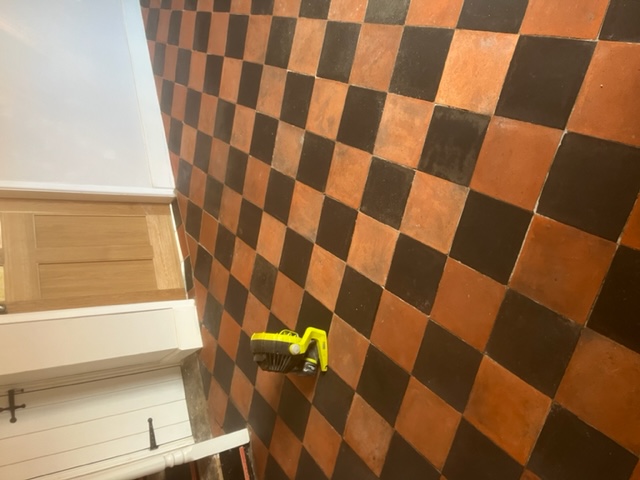
Black and Red Dorchester Pattern Quarry Tiled Floor Renovation Caton

A first glance you might not notice much improvement in this Quarry tiled floor that we recently worked on at a Victorian house in Caton near Lancaster. However, look closer and you will see that a pattern has been worn into the tiles from a previous covering most likely carpet underlay.

The sealer on the floor was also due to be replaced so having surveyed the floor on my initial visit I worked out a plan to renovate the Quarry tiles which would include deep cleaning the tile and grout, removing the underlay patterning, and then re-sealing the tiles to keep them protected.

Quarry Tiled Floor Before Cleaning Caton Lancaster

Deep Cleaning a Quarry Tiled Floor

To start neat Tile Doctor Oxy-Gel was applied to the floor and left to soak in for twenty minutes giving it time to break down soils etc. Then a 200-grit Diamond burnishing pad was attached to floor buffing machine which was a heavily weighted for extra grip and run a few times over the tiles. These pads are very aggressive and ideal for cleaning off the pattern left by the carpet underlay.

Oxy-Gel was chosen for this as being in Gel form its more manageable and holds itself against the clay Quarry tile for longer allowing the product work to a much harder, whereas a liquid cleaner generally soaks away into the clay and underneath meaning you need to use more water to remove it later resulting in longer drying times.

Quarry Tiled Floor Before Cleaning Caton Lancaster

After the gel has been scrubbed into the tiles (no water needed at this stage) a wet vacuum Is used to remove the soiling generated during the process. After this initial clean a small amount of water is added to the floor and we go over with the same 200-grit diamond pad extracting the water off the tiles within five minutes of it being applied.

With the Oxy-Gel removed the floor was given and acid rinse using Tile Doctor Acid Gel using the same process as before but this time using a Black scrubbing pad and only allowing it to dwell for 10 minutes. Acidic products are quicker acting on clay and so need less dwell time for it to work. Water was then added and after brushing it in to the floor it was removed using the wet vacuum within five minutes. I sometimes do this job twice as this is the last of the deep cleaning process and will ensure the tiles are free from any debris and dirt before we allow the clay tiles to dry out before sealing.

Before finishing for the day, I took time to apply matching grout where it was missing which was mainly around the edges and sponged off the excess. With this done the floor was left to dry off overnight.

Sealing Quarry Tiles

The next day we conducted a damp test, but despite the use of Gel cleaning products it was still too damp to seal. My client however wanted to seal how the tiles would look with the sealer we were planning to use which was Tile Doctor X-Tra Seal, so to do this three tiles were force dried using an Air blower and a Heat Gun.

With the sealer approved the floor was left for two days so it could fully dry out, the damp test showed a much better reading and we were able to crack on applying the sealer to the whole floor. Only one coat of X-Tra Seal was needed, it’s a thick Oil based product that soaks into the pores of the tile protecting it from within, it also fully breathable so ideal for old floors like this one that don’t have a damp proof membrane. Lastly it contains a colour enhancing formula that in this case improved the deep Red and dark Black colours in the tile.

Quarry Tiled Floor After Cleaning Sealing Caton Lancaster

Lastly for aftercare I recommended Tile Doctor Neutral Tile Cleaner which is a gentle but effective tile and grout cleaning product. You have to be careful when choosing an cleaning product for use on sealed tiles as many are bleach based and simply too strong.

Quarry Tiled Floor After Cleaning Sealing Caton Lancaster


Professional Restoration of a Quarry Tiled Lobby in Lancashire

Black and Red Dorchester Pattern Quarry Tiled Floor Renovation Caton Read More »

Geometric Victorian Tiled Kitchen Floor Restored Clitheroe

1920 Geometric Victorian Floor Fully Restored in Clitheroe

This property in Clitheroe dates to the 1920’s and the current owner wanted to have original Victorian Tiles in the Kitchen restored in time for the installation of new units. You can see form the photographs that the old tiles were in quite a state with 100 years of grime and some parts of the floor were missing large sections of tiling altogether.

Geometric Victorain Tile Before Restoration Clitheroe

It was clearly going to be a big project with lots of tiling required however unphased by the complexity I was happy to do the work and looked forward to seeing it completed with a new kitchen fitted. The work would need to be completed in two parts starting with the reconstruction and initial cleaning of the floor and then returning after the new kitchen units had been fitted to finish the restoration.

Geometric Victorain Tile Before Restoration Clitheroe

Restoring a 1920’s Victorian Floor in Clitheroe Part 1

On our first visit to the property the tiles were given the first of what would be several deep cleans. This involved soaking the tiles in a strong concentration of Tile Doctor Pro-Clean, leaving it to soak in for ten minutes and then working the solution into the floor using a 200-grit diamond encrusted burnishing pad fitted to a rotary buffer machine. The cleaning solution soon turned black with the dirt that was flushed out of the tile, this was then rinsed off and extracted with a wet vacuum.

The initial clean had to be repeated several times to get the tiles in a reasonable condition. Then with the initial clean completed attention was turned to the tiling work which involved relaying large sections of tiles that would be hidden by the new units to the other parts of the floor where there were none. The location of the new units had been marked out with black tape so we were able to identify where we could lift tiles from. Doing it this way rather than using replacements meant that the whole floor would be original and in keeping with the 100-year-old building.

Geometric Victorain Tile During Restoration Clitheroe

This work took several days and once complete the floor was left covered to protect it whilst the new kitchen was being fitted.

Restoring a 1920’s Victorian Floor in Clitheroe Part 2

On our return a few weeks later, it had become apparent that the design of the kitchen had changed slightly so more tiling work was needed to rectify the problem. Once done the second part of the clean was carried out with a focus on the White tiles which were proving very stubborn to get White again.

The customer wanted it perfect as did we, but I had stated from the outset that with tiles of this age and an unknown history it would be impossible to guarantee the outcome and this is more likely with White and the Sand coloured tiles which are more liable to staining. You will see on the after photos some of the White tiles are more off White in colour which I can assure you this isn’t due to a lack of effort on our part and when it comes to taking on old flooring like this one, there’s only so much cleaning we can do until you realised that this is the best it will get. Fact is you don’t know for sure how well these types of job are going to go until you get stuck in and sometimes even a small pre-test clean can be very misleading and this is what was proven to be the case here.

Sealing a Victorian Tiled Hallway Floor

With the cleaning completed the next step was to apply a sealer to the tiles to protect them from further staining and ingrained dirt. To do this a couple of coats of Tile Doctor Colour Grow were applied. This product is a fully breathable sealer which restores the colour and allows for the floor to breathe, which is an absolutely necesity on an old floor like this one which will not have a damp proof membrane installed.

Geometric Victorain Tile After Restoration Clitheroe Geometric Victorain Tile After Restoration Clitheroe

As you can see from the photographs the Kitchen was completely transformed by the time we had finished. The customer was happy with the overall result and the White tiles although not perfect showed a lot of character befitting their age.

Geometric Victorain Tile After Restoration Clitheroe Geometric Victorain Tile After Restoration Clitheroe

For aftercare we always advise our customers to use Tile Doctor pH Neutral tile cleaner as it’s specially designed for cleaning sealed surfaces without damaging the sealer which can be the case with stronger bleach-based floor cleaning products you find in supermarkets many of which contain bleach and are simply too strong for use on a sealed floor.


Professional Restoration of a Victorian Tiled Hallway in Lancashire

1920 Geometric Victorian Floor Fully Restored in Clitheroe Read More »

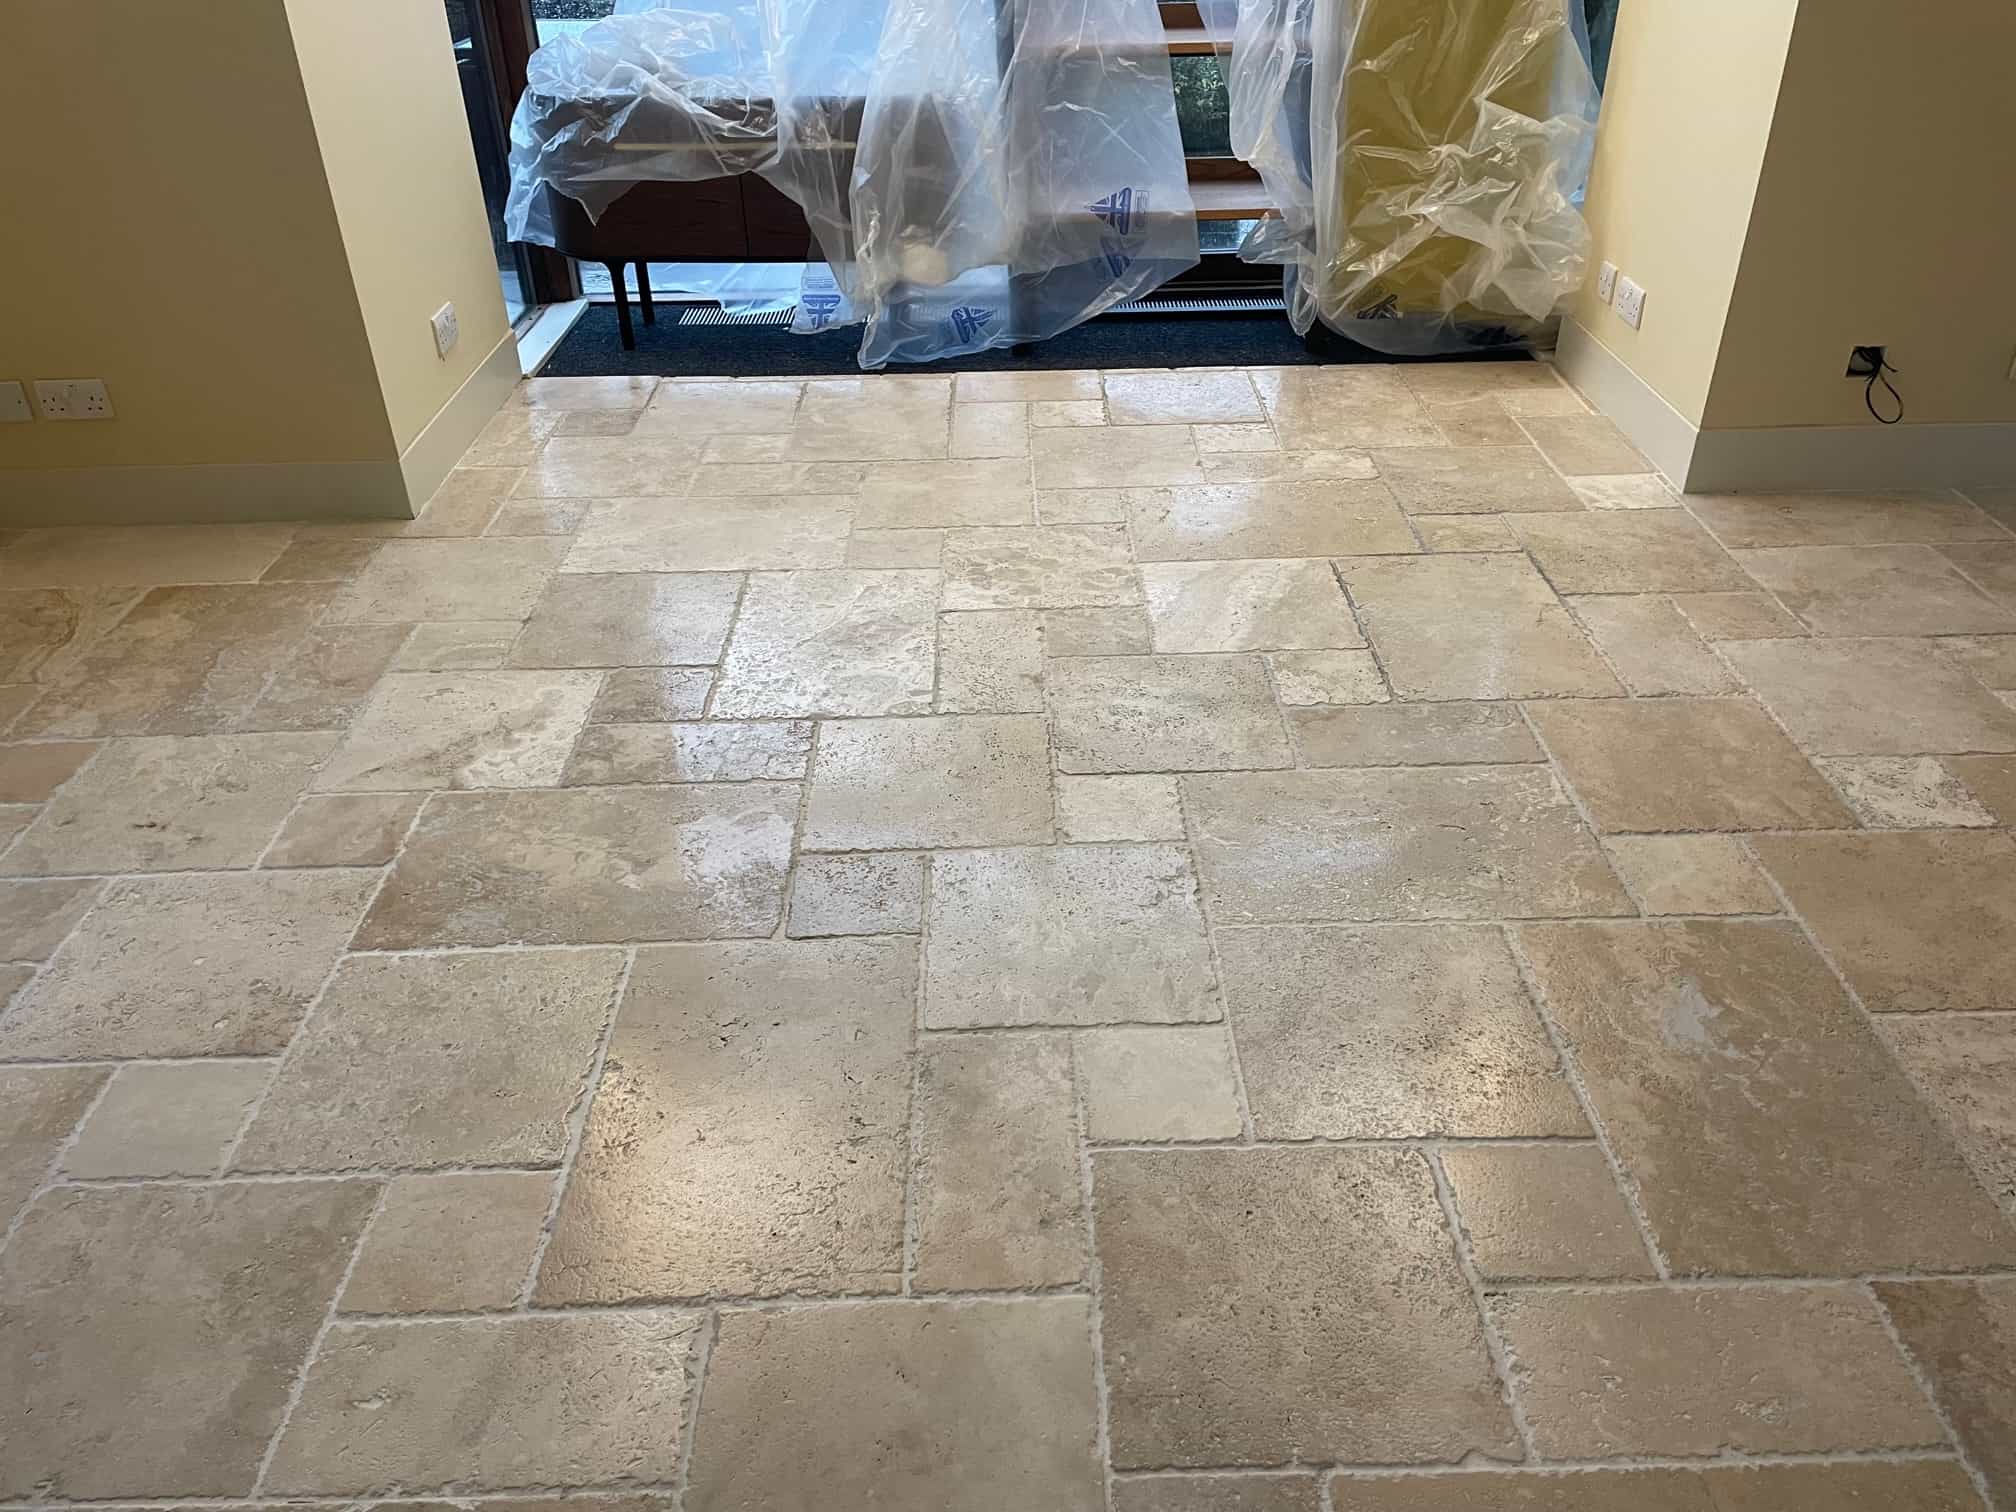
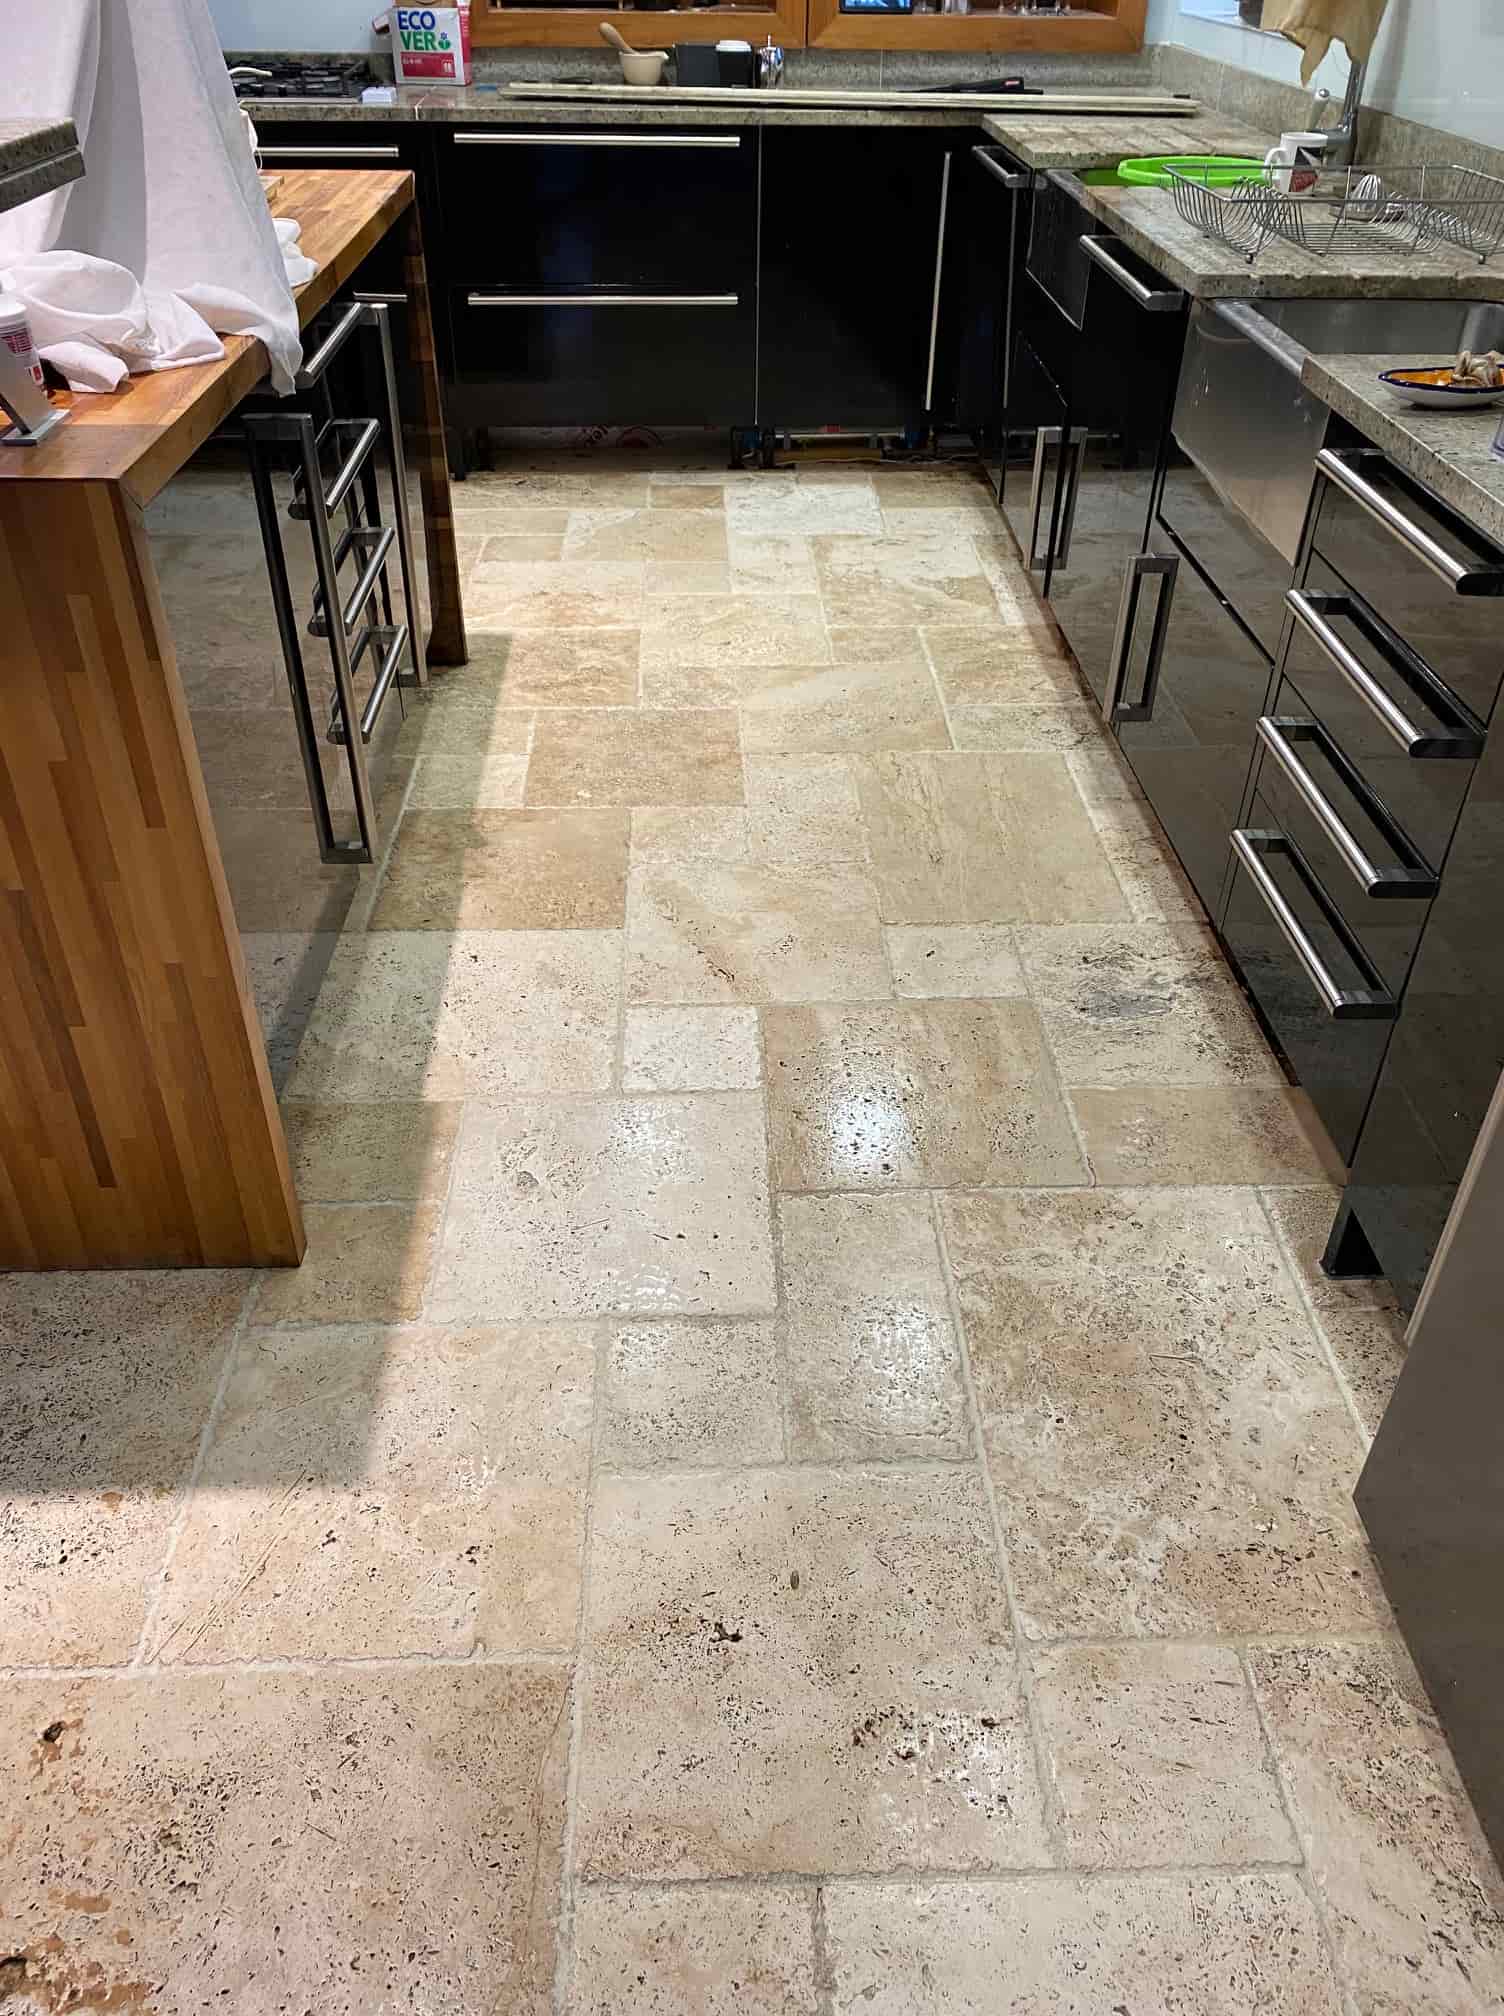
Honed Travertine Kitchen Floor Renovated in Preston

Renovating a Large Stained Travertine Tiled Floor in Preston

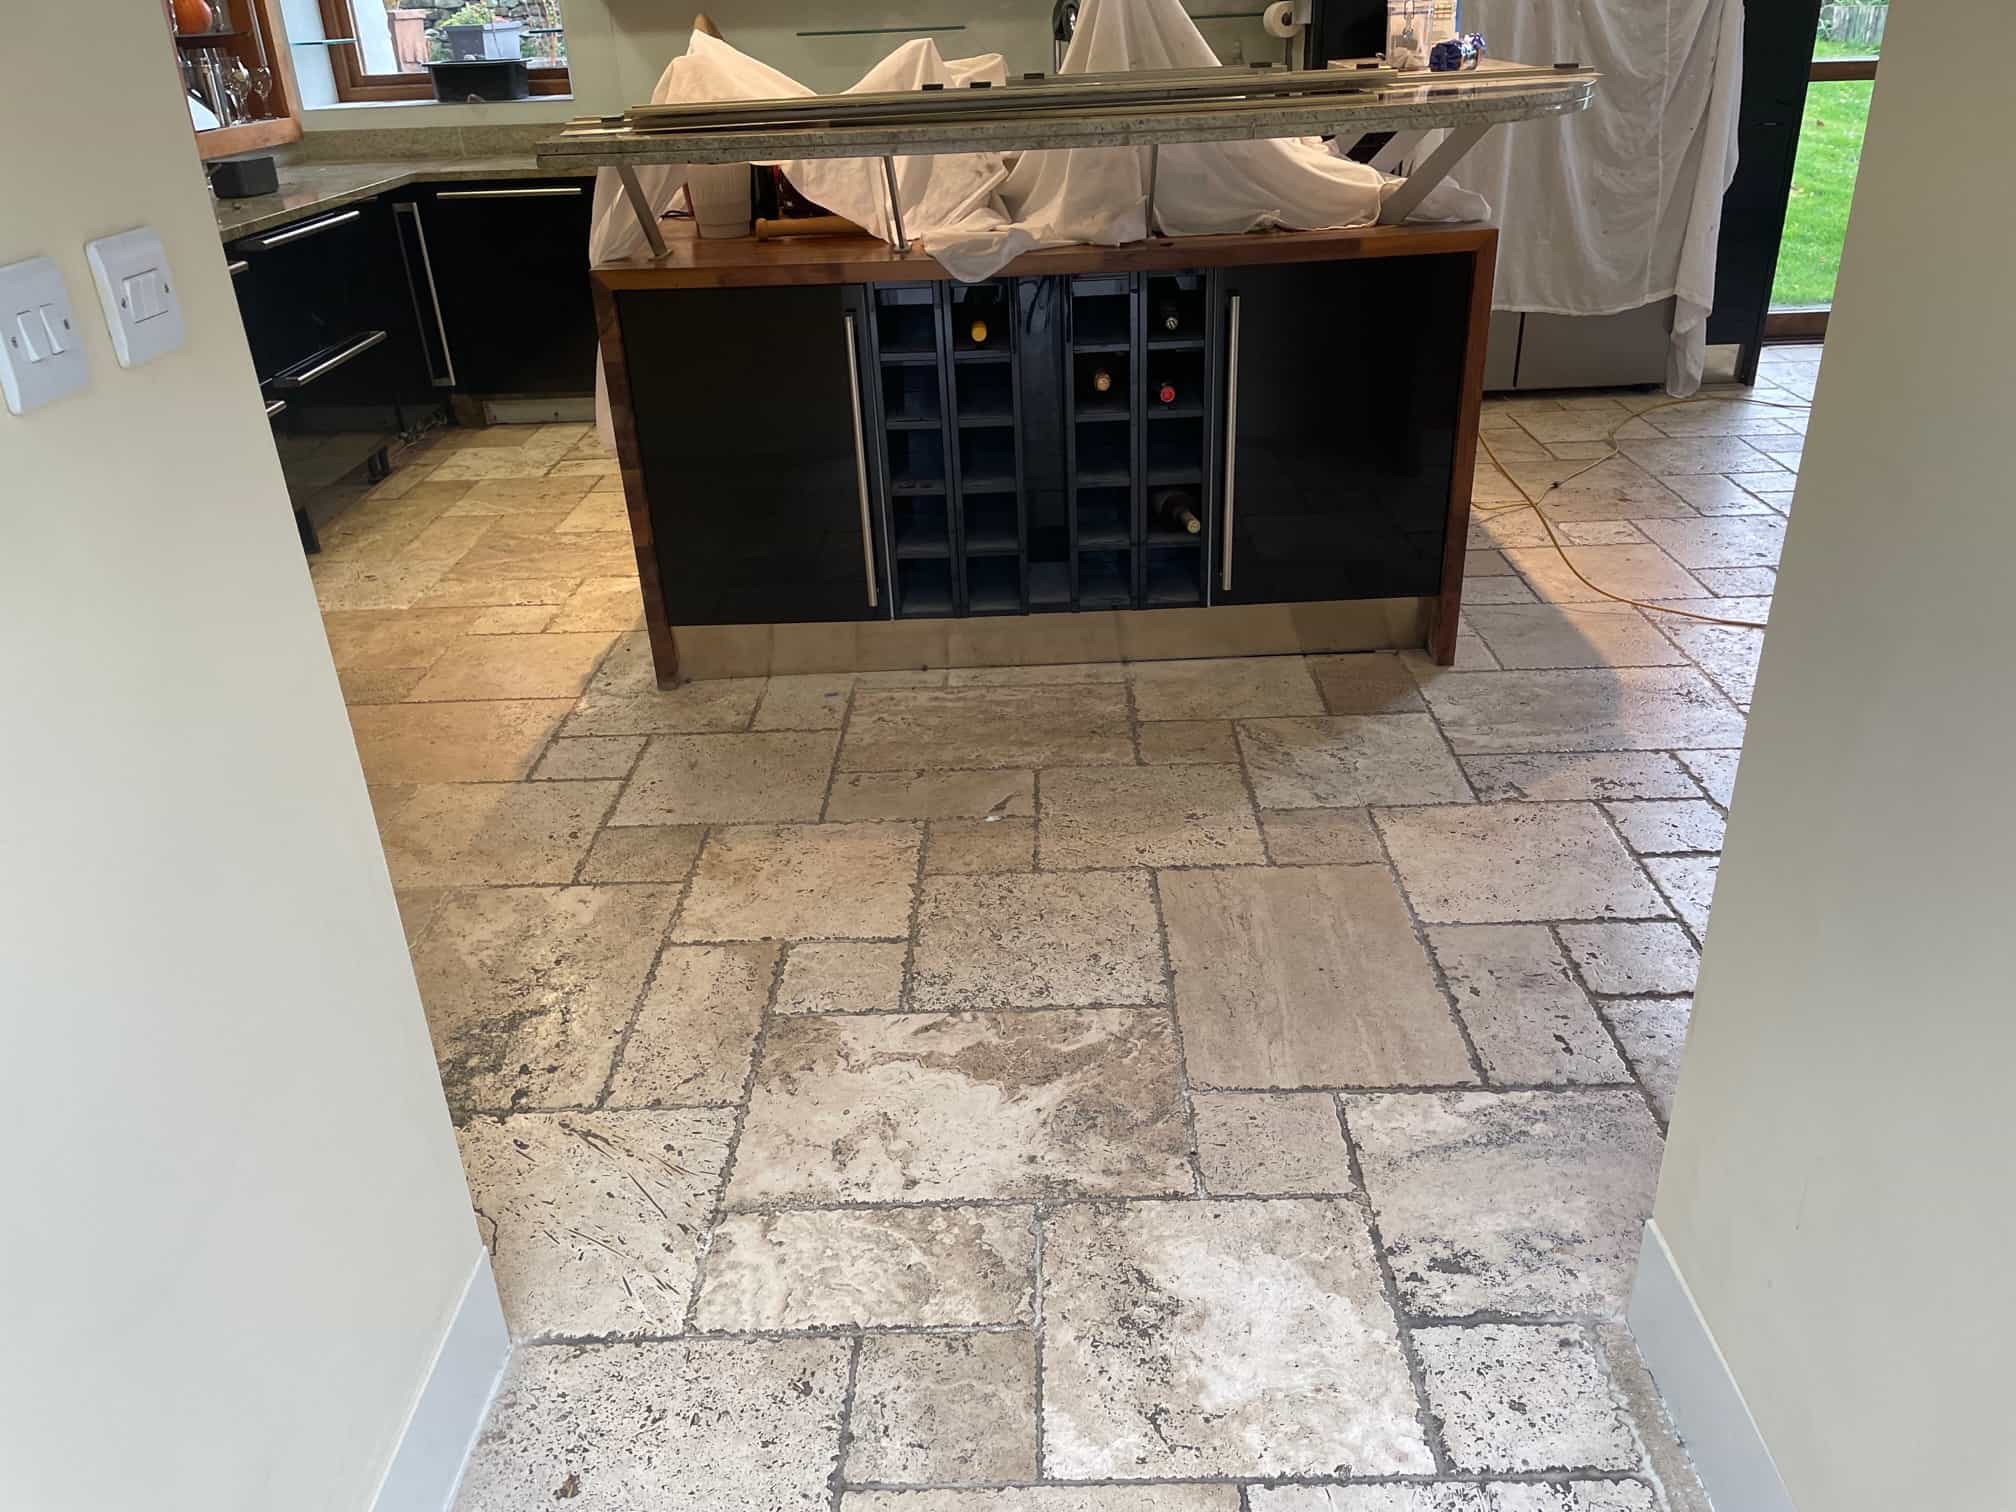
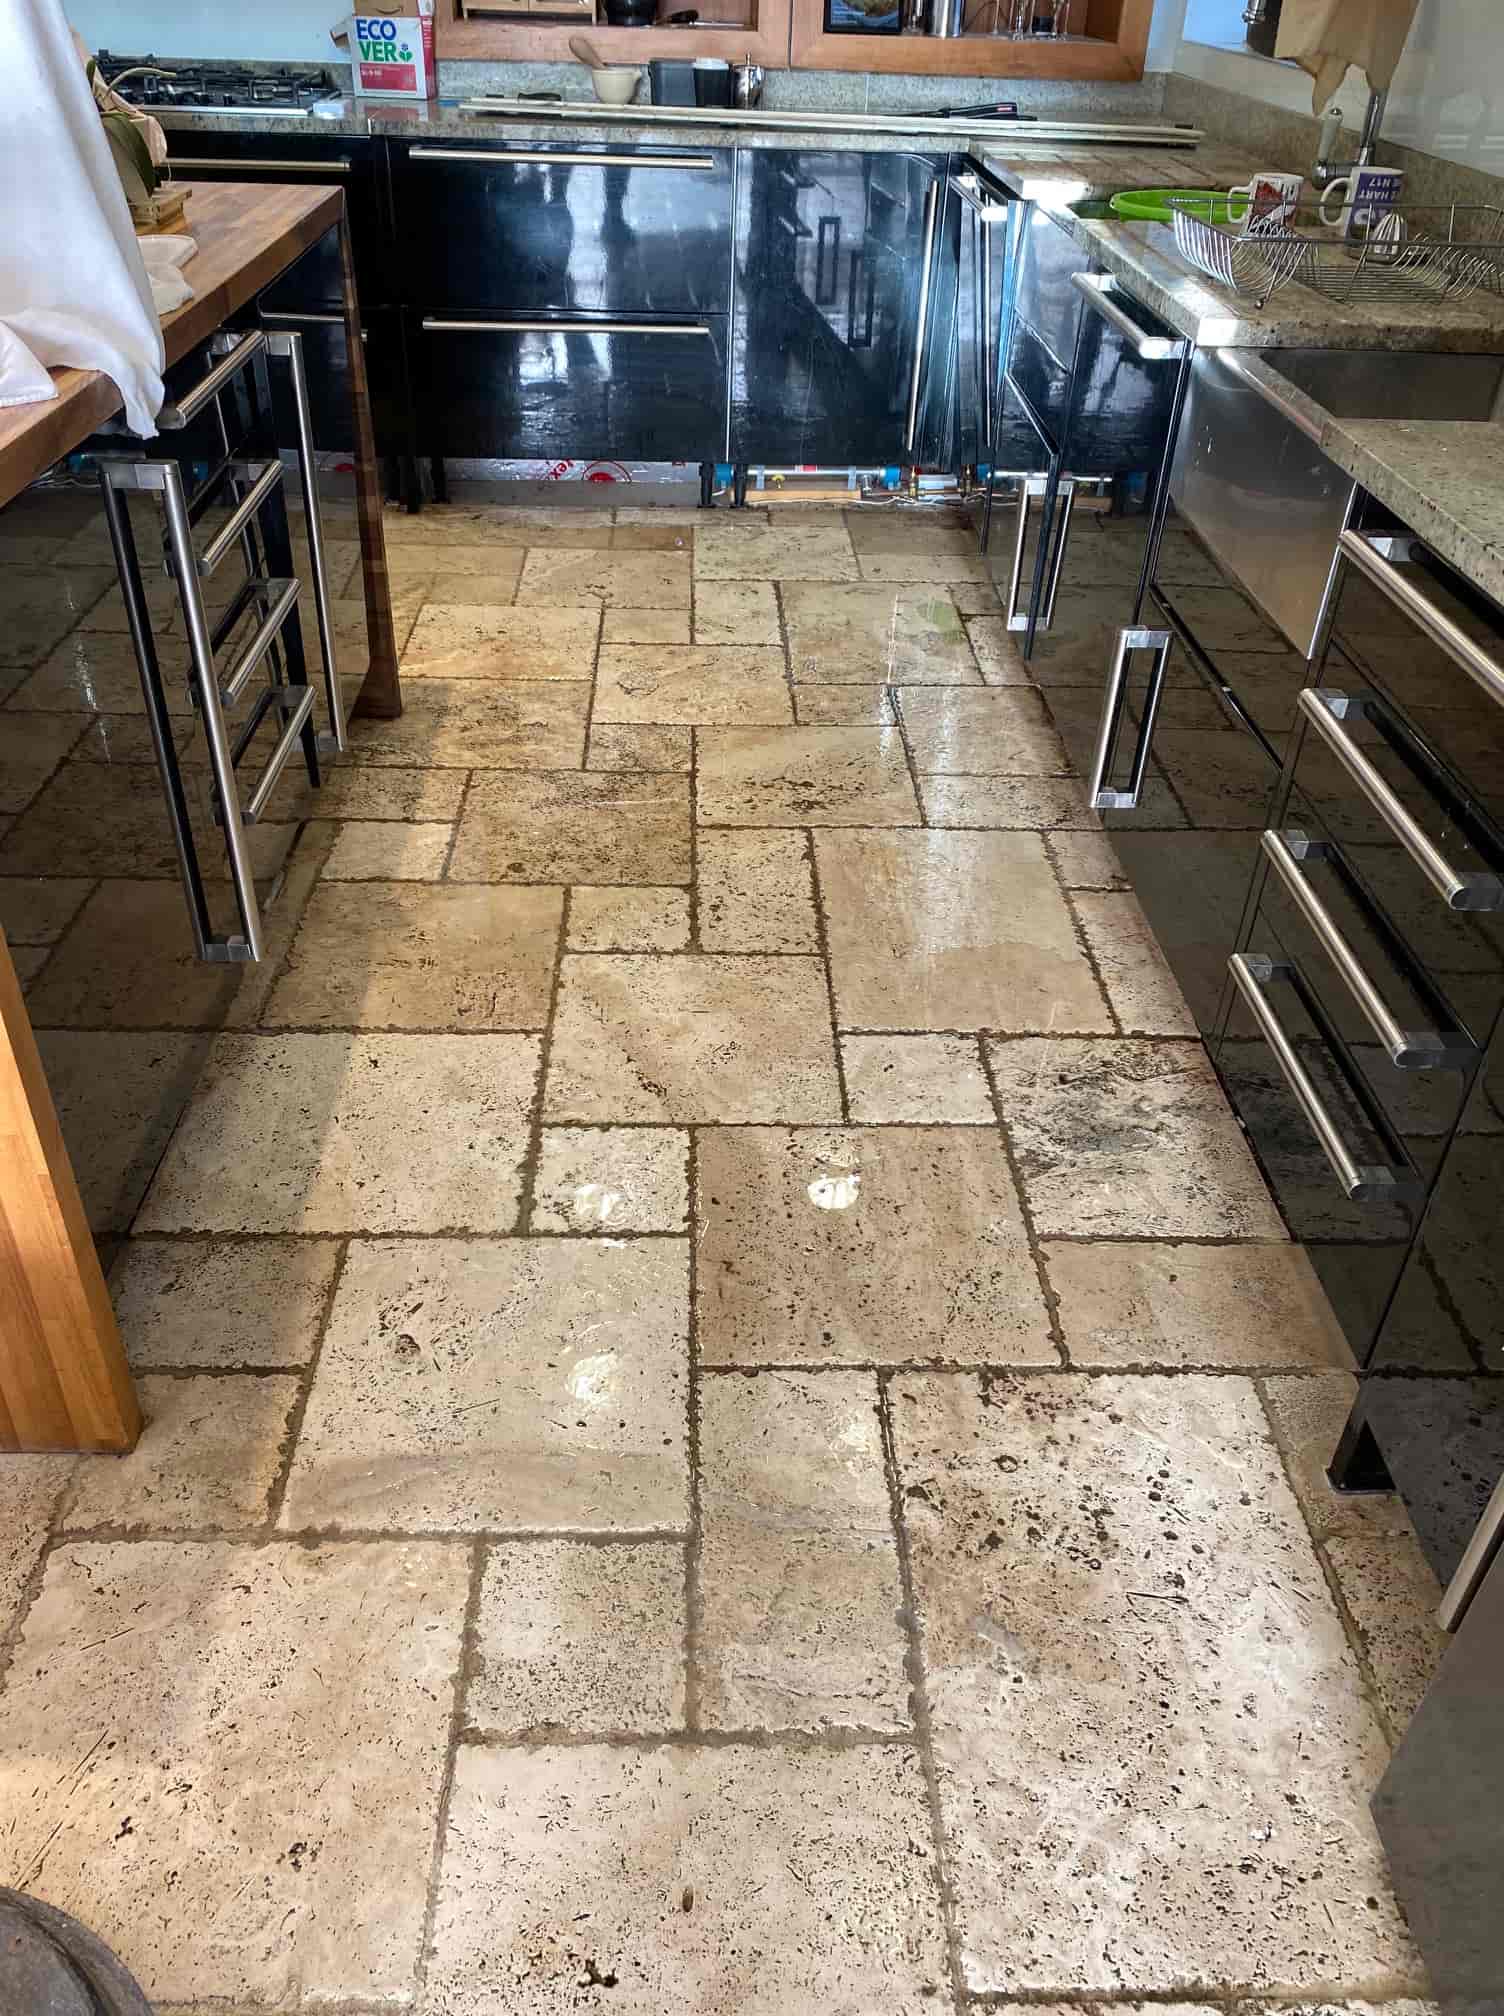
This customer in Preston in Lancashire had just moved into a house with a large 60m2 Travertine tiled floor that was installed throughout most of the ground floor. Travertine is a lovely stone but the previous owner had not maintained the sealer on the tiles and as a result it now looked grubby and there was a lot of dirt ingrained in the tiles leaving black staining, especially in the Kitchen.

Honed Unfilled Travertine Kitchen Floor Before Renovation Preston

This is a common problem with all natural stone floors, some are hardier than others but without a protective barrier in place they will attract dirt as the sealer become worn off. The new owner was seriously considering having the tiles ripped up, fortunately however they came across our service and decided to try having them renovated first.

Honed Unfilled Travertine Kitchen Floor Before Renovation Preston

Deep Cleaning a Travertine Tiled Floor

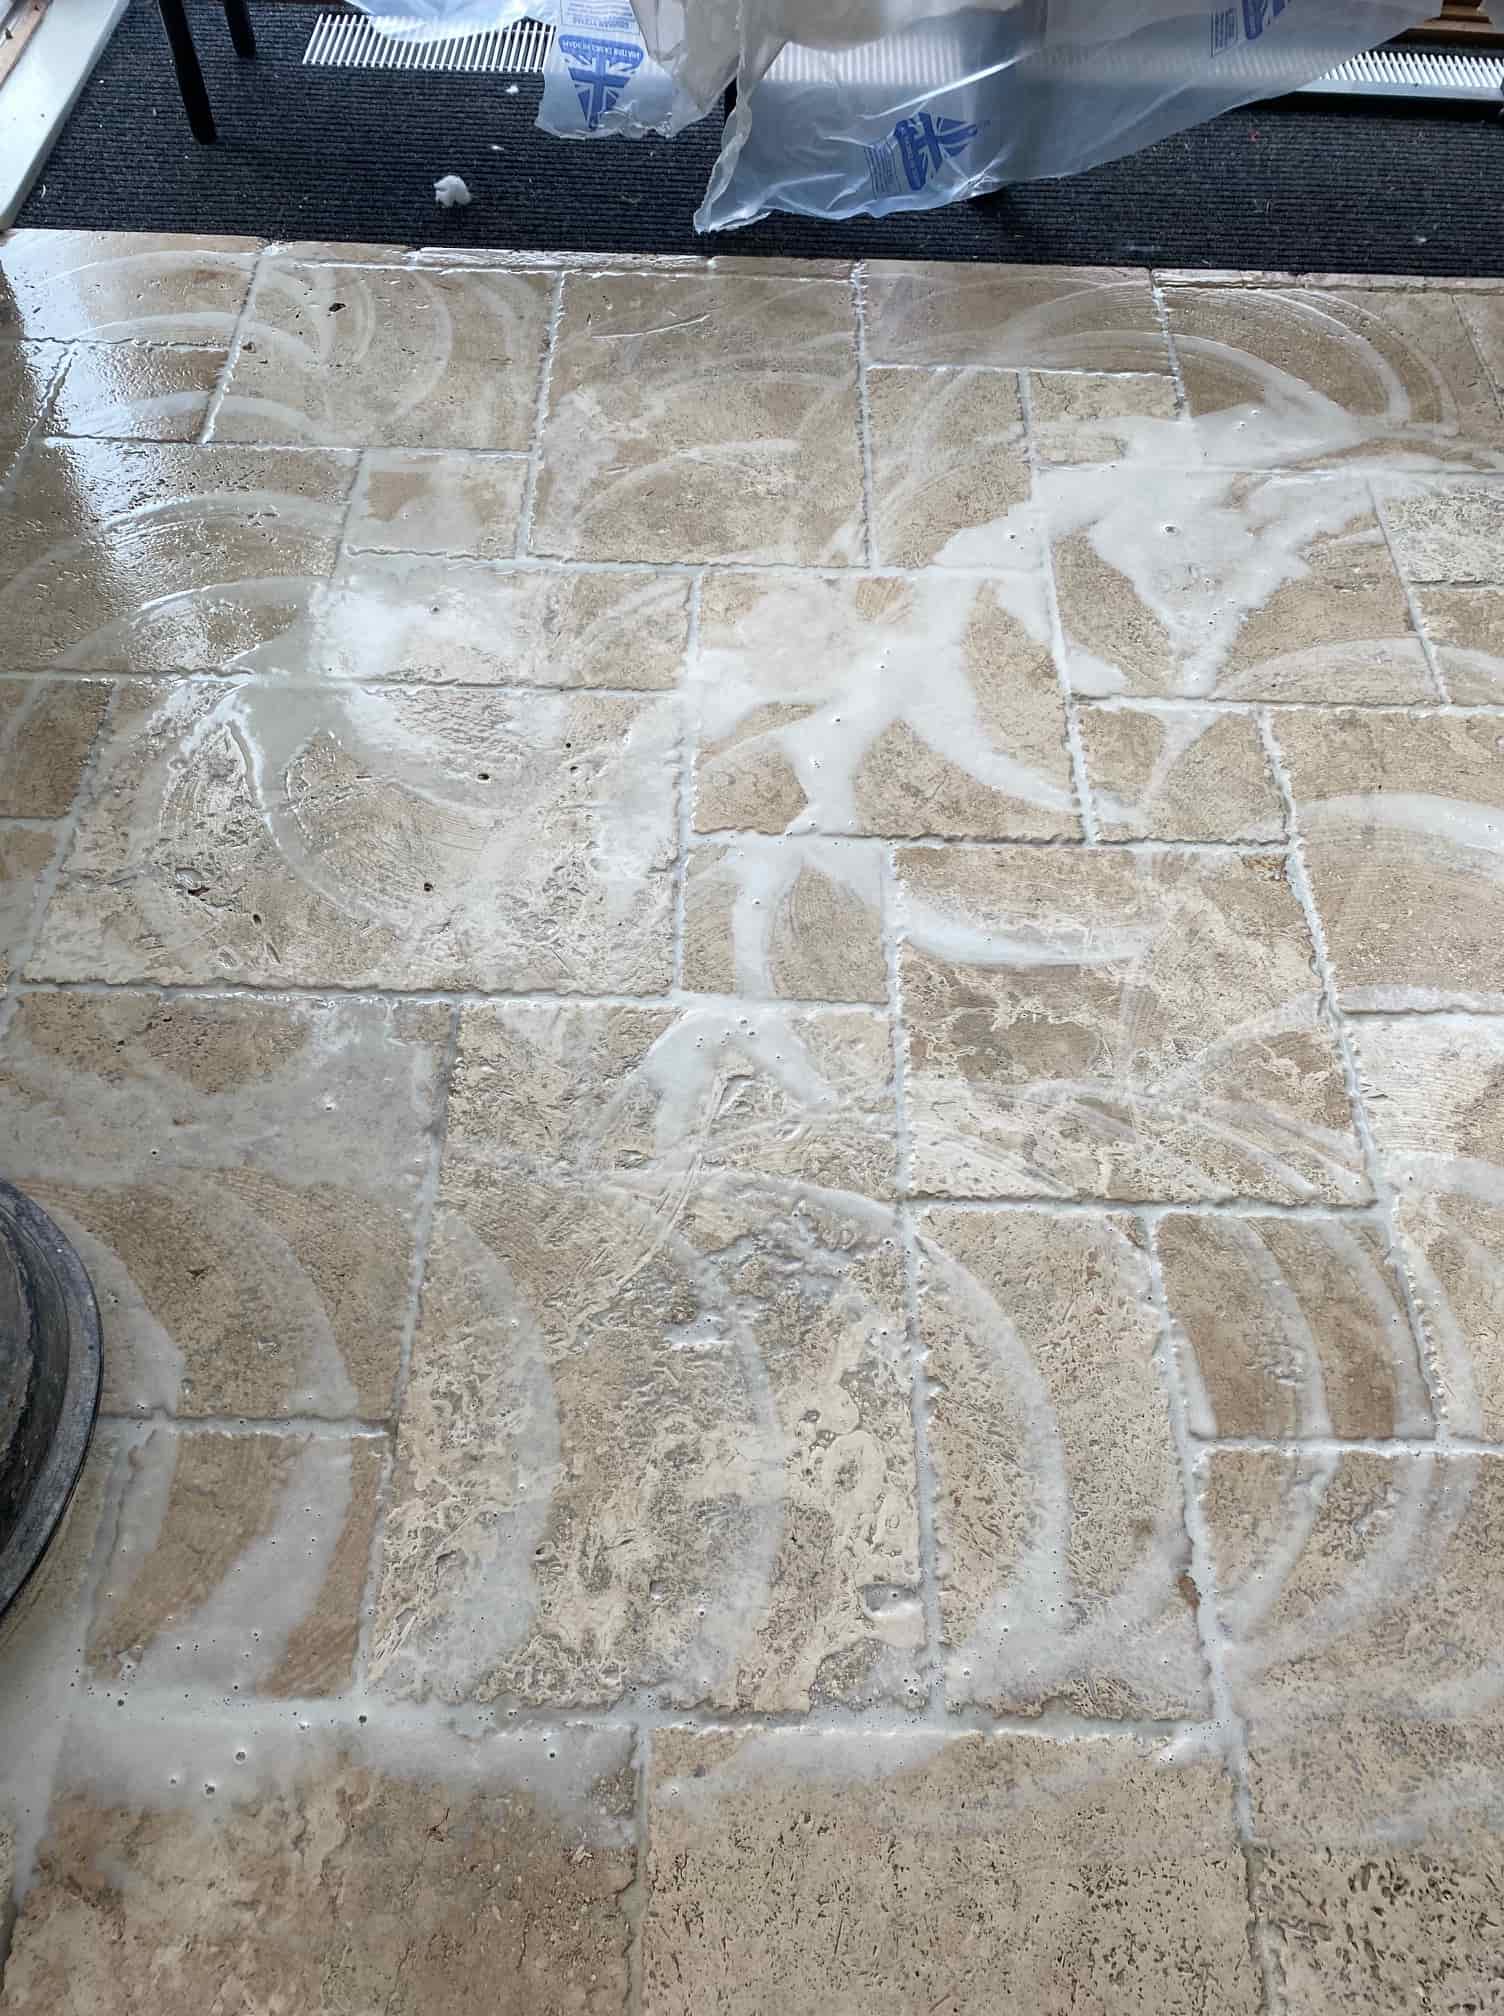
To get the stone clean and bring back the beautiful appearance of the Travertine I used several diamond burnishing pads which are run over the tiles with water for lubrication. The first was a coarse 200-grit pad which is fitted to a rotary floor machine and buffed into the stone in a circular motion. This process generates a lot of slurry which is then rinsed off afterwards and extracted with a wet vacuum.

Honed Unfilled Travertine Kitchen Floor During Renovation Preston

This process was then repeated using finer burnishing pads and continued with a 400-grit, 800-grit and finally a 1500-grit, again each pad was run over the tiles several times and then the slurry extracted as before. It’s a completely abrasive process with no other products needed and the result is a sealer and dirt-free tile.

Honed Unfilled Travertine Kitchen Floor During Renovation Preston

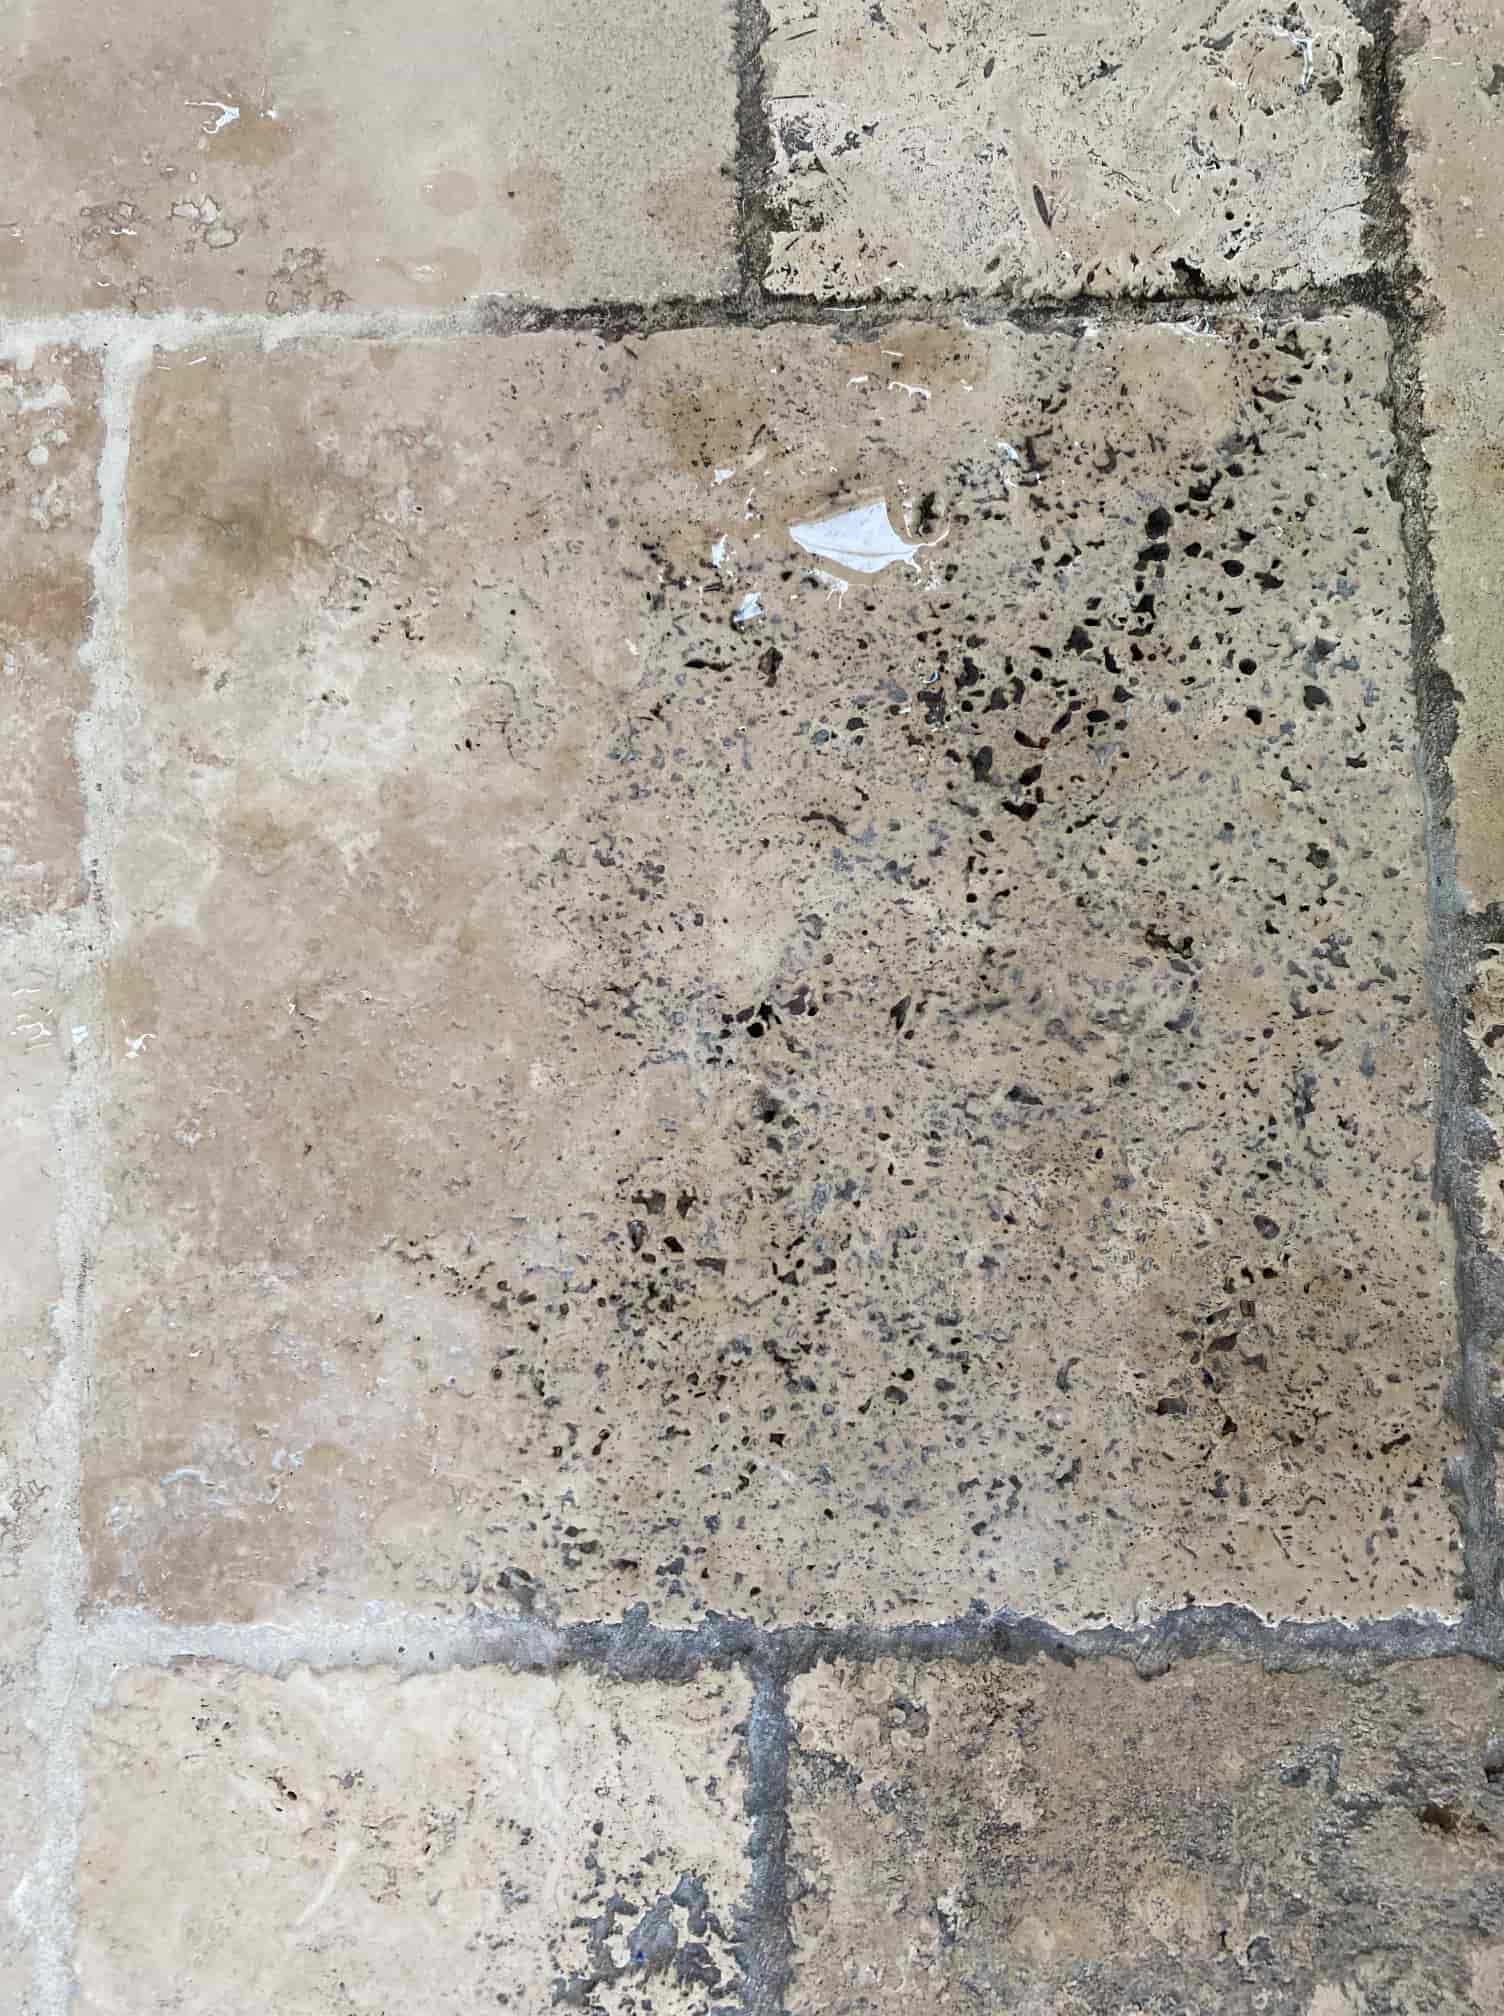
At this point I inspected the floor to see if the pads had been able to clean up the grout as well as the tile. Pads can struggle to reach down into the recess so I often find more work is needed on the grout. As suspected the Travertine had responded well to the treatment however it was clear the grout would need more work and was still stained black in places.

Normally use a grout cleaning product called Tile Doctor Pro-Clean for the grout but on this occasion, I felt something stronger would be needed. So, on this occasion I applied undiluted Tile Doctor Remove and Go along the grout lines and left it to soak in for ten minutes. It was then scrubbed in by hand, rinsed off and the soil remove with the wet vacuum. The grout cleaning had worked a treat and happy with the condition of the floor it was left to dry off overnight.

Sealing a Travertine Tiled Kitchen Floor

The next morning time was spent filling in holes (aka pitting) in the Travertine with colour matching grout before running over the whole floor with a very fine 3000-grit polishing pad to further bring up the appearance of the stone. This is done using a little water sprayed onto the tile a process we call a spray burnish.

Spray burnishing also leaves the floor dry and ready to be sealed. The owner wanted the Travertine to look as natural as possible so two coats of Tile Doctor Ultra Seal were applied. This is an impregnating sealer which is recommended for use on polished stone and for use in kitchens.

Honed Unfilled Travertine Kitchen Floor After Renovation Preston

Before leaving I took time to discuss aftercare cleaning and how important it is to avoid the use of strong cleaning products (especially bleach) on Travertine, not only will it degrade the sealer but can also harm the stone. For the regular cleaning of sealed Travertine, I recommend using Tile Doctor Stone Soap which is a gentle but effective cleaner that also helps maintain the patina.

Honed Unfilled Travertine Kitchen Floor After Renovation Preston


Professional Renovation of a Travertine Floor Tiles in Lancashire

Renovating a Large Stained Travertine Tiled Floor in Preston Read More »
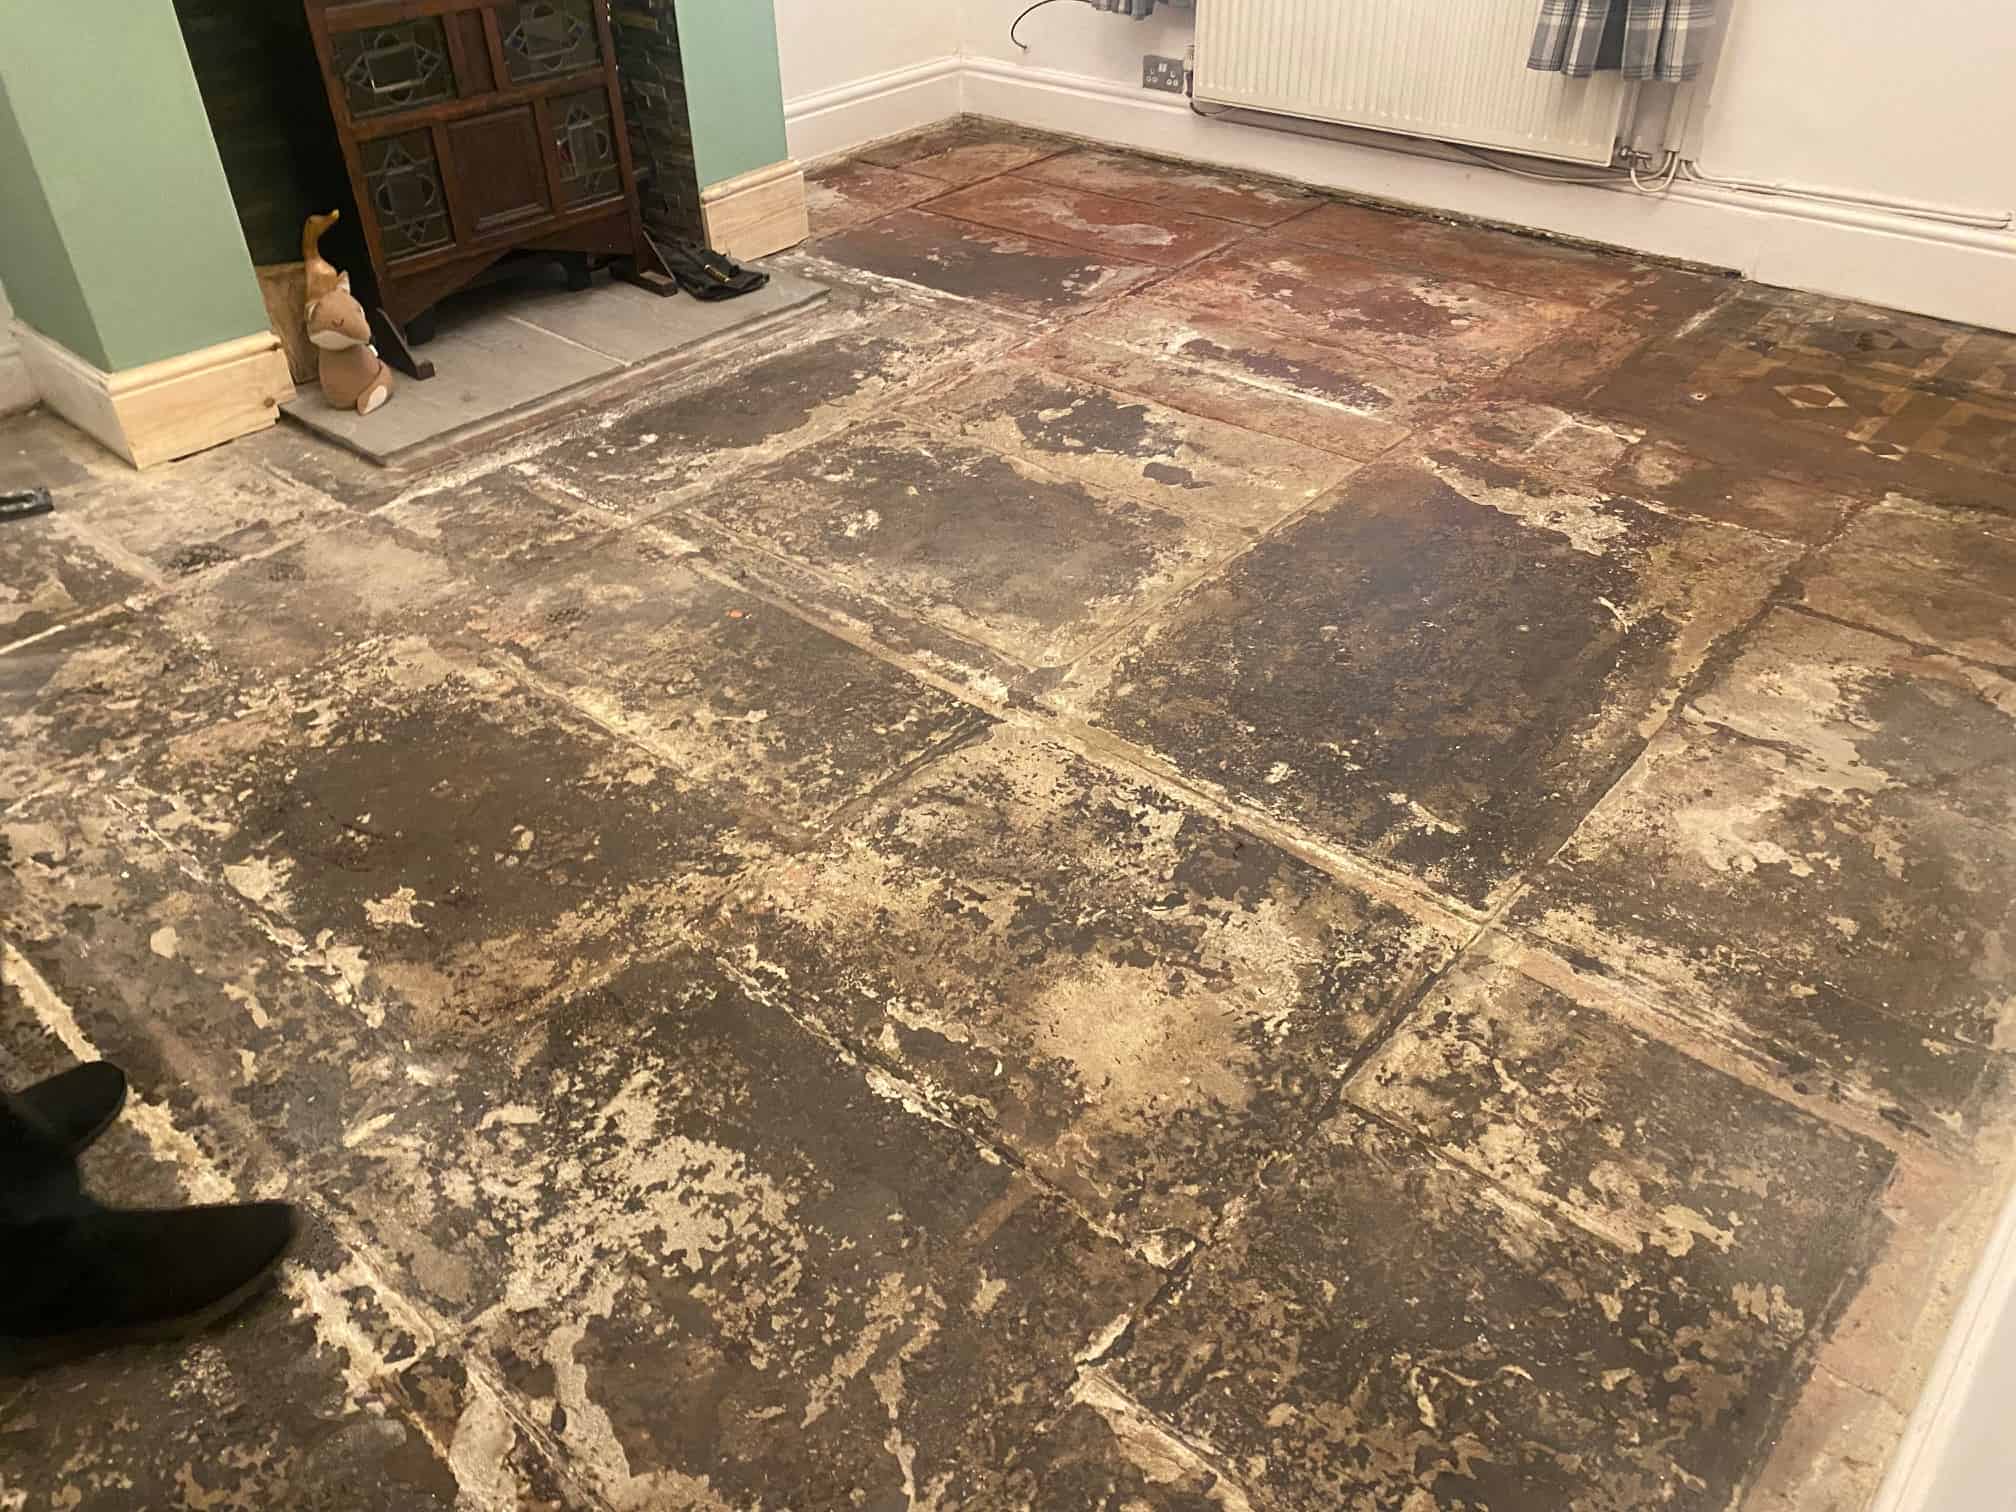
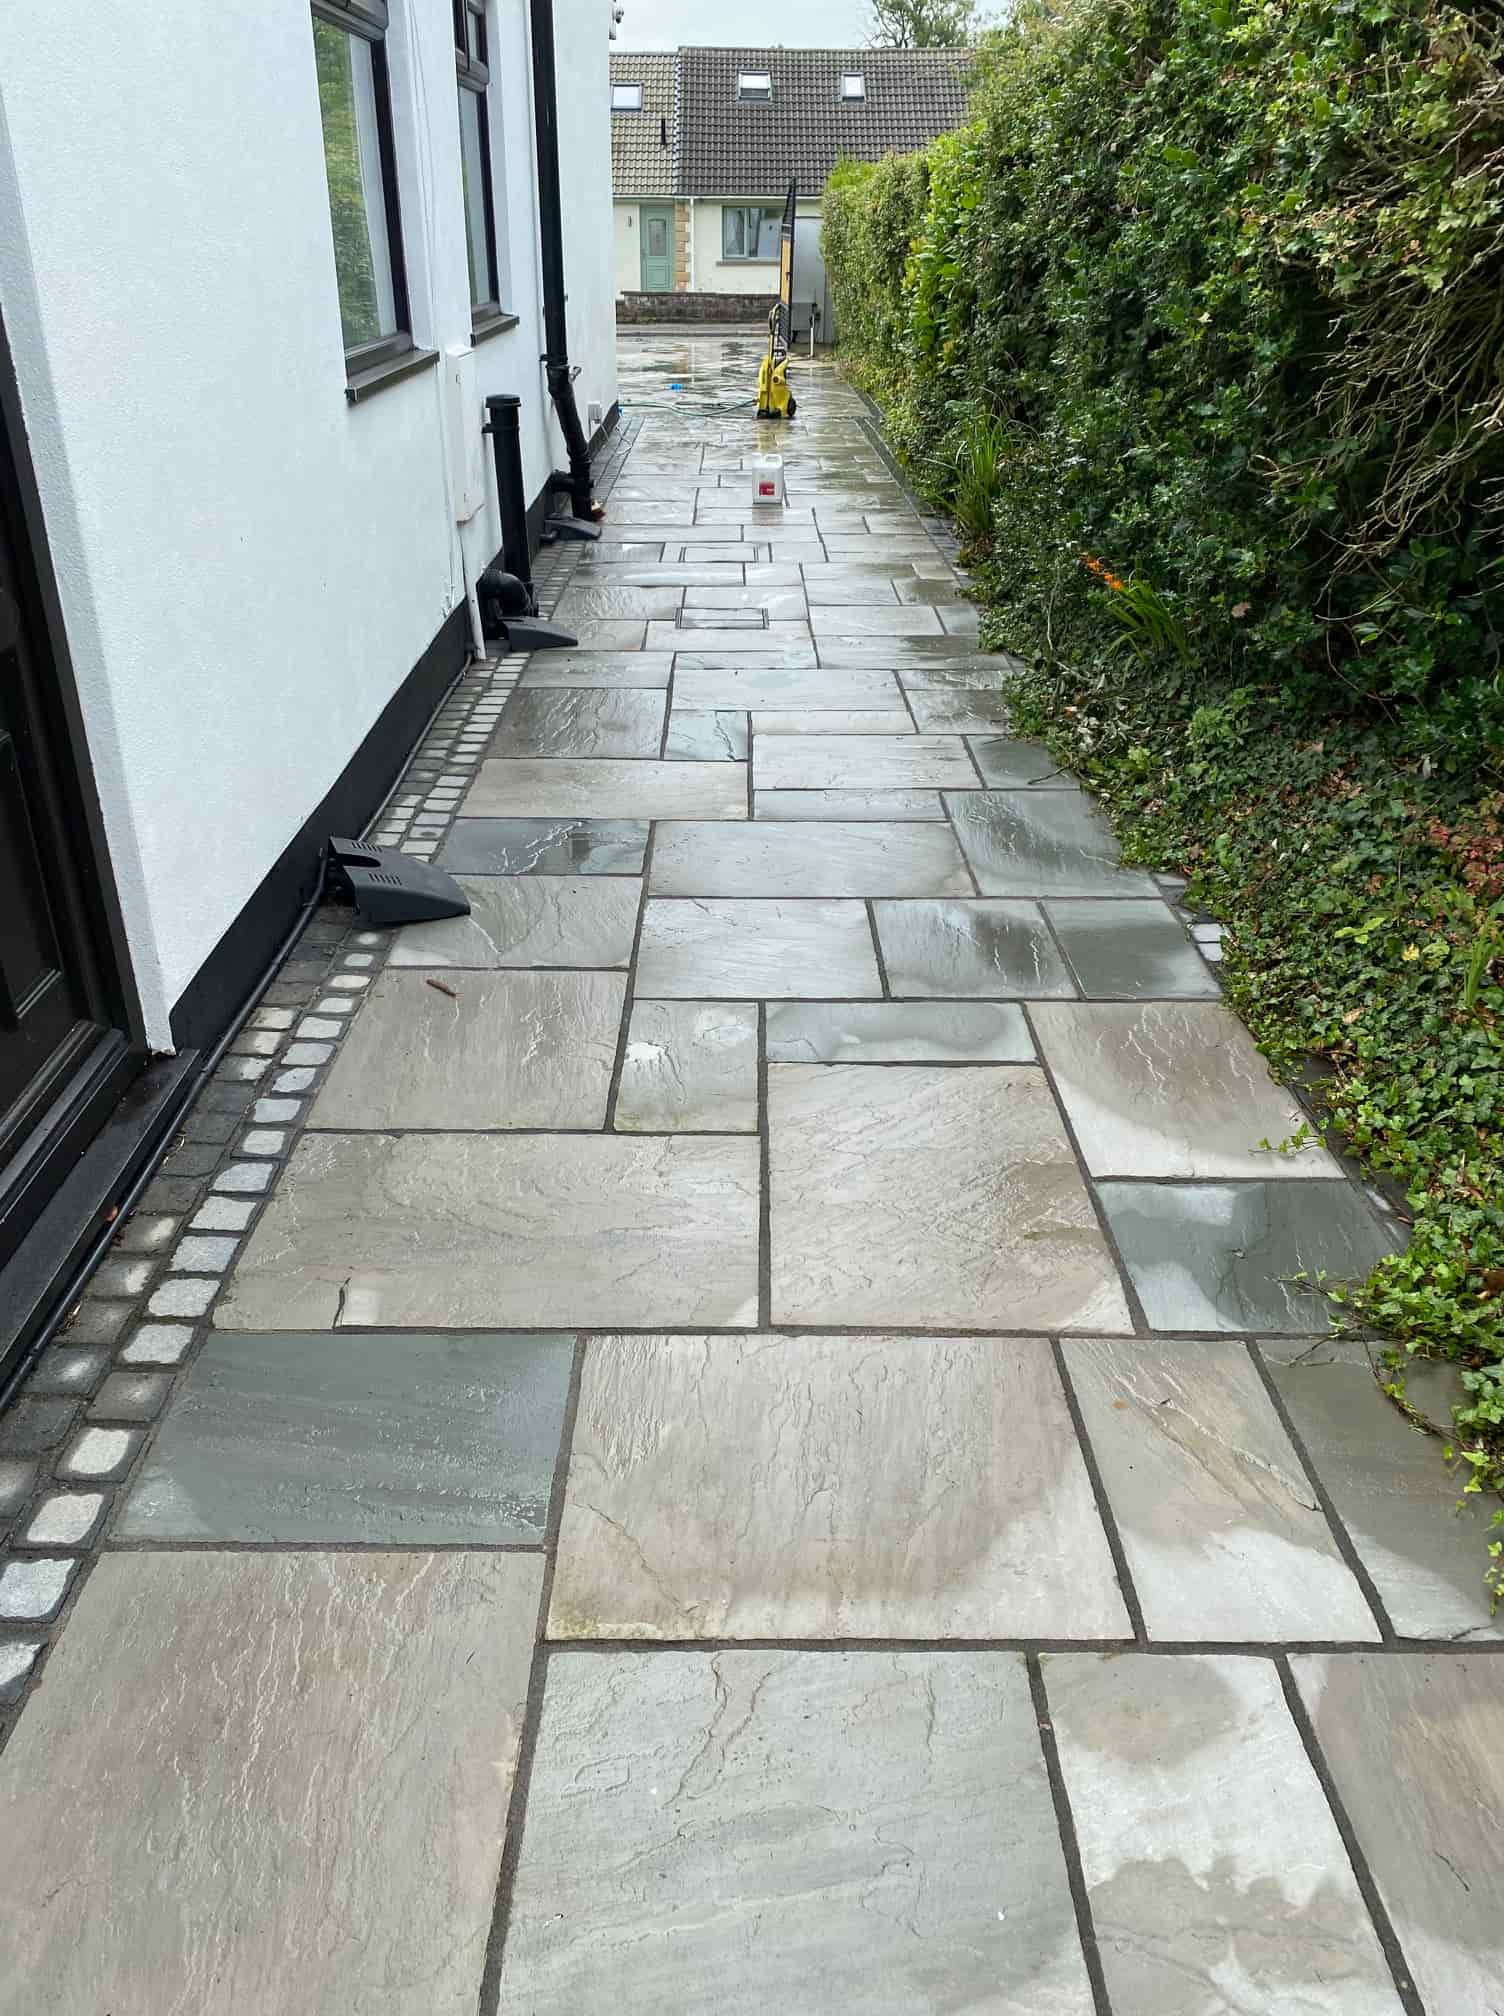
Indian Sandstone Patio Deep Cleaned in Lancaster

Large Indian Sandstone Patio Renovated in Lancaster

The picture below is of an Indian Sandstone Patio at a property in Lancaster which has turned green with algae and lichens from the surrounding bushes etc. It had been a while since it was properly cleaned and was likely to get worse over winter and slippery. You can see from the photograph that the beautiful stone was unrecognisable and clearly overdue a deep clean.

Indian Sandstone Patio Before Cleaning Lancaster

You would be right in thinking that Tile Doctors mainly work on internal floors but in fact were just as happy working outside as in, assuming the weather stays fine of course. In fact, we love working on driveways and patios as it’s nice to work outside for a change. We also have solutions for most problems including blackspot and deep-seated dirt.

Deep Cleaning an Indian Sandstone Patio in Lancaster

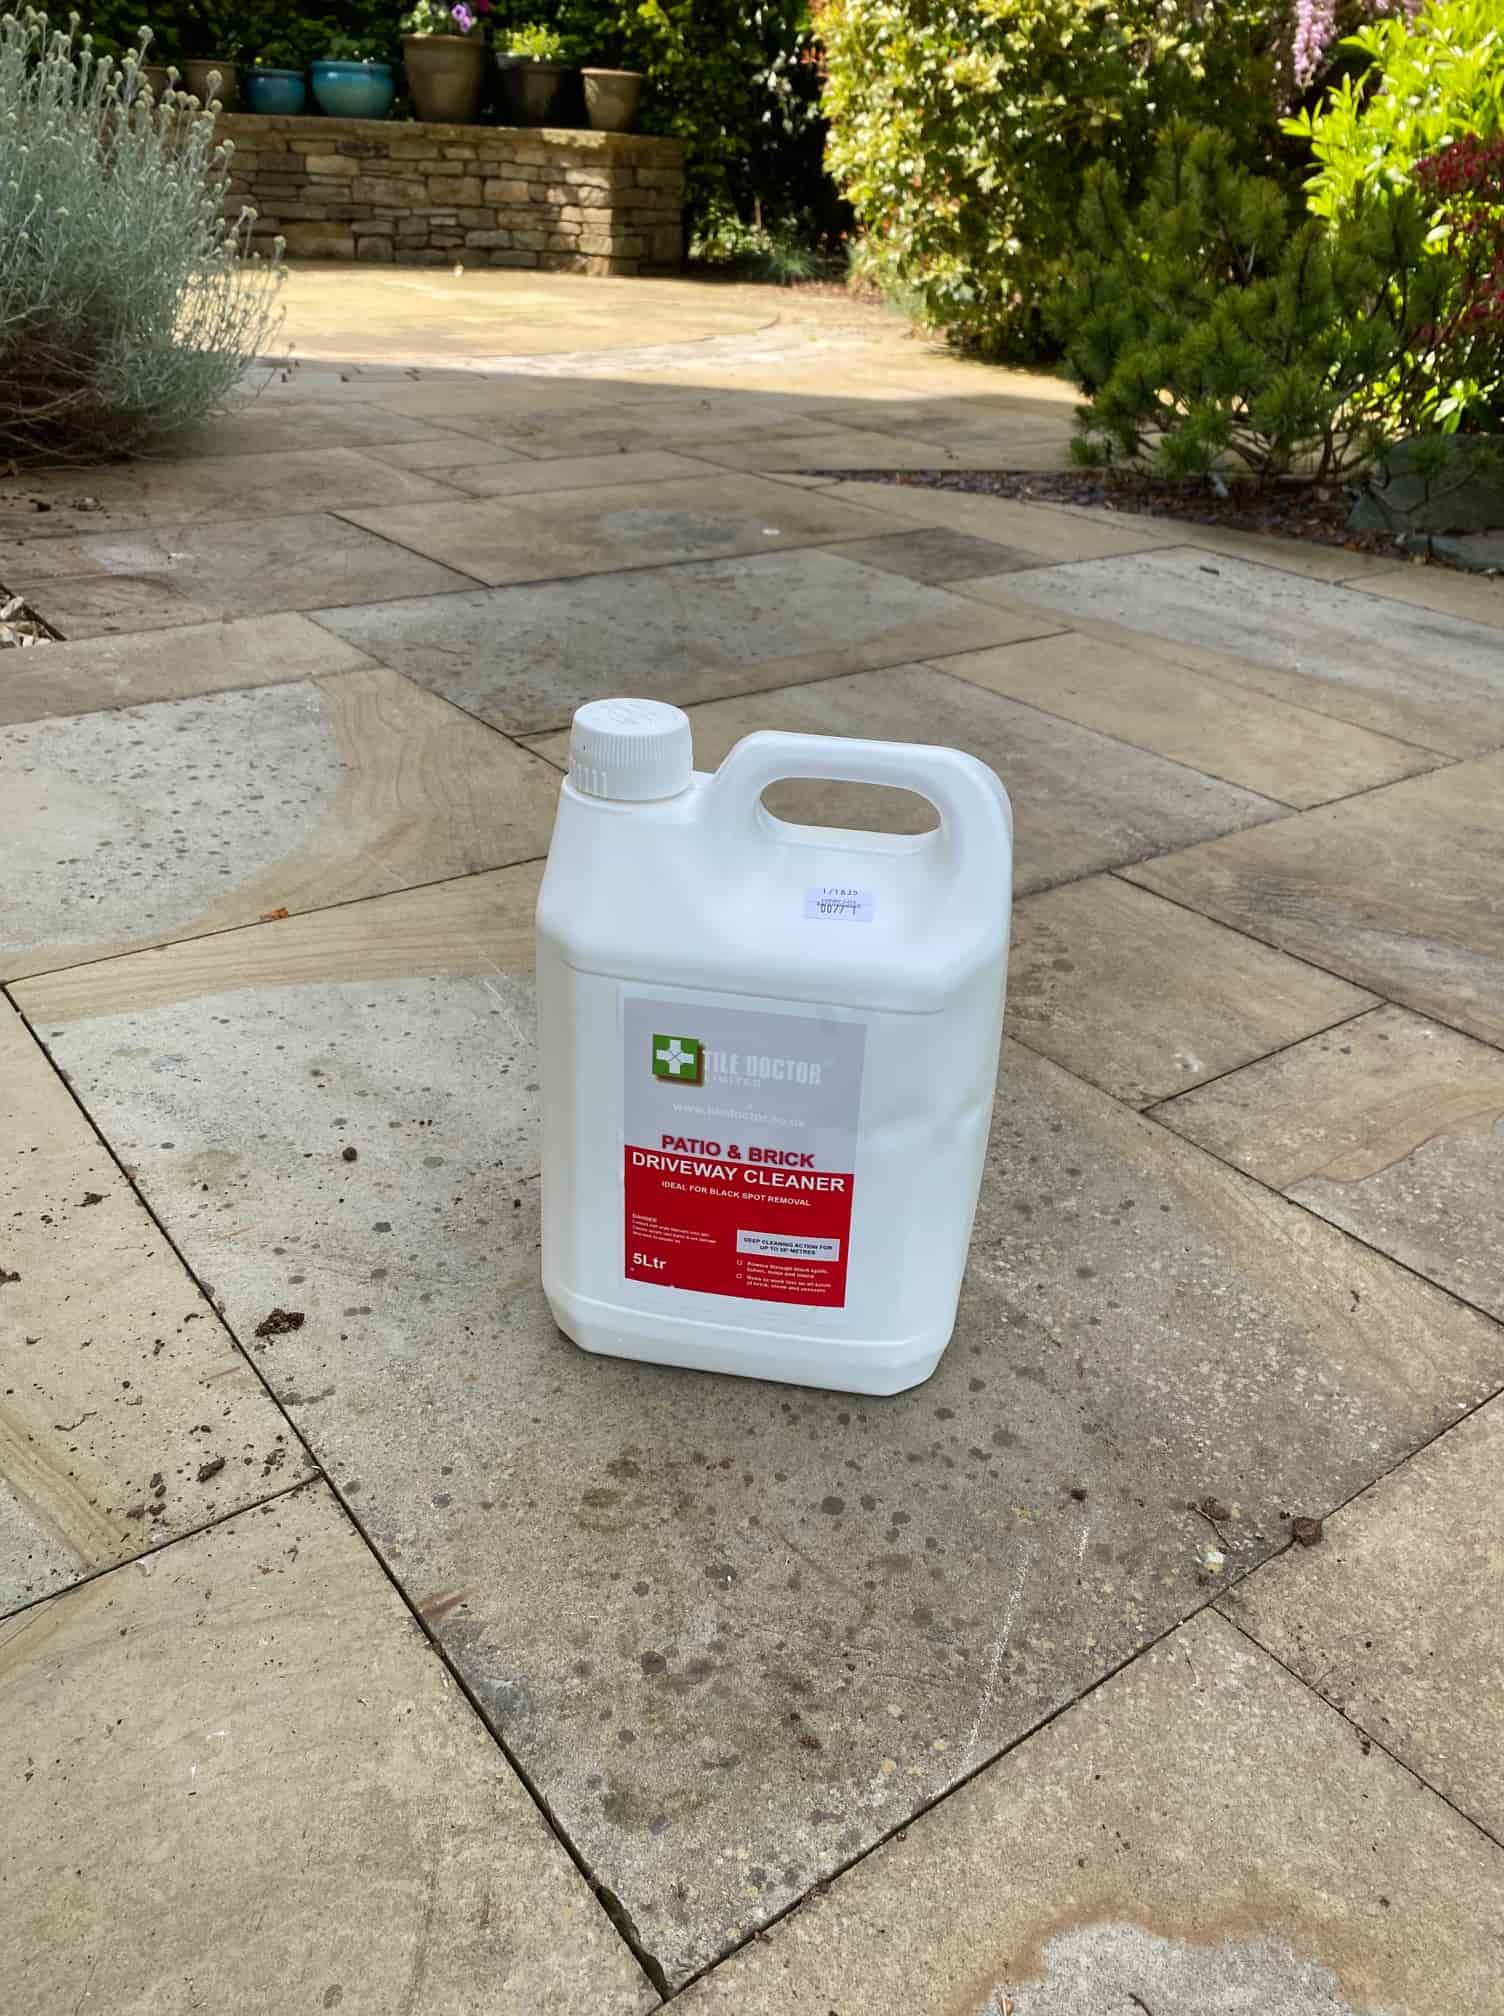
On arrival I started by power washing to remove as much dirt as possible, this was then rinsed off and the Sandstone inspected. I the sprayed the patio with Tile Doctor Patio & Brick Driveway Cleaner and left it to soak in and get to work for about half an hour. The patio was then scrubbed with a rotary machine fitted with a carbide brush. This process removes the deep-seated dirt and staining. The whole patio was then rinsed again to remove the soiling.

We have had some good weather this summer and so it wasn’t long before it had dried and I was able to inspect the patio and repeat the process focusing on the stubborn staining and to make sure the black spots were removed. To treat the Blackspot, I applied more Patio & Brick Driveway Cleaner directly to the affected areas and left it to get to work before hand-scrubbing it in. To be thorough I also looked for paint stains which can happen during the decorating of window frames, sills, and doors; I didn’t find any in this case but if I had I usually treat them using Tile Doctor Remove and Go.

Sealing an Indian Sandstone Patio in Lancaster

We don’t usually seal external tile and stone (unless it’s a Black Limestone or Marble), the reason being that the weather in Lancaster is very variable with hot weather in the summer (record breaking this year) down to minus ten degrees in winter.

Outdoor sealers can cope with these temperatures but will break down outside of their tolerant range, also its important to apply sealers when bone dry as any moisture trapped in the stone or tile could freeze and breakdown the sealer prematurely. If this happens you have no option but the take off all the existing sealer and start again, because of this we have concluded that for most external stone and tiles it’s best to just power wash them clean once or twice a year.

Indian Sandstone Patio After Cleaning Lancaster

Once done the natural beauty of the Indian Sandstone came through and the patio was transformed much to the delight of the owner.


Professional Restoration of an Indian Sandstone Paved Patio in Lancashire

Large Indian Sandstone Patio Renovated in Lancaster Read More »

Red and Black Victorian Tiled Floor Renovated in Lytham St Annes Lancashire

Traditional Black and Red Victorian Floor Renovated in Lytham St Annes

This property in Lytham St Annes had a large area of Black and Red Victorian floor tiles in the front room, dining room and scullery. The building dates to 1870, so the floor is likely to be over 150 years old which is a true testament to how well Victorian’s made and constructed materials even with the most basic of methods compared to modern times.

Red and Black Victorian Tiled Floor Before Cleaning Lytham St Annes

After inspecting the floor, I could see some of the tiles had characterful chips and marks in them, in fact none of them were perfect but I was confident they would still respond well to a deep clean and fresh seal. Having agreed a price and having discussed sealer options a date was scheduled for the work to commence.

Red and Black Victorian Tiled Floor Before Cleaning Lytham St Annes

Cleaning a Victorian Tiled Scullery, Front and Dining Room Floor

I was wary that such an old floor as this would not have a damp proof membrane and because of the sandy nature of Lytham’s geology I suspect was laid directly onto a sand base. Using a lot of water on a floor like this can result in long drying times and could exacerbate efflorescence issues. I therefore opted for a low moisture cleaning method that uses gel-based products.

To start we applied neat Tile Doctor Oxy-Gel which is an alkaline cleaning product safe for use on tile and grout. After being scrubbed into each tile with a black pad fitted to a rotary machine the soiling was then removed using a wet vacuum. It’s necessary to add a little water at this point as it makes extraction with the vacuum easier.

Once done the process was quickly repeated using Tile Doctor Acid Gel to give the floor an acid rinse. This process serves to clean up the floor further, removing old grout smears and countering alkaline salts latent in the tile that may lead to efflorescence later. Using an acid-based product at this point also neutralises the ph level of the floor following the use of an alkaline cleaner earlier.

The floor was then left to dry off overnight and went through the sealing options with the client, these particular tiles were laid directly on a sand base which was quite common back in the 1800s in Lytham as it’s just a bed of sand in that area of the country.

Sealing a Victorian Tiled Scullery, Front and Dining Room Floor

The next day we called back to seal the tiles and started by taking several moisture readings across the floors using a damp meter. The low moisture cleaning system method had worked and all the readings were with tolerance.

Three coats of Tile Doctor Colour Grow were then applied to the tiles allowing approximately thirty minutes between coats. Colour Grow was ideal for these tiles as its fully breathable and with a built-on colour enhancer it helped the red and black tiles stand out. A fully breathable sealer is necessary for a floor without a damp proof membrane as it will allow moisture from the sub floor to rise through the tile and evaporate at the surface, using a non-breathable product will result in moisture building up under the floor until it reaches out the walls potentially leading to rising damp.

Red and Black Victorian Tiled Floor After Cleaning Sealing Lytham St Annes

The floor was transformed by our efforts and before leaving I recommended that for regular cleaning, they use a ph neutral cleaning product such as Tile Doctor Neutral Cleaner, many of the tile cleaning products you find in supermarkets today are bleach based and simply too strong for the sealer.

Red and Black Victorian Tiled Floor After Cleaning Sealing Lytham St Annes


Professional Restoration of a Victorian Tiled Flooring in Lancashire

Traditional Black and Red Victorian Floor Renovated in Lytham St Annes Read More »

Mouldy Ceramic Tiled Bathroom Refresh Hest Bank

Renovation of a Mouldy Ceramic Tiled Bathroom in Hest Bank Lancaster

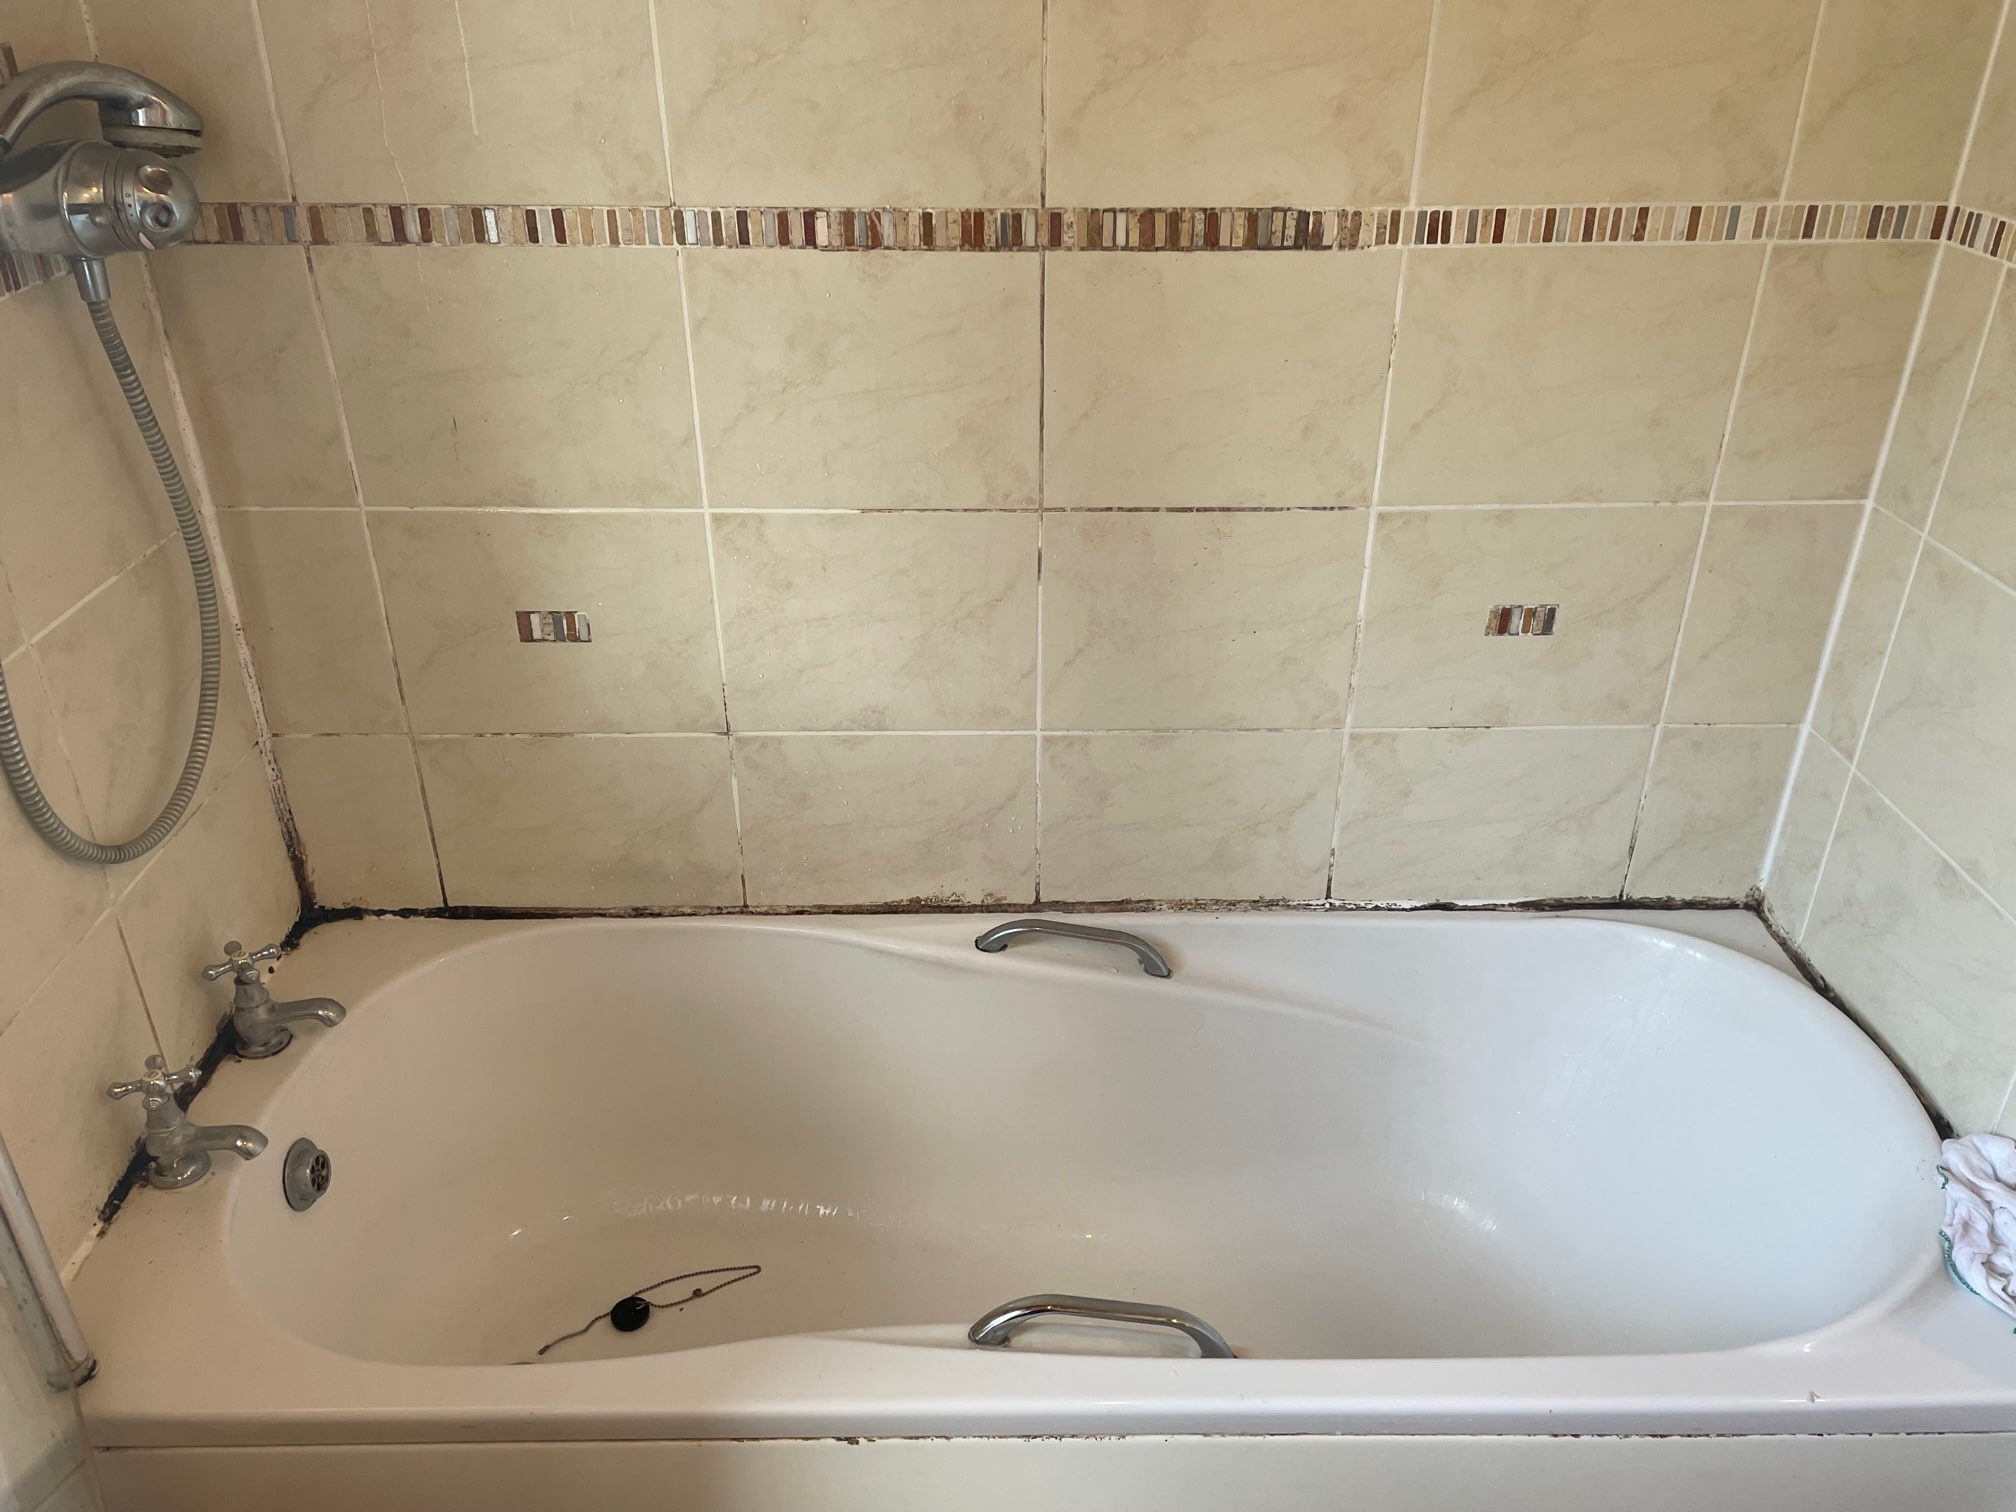
We were recently asked to refresh the Ceramic Wall Tile and Grout in the bathroom of a property in Hest Bank which is a small village on the coast North of Morecombe Bay and Lancaster. Ceramic tiles are glazed so very easy to keep clean however the main issue wasn’t the tiles themselves but the grout and silicone sealant which over time had turned black in some areas due to mould and staining.

Ceramic Tiled Bathroom Before Cleaning Hest Bank

This is not uncommon problem in small bathroom were a general lack of ventilation provides the moist conditions that mould thrives in. Additionally, the top layer of grout is slightly porous and having a rough surface it does attract dirt over time.

The only real solution to this problem is to improve the ventilation however you can minimise the problem by opening windows during showering and leaving the bathroom door open afterwards to improve cross ventilation. In the meantime, however you can keep on top of the problem with a little renovation work.

Ceramic Tiled Bathroom Before Cleaning Hest Bank

Deep Cleaning Grout in a Ceramic Tiled Bathroom

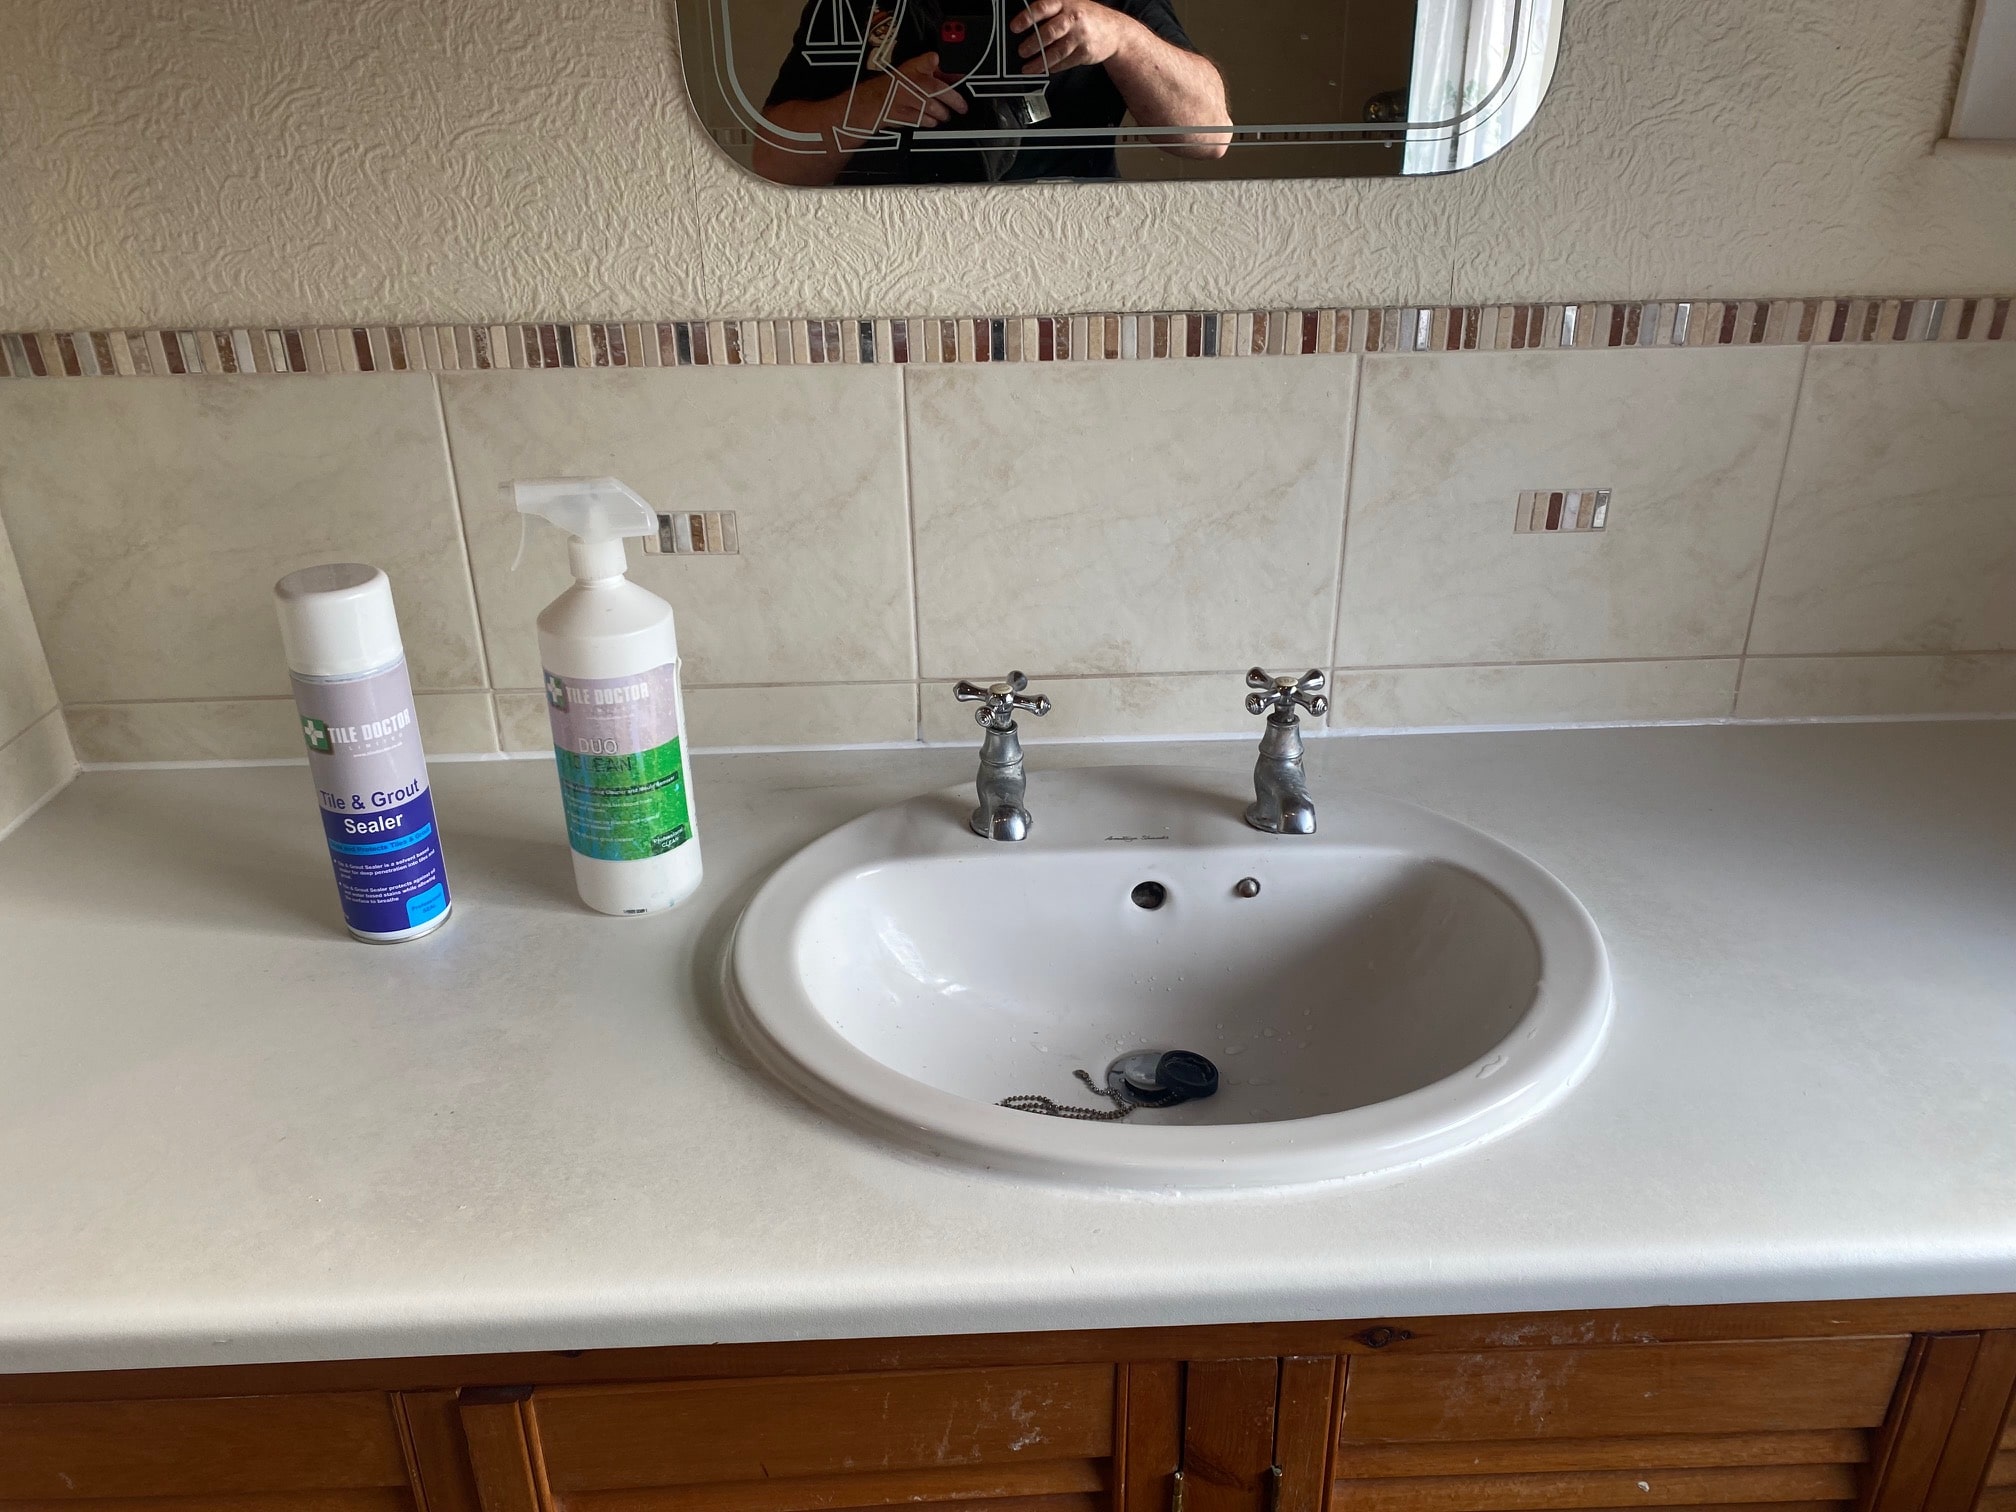
The renovation started by scrubbing the grout and sealant with Tile Doctor Duo-Clean which is a purpose made bathroom tile and grout cleaner designed to tackle mould and staining. It also kills mould spores that are still prevalent and can respawn resulting in more mould. Once done, I always like to leave any remaining product with the client for this reason so they can re-treat the problem in the future.

Scrubbing with Duo Clean worked well but some of the staining was simply so deep to remove so the only solution was to scrape it out of the grout joints with a flat blade and Stanley Knife and then re-grout. The silicone sealant around the bathtub was very badly affected by mould and had to be completely stripped out using the same method.

Grout Sealing a Ceramic Tiled Bathroom

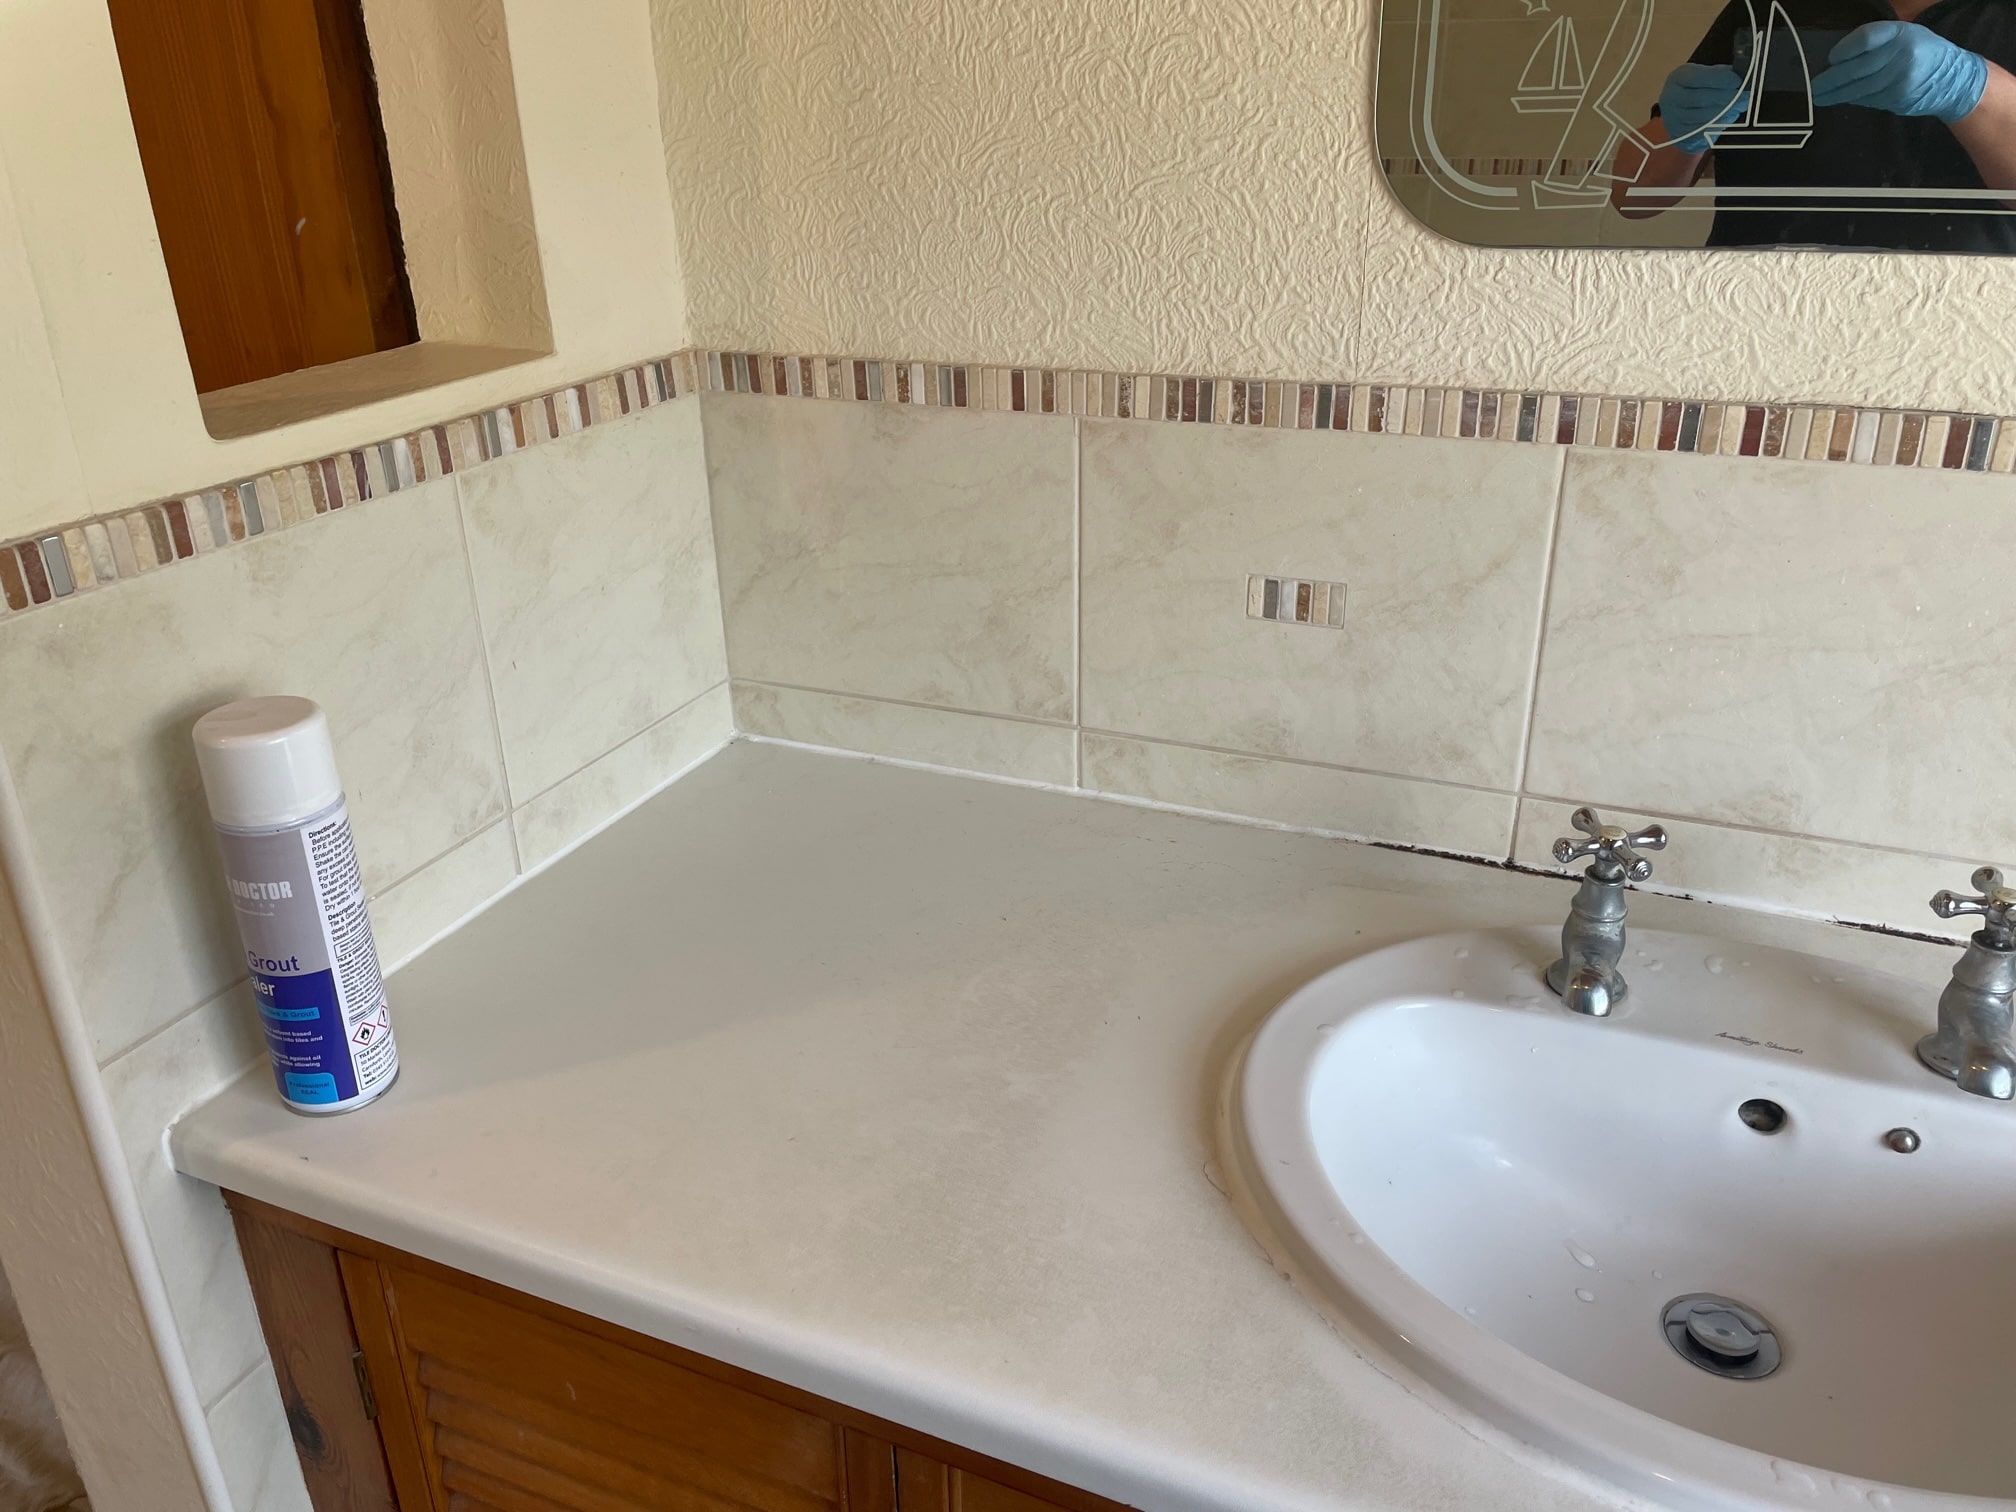
Once the treatment was completed the tile and grout was dried off thoroughly and then a coat of Tile Doctor Wall Tile and Grout Sealer was sprayed onto the grout to help protect it from mould forming going forward. This product is very easy to use and adds a protective layer over the surface of the grout to prevent the mould spores or limescale attaching itself. It also makes the tile and grout easier to clean afterwards.

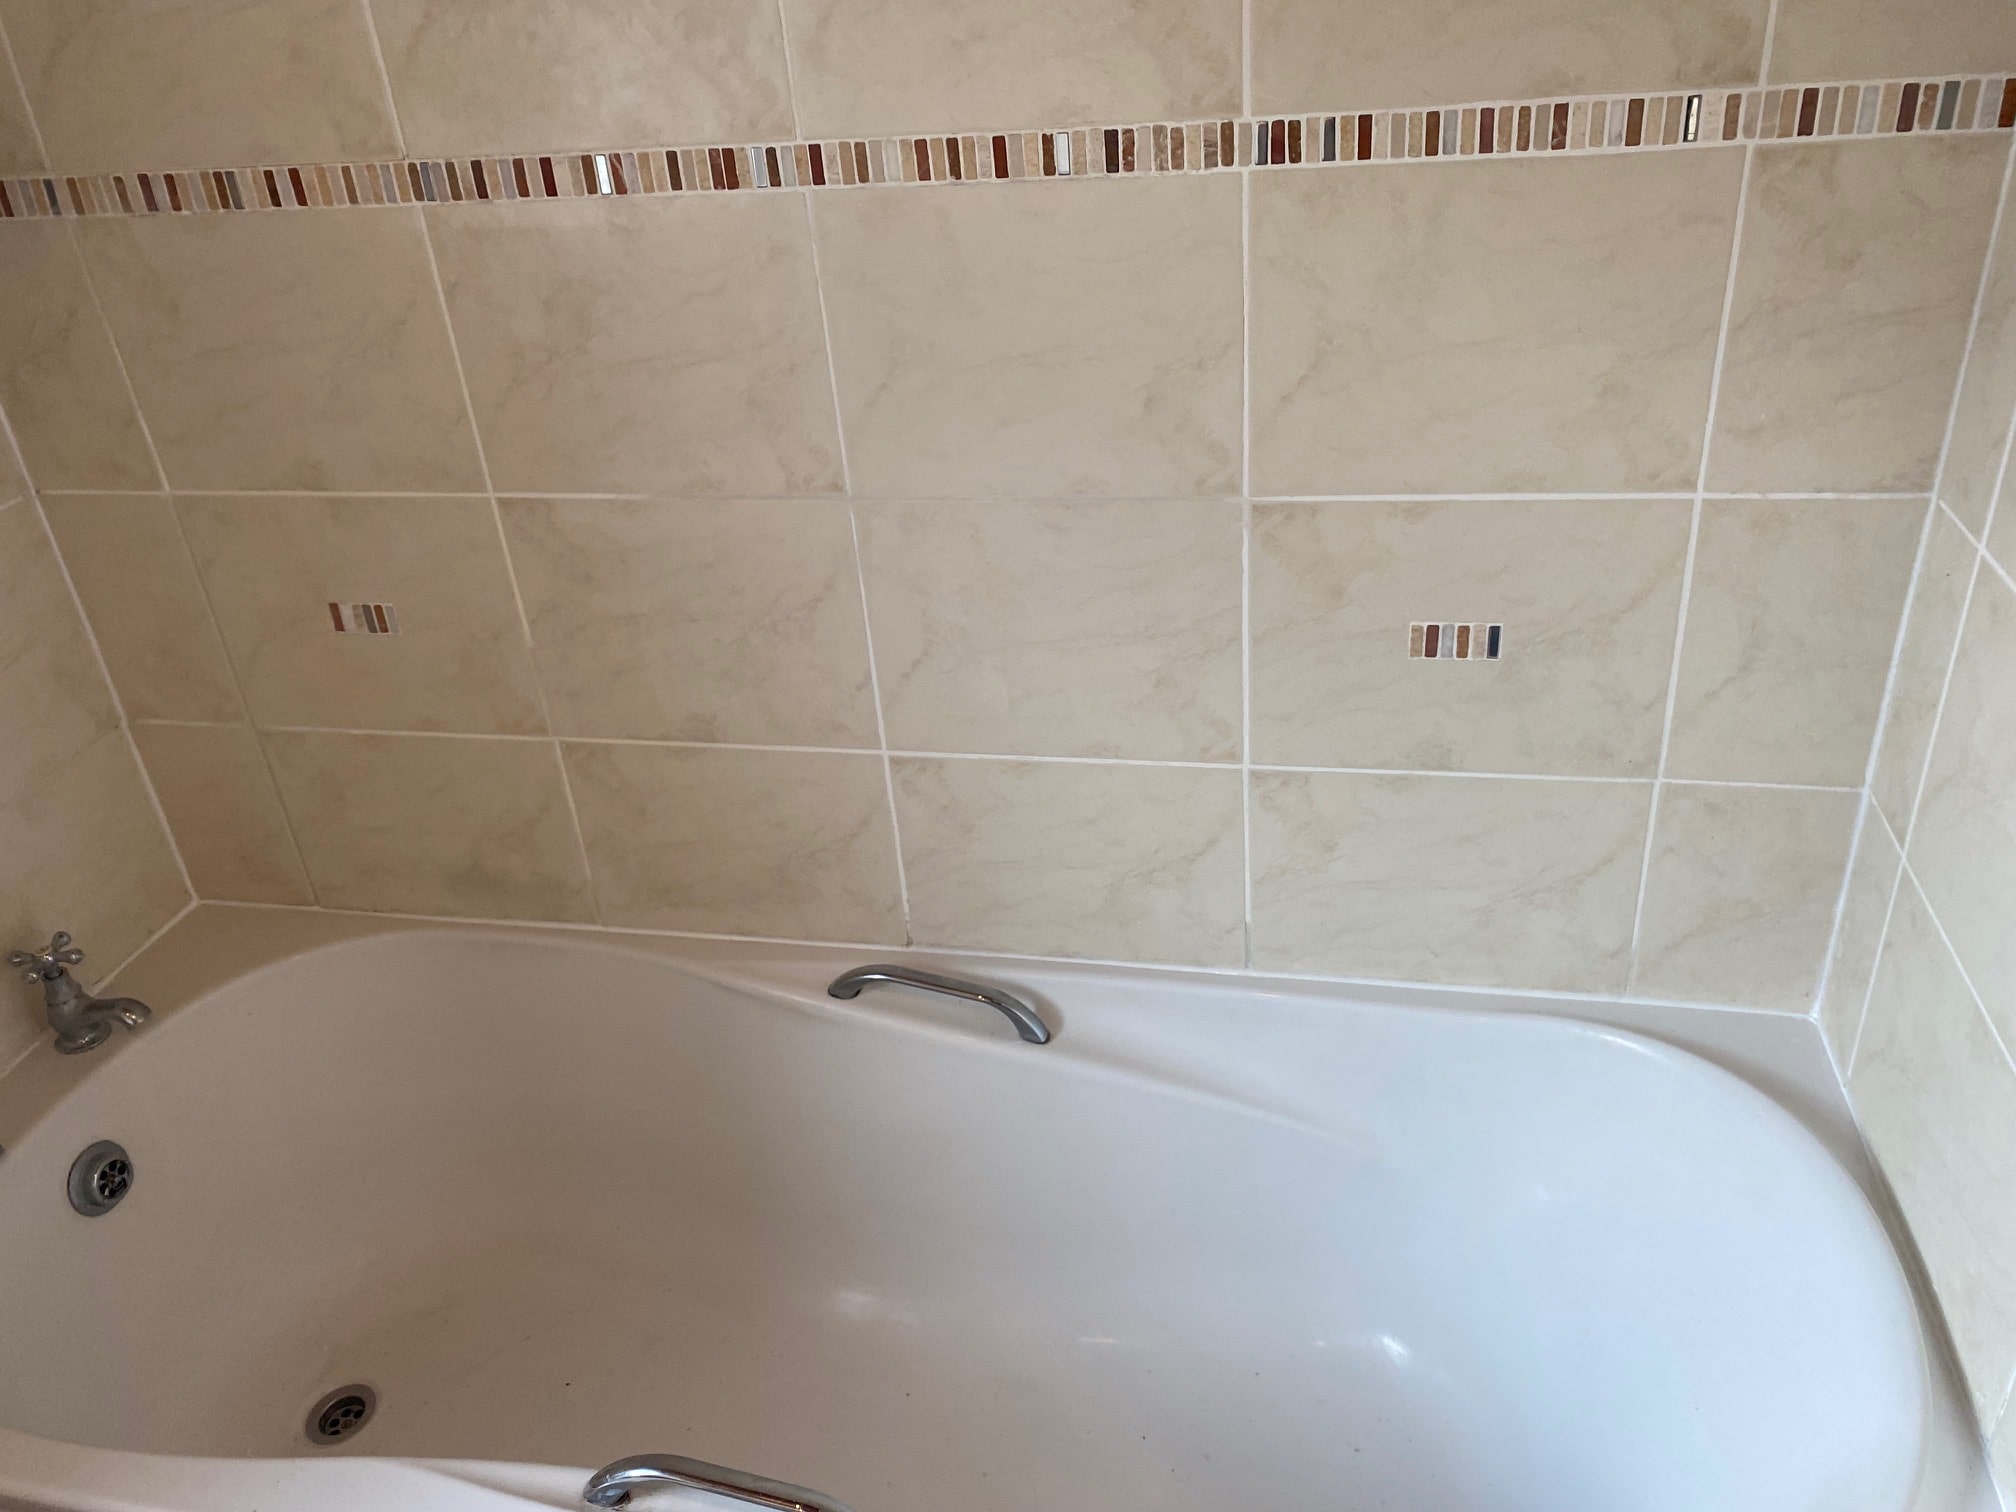
Ceramic Tiled Bathroom After Cleaning Hest Bank

Once this was done a fresh mould resistant and waterproof brand of silicone was applied to the joints between the tiles, and the bath and sink. With the fresh silicone in place and the tile and grout renovated the bathroom looked almost new and much more inviting.

For aftercare I recommended using Tile Doctor Aqua-Pro which is designed for cleaning bathroom and shower tiles, you will find this product is a mild but effective cleaner that will promote the length of the sealer applied earlier. Many tile cleaning products are bleach based and these will strip the sealer off, so it is well worth bearing that in mind when purchasing household cleaners.

Ceramic Tiled Bathroom After Cleaning Hest Bank

The client was very happy with the work we had carried out and were no longer embarrassed to allow people to use their bathroom.


Professional Restoration of Ceramic Tiled Bathroom in Lancashire

Renovation of a Mouldy Ceramic Tiled Bathroom in Hest Bank Lancaster Read More »
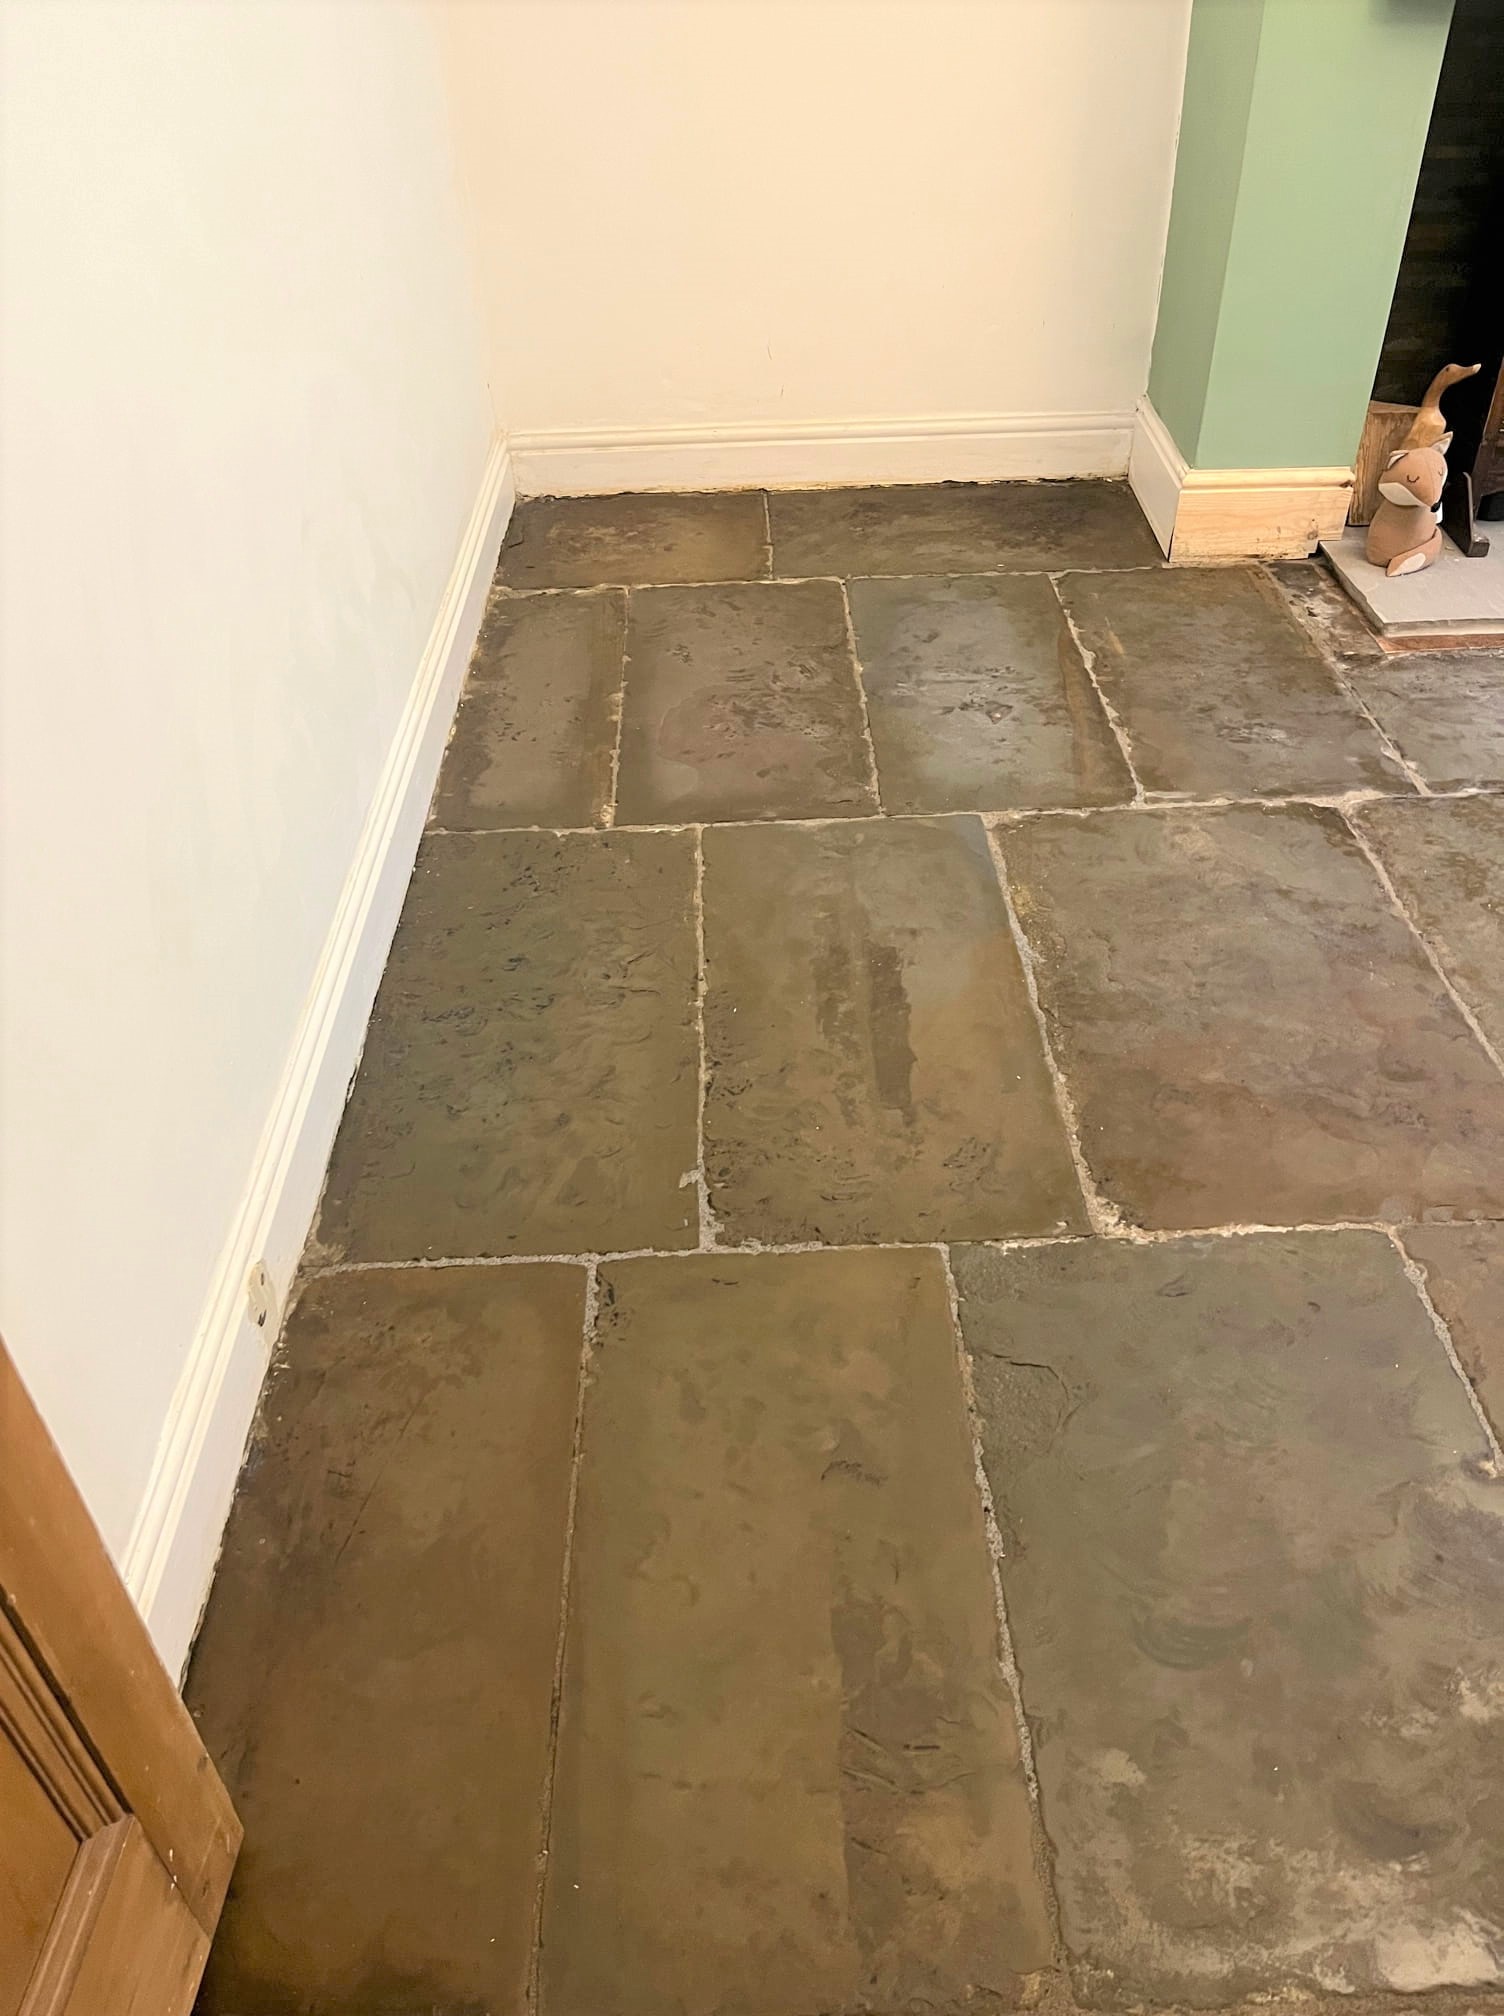
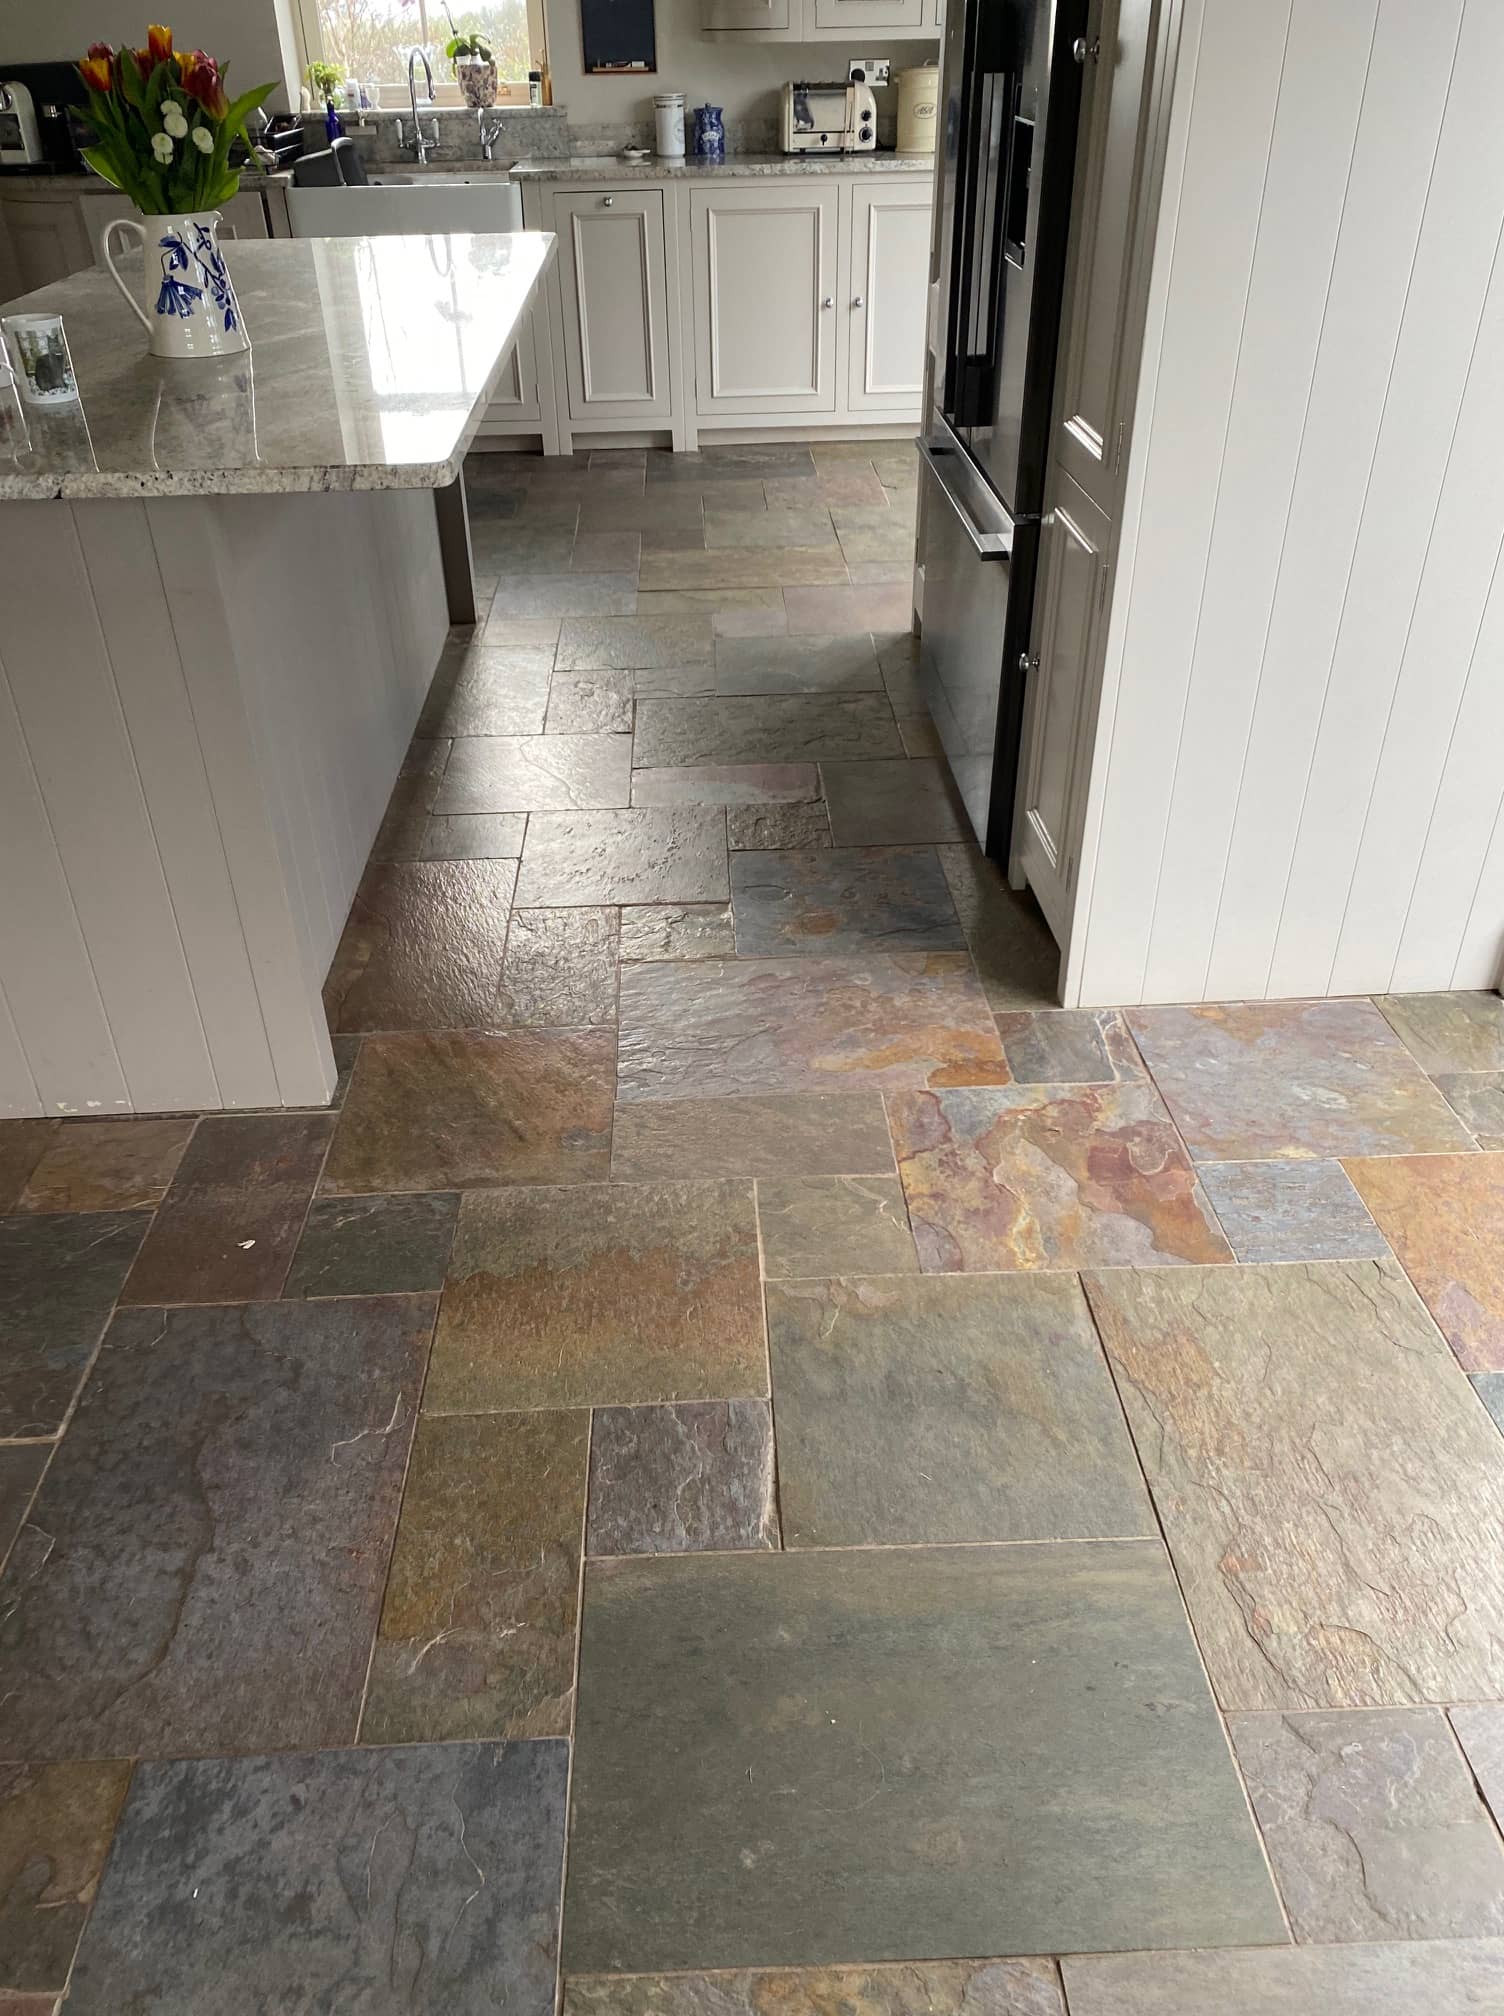
Copper Slate Tiled Kitchen Floor Cleaned Sealed in Ribchester

Renovating Copper Slate Tiles with a Semi Riven Finish in Ribchester

This Copper Slate tiled floor at a property in the Ribble Valley village of Ribchester had been sealed just twelve months before by another company who used a topical acrylic sealer as the client wanted a shiny finish. However, this was a bad choice for a semi-riven tile and exacerbated by the fact that the client had three large dogs. The topical sealer just couldn’t cope and the shine on the Slate faded in a few months.

Semi Riven Copper Slate Before Cleaning Ribchester

After discussing the problem, I suggested stripping off what was left of the topical seal and then re sealing with a sturdier impregnating sealer. I recommended a product called Tile Doctor X-Tra seal which is a premium product that improves colour and is very durable so much so it can also be used externally. Since releasing this product last year it has proved to be very popular and has proven to be the answer in numerous tricky situations. It also adds a lustre and patina to the stone. The client was happy to go ahead with my quote.

Semi Riven Copper Slate Before Cleaning Ribchester

Cleaning a Semi Riven Copper Slate Tiled Kitchen Floor

My first concern when dealing with a floor situated in a kitchen is to prevent water being absorbed by the kitchen base units and plinths. Normally the plinths can be removed but if not, the solution is to run a bead of silicone around the area of concern. MDF is easily blown by moisture, and it doesn’t take us long to add so it’s well worth doing.

Semi Riven Copper Slate Before Cleaning Ribchester

The cleaning started with the application of a strong dilution of Tile Doctor Pro-Clean which was scrubbed into the floor to remove the old sealer. On this occasion it was scrubbed in using a 200-grit milling pad fitted to a rotary machine. As well as stripping off the old sealer this action deep cleans the tile and grout. A lot of soil is released during the process, and this is brushed and rinsed away with clean water and extracted using a wet vacuum.

The next step was to give the floor an Acid Rinse using a product called Tile Doctor Grout Clean-up, this not only cleans the grout but also neutralised the pH of the floor after cleaning with The Tile Doctor Pro-Clean which is an alkaline product.

An acid wash removes grout smears, unwanted mineral deposits and roughens the stone at a microscopic level to provide a better bond for the sealer. You must be careful what you use it on, and we wouldn’t recommend it for use on acid sensitive materials such as Limestone, Marble, or Travertine. Grout Clean-up is however safe to use on Slate, but I wouldn’t leave it on for a long period of time.

After another rinse with water the wet vacuum was deployed again to remove as much moisture from the floor as possible. The floor was then left to dry out fully overnight.

Sealing a Semi Riven Copper Slate Kitchen Floor

The next day after confirming the floor was dry, work started with the application of what would be two coats of Tile Doctor X-Tra seal. X-Tra seal is an impregnating sealer that soaks into the pores of the Slate ensuring dirt cannot reside there.

Semi Riven Copper Slate After Cleaning Ribchester

I would be the first to admit that a topical sealer would have resulted in a shiner finish but clearly this was not a practical choice when you have 3 big dogs who will run around the floor and tear at the sealer with their claws. Topical sealers as the name suggest sit on the surface and are simply not a very practical option for this situation.

Semi Riven Copper Slate After Cleaning Ribchester

Once completed the Copper colour in the Slate was really enhanced, the grout looked much cleaner and overall, the floor looked great; more importantly the client was very happy with the work we had carried out.

For the cleaning of sealed Slate tiles, I recommend the use of Tile Doctor Neutral Clean which is pH neutral and gentle enough for regularly use. Its also provided in concentrated form so a small amount goes a long way. Many of the floor cleaning products you find in supermarkets are bleach based and far too strong for use on a sealed tile resulting in premature damage to the sealer. I forgot to ask what they had been using to clean the floor previously, but this may also have been a factor in why the previous sealer only lasted a few months.


Professional Restoration of a Semi Riven Copper Slate Kitchen Floor in Lancashire

Renovating Copper Slate Tiles with a Semi Riven Finish in Ribchester Read More »

Riven Green Slate Kitchen Floor Renovation Leyland

Old Riven Green Slate Kitchen Floor Renovated in Leyland

This is an old Riven Green Slate floor in the kitchen of a property in Leyland that dates to when the house was built around 150 years ago. It was looking very worn indeed and the cement pointing was falling out in several areas. The client requested a site visit so we could provide a quote for the renovation.

Riven Green Slate Before Cleaning in Leyland

On inspection I could see the floor was in desperate need of a deep clean, repairs to the pointing and then sealing to add protection going forward. Having worked on the renovation of similar stone floors I was confident we could improve it significantly and with a new sealer applied it would look totally different. They were happy to go ahead with my quote and we booked in a suitable time to carry out the work.

Riven Green Slate Before Cleaning in Leyland

Cleaning and renovation of a Riven Green Slate Tiled Kitchen Floor

Were happy to take on work of any shape and size and as jobs go this was one of the smaller floors I’ve been asked to work on.

Work began with the application of a coarse 200-grit diamond pad fitted to a weighted rotary floor buffer. The pad was worked into the floor using a strong dilution of Tile Doctor Remove and Go for extra cleaning power and lubrication. The scrubbing action releases a lot of dirt and old sealers etc from the Slate turning the solution black. This was then rinsed off with water and the soil extracted with a wet vacuum.

Old floors like this one don’t have a damp proof membrane installed under the stone and so it’s quite common to see moisture from underneath the floor rising through the stone and depositing minerals including salts on the surface as the moisture evaporates. This problem is commonly known as effloresce and to counter it I like to neutralise the alkaline salts by giving the floor an acid rinse. This involves further cleaning the stone using a dilution of Tile Doctor Grout Clean Up which is scrubbed into the stone and then rinsed off with water and extracted afterwards. Not only does this dissolve any salts is also neutralises the use of alkaline cleaners and etches the stone slightly so you get a better bond with the sealer.

Once the floor cleaning part of the renovation plan was complete attention turned to knocking out the old failing cement that was used to grout the Slate slabs. With the rubble cleared away the stone was repointed using a modern breathable and flexible product that will cope with any moisture rising through the floor. Once dry the floor was then cleaned again removing all the soil with a wet vacuum and left to dry overnight.

Sealing a Riven Slate Tiled Kitchen Floor

Calling back the next day one thin coat of Tile Doctor X-Tra Seal was applied which added a bit of lustre and this will add strong protection to the stone. X-Tra seal is a premium product, but it was the perfect product for this stone and situation as its formulated using an oil-based resin that will bring out the colour of the green slate; it’s also fully breathable and waterproof so it’s a great sealer for use in high traffic internal or external areas.

Riven Green Slate During Sealing in Leyland

Again, it’s not a cheap sealer but for old rough stone floors in an old house without a damp proof membrane it ticks all the right boxes. Once done the floor was complete and it looked so much cleaner and healthier.

Riven Green Slate After Sealing in Leyland

As usual I discussed after care with my client and recommend they use Tile Doctor pH Neutral Cleaner which is a lot milder than the bleach based cleaners you often find on supermarket shelves. These stronger products can damage the seal (not the stone) and within weeks or months of using that type of cleaner the sealer will be compromised. It’s the sealer that stops dirt from becoming ingrained into the pores of the stone so it makes sense to use a cleaning product that will maximise its life.

Riven Green Slate After Sealing in Leyland


Professional Restoration of a Riven Green Slate Tiled Kitchen in Lancashire

Old Riven Green Slate Kitchen Floor Renovated in Leyland Read More »

Sandstone Flagstone Floor Restoration Preston

Flaking Sandstone Flagstone Floor Restored in Preston

The pictures below are of a 12m2 Sandstone Flagged floor at a property in Prestonwere the surface of the stone was flaking off. The floor looked terrible and more importantly my customer mentioned that visitors had occasionally tripped on the uneven stone, and this was causing some concern.

Flagstone Floor Preston Before Renovation

The most likely cause of the surface flaking or shaling was due to water damage at some point in the stone’s history and probably well before the flagstones were laid. However here at Tile Doctor we have developed a solution for this problem called Milling. The process involves applying very abrasive floor pads to the stone in order cut back approximately 3 to 5mm of damaged stone from the top of the slab to reveal a fresh surface underneath. Essentially it will reface the stone and, in the process remove heavy lippage to leave a smoother beautiful surface that is easier to clean and maintain.

Another job which we agreed to do was to knock out the old pointing (what there was of it) and apply fresh. With the Sandstone flagstones smoothed, new pointing and stone sealed the floor was going to be transformed and unrecognisable once completed.

Milling a Flaking Sandstone Flagged Floor

Milling Sandstone flagstones involves the use of a set of thee coarse millings pads of different grades (50, 100 and 200 grit). They are applied to the stone in sequence beginning with the 50-grit pad and applied using a weighted heavy duty floor buffer. This generates a lot of dust, so water is used to lubricate and keep the dust down. During the process the water turns into a murky brown slurry which needs to be rinsed off and extracted using a wet vacuum as you go.

With the shaling removed it was then a question of polishing up the surface of the stone with the finer 100 and then 200-grit milling pads. Again, water is used to lubricate and capture the dust created during the process and then rinsed away and extracted with the wet vacuum.

Flagstone Floor Preston During Renovation

The process successfully managed to remove all the flaking material, flatten out the lippage and remove the unappealing surface.

When it comes to repointing old flagstone floors, I find a lot of builders and tilers I speak to usually recommend Limecrete or similar which is staple for old floors as its breathable, but I find it difficult to work with and it takes a long time to cure fully. Another problem is every time the floor is given a decent clean, some of the White Limecrete rinses out and into the stone.

Personally, I like to use a German product called VDW800, its fully breathable, has a reliable working time, its easy to apply and does a great job. I’ll put a link to a video about it in this post so you can see how to use it. It’s not a Tile Doctor product but I’m more than happy to endorse it.

Flagstone Floor Preston During Renovation

Sealing Flagstone Floor Tiles

The stone and fresh mortar was left to dry out for 48 hours to ensure it would be dry before completing the last stage of applying a sealer. Before starting with sealing, I gave the floor light clean to remove any loose mortar from the pointing.

One done I sealed the sandstone using several coats of Tile Doctor Colour Grow, which is an impregnating product that soaks into the pores of the stone and occupies that space preventing dirt from become ingrained. Colour Grow as its name suggests also improves the appearance of the stone by enhancing its natural colours. The sealer also leaves a matt finish, which is a perfect match for the rustic character of the old stone.

Flagstone Floor Preston After Renovation

For aftercare I recommend using a pH neutral tile cleaner such as Tile Doctor Neutral Tile Cleaner, many supermarket products are very strong and contain bleach, using something like that on a sealed floor will reduce the life of the sealer.

Flagstone Floor Preston After Renovation


Professional Transformation of a Flaking and Uneven Stone Floor in Lancashire

Flaking Sandstone Flagstone Floor Restored in Preston Read More »

Damaged Victorian Tiled Hallway Floor Restored Preston

Restoration of a Damaged Victorian Hallway Floor in Preston

Cleaning and Repairing a Victorian Tiled Hallway Floor

Detailed below is the restoration of a Victorian tiled hallway floor that we started back in June in Preston. Although we started in June there was so much damage to the subfloor and the tiles it took some time to complete, additionally, the client did not like the colour samples of the replacement tiles we had brought along and so decided to source their own which took some time.

Damaged Victorian Tiled Hallway Floor Before Restoration Preston

Deep Cleaning a Victorian Tiled Hallway

Three months later with replacement tiles now sourced we were given the go ahead to start the restoration. The first day’s focus was cleaning the original floor using very coarse 100-grit and 200-grit Diamond pads fitted to a rotary buffer machine and applied to the floor using a strong dilution of Tile Doctor Remove and Go to add extra cleaning power. Tile edges were given special attention using a flex machine fitted with small diamond grit pads.

Damaged Victorian Tiled Hallway Floor Before Restoration Preston

The floor was rinsed with water to remove the soil generated and this was followed up with an acid rinse using a 1:3 dilution of Tile Doctor Grout Clean Up. This last step in the cleaning process is especially recommend for old floors like this which don’t have a damp proof membrane and can suffer from efflorescence issues.

Replacing Damaged Victorian Tiles

The next stage focused on repairing the floor and started by carefully knocking out all the broken and chipped tiles. We had previously estimated over 30 tiles needed replacing and so the client had bought two boxes, meaning I had plenty of spares to work with.

Before tiling however, the subfloor had suffered over the years and needed attention first. To deal with this the damaged areas were raked out, cleaned up and then back filled with rapid setting self-levelling screed from Mapie adhesives. Once the sub-base was fixed then we put the new tiles back in, they were not an exact match, about 5mm too short and lighter in tone, but the colour was pretty close.

Tiling an old Victorian floor like this can be a bit like dominoes as you move one out of place 2 decent ones come loose and then they also need refixing. Some of the tiles had hair line cracks in them and once they were loose, they just cracked in half. As such the 20 spare tiles that I thought were spare came into good use and I actually ended up using all of them. I could have done with a few more so it was decided to reset the last four broken tiles and grout them in. Luckily for me the client was very understanding about the nature of tile restoration and had accepted that there would be some imperfections and they were not expecting a new floor.

The Tiles were fixed down using Ultralite Rapid Flex (another product from Mapie) and then grouted using the same adhesive (not a grout, as they did not have grout back in the day, just cement and screed).

The floor was left this to cure overnight, and we came back the next day to finish the clean using a 200-grit diamond pad fitted to a buffing machine and lubricated with water, then one last acid rinse to get the tiles as clean as possible and remove any lingering grout haze. This last clean helps to blend the new tiles in with the original.

Sealing a Victorian Tiled Hallway Floor

Before applying a protective sealer, the floor was left to dry for a couple of days, the tiles need to be thoroughly dry before sealing or you can end up with a patchy appearance.

For this floor with no damp proof membrane, it was important to use a fully breathable sealer that will allow moisture to rise through the tile and evaporate at the surface, so Tile Doctor Colour Grow was chosen. This is a good choice for old floors like this as its fully breathable, head wearing, and it contains a colour enhancer that improves the overall appearance of the tile.

Damaged Victorian Tiled Hallway Floor After Restoration Preston

Three coats of Tile Doctor Colour Grow which is a fully breathable, colour enhancing sealer hat works by soaking into the pores of the tile protecting it from within. It has a matt finish, and it works really well with all clay tiles and is ideal for these types of floors.

Damaged Victorian Tiled Hallway Floor After Restoration Preston

You can probably spot the lighter coloured tiles in the after photos on this page, however it’s a very subtle difference and I think they have blended in quite well with the original. Certainly, my client was very pleased with the newly restored floor, its completely transformed from when we first visited the client, and the floor has now gained character and history. For aftercare we recommend Tile Doctor Neutral Cleaner, its an effective pH neutral product that is compatible with the new sealer.


Professional Restoration of a Victorian Tiled Hallway in Lancashire

Restoration of a Damaged Victorian Hallway Floor in Preston Read More »

Indian Sandstone Floor Tile Renovation Bamber Bridge

Milling a Rough Sandstone Kitchen Floor Smooth in Bamber Bridge

This client at a property in Bamber Bridge was really fed up with his Indian sandstone kitchen floor. The sandstone suited the age of the property but due to its course rough texture he was having issues keeping the stone clean and maintaining it to a decent standard. Ideally, he wanted something long lasting that was easier to keep clean.

Indian Sandstone Kitchen Floor Before Cleaning Bamber Bridge Indian Sandstone Kitchen Floor Before Cleaning Bamber Bridge

Sealers can only help so much on a rough stone like this, in my opinion really rough stone is best sold for use outside in patio’s etc. My client didn’t want to rip it up as it ran underneath the kitchen units and it cost them a lot of money to have it laid, so having been on our website and checked out our previous work they realised we could mill the stone and smooth down the rough texture to a much smoother finish and yet still leave enough texture in the stone for it to look very natural.

Milling an Indian Sandstone Tiled Kitchen Floor

We have developed a system at Tile Doctor called “Milling” which is very similar to sanding rough wood to reveal the inner patina. Once done we then we give it one more clean before adding a fresh sealer to add protection. Milling does change the look of the stone as you will see on the before and after pictures on this page, so it is not for everyone. It is however a one-off process so once done it will never need to be milled again. Like all stone floors it will still benefit from a deep clean and re-seal every five years (depending on use) just to keep it looking its best but after milling you will be able to walk on the stone in bare feet or socks and slippers as it really does make a big difference to the finish.

Indian Sandstone Kitchen Floor During Cleaning Bamber Bridge

By milling we mainly use coarse-grit burnishing pads that contain segments made from hard industrial diamonds. Working our way up the different grits the pads are applied using a weighted floor buffer which is run over each tile several times to cut the stone back. The process is so effective we often find that the pads are all you need to clean the stone so hardly ever use any chemicals with this process, apart from the sealer which is applied once fully dry.

I should mention that Milling is not something a customer should consider doing themselves as you need invest in a heavy-duty weighted buffing machine which are rarely available for hire.

Sealing an Indian Sandstone Tiled Kitchen Floor

To seal internal Sandstone floors, I usually use Tile Doctor Colour Grow which brings out the natural colours in the stone. On this occasion however two coats of Tile Doctor Ultra Seal were applied to the stone and grout which results in an invisible natural finish and better matched the clients’ requirements.

Indian Sandstone Kitchen Floor After Cleaning Bamber Bridge Indian Sandstone Kitchen Floor After Cleaning Bamber Bridge

My client was really pleased with the new floor and left the following feedback:

“Only finished today but looks so good now. Russell did a great job milling the flags to a much smoother finish. Two coats of sealant applied by Heidi on last day which hopefully will keep it looking that way. Mark F. Bamber Bridge”

For aftercare cleaning I left them with a bottle of Tile Doctor Neutral Cleaner which is specially designed for cleaning sealed floors. You need to be very careful when using supermarket cleaners as many are tool strong and will slowly strip the sealer off the floor, always read the label.


Professional Restoration of a Sandstone Kitchen Floor in Lancashire

Milling a Rough Sandstone Kitchen Floor Smooth in Bamber Bridge Read More »

Sandstone Patio Floor Before After Renovation in Bolton Le Sands

Black Spot Removed from an Indian Sandstone Patio in Bolton-Le-Sands

This Indian Sandstone Patio in Bolton-Le-Sands near Lancaster had not been cleaned successfully for several years. Although the owner had power washed it on occasion, that won’t rid you of Black Spot, Mould, Lichen etc and this will build-up over the years. It does clean the stone up to a certain standard but at some point, it will need further treatment.

My client had now reached this point and decided to give Tile Doctor a call to have it renovated. We discussed the Patio which ran around the house and calculated that it measured approximately 60m2. With the measurements and a summary of the issues I was able to work out a quote which they were happy to accept.

Indian Sandstone Patio Before Cleaning in Bolton-Le-Sands

Removing Black Spot from an Indian Sandstone Patio

To improve the appearance of the stone I started by giving it a power wash to remove the general grime and dirt. I used a top of the range Karcher Pressure Washer for this which can apply up to 20 bars of pressure. The machine also comes with a spinner attachment results in a much more even clean than simply using the spray head.

The patio was left to dry for thirty minutes before applying neat Tile Doctor Patio & Brick Driveway Cleaner. Please note this is a very powerful product meant for professional use so if you’re using it always wear gloves and protective glasses. You leave it on the stone for ten minutes or longer before working it in. The directions on the back of the bottle say recommend leaving it for two to four hours, but its general advice. Personally, I find it is best to test the timing on a small inconspicuous area first, leave it on for say ten minutes then add a bit of water, scrub the surface and if the Black Spot disappears then that is all the time you need. If the stain is stubborn, increase the time. The two to four hour recommendation is really for difficult Black Spots that have become ingrained into the stone and then the product needs longer to digest the stain before it can work.

Once that was done, I used the power washer on low pressure to wash the products off the stone and into the sewerage drain, a wet vacuum comes in handy for this. Don’t dispose of it into the grass or planting areas as the strong chemicals in the product could upset them. Many properties have a soak away to capture rainwater from gutters, so you need to make sure it’s the sewage drain you are using.

Indian Sandstone Patio After Cleaning in Bolton-Le-Sands

As you can see on the pictures, this product really does work and got rid of the Black Spot completely. To maintain the patio a regular jet wash was recommended, the household versions are ideal for keeping it clean and tidy.

Due to the size of the Sandstone patio the whole process took around six hours to complete. Once done though the patio looked transformed and was all ready for a barbeque and some guests. Hopefully, it will stop raining long enough for this to happen.

Indian Sandstone Patio After Cleaning in Bolton-Le-Sands


Professional Restoration of an Indian Sandstone Patio in Lancashire

Black Spot Removed from an Indian Sandstone Patio in Bolton-Le-Sands Read More »
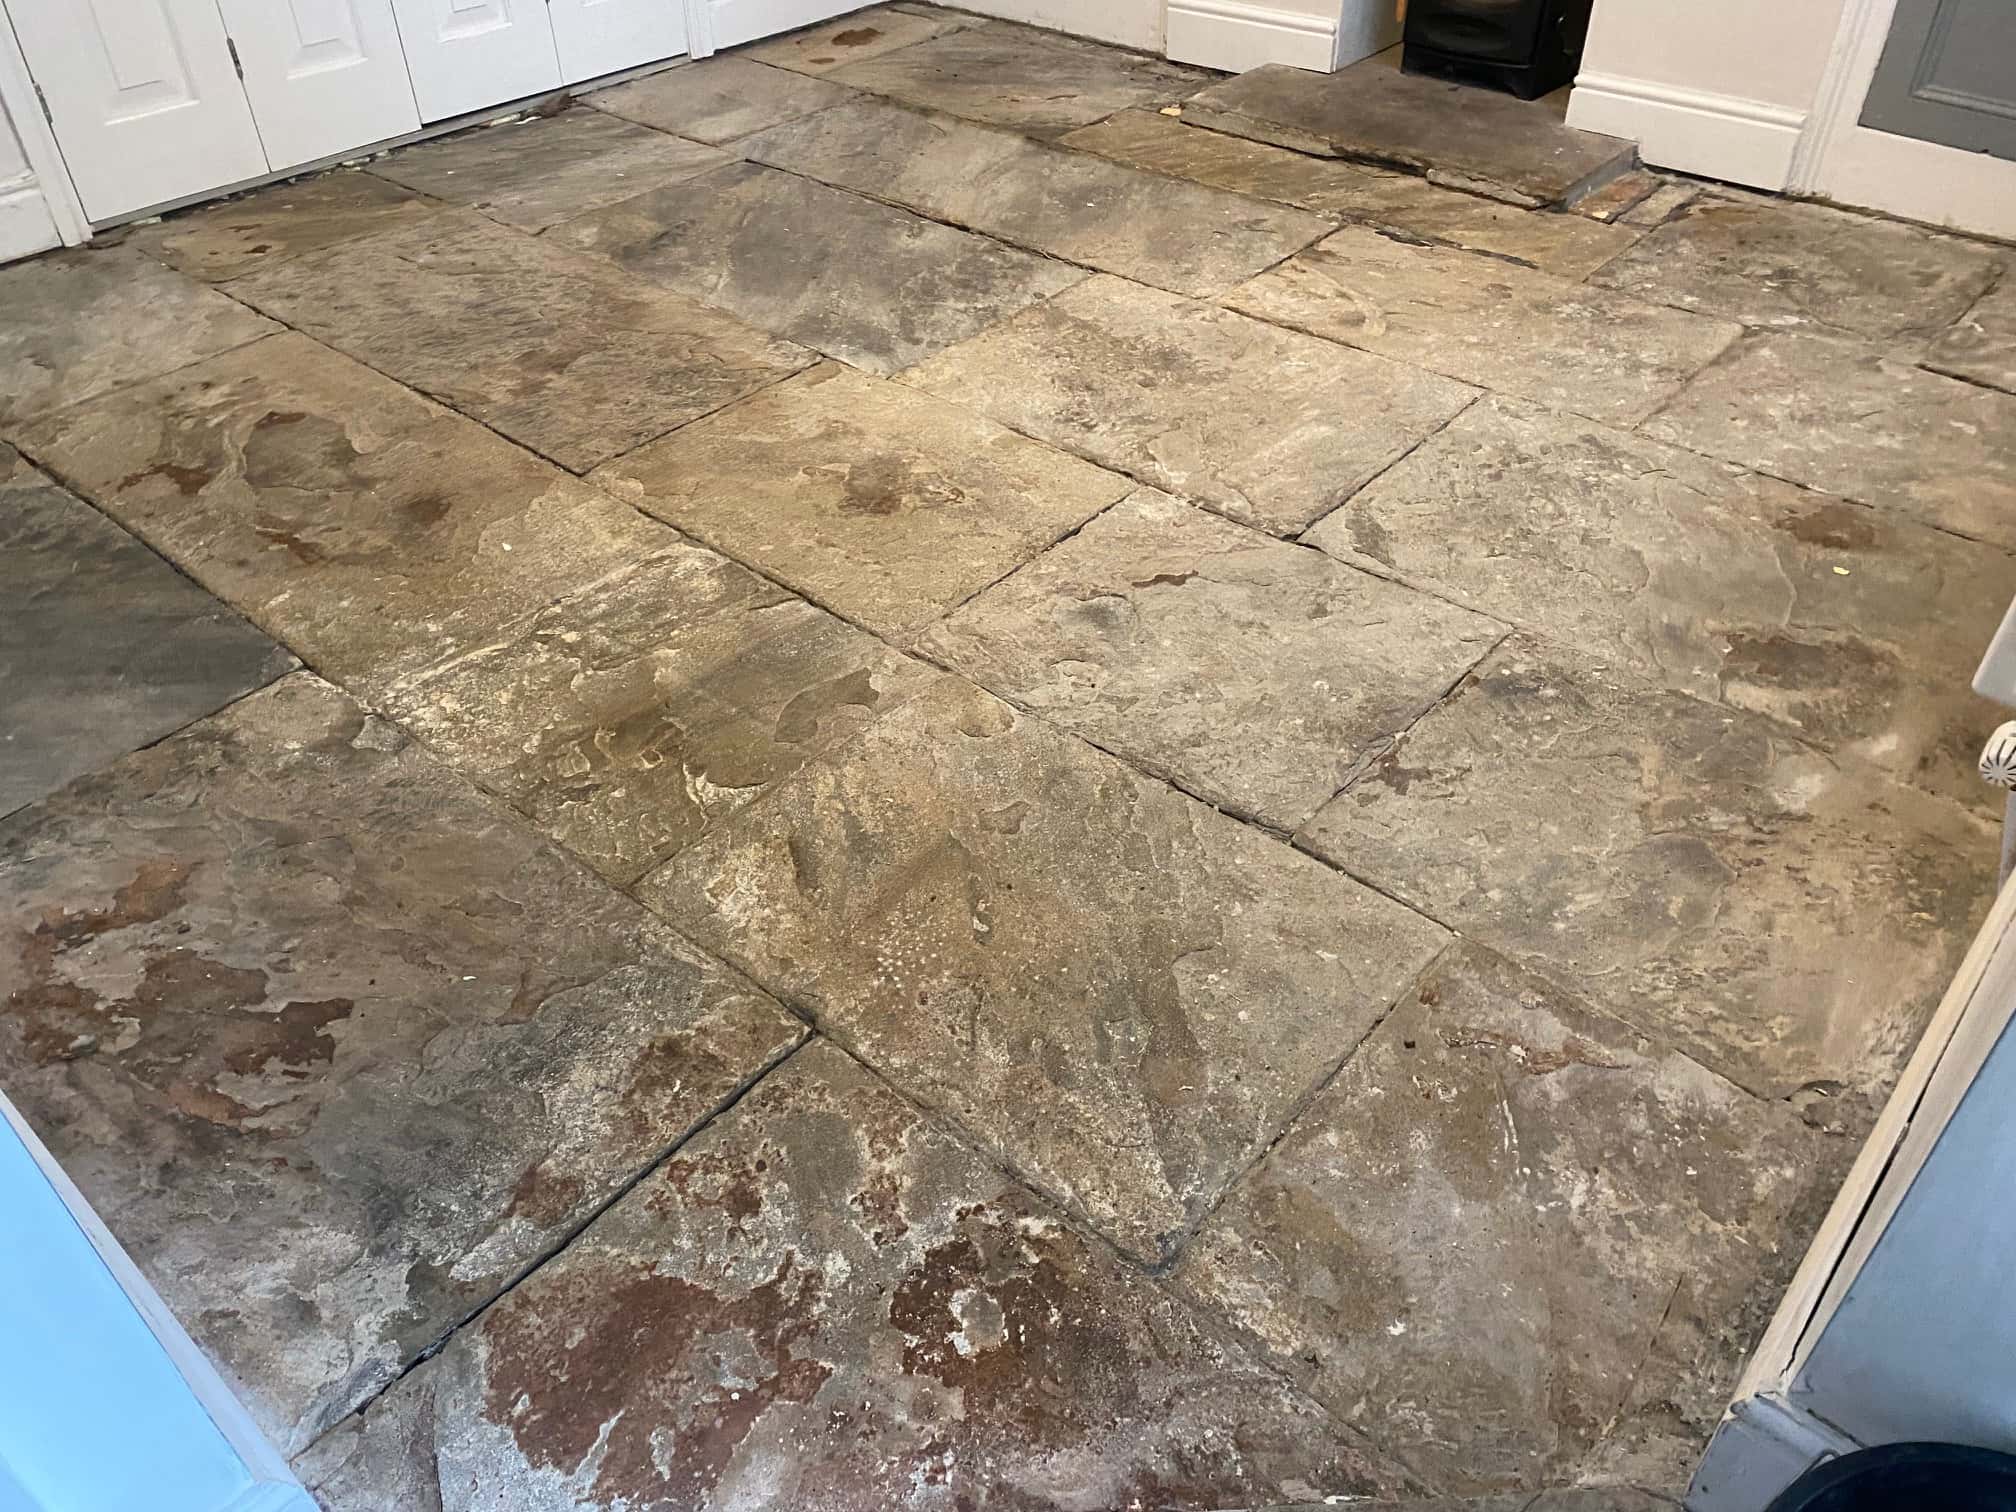
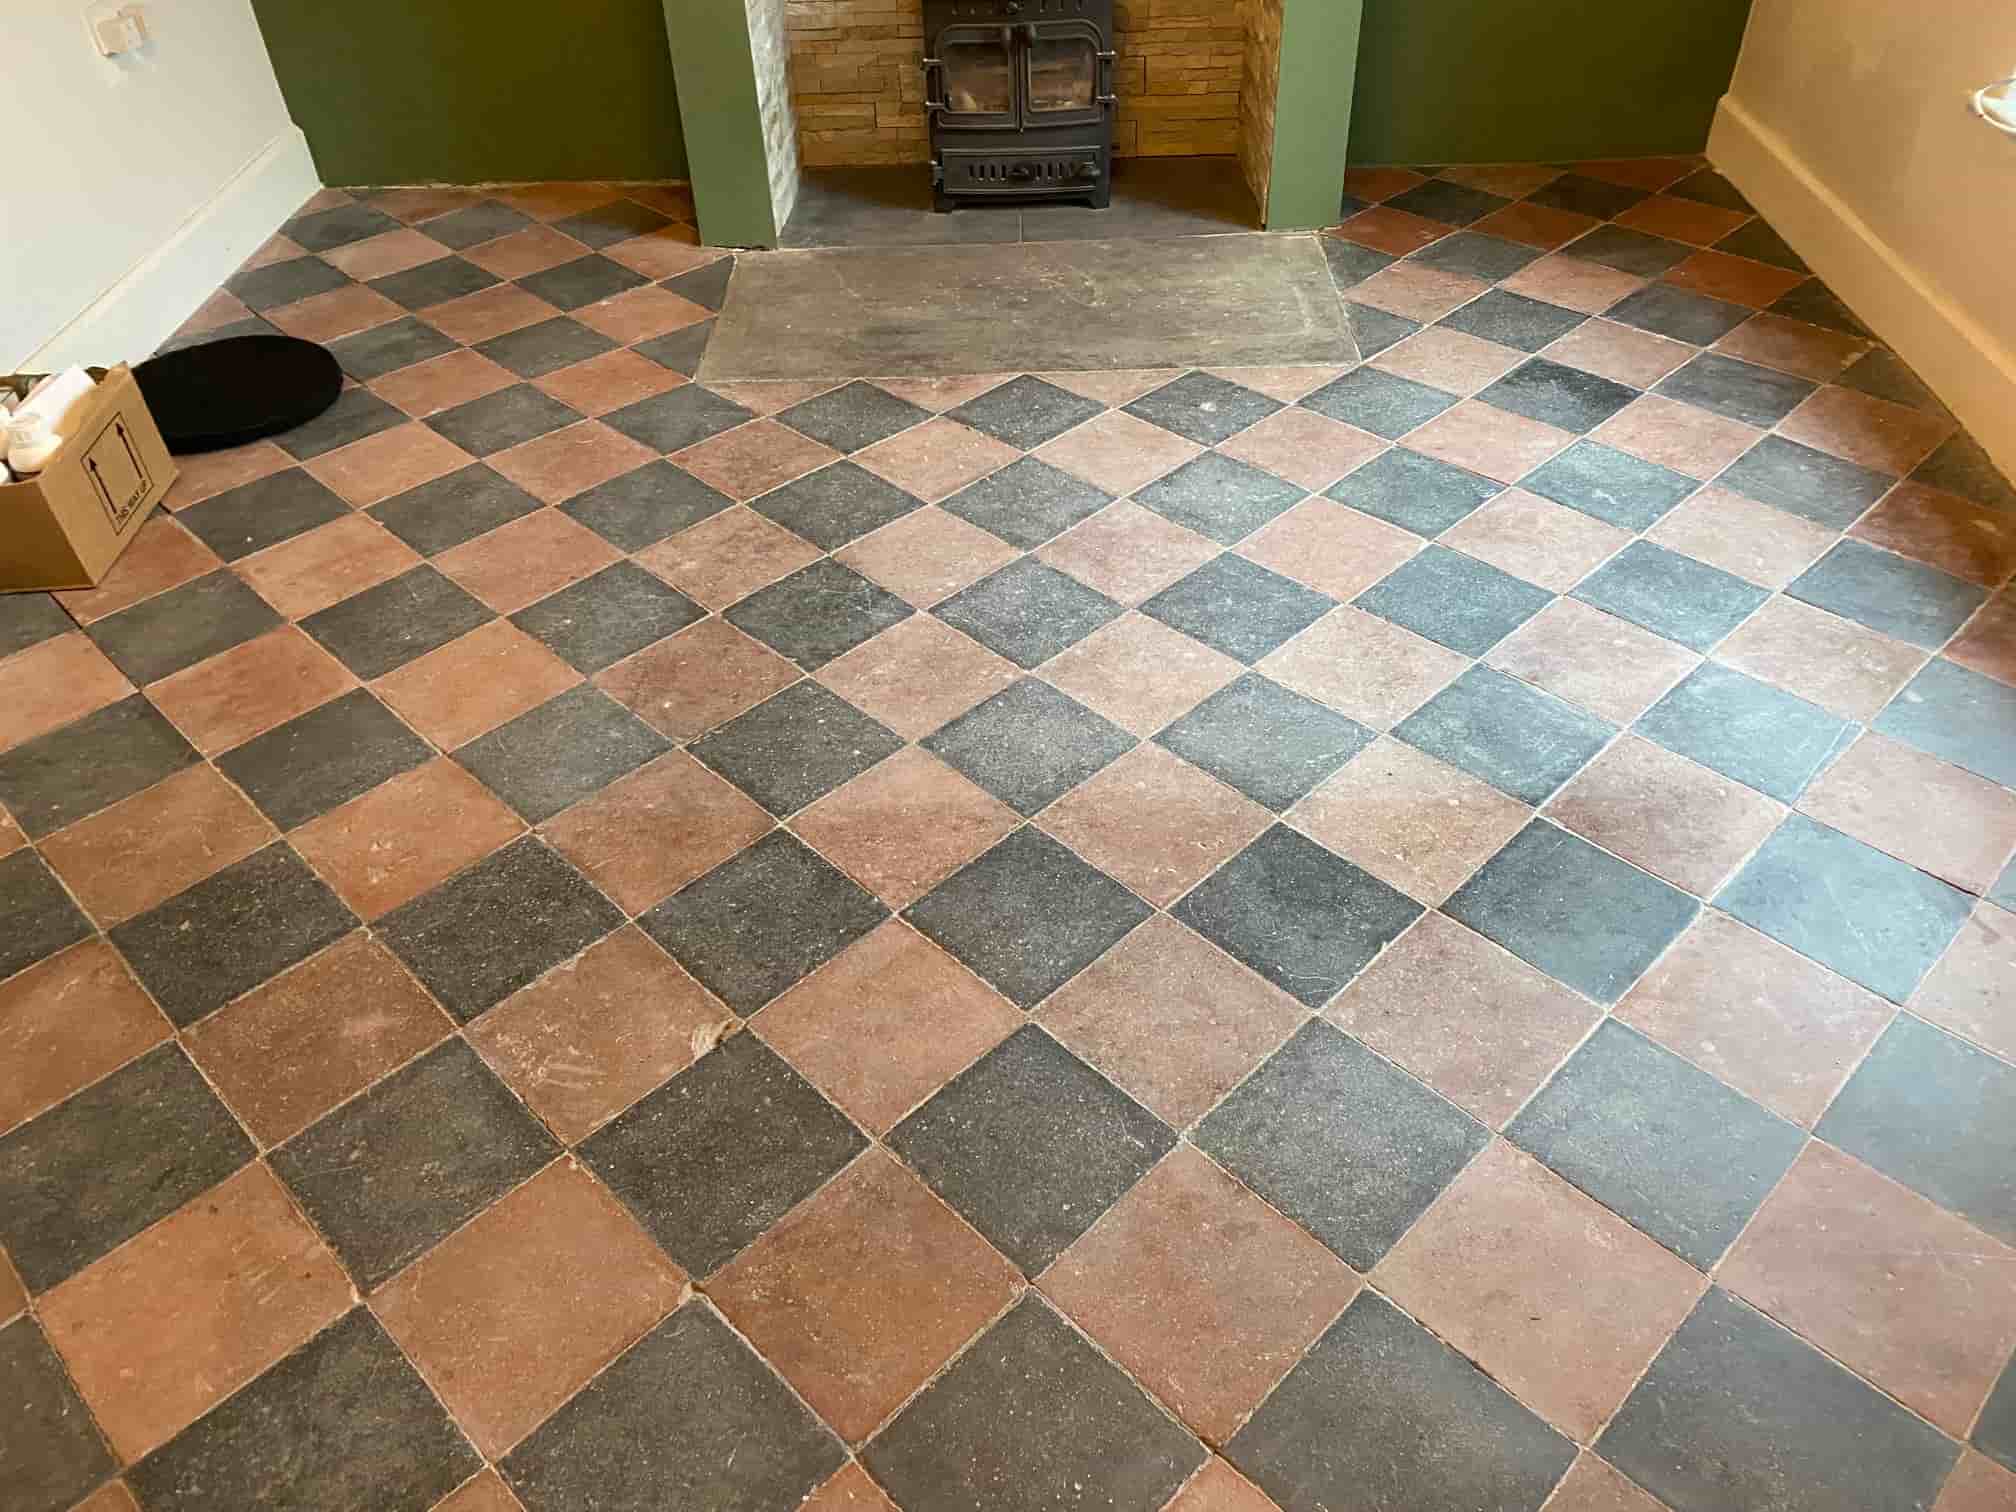
Victorian Black and Red Floor Restoration Lancaster Lancashire

Original Red & Black Victorian Tiled Floor Fully Restored in Lancaster

This old Red and Black Victorian tiled floor at a property in Lancaster was in a bit of a state and had numerous issues that needed resolving as part of the restoration. This included dealing with an old, tiled fireplace hearth, but as the fireplace had been removed years ago it was now a bit of an eyesore as it did not match the rest of the floor.

Victorian Black and Red Floor Before Cleaning Lancaster

Additionally, some of the tiles had been ripped up along one edge of the floor to make way for a gas pipe, but this was now capped off. This area would need replacement tiles matching the original to be sourced and put in place.

Victorian Black and Red Floor Before Cleaning Lancaster

Lastly the whole Quarry tiles floor had previously been covered in carpet so there were adhesive stains all over the floor, not to mention the ingrain dirt that had accumulated in the tile itself.

Victorian Black and Red Floor Before Cleaning Lancaster

We specialise in restoring old Victorian tiled floors like this one and you will find lots of examples of this sort of work on our website. Our service is quite unique as we generally find other companies either offer a cleaning service or just a repair service; Tile Doctors on the other hand offer a full solution.

Removing Carpet Adhesive from a Victorian Tiled Floor

The first job was to remove the carpet glue and old splashes of paint which we tackled by spraying the floor with a strong dilution of Tile Doctor Remove and Go. Designed for use on tile and stone this product is a coatings remover combined with a cleaning agent. This was left to soak into the tiles for ten minutes before it was worked in with a coarse 200-grit pad fitted to a rotary buffer machine. The floor was rinsed with water and then an industrial wet vacuum extracted all the soils away.

Stubborn marks were retreated and then once happy with the initial clean the tiles were treated to an acid rinse using Tile Doctor Grout Clean-Up. Not only does this product remove old grout smears from the tiles it also helps to restore the natural pH of the floor after the use of an alkaline cleaner such as Remove and Go. The acid in this product also slightly etches the clay tile which will allow for a better bond with the sealer later.

Lastly, I had noticed evidence of efflorescent salt staining which is a common issue on old Victorian floors that don’t have a damp proof membrane. It’s caused by salts being carried up through the floor as moisture evaporates from the subfloor and results in unsightly white salt deposits being left on the surface of the tile. An acidic cleaning product such as Grout Clean-up can counter the alkaline salts but for best results, we like to use Tile Doctor Acid Gel, it’s a slightly stronger product and being a gel allows it to sit in place for longer. After finishing the floor, it was given another rinse with water to remove any trace of product and then dried as much as possible with the wet vacuum.

Sealing a Victorian Tiled Floor

A lot of water was used in the cleaning process, so the floor was left for four days before returning to add the sealer. For best results, It’s not a good idea to apply sealer to a damp floor and to avoid any doubt use a damp meter to obtain a moisture reading and compare it with one taken before cleaning.

To seal the floor two coats of Tile Doctor Colour Grow were applied, this is a fully breathable sealer and if the salts do come back this sealer will let the efflorescence breathe through to the surface where it can be easily mopped off the floor, we use Tile Doctor Concentrated Neutral Cleaner for this.

Victorian Black and Red Floor After Restoration Lancaster

In the after pictures, you will see the difference we have made to this floor, bringing it back to its former glory, the house was built in 1901 so the floor is original and that makes it 120 years old. not all floors would look this good after that length of time.

Victorian Black and Red Floor After Restoration Lancaster


Professional Restoration of a Victorian Tiled Floor in Lancashire

Original Red & Black Victorian Tiled Floor Fully Restored in Lancaster Read More »

Flagstone Floor Renovation Carnforth

Renovating Flagstones Covered in Concrete Screed and Bitumen in Carnforth

The owner of this Flagstone floor at a property in Carnforth was told by a damp specialist to remove the carpet and underlay and have the floor taken out and skipped. Then to install new hardcore and concrete put in place but with a Damp Proof Membrane installed in between, then once fully cured (four weeks at least) they could have a new carpet, tile or wood floor etc. installed. All good advice, however, the owner of the house wanted to keep as many original features as possible and wasn’t keen on the proposal.

Looking for an alternative solution they reached out to Tile Doctor and so I went over to take a look. After surveying the floor, I came up with a completely different solution which involved milling the stone with coarse abrasive pads to remove the screed and bitumen and then resurface with diamond encrusted burnishing pads of medium and fine grits which would result in a smooth finish. Not only would this be much easier to clean going forward it would also be much more attractive, especially once sealed.

Flagstone Floor Before Renovation Carnforth Flagstone Floor Before Renovation Carnforth

Happy with our alternative we arranged a date to come and do the work which would take three days, two days to prepare the floor and a third to apply a sealer.

Cleaning a Flagstone Tiled Ground Floor

Milling a floor is arduous work and requires the use of a heavy rotary machine that can apply weight onto the stone so the milling pads can really get a bite into the surface. Because of this I roped in a colleague to help take some of the strain. Some of the areas of bitumen and screed were so prominent we used an SDS hammer action drill with a flat bit to chisel them off first, this can leave a few marks in the stone which we then level out with the milling pads starting with a 50 grit and go all the way up to a 400 grit

Flagstone Floor During Renovation Carnforth Flagstone Floor During Renovation Carnforth

We used a lot of water during this process to help lubricate the abrasive action of the milling pads, this also helps to rinse off the soil that is created, all of which is extracted with a wet vacuum.

Next step is to give the floor an acid rinse with Tile Doctor Grout Clean-Up which is designed to neutralise any alkaline salts in the stone that could result in efflorescence later.

With the floor cleaned up the last step was to re-point between the Flagstones using a breathable pointing product called GFtK 800.

Flagstone Floor After Cleaning Carnforth Flagstone Floor After Cleaning Carnforth

Sealing a Flagstone Tiled Ground Floor

Sealing was the next step however the floor was still quite damp after the initial renovation, so it was left for a few days to dry out first.

We selected a fully breathable sealer for this floor, this is an important requirement for a floor with no damp proof membrane as it will allow moisture to rise through the flagstone and evaporate at the surface. The concrete screed and bitumen covering will have prevented this previously which is dangerous as a build up of moisture in the stone can lead to it crumbling and you risk moisture reaching out to the walls where it can lead to rising damp.

Tile Doctor has three breathable sealers to choose from and in this case the customer decided to go with Tile Doctor Colour Grow which is an impregnating sealer that protects from within and enhances the natural colours in the stone.

Flagstone Floor After Sealing Carnforth Flagstone Floor After Sealing Carnforth

The floor was completely transformed by the end of the third day, you would not have known it was the same floor. It was now clear of all the previous coverings and now looked like a characterful old Flagstone floor should.

Before leaving I recommended, they use Tile Doctor Neutral Cleaner for everyday cleaning, being pH neutral it won’t prematurely erode the sealer allowing it to work for longer. I also advised that it’s possible that parts of the stone may go a shade darker in winter and a shade lighter in summer due to the moisture rising through the floor.


Professional Restoration of a Flagstone Tiled Ground Floor in Lancashire

Renovating Flagstones Covered in Concrete Screed and Bitumen in Carnforth Read More »

Marble Tiled Floor Before After Renovation Bamber Bridge

Classic Black and White Marble Floor Renovated in Bamber Bridge

The tiles shown in the photographs below are classic distressed Black and White Italian Marble installed in the kitchen of a property in Bamber Bridge which is South of Preston. Some of the tiles had an issue with loose grout which I suspect was due to the suspended wooden floor and a small amount of movement had resulted in the grout cracking.

Classic Black and White Marble Kitchen Floor Before Renovation Bamber Bridge

Ideally more support would be needed under the floor to prevent this, in the meantime however I recommended removing the grout and replacing with a flexible grout product that could cope with the movement. The tiles also needed a clean, polish and reseal so it made sense to address the issue with the grout as part of the work.

Cleaning and Re-grouting a Marble Tiled Kitchen Floor

Working as a two-man team we started by cleaning the floor with a set of diamond burnishing pads starting with a coarse 400-grit, followed by 800 and 1500 grit. Water was used to lubricate the process and the floor was rinsed with water between pads with the fine slurry generated by the process extracted using a wet vacuum. These pads remove ingrained dirt and then slowly refine the appearance of the Marble building up its polished appearance in the process.

The next step was to rake out all the grout which as discussed was compromised and needed replacing. We had to be very careful when removing the grout due to the electric heating mat under the floor, any damage to that would require ripping the floor up. With the old grout removed and the floor cleaned the floor was then grouted using Mapei Ultra-colour which is a flexible and fully waterproof grout more than suitable for this situation.

Between us we managed to pack a lot into day one which was tough, however with the hardest tasks out of the way day two should be a lot easier.

Classic Black and White Marble Kitchen Floor During Grouting Bamber Bridge

Sealing a Marble Tiled Kitchen Floor

Day two started with an initial clean making sure to remove any excess grout smeared on the surface that can affect the look of the tile if not removed. This was followed by the application of the last of the set of burnishing pads which is a 3,000-grit pad that really brings up the polish on the marble. You only need a small amount of water sprayed onto the floor when applying this last pad so by late morning the floor was dry and ready for sealing. The customer wanted a better sheen appearance than they previously had, fortunately we find the Diamond burnishing pads do this well, they also tighten up the pores of the stone as well which means less sealer is needed.

The floor was then sealed with Tile Doctor Colour Grow which is an impregnating sealer that improves colour and soaks into the stone occupying the pores and thereby preventing dirt from becoming ingrained. Once complete the floor looked great and the client was very happy.

Classic Black and White Marble Kitchen Floor After Cleaning Bamber Bridge Classic Black and White Marble Kitchen Floor After Renovation Bamber Bridge

Sealers and Polish do wear down with use over time so before leaving I discussed our annual maintenance plan option which will ensure the appearance of the Marble floor always looks good. The plan involves returning once a year to further polish the floor with a high-grade burnishing pad and to add more sealer if required. We also discussed the use of Tile Doctor Stone Soap for regular cleaning, it is a pH neutral cleaner which is ideal for stone floors like Marble which are acid sensitive.

Classic Black and White Marble Kitchen Floor After Grouting Renovation Bamber Bridge


Professional Restoration of a Marble Tiled Kitchen in Lancashire

Classic Black and White Marble Floor Renovated in Bamber Bridge Read More »

Victorian Hallway Floor Before After Restoration Lancaster

Yellow and Black Victorian Hallway Floor Tiling Restored in Lancaster

I thought I would share this case history of a Yellow and Black Victorian Tiled floor that we worked on at a large house in Lancaster last year. It’s a great example of the typical problems we face with old Victorian floors, especially around door thresholds where the transition between the different foundation invariable cause problems.

I didn’t know the full history of the floor, but it was now in quite a state and recent renovation work had left the floor unstable with loose and cracked tiles. The tiles needed to be removed and then the damaged subfloor carefully scraped out and replaced. Once that was done the floor would need relaying and then cleaned and sealed so everything would blend in.

After visiting the property and providing a quotation we were given the go ahead and agreed a date to do the work.

Repairing a Yellow and Black Victorian Tiled Hallway Floor

We returned on the agreed date and set about carefully removing the loose and cracked Victorian tiles and put them aside for later use. Some would need replacing however this would not present a problem and they are still widely available, and I have several contacts I can turn to for this.

Yellow and Black Victorian Tile Floor During Restoration Lancaster

Once this was done and the subfloor exposed and cleaned up, I used self-levelling cement to bring the floor level up and in-line with the existing. This now needed to set hard, so the rest of the day was spent cleaning up the tiles we removed earlier with Tile Doctor Grout Clean-up and Pro-clean. Our goal is to reuse as many of the original tiles as possible to preserve the heritage of the floor.

The next day with the new subfloor set it was ready for tiling. This involves laying out the tiles first without adhesive carefully cutting and fitting new tiles as needed to maintain the overall pattern of the floor. Once I was happy the tiles were moved to a board and then fitted with fresh adhesive.

Yellow and Black Victorian Tile Floor During Restoration Lancaster

Deep Cleaning a Victorian Tiled Hallway Floor

I came back on day three with the aim of cleaning the floor so it could be sealed however whilst inspecting my new tiling I was disappointed to discover some were not as level as I had hoped. I had noticed the replacement tiles were not the same thickness as the originals the previous day but I had worked around this by using different levels of adhesive, clearly this plan was not as effective as I had hoped for.

To counter this problem, I used a set of 50-Grit, 100-grit and then 200-grit diamond pads in sequence to mill the floor flat and remove the lippage between them. This is done with water to lubricate the process and a weighted floor buffer. The pads generate a lot of slurry and so you need to rinse this off with more water and extract all the soil after each pad.

I followed this up with various Diamond burnishing pads of increasingly finer grits across the whole floor until we achieved a consistent finish and had the added benefit of getting the whole floor clean. More water is used to rinse the tiles after burnishing and the soil extracted with a wet vacuum as before. Once done and inspected the floor was left to dry off overnight.

Sealing a Large Victorian Tiled Floor

Tile Doctor Colour Grow was applied to enhance the appearance of the tiles and protect them going forward. This product copes well with damp which can always be a problem with old floors like this one with no damp proof membrane present.

Yellow and Black Victorian Tile Floor After Restoration Lancaster

The floor looked amazing when finished and our attention to detail had really paid off, in fact you simply could not tell we had done any tiling work or replaced any tiles. For aftercare I recommend the use of Tile Doctor Neutral Cleaner which is designed for the regular cleaning of sealed tiles.

Yellow and Black Victorian Tile Floor After Restoration Lancaster


Professional Restoration of a Victorian Tiled Hallway in Lancashire

Yellow and Black Victorian Hallway Floor Tiling Restored in Lancaster Read More »

Flagstone Floor Before After Restoration Morecambe

Old Bitumen Covered Flagstone Floor Restored in Morecambe

Late last year I was asked to survey a Flagstone floor in Morecambe which appeared to be beyond restoration. The floor had a long history and at some point in its past was covered with carpet which had been secured onto self-levelling cement with bitumen. All the companies that had visited before we got there said nothing could be done with it and recommended replacing the carpet or covering it with vinyl. As mentioned, it had been previously covered with carpet however this is an old floor and damp had been rising though the floor causing the carpet to rot. My client didn’t want to entertain that as a solution and so kept on looking for a company that could restore the stone.

Flagstone Floor Before Restoration Morecambe Removing Self-Levelling Compound and Bitumen from Flagstones in Morecambe

Old houses like this one do not have a damp proof membrane installed under the floor and moisture rising through the stone needs to be allowed to evaporate or you will find damp spreads outwards towards the walls leading to rising damp. In this case I suspect the bitumen which acts as a water barrier had either failed or damp was coming up the wall and into the carpet and underlay. Certainly, in our experience, if you have an old natural stone floor like this it is best not to cover it with anything more than a rug.

Having inspected the floor, I recommended restoring the appearance of the flagstones by grinding the surface down a few millimetres to reveal new stone. We can do this using several different grades of coarse diamond encrusted diamond pads, a process we call Milling.

Cleaning/Repairing a Flagstone Tiled Hallway Floor

After being given instructions to restore the floor we returned on the schedule date and began by removing as much of the loose cement and bitumen by hand using hand tools.

Removing Self-Levelling Compound and Bitumen from Flagstones in Morecambe

milling the floor using a very coarse 50-Grit pad fitted with DRB segments (Diamond Resin Blocks). Cutting the surface of the stone like this is hard work and requires the use of a weighted floor buffer to apply the pads. The process is lubricated with water and generates a lot of slurry which is extracted off the floor with a wet vacuum. The 50-grit pad was followed with a 100-grit DRB pad and then 200-grit DRB pad which start the slow process of refining the surface. It’s a two-man job so I brought a colleague along, whilst one was milling the other could take a rest and help with the clean-up.

The milling did a great job of removing the Black Bitumen, Self-Levelling compound and old paint revealing the true beauty ` and colour of the Flagstones, in fact the stone had quite a variance of colour which was lovely to see coming through. Half the pointing was missing so after milling the stone we moved onto replacing what was left of the old pointing and replacing with a modern breathable product.

We called back the next day to finish the stone cleaning by further renovating the stone surface using finer grades of diamond encrusted burnishing pads of 400 and 800-grit. Again, you need to water to lubricate the process and rinse the slurry of the floor with water after each pad, then extract with a wet vacuum. This does leave the floor damp, so once we had finished it was left to dry out for a few days, old floors without a damp proof membrane can take longer to dry and especially so in the Winter months.

Flagstone Floor After Restoration Morecambe

Sealing a Flagstone Tiled Hallway Floor

Returning a few days later the stone was first checked with a damp meter to check it had dried out before sealing. The moisture readings were fine, so it was then sealed with a couple of coats of Tile Doctor Colour Grow which penetrates deep into the stone protecting it from within and enhancing the natural colours in the process.

Flagstone Floor After Restoration Morecambe

The flagstone floor was completely transformed by the process and our client was over the moon with the result. In fact, they have asked us back to do the same in the Kitchen as the vinyl in there has since been torn up and revealed the same stone.


Professional Restoration of a Flagstone Tiled Hallway in Lancashire

Old Bitumen Covered Flagstone Floor Restored in Morecambe Read More »

Flagstone Floor Before After Restoration Whalley

Renovating Flood Damaged Flagstone Floor in a Whalley Listed Building

This Flagstone floor was under water in 2015 due to a flood that affected the beautiful village of Whalley resulting in many residents being evacuated from their homes. Four years later and the floor had settled in places and large chunks of Limecrete pointing had become loose. As you can imagine the floor hadn’t been the same since.

It took a while before the customer could get back into the house and the insurance assessor said that because this was an original floor and the building was grade 2 listed the flagstone floor had to stay in place. There is no guarantee from the local council that the house and adjacent streets won’t get flooded again in the future, but this type of floor is probably the most hardwearing for this situation so is best left in place. Wood flooring, carpet, vinyl etc will not stand up to another flood and would have to be replaced every time.

Flagstone-Floor Before Restoration in Whalley Flagstone-Floor Before Restoration in Whalley

I was asked to come up with some solutions for renovating the flagstone floor and replacing the Limecrete pointing which was tricky as whatever replaced the Limecrete pointing needed to be fully breathable as did the sealer that went on the stone.

After some research we decided to use a German product called VDW 800 for the pointing instead of Limecrete. it’s designed to be fully breathable (permeable) and suitable for outside use such as patios and porches etc which made it ideal for a floor that may face flooding again. Its highly flexible, durable and comes in four colours. It can be cleaned via a pressure washer on a wide fan and it won’t loosen, so I was confident that if another flood hit the town all this floor would need was a clean down.

The client was very happy to hear this news and wanted us to go ahead as soon as possible and get the floor restored. With a restoration plan worked out we agreed a date for our return to complete the work.

Cleaning and Repointing a Flagstone Floor

On our return our first course of action was to clean the stone using a 100 and 200-grit milling pads which were run several times over each flagstone using water for lubrication. The resulting slurry was removed using a wet vacuum and the floor was then treated to an acid rinse using Tile Doctor Grout Clean-up. After a rinse with water and extraction with the wet vacuum the flagstones were given a final clean using a 400-grit diamond burnishing pad.

With the floor now clean we set about removing the old pointing using an 8lb pneumatic drill, whilst noisy it did make quick work of the task. After a another clean to remove the debris the floor was repointed using the VDW 800 product mentioned earlier. The floor was then left to dry overnight.

Flagstone-Floor During Restoration in Whalley Flagstone-Floor During Restoration in Whalley

Sealing a Flagstone Tiled Floor in Lancashire

I came back the next day to review the previous days work and ensure I was happy with the state of the floor before applying a sealer. This is important as otherwise you risk sealing in dirt which would affect the appearance. It’s tricky to tell when a floor it wet and on this occasion I felt the stone would benefit from another clean so I cleaned the floor one last time using a black buffing pad and water. The water was then removed as before with a wet vacuum.

Flagstone-Floor After Restoration in Whalley Flagstone-Floor After Restoration in Whalley

The floor was left to fully dry out for a further 24 hours and I called back one more time to review the floor and apply three coats of Tile Doctor Colour Grow which is a breathable sealer that also enhances the natural colours in the stone.

Once finished the floor looked great again and the clients were over the moon with the result. Fingers crossed there would be no further flooding in the future, however even if there was the new grout should stand up to it.


Professional Restoration of a Flood Damaged Flagstone Floor in Lancashire

Renovating Flood Damaged Flagstone Floor in a Whalley Listed Building Read More »
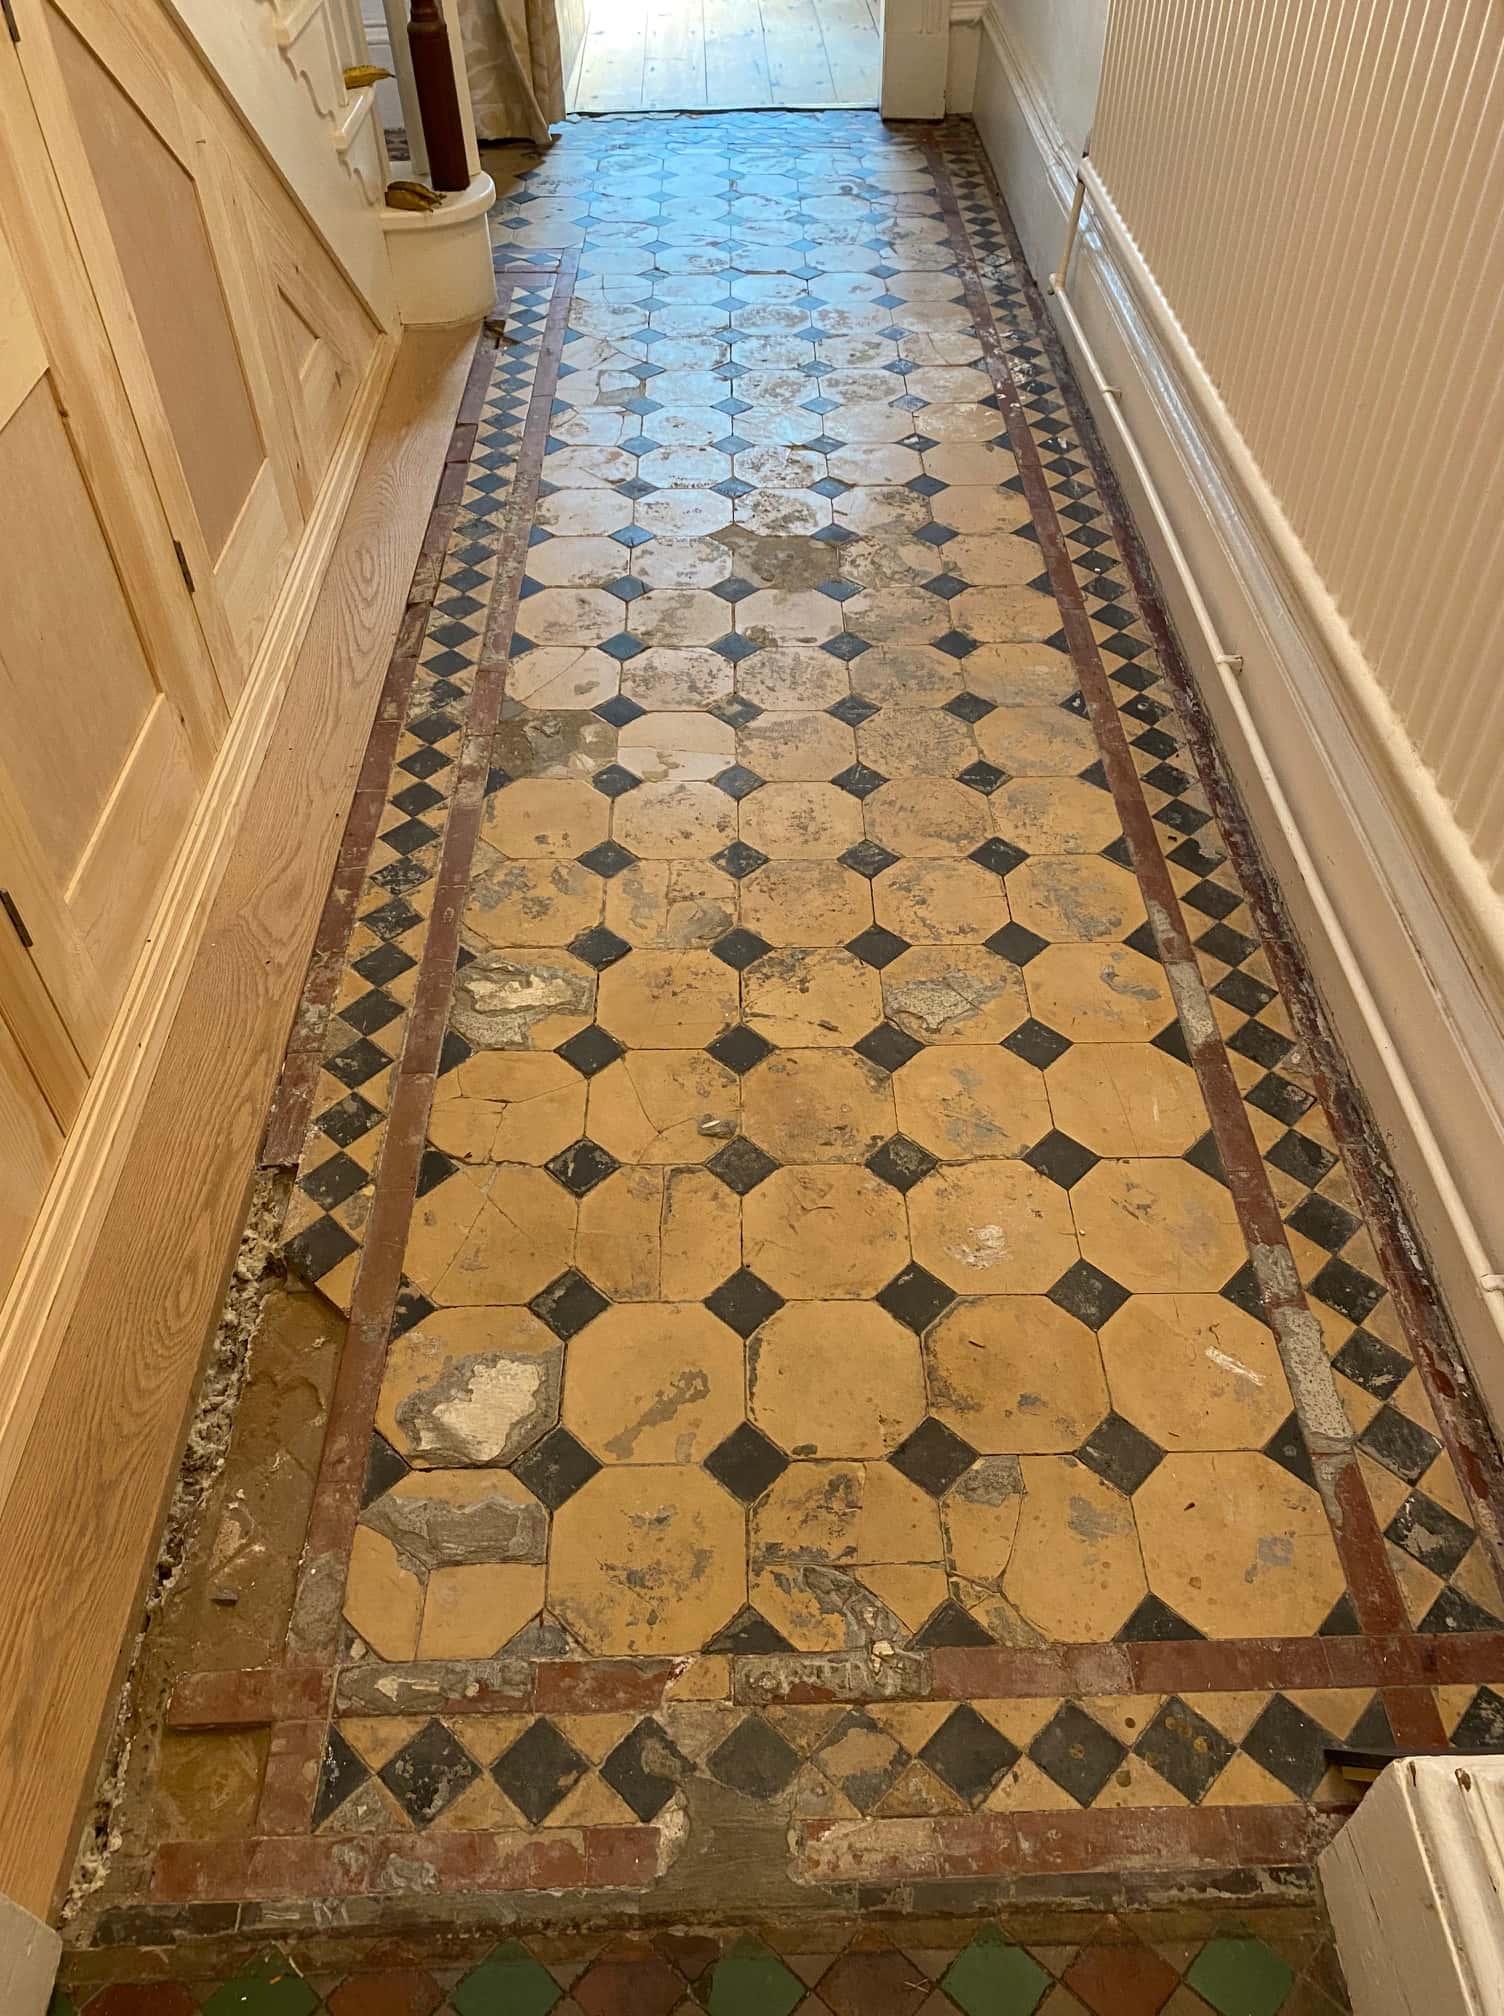
Black Slate Tiled Kitchen Floor Before After Clean Seal Lancaster

Renovation of a Black Slate Kitchen Floor in Lancaster

The photographs below are of a dull and dirty Black Slate floor that I was recently asked to renovate at a property in the City of Lancaster which is a few miles south of our base in Carnforth.

Black Slate Floor Before Renovation Lancaster

Slate isn’t very porous which is why you often find it being used as roofing; however, this means any sealer applied is primarily active on the surface where it is more prone to wear from foot traffic. Regular cleaning with a pH neutral tile cleaner combined with topping up the sealer every 12 to 18 months will make the sealer last a lot longer. This rarely happens though and once a sealer has been worn off dirt will begin to penetrate the stone making it difficult to clean and dull.

In this case my client explained that the sealer had been applied by the tiler a few years ago and that they had been using washing up liquid to clean the floor. pH levels for washing up liquids vary but the most popular product has a pH level of 9 which is far too acidic for use on a sealed tile and slowly stripped the sealer away. I discussed with the client the process for renovating the slate floor, agreed a price for the work and arranged to come back a few weeks later.

Cleaning a Black Slate Floor Tiled Kitchen Floor

To renovate the floor, I first attached a coarse 200-grit Diamond pad to a buffing machine and ran it over the floor using water as a lubricant. This removed what was left of the old sealer deep cleaned the stone. The Grout was then scrubbed with Tile Doctor Pro-Clean and the floor was then rinsed with water and the soil extracted with a wet vacuum.

The floor was then inspected, and stubborn areas were spot treated with a little Tile Doctor Remove and Go which was sprayed on and left to soak in for ten minutes before being scrubbed in and rinsed off.

We finished the clean with a 400-Grit diamond padf followed by an Acid Wash with Grout Clean-Up, this left the Slate with a slightly acidic pH which helps bond the new sealer and counters the alkaline pH of the floor following the use of alkaline cleaning products.

Sealing a Black Slate Tiled Kitchen Floor

Before we sealed the whole floor, we always do some damp testing to make sure it is dry before sealing. This was an old floor with no damp proof membrane underneath so it needed to be very dry before we could apply the sealer.

Black Slate Floor Moisture Testing Before Sealing Lancaster

The client wanted a very high gloss finish, so we applied four coats of Tile Doctor High Shine sealer which is an acrylic sealer ideal for achieving this affect. If the floor wasn’t fully dry, we would have left it another day or two, but we find you can often speed up the drying process with the use of a dehumidifier and some air blowers.

Black Slate Floor During Renovation Lancaster

The client was very happy with the transformation in the Black Slate floor, they had looked dull and drab for quite a while and it was refreshing to see them look like new again. They also felt more confident that now they understood what had caused the problem and would be better able to maintain the floor going forward.

Black Slate Floor After Renovation Lancaster


Professional Restoration of a Black Slate Tiled Kitchen Floor in Lancashire

Renovation of a Black Slate Kitchen Floor in Lancaster Read More »

Victorian Tiled Lobby Floor Restoration Lytham St Annes

Victorian Tiled Lobby Floor Rebuild in Lytham St Annes

I visited this property in Lytham St Annes to survey a small Victorian tiled lobby which was in a sorry state. The client was keen to have it restored and wanted to know if it was possible. I discussed with them what we could do, and I gave them a quote for the work. Although it was only a small lobby, I could see the job could be quite involved and would be subject to the replacement tiles which I was confident we could source.

Victorian Tiled Lobby Before Rebuild Lytham St Annes

Repairing a Victorian Tiled Lobby Floor

This is one of those jobs you wish you hadn’t started as there were a lot more tiles to remove than anticipated and it mushroomed into replacing half the floor. Once the area was cleaned up, I applied a self-levelling compound to bring up the height of the base.

Victorian Tiled Lobby During Rebuild Lytham St Annes

Once the levelling compound had set, I was able relay the Victorian tiles using a combination of original tiles and replacements which had to be cut to shape. Cutting tiles to fit is quite intricate and time-consuming work especially when you consider new tiles are all metric in size and a 2mm difference becomes very telling after a foot or so! My solution was to use 150 mm tiles which are the biggest the stockist offers and then cut them down on my Rubi cutter using a template made from the original tiles. This the only way I could get it to look tight, it takes longer but it makes for a thorough job and a better finish.

Victorian Tiled Lobby During Rebuild Lytham St Annes

I always use flexible floor adhesive when laying tiles, my preference is Keraquick Grey from Mapei. There are other brands off course but this one is quite easy to get hold of and as the term grouting is a relatively modern invention (in the past it was called pointing ) I find it looks right with this type of tile and similar to the screed cement the Victorians used in the past.

Deep Cleaning a Victorian Tiled Lobby Floor

After the tiling had been completed, I left the floor to cure and fully dry and returned at a later date to give the floor an overall clean. For this I ran a coarse 200-grit diamond floor pad across the floor lubricated with water and used handheld diamond blocks for the edges where the pad can’t reach. The slurry was rinsed off with water and extracted with a wet vacuum.

With old floors like this, which don’t have a damp-proof membrane installed under the floor, efflorescence is always a concern and can lead to white salts appearing on the surface of the tile as moisture rises through the floor. To counter this, I finished cleaning the floor by scrubbing it with Tile Doctor Acid Gel. This was then rinsed off with water and the soil extracted using a wet vacuum.

Sealing a Victorian Tiled Lobby Floor

The client was happy to seal the floor themselves (they wanted to save some money and it wasn’t a big area) so I supplied them with a bottle of Tile Doctor Colour Grow. I recommended this sealer as it will enhance the dark colours and being fully breathable it will cope with any moisture rising through the base. I recommended they apply two coats to start leaving time to allow the first coast to dry they could also then decide to leave it at that if they were happy with the finish.

Victorian Tiled Lobby After Rebuild Lytham St Annes


Professional Restoration of a Victorian Tiled Hallway in Lancashire

Victorian Tiled Lobby Floor Rebuild in Lytham St Annes Read More »

Amtico Vinyl Floor Before After Cleaning Silverdale

Renovating Amtico Vinyl Flooring in Silverdale

This client from Silverdale had called us over to renovate their 12-year-old Amtico vinyl floor that runs from the back door, through the kitchen and then over to the dining room. Although modern brands of Vinyl are much more durable than in the past, they do require a sealer to protect the surface from marking, enhance the colour and general appearance. This floor had not been retreated for twelve years and so its appearance had become dull and patchy in places.

Amtico Floor Silverdale Before Cleaning Amtico Floor Silverdale Before Cleaning

Tile Doctors are trained in the renovation of all types of Tile and this includes Vinyl flooring with which we use the same methods and equipment to strip the old sealer away and replace with new. Vinyl if a manufactured material so the products we use are different and Tile Doctor supply a Stripper and Sealer which are designed for the job.

Cleaning and Stripping an Amtico Vinyl Floor

We started by applying a clear mastic silicone around the base of the MDF panels in the kitchen, we would be using water in the cleaning process, so this was done to prevent any moisture being absorbed via capillary action which would ruin the panels.

Amtico Floor Silverdale Prep Before Cleaning

Once the area was prepped, we started stripping the old sealer off the Amtico using Tile Doctor Vinyl Strip diluted with five parts warm water. The solution was gradually applied as a slow speed buffing machine fitted with a black scrubbing pad was run over the surface. The soil generated was rinsed off the floor with water and then extracted using a wet vacuum

The floor was then steam cleaned to remove any excess product from the Vinyl, as well as making sure the floor area was as clean and dust free as possible before moving onto the next step of applying a fresh sealer.

Amtico Floor Silverdale During Steam Cleaning

The Amtico would need to be dry in order to seal it so as much moisture as possible was removed using the wet vacuum and then left to dry for about an hour with air blowers in place. This is very important as applying sealer to a damp Vinyl floor can cause issues with the bonding process resulting in the affected area turning white and feeling sticky.

Amtico Floor Silverdale Drying After Cleaning

Sealing Amtico Vinyl Flooring

Once I was satisfied the floor was dry three thin coats of Tile Doctor Vinyl Shine applied to the Amtico leaving the floor to dry for up to forty minutes between coats. Thin coats are the key, if it has a blueish tinge to the seal (what we call pooling) then the coat is too thick and needs to be thinned out which is best done with a paint pad. If the first coat is patchy, we just let it dry and then add a second coat to which will even out the patchiness.

Amtico Floor Silverdale After Cleaning Amtico Floor Silverdale After Cleaning

Tile Doctor Vinyl Shine is a modern high solids polymer floor seal and polish designed to protect and enhance the appearance of Vinyl floor tiles. It works well on all types of Vinyl including Amtico and Karndean and the optional third coat adds a super high gloss finish.

The floor looked great and really lifted the room. The client was very happy with the result and was kind enough to leave the following feedback.

”Very professional, efficient service, with an excellent end result. Very clean and tidy, punctual and made sure the job was finished to a high standard. Very pleased with the finish on my Amtico floor. – Sheila and Kevin S”


Professional Clean and Seal of an Amtico Tiled Kitchen in Lancashire

Renovating Amtico Vinyl Flooring in Silverdale Read More »

Bolivian Black Slate Floor Before After Renovation Blackpool

Renovating a Bolivian Black Slate floor in Blackpool

This kitchen floor in Blackpool was laid 20 years prior and comprised of Bolivian Black Slate inlaid with White Ceramic Tozzettos. The slate was now looking dull and unloved and the owner now wanted the floor deep cleaning and resealing to restore its appearance.

We visited the property in Blackpool to inspect the floor and discuss what would be needed to restore the floor. It was clear that the old seal had worn away with use which left the stone vulnerable to ingrained dirt and hard to keep clean. Additionally, there were a few broken tiles near the glazed patio doors that would need replacing but the rest of the floor was solid and just in need of some love and care.

Bolivian Black Slate with White Ceramic Tozzettos Before Cleaning Blackpool Bolivian Black Slate with White Ceramic Tozzettos Before Cleaning Blackpool

We discussed the process which would involve tile replacement, tile and grout cleaning and then sealing. I worked out a price to complete the job which was accepted and booked in for later in the month.

Cleaning and Repairing a Bolivian Slate Kitchen Floor

We cleaned the tiles with a strong dilution of Tile Doctor Remove and Go which was sprayed onto the floor and left to soak in for ten minutes before being scrubbed in. To scrub the floor, I used a rotary buffing machine fitted with a with a black scrubbing pad and approximately 15kg of additional weight to give the pad more bite. This removed what was left of the original matt sealer which was still evident in the less used parts of the floor. This process released the ingrained dirt from the stone into the cleaning solution which was then rinsed off the floor and extracted with a wet vacuum.

The grout was then deep cleaned with Tile Doctor Pro-Clean which was scrubbed in with a narrow brush and finished with a wire brush on some of the more stained grout lines. After this the wet vacuum was used again machine to extract the loose dirt and sediment and the floor rinsed down with water a few times to restore the pH balance in the floor. With the cleaning finished the floor now needed to dry off so it would be ready for sealing the next day.

Bolivian Black Slate with White Ceramic Tozzettos During Repair Blackpool

Next step was to turn my attention to the cracked tiles near the patio door. I suspect the patio doors were not an original feature and there had been some settlement over the years in the underlying cement. The cracked tiles were removed, and old adhesive and grout scraped out. Fortunately, the customer still had some spares, so these were laid in place with rapid setting adhesive and then grouted in.

Bolivian Black Slate with White Ceramic Tozzettos Before Cleaning Blackpool

Sealing a Bolivian Tiled Kitchen Floor

On the 2nd day we applied a tester of 2 coats of Tile Doctor Seal and Go in a corner area as the customer wasn’t sure if she should stick with a matt colour enhanced finish or satin. The customer liked the satin finish, so we applied four further coats of the Tile Doctor Seal and Go throughout. Each coat is left to dry before applying the next so this process can take some time.

The floor looked fabulous when finished in fact the customer said it almost looked like new, which wasn’t bad for a floor that was 20 years old!

Bolivian Black Slate with White Ceramic Tozzettos After Cleaning Blackpool Bolivian Black Slate with White Ceramic Tozzettos After Cleaning Blackpool

As usual before leaving we discussed aftercare which for the regular cleaning of the Slate I recommend Tile Doctor Neutral Cleaner. Neutral Cleaner as its name suggest is pH neutral so it won’t damage the sealer which can be a problem for cleaning products you find in supermarkets which are basically too strong. You really do need to check the label when choosing a cleaning product for a natural stone or sealed floor as many products are made from a derivative of a bleach which will erode the sealer prematurely with regular use.

Bolivian Black Slate with White Ceramic Tozzettos After Cleaning Blackpool


Professional Restoration of Black Slate Kitchen Tiles in Lancashire

Renovating a Bolivian Black Slate floor in Blackpool Read More »

Quarry Tiled Floor Before After Renovation Lancaster

Old Quarry Tiled Floor Repaired and Renovated in Lancaster

The pictures below are taken from a property in Lancaster which had two areas of tiled flooring that needed work, one Quarry tiled and the other an original Victorian tiled hallway which was over 100 years old.

We often get called out to restore broken tiles, replace missing pieces and then do a clean and seal afterwards to make it all look as good as possible. Tile Doctor covers both areas and our aim is to restore a tiled floor to its best possible condition, ideally making it look new or at least as close to new as is feasible with an old floor.

Quarry Tiled Floor Lancaster Before Repair

Repairing a Quarry Tiled Floor in Lancaster

The focus of this article will be the renovation of the Quarry tiled floor which required a lot of tiling work due to cracked and missing tiling. This presents a problem as it can be difficult to find exact match replacements, especially when the floor has been down for some time. There are a few companies that specialise in reproduction Victorian tiles however Quarry tiles don’t have a dedicated store or website where we can get matching tiles. In this case the client had scoured the internet and hunted down replacements which came close to matching the original.

Quarry Tiled Floor Lancaster During Repair
The first step in repairing a tiled floor is to carefully remove any damaged tiles and, in this case, there were quite a few. The exposed area is the cleaned of old adhesive and grout and the subbase is made good where required. Next the replacement tiles are laid onto a base of new rapid set flexible floor adhesive, I prefer to use a flexible adhesive as it will allow for any further moment in the floor. Once the adhesive had set the tiles were grouted in and we then left floor to fully set overnight.

Deep Cleaning a Quarry Tiled Floor in Lancaster

I came back the next day with our cleaning equipment and products to get the floor clean which should help blend the new tile in with the original.

I started by applying a strong dilution of Tile Doctor Pro-Clean to the Quarry tiles and then scrubbed it in with a rotary floor machine fitted with a black scrubbing pad. Pro-Clean is a strong and effective alkaline cleaner which is safe to use on Tile and Stone and unlike acid wont damage the clay. The cleaning solution soon turned black with the dirt that had been released from the old Quarry Tiles, so I gave the floor a rinse with water and extracted the soil with a wet vacuum.

The last job was to give the tiles a light acid rinse using Tile Doctor Grout Clean-Up, this isn’t a strong acid like the brick acid you find in DIY stores so it’s safe to use on most surfaces if it isn’t left for too long. The Grout Clean-up removes any old grout and minerals such as efflorescent salts from the Quarry tiles and is then rinsed off with water and extracted with the wet vacuum. The other advantage of giving the floor an acid rinse is it counters the alkaline cleaning products used earlier effectively neutralising the pH level of the tiles. Lastly the acid slightly etches the clay tile ensuring a much stronger bond with the sealer.

Sealing a Quarry Tiled Floor in Lancaster

The Quarry tiled floor was then sealed with Tile Doctor Colour Grow which is a matt sealer that impregnates the pores of the clay enhancing colour in the process and effectively adding protection to the tile from within.

Quarry Tiled Floor Lancaster After Repair
The quarry tiled floor looked much cleaner and fresher following the work, the cracked tiles were gone, and our customer was pleased with transformation we had managed to achieve.


Professional Restoration of an Old Quarry Tiled Floor in Lancashire

Old Quarry Tiled Floor Repaired and Renovated in Lancaster Read More »

Semi Riven Slate Floor Before After Renovation Bentham

Renovating Dull Semi Riven Black Slate Flooring in Bentham

This is a Semi Riven Black Slate floor which had been installed throughout much of the downstairs floor at a property in Bentham which is right on the Eastern edge of Lancashire. The Black slate and Grout had seen some wear and was now more Grey than black and having recently installed a new Kitchen the owner wanted the floor to look its best.

Rough stone can be especially hard to maintain if the wrong sealer has been applied. With rough or textured stone, it’s always best to use an Acrylic Sealer (aka ” Topical sealer”) where possible. Unlike a Matt finish impregnating sealer a Topical Sealer is designed to sit on the surface of the Stone preventing dirt from getting caught in the nooks and crevices making it much easier to clean.

Rough Black Slate Floor Before Cleaning Bentham

After surveying the floor, I recommend burnishing the stone with a coarse pad to deep clean the stone and remove any remaining sealer, then seal with Tile Doctor Seal and Go which is a Topical sealer which we find always has provides good results on this type of floors. Happy with the price and keen to get the floor renovated we were given the go ahead and scheduled a date to return to do the work.

Rough Black Slate Floor Before Cleaning Bentham

Deep Cleaning a Semi Riven Black Slate floor in Bentham

The last thing we want to do is cause any damage to their beautiful new wooden kitchen. So before starting the cleaning process I applied clear silicone to the base of the new Kitchen units, this prevents water from the cleaning process seeping into the woodwork through capillary action.

Rough Black Slate Floor Applying Silicone Bentham

To get the tiles clean we burnished the stone floor with a coarse 200-grit Diamond pad fitted to a buffing machine running at slow speed and using water for lubrication. This gives a really deep clean and was followed up with the application of a black scrubbing pad to remove any excess resin released from the Slate which is quite common with Black stones due to the oil content. Once the Slate was clean, we turned our attention to the grout which was scrubbed with Tile Doctor Pro-clean. The floor was then rinsed with water and the soil extracted with a wet vacuum, once done the floor was left dry out.

Whilst at the property we managed to resolve a problem with a poorly laid slate tile in the hallway which the customer had often tripped over, so much so they had covered it with a rug, which was fine, but you couldn’t see the Slate. Rather than lift and relay the tile I managed to cut back the surface of the stone with a hand held flex machine using several different diamond grits. You can see from the pictures how this looks before, during and after the seal. A further advantage of treating the stone in this way is that the slate takes on a more polished finish as the rough texture is cut back. The results speak for themselves and the customer certainly won’t be tripping over the tile from now. With no further need for the rug they can get the full benefit of the slate floor.

Rough Black Slate Tile Before During After Surface Correction Bentham

Sealing a Riven Black Slate Tiled Floor

The floor was left to dry off overnight and we returned the following day to apply a sealer first checking the floor was dry using a moisture meter. All was well, so we started to apply the first of several coats of Tile Doctor Seal and Go. It was a large area across multiple rooms, so it took some time before the job was complete.

Rough Black Slate Floor After Cleaning Bentham

The sealer added a lovely subtle sheen to the floor and restored the black colour in the Slate, the grout was also much cleaner and floor look transformed from the grey dull appearance we first experienced. As usual before leaving we talked about aftercare, using warm water (not hot or cold) with a mop and bucket and half a cap of Tile Doctor concentrated Neutral Tile Cleaner. Using the correct cleaning product will ensure they get maximum life out of the sealer.

Rough Black Slate Floor After Cleaning Bentham


Professional Renovation of a Black Riven Slate Tiled Floor in Lancashire

Renovating Dull Semi Riven Black Slate Flooring in Bentham Read More »

Stone Cross Manor Victorian Tiled Hall Restoration Ulverston

Large Victorian Manor House Hall Floor Restored in Ulverston

Earlier this year we had the privilege to be involved in the restoration of a large Victorian tiled hall at Stone Cross Manor in Ulverston which is being sympathetically redeveloped into nineteen apartments by Persimmon Homes at a reported cost of £4 million. The magnificent Grade II-listed stately home was built in 1874 for Myles Kennedy who was a Limestone Quarry owner and chairman of an Ironworks.

The property continued to be occupied by the Kennedy family until 1943 when it was requisitioned by the military who then sold it to Lancashire County Council in 1946. The council used it as a boarding school for some decades and allegedly had the central oak staircase removed so the hall could be used to play indoor football. Since that time, it has had different owners and states of disrepair until finally being acquired by Persimmon who contacted us to quote for restoring the floor to its former glory. This would be no easy task and would require plenty of help. However, we are a resourceful bunch and being part of a large network of Tile Doctors means we were able to draft in other Tile Doctors to assist.

Stone Cross Manor Ulverston

Before we took the job on, I went over to survey the floor and was immediately taken aback by the sheer size and scale of the project. The impressive Victorian hall has now had its large wooden staircase rebuilt and this sits in the centre of a series of architectural stone columns.

The floor was in a sorry state though and it certainly had a story to tell. At some point in its long history sections of the beautiful Victorian tiles had been cut out for the installation of central heating and then back filled with cement. There were also other areas that had been given the same treatment for some inexplicable reason. I suspect that the floor must have been covered in carpet during its later life to hide the mess.

Victorian Tiled Stone Cross Manor Hall Before Restoration Victorian Tiled Stone Cross Manor Hall Before Restoration

The biggest problem was the realisation that with so many tiles missing the only way we could get exact duplicates would be to have them made by a company such as Craven and Dunhill. They are specialist tile manufacturer who date back to 1872 and can reproduce old tiles using the same tones and colours to match the originals. This was a high spec job, so this was the right approach however the price for the moulds and the time needed to manufacture threatened to push the cost of renovating the floor off the scale.

Victorian Tiled Stone Cross Manor Hall Before Restoration

We discussed this with the developer and manged to come to a compromise by reusing tiles from another room in the property. Many of the tiles in that room had been damaged and were beyond restoration however there were enough tiles in good condition to fulfil our requirements in the main hall. They would have to be carefully lifted and cleaned but the tiles matched the colour and tone, size and texture to the main hallway perfectly. When you look at the before and after pictures on this page you will really struggle to see any difference and this is rare on old floor like this, the only exception being the black tiles underneath the radiators where a matching tone wasn’t available.

Rebuilding a Large Victorian Tiled Floor

The first week was spent lifting and replacing broken tiles, it was a large floor area of about 120m2 which was set to be the main showpiece of the building, so it had to be right. As part of the floor prep it was also necessary to level parts of the floor with the application of a a self-levelling compound. We brought in Cardiff Tile Doctor Julian Iaconno to run this part of the job, he is an absolute master tiler and one of the best Victorian Tile installers in the country. At one point there was three of us working on the floor in order to keep to schedule.

Victorian Tiled Stone Cross Manor Hall During Restoration Victorian Tiled Stone Cross Manor Hall During Restoration

Deep Cleaning a Large Victorian Tiled Floor

The second week was spent cleaning the floor various Diamond burnishing pads, moving though increasingly finer girts until we achieved the desired finish. We also used a lot of Tile Doctor Grout Clean-up and Pro-clean to remove the old grout and dirt from the recycled tiles. As is always the case on a building site you get a lot of tradesmen who like to have a look at what we have done and walk all over our nice clean tiles, thus leaving dusty footprints everywhere. I must give credit to the Site Foreman for keeping these guys out although best intentioned they weren’t helping with the cleaning process, so all doors were locked off and access was limited to the site foreman and Tile Doctor only.

Victorian Tiled Stone Cross Manor Hall During Restoration Victorian Tiled Stone Cross Manor Hall During Restoration

Sealing a Large Victorian Tiled Floor

The third week was reserved for Sealing the tiles however this dragged on due to issues with the heating which was basically non-existent at the time and not an ideal situation in January. Persimmon went out of the way to chase up the plumbers who had been running behind and got this sorted for us, without heat we would struggle to get the sealer to dry.

Victorian Tiled Floor Stone Cross Manor Hall After Restoration Victorian Tiled Floor Stone Cross Manor Hall After Restoration

We applied a Matt finish sealer called Colour Grow, which copes very well with potential damp issues that can cause problems with old floors with no damp proof course, it’s also excellent at bringing out the colour of Tiles whether Clay or Stone. Four coats of Colour Grow were applied to the Victorian tiles and being such a large floor area, it took a few days to fully seal the floor.

Victorian Tiled Floor Stone Cross Manor Hall After Restoration Victorian Tiled Stone Cross Manor Hall After Restoration

We cannot praise Persimmon enough for the dedication they have shown in the restoration of this historic property which has had a chequered past and will now have a long future.


Professional Restoration of a Victorian Tiled Hallway in Lancashire

Large Victorian Manor House Hall Floor Restored in Ulverston Read More »

Sandstone Floor Grout Before After Restoration Ulverston

Grout Colour Restoration on a Ceramic Kitchen Floor Ulverston

This client got in touch to see if we could clean the grout in her large kitchen floor which was tiled with Terracotta style Ceramic tiles. As per usual we visited the property first which was in the market town of Ulverston to survey the floor and get a better idea of what was required.

Ceramic Tiled Kitchen Floor Before Grout Colouring Ulverston

Believe it or not the grout had originally been Sandstone in colour, but poor cleaning practices had reduced the colour back to grey as all floor grouts (apart from white) are basically a cement grey with a colour dye added. I suspect the customer had been using a strong bleach-based product to clean the floor with which as well as removing colour can also lead to dehydration resulting in cracking. It’s work knowing that even the “Green Cleaning Products” on the market generally contain at least 5% of “non-ionic surfactants” which can also impact grout with constant use.

Ceramic Tiled Kitchen Floor Before Grout Colouring Ulverston Ceramic Tiled Kitchen Floor Before Grout Colouring Ulverston

Our recommendation was to re-colour the grout using a durable Tile Doctor Grout Colourant which seals and rejuvenates existing grout and is available in ten popular colours. The client was happy that we could improve the appearance of the floor, we agreed a price and scheduled the work in which would take two days to complete.

Cleaning and Colouring Grout on a Ceramic Tiled Kitchen Floor

It was a large 45m2 kitchen and so it took most of the first day just to clean the grout using Tile Doctor Grout Colourant Pre-Treater. This is an effective ready-to-use acidic cleaner which is designed to lightly etch and clean the grout joints so that you achieve a superior bond with the colourant. The product comes in a spray bottle so its just a question of spraying it onto the tile, leaving it for five minutes and then scrubbing it in with a brush. Afterwards you rinse it off with water and extract with a wet vacuum.

We worked our way across the large floor area in sections leaving an air blower in place over the completed section to accelerate the drying process. Once we managed to get a cleaned area dry, we started to apply the first coat of Grout Colourant. The colourant is relatively easy to apply with a small brush, you just need to ensure that any excess that gets on the tile is wiped off before it dries.

Once the second of coat of grout colourant had been applied and had dried the floor was inspected and touched up further where required. Before leaving we gave the floor a dry polish with our buffing machine just so it all looked spick and span before we handed the floor back to the customer. There was no need to seal the floor, Ceramic tiles won’t accept a sealer and the grout will now be protected by the colourant which acts like a barrier.

Ceramic Tiled Kitchen Floor After Grout Colouring Ulverston Ceramic Tiled Kitchen Floor After Grout Colouring Ulverston

The transformation to the floor was huge as you can see in the pictures. My customer was over the moon with the results and left the following feedback:

‘I can recommend the professional services of Russell and team, nothing was too much trouble and the job was completed on time with excellent results’
Karen. Ulverston

Ceramic Tiled Kitchen Floor After Grout Colouring Ulverston


Professional Grout Restoration of a Ceramic Tiled Kitchen Floor in Lancashire

Grout Colour Restoration on a Ceramic Kitchen Floor Ulverston Read More »

Textured Indian Sandstone Before After Grinding Smooth Barnoldswick

Rough Textured Indian Sandstone Grinded Smooth in Barnoldswick

The pictures below show a Rough Textured Indian Sandstone floor installed in the Kitchen and Hallway at a property in Bernoldswick which is a small town just outside the Yorkshire Dales national park. The client called us out to have a look at their floor which was very dirty. They were undecided as to what to do with it and were even considering ripping it up and putting a more practical floor down. This Sandstone has a rough texture which traps dirt and can shred mops making it very difficult to maintain so it’s not surprising that the client was close to giving up on it.

Textured Indian Sandstone Before Cleaning Barnoldswick

Initially we were asked just to deep clean and seal the Stone, but I realised that wouldn’t resolve the problem completely, so I offered a service we call Milling. This is a process involves applying coarse diamond pads with special machinery to remove a good chunk of the rough texture (about 80 to 85% ). It would leave the stone with a much smoother finish which is easier to keep clean, easier to seal and a lot easier to maintain in the future.

Textured Indian Sandstone Before Cleaning Barnoldswick Textured Indian Sandstone Before Cleaning Barnoldswick

After a demonstration was done and a price given for either a clean and seal or to Mill first followed by a clean and seal the customer opted for the latter. This would also prove significantly cheaper than ripping up the floor, hiring a skip to take away the stone, then self-levelling the concrete to get it ready for the new floor, not to mention the cost of the new floor covering.

Cleaning and Milling an Indian Sandstone Tiled Kitchen and Hallway Floor

Milling the stone involves the use of a set of thee milling pads of different grades (50, 100 and 200 grit) which are applied in sequence. You start with the coarse and abrasive 50 grit milling pad and follow this by smoothing this surface with the finer 100 and 200 diamond grit milling pads. Water is used to lubricate and capture the dust which is created during the process resulting in a slurry which needs to be rinsed away and extracted with a wet vacuum between each pad. The process requires the use of a solid weighted rotary machine and a fair bit of muscle power to guide it.

As you can see from the pictures the difference is immense but what you can’t tell from these photos is how smooth the stone feels to the touch as its the rough texture of Sandstone that catches all the dirt and makes it hard to clean, even after it has been cleaned and sealed professionally.

To refine the surface of the Sandstone even further the Milling process is followed by the application of finer grade Burnishing pads, again applied with water and the soil rinsed off between each pad. This process uses no chemical cleaning products only water, Diamond pads and machinery.

Sealing an Indian Sandstone Tiled Kitchen and Hallway Floor

After allowing the stone to fully dry out overnight we finished the job with several coats of Tile Doctor Colour Grow which is a colour enhancing impregnating sealer that protects the stone from within. It gave the stone a nice low-key matt colour enhanced finish that really showed off the character in the stone.

Textured Indian Sandstone After Cleaning Barnoldswick Textured Indian Sandstone After Cleaning Barnoldswick

The client was over the moon with the result and were so pleased they had not ripped up the floor!

Textured Indian Sandstone After Cleaning Barnoldswick


Professional Restoration of Indian Sandstone Floor in Lancashire

Rough Textured Indian Sandstone Grinded Smooth in Barnoldswick Read More »

Slate Tiled Kitchen Floor Before and After Cleaning High Bentham

Dull Riven Black Slate Floor Transfored in High Bentham

We were asked to come and advise a customer regarding their stone floor which the customer was struggling to keep clean. The property was in High Bentham which lies on the River Wenning, just West of the Yorkshire Dales National Park.

Slate Floor Before Cleaning High Bentham

We often get customers who give up looking after their tiles after a while as some stone like this Black Riven Slate need quite a bit of upkeep to keep them looking good and a standard mop and bucket at times isn’t enough to keep them looking pristine. In this case the sealant had worn away in the high traffic areas and the floor had a slightly rough texture to the surface which meant it was holding onto dirt making it difficult to keep clean. We proposed the floor should be cleaned and resealed, discussed the cost and agreed a time for the work to be carried out.

Slate Floor Before Cleaning High Bentham

Cleaning a Black Riven Slate Tiled Floor

To get the tiles clean we burnished the stone floor with a coarse 200-Grit Diamond pad fitted to a weighted buffing machine using water for lubrication. The floor was then rinsed and then the process repeated using a series of different graded pads, namely the 400 and 800 grit burnishing pads which further cleaned and resurface the appearance of the stone.

The grout was cleaned using Tile Doctor Pro-Clean which was scrubbed into the grout lines by hand; Pro-Clean is a heavy-duty cleaner which gets to the really stubborn stains and it did a great job at getting the grout looking like it should. The cleaning process was then finished off by rinsing the floor with water and extracted the slurry with a wet vacuum. The floor was inspected and retreated to the same process where more work was required. We usually find leaving Pro-Clean on a stain for longer and assisting with a bit of steam helps to lift the dirt out of the pores of the stone.

Once cleaned thoroughly we rinsed the floor again and then extracted as much moisture from the floor as possible with a wet vacuum before leaving it to dry off fully overnight.

Sealing a Riven Black Slate Tiled Floor

We called back the following day to apply a sealer first checking the floor was dry using a moisture meter. All was well, so we started to apply the first of two coats of Tile Doctor Colour Grow, a third coat was attempted but the slate would not accept any more sealer, and this was removed with a cloth. It is important to know if you have reached FCS (Full Cure Sealability) if not then the pores of the tiles will still be open to accepting dirt and the job won’t last long. Over a very short period of time the tiles will diminish in stature and finish.

Slate Floor During Sealing High Bentham

The sealer really restored the black colour to the Slate and transformed the look of the floor. As always, we left the customer a free bottle of Tile Doctor Neutral Cleaner, using the correct cleaning product in future will ensure they get maximum life out of the sealer.

Slate Floor After Sealing High Bentham Slate Floor After Sealing High Bentham

The floor looked lovely when finished and the customer was very happy with the overall result.


Professional Renovation of a Black Riven Slate Tiled Floor in Lancashire

Dull Riven Black Slate Floor Transfored in High Bentham Read More »

Victorian Tiled Hallway Floor Before After Restoration Lancaster

Victorian Floor Tile Restoration Lancaster

We often get asked to restore old Victorian tiled floors which are generally over 100 to 150 years old and as I’m sure you can imagine they experience a lot of wear over that length of time.

Victorian floor tiles before restoration Lancaster

We recently visited a property with such a floor in Lancaster after the client got in touch looking to have their hallway floor tiles restored. We arrived to inspect the floor and could see straight away that it was looking a little tired and in need of care and attention. Some tiles had become loose and had broken apart, especially around the doorways. Also, this floor had suffered from subsidence in the past and this had created a crack line near the top end of the hallway which pushed up several of the tiles. We went through what could be done to restore it, the client agreed a price and we arranged a time to come back.

Cleaning and Repairing a Victorian Tiled Hallway Floor

My first task was to take the loose tiles up, grind the concrete screed back so it was as level as we could make it and then we needed to refit the tiles. Once all loose tiles were fixed, we left them to dry and cure.

Victorian floor tiles during restoration Lancaster

We then came back to start the main clean of the floor, we used Tile Doctor Diamond Burnishing pads for this, which bite in deep to the clay face and remove ingrained dirt far better than conventional alkaline cleaners can. We used a series of different grades of these diamond pads to get the finish we required and then rinsed with clean water once were finished, removing the slurry created with a wet vacuum.

Any areas we couldn’t reach with our weighted buffing machines we had to get on our hands and knees and use small handheld Diamond Blocks, using a bit of clean water and elbow grease, this is especially good on intricate edges and around doors and corners.

Victorian floor tiles during restoration Lancaster

The floor was given a quick rinse with water to remove any remaining clay resin and soil generated by the burnishing process. A wet vacuum is then used to extract the soil and remove as much moisture from the floor before being left to dry off fully overnight.

Sealing a Victorian Tiled Hallway Floor

Before we seal the Victorian Tiles, they looked very dull and washed out however this all changes once we apply the sealer. We checked the moisture levels in the floor which were fine. Our favourite sealer for this type of tile is called Tile Doctor Colour Grow, this is a fully breathable sealer which restores the colour lost in the cleaning process and allows for the floor to breathe, which is an absolutely necesity on an old floor without a Damp Proof Membrane where Efflorescence can be an problem.

Tile Doctor Colour Grow is an impregnating sealer that works by occupying the pores in the tile, so dirt cannot become ingrained there. It leaves a matt finish and enhances the colours in the tile bringing them to life, as you will see on the photos.

Victorian floor tiles after restoration Lancaster

For aftercare we always advise our customers to use Tile Doctor pH Neutral tile cleaner as it’s specially designed for cleaning sealed surfaces without damaging the sealer like cheap supermarket cleaners that contain anionic surfactants.

The client was very pleased with the restoration of her floor which is now in good physical condition and looks much brighter.


Professional Restoration of a Victorian Tiled Hallway in Lancashire

Victorian Floor Tile Restoration Lancaster Read More »

Mexican Terracotta Tiled kitchen Before and After Renovation Penwortham

Stripping Wax from Mexican Terracotta Kitchen Tiles in Penwortham

My client from Penwortham, on the outskirts of Preston on the south bank of the River Ribble contacted me about their Mexican Terracotta kitchen floor as you can see from the photographs below was in a bit of a state.

Mexican Terracotta Floor Penwortham Before Cleaning
On the pictures you will see numerous white marks which have happened due to the use of bleach-based supermarket cleaning products on the tiles. The bleach has upset the original wax polish and over time layer after layer of new polish has been applied to try and hide it, but they had also continued to use the wrong cleaner, so the problem simply became worse. The floor was otherwise in good condition with very little damage, although the grout had also discoloured and needed deep cleaning.

Mexican Terracotta Floor Penwortham Before Cleaning

Stripping Wax off a Mexican Terracotta Tiles

Luckily Tile Doctor have recently brought out a new product called Tile Doctor Wax Away which is specifically formulated to remove layers and layers of compacted wax polish. It was the first time we had used it on a situation this bad before to it was in for a good test. I’m please to say Wax Away didn’t disappoint and is designed to melts the formula that makes the wax stick together. So, with the aid of a stiff deck brush the product was scrubbed into the floor and then extracted off the floor with an industrial wet vacuum.

Mexican Terracotta Floor Penwortham During Cleaning
With the old layers of wax removed the white markings that were spoiling the look of the surface disappeared. Stubborn areas had to be retreated but once all the wax slurry was removed using the wet vacuum you could see the improvement in the floor.

The grout was then cleaned using a Tile Doctor Pro-Clean scrubbed into the grout line using a stiff brush, one done the soiled cleaning solution was rinsed off the floor with water and extracted using the wet vacuum. The only thing we couldn’t fix was the damage done to the grout by the bleaching agent which hydrates grout and turns it white. It often cracks the grout as well with long term usage as in this case. We did offer to apply a grout colourant over this once the sealer had fully dried, but this was an added cost the client didn’t want to bare which was understandable. This is a service we could return in the future to complete if the client wished.

Sealing Mexican Terracotta Kitchen Floor

Once cleaned, we fully rinsed with water to remove any chemicals and left the kitchen floor to dry out overnight. Returning the following morning to seal the floor. Before starting the sealing process however I wanted to be sure the floor was indeed dry, so I ran a few checked with a moisture meter in different spots. Once satisfied we moved on to the sealing process.

Terracotta tiles being made of clay are very porous and so seven coats of sealer were applied before it was fully sealed. We used Tile Doctor Seal and Go for this, it’s an excellent choice for Terracotta as it brings out the true hue and texture of the clay as well as adding a nice subtle shine. The new sealer will make the floor much easier to maintain than the old wax polish they had previously been using.

Mexican Terracotta Floor Penwortham After Cleaning
For regular cleaning of sealed floors, we recommend using Tile Doctor Ph Neutral Tile Cleaner. Most supermarket cleaning products are acidic which will prematurely degrade the sealer over time.

As you can see from the after photos the floor was left looking much cleaner and brighter and the horrible white marks were no where to be seen. The client was very happy with the final result.

Mexican Terracotta Floor Penwortham After Cleaning
 

Professional Clean and Seal of a Mexican Terracotta Tiled Floor in Lancashire

Stripping Wax from Mexican Terracotta Kitchen Tiles in Penwortham Read More »

Copper Slate Tiled Floor Before and After Cleaning and Sealing Heysham

Rough Copper Slate Tiled Floor Renovated in Heysham

This customer in the coastal village of Heysham had recently had these beautiful Copper Slate Tiles laid by a builder who had been working on the house. As part of the work he also sealed them with a solvent aerosol sealer. Floor tiles experience a lot of wear from foot traffic and as a result the sealer only lasted about two weeks before it had worn off and dirt had started to penetrate the pores of the stone. The photos below were taken two months after they were sealed.

Rough Slate Before Cleaning Heysham
Aerosol sealers are only good for wall Tiles where they experience minimum contact, we usually only recommend their use for shower cubicle or wet rooms and they need constant topping up every 6 months or so. In our experience floor surfaces receive a lot of abrasion from the traffic of shoes and so on which will diminish an aerosol applied sealer very quickly.

Rough Slate Before Cleaning Heysham

Cleaning Rough Copper Slate Tiles

It makes sense to clean tiled floors before applying a sealer otherwise you simply trap the dirt under the seal which will reduce its appearance. So before re-sealing the floor with something more effective it was treated to an abrasive clean using a 200-grit diamond encrusted floor burnishing pad fitted to a weighted buffer machine. The pad was run over the whole floor using water to lubricate and with the machine running at slow speed to reduce splashing.

Next step was to clean the recessed grout which pads can struggle to reach, this was done by applying a dilution of Tile Doctor Pro-Clean along the grout lines and then scrubbing it in with a stiff grout brush by hand. Once done the residue from the tile and grout cleaning was rinsed off the floor with water and then extracted with a wet vacuum.

Sealing Rough Copper Slate Tiles

The floor was left to dry off completely overnight and I returned the next day to re-seal, this time with a more suitable product. My sealer of choice for Slate is Tile Doctor Seal and Go which will not only protect the stone from dirt and staining but also adds a very pleasing sheen finish. The new sealer really brought out the black and copper colours in the stone and now looks amazing.

Rough Slate After Cleaning Heysham
For long-term care I always recommend customers avoid the use of steam cleaners and acidic or strong alkaline cleaning products which can prematurely reduce the life of the sealer resulting in dirt becoming trapped in the pores of the stone again. Naturally Tile Doctor have designed a product for this which is called Tile Doctor Neutral Tile Cleaner, supplied in concentrated form when diluted with water it becomes pH neutral and safe to use on sealed surfaces. I always leave my customers with a complimentary bottle after cleaning their floor, so they are reminded what to use.

Rough Copper Slate After Cleaning Heysham

Professional Slate Floor Maintenance in Lancashire

Rough Copper Slate Tiled Floor Renovated in Heysham Read More »

Carpet Covered Mexican Terracotta Floor Restored in Elswick

Carpet Covered Mexican Terracotta Floor Restored in Elswick

Mexican Terracotta is quite a difficult tile to deal with, mainly due to the fact it is very porous clay and partly fired, unlike a Spanish or French equivalent which is fully fired and a lot less porous as a result. Although difficult to maintain they are full of character and colour so it’s understandable why they are so popular.

Mexican Terracotta Before Cleaning Elswick
This particular Mexican Terracotta floor was installed in the kitchen and garden room of a house in Elswick near Preston around twenty years prior. The house had recently changed hands and the new owner wanted the floor in the garden room renovating, it had been covered with a carpet in the past and had now lost all its colour due to ingrained dirt.

Mexican Terracotta Before Cleaning Elswick Mexican Terracotta Before Cleaning Elswick

Cleaning Mexican Terracotta Tiles

You can see from some of the photographs that the tiles were quite grubby, so I knew we would have to give this floor a really deep clean to get the dirt out. I felt the best way forward would be to apply Tile Doctor Oxy Gel to the Terracotta and leave it to soak in. This product is a very strong gel version of Tile Doctor Pro-Clean, our popular tile and grout cleaner and needs a lot of dwell time to break down fully what was left of the sealer, carpet adhesive and extract the dirt from the pores of the clay.

The product was then worked into the tile and grout using a black scrubbing pad fitted to a rotary floor buffer running at a slow speed. This action worked as predicted and the now soiled cleaning solution was extracted from the floor using a wet vacuum. A lot of rinsing with water was required after this to remove all the dirt and traces of product from the tiles. I wanted to ensure all traces of the alkaline cleaning solution were rinsed from the pores of the clay, if we left any of this in the clay it could cause issues with the new sealer.

Sealing Mexican Terracotta Tiles

The floor was left to fully dry out which can take some time with Terracotta so after returning to seal the floor damp meter readings were taken first so we could be sure it had dried completely. This is essential because excess moisture can cloud the sealer and damage its performance.

Our choice of sealer was Tile Doctor Seal and Go, which provides excellent surface protection along with an aesthetically pleasing deep sheen finish that the customer wanted. The sealer is also water based so you don’t get that solvent smell as it dries.

Mexican Terracotta Before Cleaning Elswick
As you can see from the photographs, the result was fantastic, and it just goes to show even a twenty-year-old Terracotta floor can be rejuvenated and make it look like almost new.

Excellent results on terracotta tiled floor that had had carpet laid on top so was covered with glue and pretty dirty! Wouldn’t hesitate to use them again.
Caroline M, Nr Preston

Mexican Terracotta Before Cleaning Elswick
 

Professional Mexican Terracotta Tile Renovation in Lancashire

Carpet Covered Mexican Terracotta Floor Restored in Elswick Read More »

Limestone Fireplace Hearths Stained by Flooding Rejuvenated in Morecambe

Limestone Fireplace Hearths Stained by Flooding Rejuvenated in Morecambe

Morecambe is a large town on Morecambe Bay in Lancashire, and is a tourist hotspot within the region – particularly amongst beach goers during the summer. However, due to its location of being right next to the coast and near to the River Lune, Morecambe is an area which is commonly affected by flash flooding. Just last year there were several episodes of severe flooding.

This flooding has a big impact on houses and businesses – the damage water can cause can come as quite a surprise if you have not experienced it before. I recently visited to a business in Morecambe which had been affected by flooding. The business was, in fact, a fireplace showroom and a pair of the Limestone fireplace hearths on display had been stained by the water.

Floor Damaged Limestone Fireplace Hearth Before Cleaning Floor Damaged Limestone Fireplace Hearth Before Cleaning

We were asked to remove the water marks left by the flooding. One of the hearths has been in use as a test model, with a coal burner installed, and it hadn’t been cleaned properly in some time. As you can imagine, there were more problems than just the water stains to overcome! Both hearths would require a deep clean and fresh seal.

Cleaning Stained and Dirty Limestone Fireplaces

To begin, we applied Tile Doctor Oxy-Gel to the hearths. This product is a specially formulated, alkaline-based degreaser and cleaner. As it comes in a gel form, not a liquid, Oxy Gel can be brushed into vertical surfaces and left to soak, without risk of it either disappearing into the Limestone or, even worse, trickling down the side of the surface. We would not want it coming into contact with the carpet, for instance.

We left the Oxy-Gel to dwell for a short period on one hearth while we worked on the other, applying the same treatment. After around twenty-five minutes we rinsed off the gel with clean water and then extracted any excess moisture with the use of a wet vacuum.

This process did a good job of cleaning the Limestone, but more work was required to restore its appearance, so the hearths were polished using a set of diamond encrusted hand held burnishing blocks. We started with the coarsest block (50 grit) and rubbed the stone with a bit of added water as lubrication, before wet vacuuming away the excess residue. This process was then repeated with progressively finer blocks (100, 200 and 400 grit), and the hearths were given a final rinse with fresh water.

There were some odd ring marks on one of the Limestone hearths that we couldn’t remove. Thankfully, the owner put our minds to rest on this problem, as he said they were there when he initially purchased the stone over 20 years ago. They had been covered with dirt ever since and the customer was surprised, but not shocked, to see them again. I suspect that these marks were caused by the natural mineral deposits within the stone. These should not be seen as a stain, but just a characteristic of the stone – and no amount of cleaning will get these marks out.

We would normally seal a light-coloured stone like this with Tile Doctor Ultra-Seal, as this no-sheen product helps to retain the natural patina of the stone. Alternatively, if we wanted to darken the tone of the Limestone, we would apply Tile Doctor Colour Grow, which is a colour-intensifying, impregnating sealer. Two coats of either sealer would suffice, in this case despite being very pleased with the results of the cleaning, the customer decided that he wanted to take care of sealing of the stone himself.

Floor Damaged Limestone Fireplace Hearth After Cleaning Floor Damaged Limestone Fireplace Hearth After Cleaning


Water Stained Limestone Fireplace Hearth Restoration in Morecambe

Limestone Fireplace Hearths Stained by Flooding Rejuvenated in Morecambe Read More »

Brazilian Grey-Green Semi-Riven Slate Floor Hornby Kitchen

Brazilian Grey/Green Semi-Riven Slate Floor Hornby Kitchen

Rough Slate is notorious for homeowners to maintain as dirt can quickly become trapped in the rough surfaces. The example on this page is that of Brazilian Semi Riven Slate installed in the Kitchen of a house in the village of Hornby, which while naturally cleft from the rock loses none of its texture and style and yet has a much smother appearance than the typical rough Slates from China. Less processing means it’s not quite completely smooth but it is a lot less expensive to buy than say a honed or polished Slate which is more difficult to maintain due to various polishing techniques required to keep up the appearance. Brazilian Slate is in fact one of my favourite slates to clean and also one of the most rewarding of Slates to seal as the sealer really does bring out the colour and character of the stone.

Sealers provide a protective barrier on natural stone floors and without it dirt can penetrate into the pores of the stone making it more and more difficult to clean effectively. Unfortunately on this floor the new homeowners were unaware on what sort of Stone it was and had no idea how to look after it which resulted in the sealer wearing down prematurely and the floor becoming dull and un-inviting.

Semi-Riven Slate floor Before Cleaning Hornby Semi-Riven Slate floor Before Cleaning Hornby

Cleaning Black Semi-Riven Brazilian Slate Tiles

To restore the appearance of the Slate floor we started by taping up the edges of the new kitchen units to protect the wood from splashing. This was followed with an application of a strong dilution of Tile Doctor Pro-clean worked in with a black buffing pad fitted to a buffing machine running at slow speed (working at a slower speed results in less splashing). The pads can struggle to reach the edges and corners so these were cleaned by hand.

Once we had finished on the main floor area we then concentrated on the grout using a steam cleaner and more Pro-clean scrubbed in with a narrow stiff brush.

Last step of the cleaning was to rinse the floor with water to remove any trace of cleaning products from the Slate and then dried off the floor the best we could with our high wattage wet vacuum machine and left the floor to dry off naturally over night.

Sealing Black Semi-Riven Brazilian Slate Tiles

The next day we returned to seal the floor checking first that the floor had completely dried. The customer had requested a matt finish however we have worked on Brazilian Slate many times before and we knew how good they can look with this Satin finish sealer. Naturally its the customers decision so we offered to do a test piece and let them decide if they didn’t like it we would strip off the test piece and apply a Matt finish sealer like Tile Doctor Colour Grow instead.

The floor was dry so a couple of coats of Tile Doctor Seal and Go were applied to one Tile so that they could appreciate how it would look. Luckily the customer agreed with us and so we set about sealing the whole floor with Seal and Go.

To speed up the drying process Air Blowers were installed as we worked and it wasn’t long before the sealer was dry and the customers were able to walk on the floor and inspect every area before we left. I’m please to report that they were over the moon with the floor and my recommendation of sealer.

Semi-Riven Slate floor After Cleaning Hornby Semi-Riven Slate floor After Cleaning Hornby

To maintain the slate tiles going forward we always give our customers a free bottle of Tile Doctor pH neutral tile cleaner, which is a little incentive for them to provide some feedback via our website.

Professional Semi Riven Slate Floor Renovation in Lancashire

Brazilian Grey/Green Semi-Riven Slate Floor Hornby Kitchen Read More »

Bitumen Stained Victorian Geometric Hallway Rejuvenated in Barrow in Furness

Bitumen Stained Victorian Geometric Hallway Rejuvenated in Barrow in Furness

This old Victorian tiled Hallway floor, laid in a geometric pattern, at a house in Barrow in Furness was a challenging project. The tiles were extremely dirty and also stained with Black Bitumen which has been used as an adhesive, however we have come across these sorts of problems before and so I was confident it could be resolved.

Geometric floor before Restoration Barrow in Furness Geometric floor before Restoration Barrow in Furness

Deep Cleaning an Old Victorian Tiled Floor

I roped in Heidi and my son Lewis who spent a whole day cleaning with chemicals, steam, buffing pads and unfortunately the results were far from satisfactory; the customer wasn’t happy and Heidi wasn’t happy with it either. It was clear that the black bitumen had penetrated deep into the pores of the clay and becoming so embedded that no chemical or technique we were using would shift it fully.

Geometric floor before Restoration Barrow in Furness
To top it off I had gone out earlier to tile the old mat well with matching tiles before we started the cleaning but due to the depth of the floor matt. The matt well was at least 35mm so it was clear I couldn’t use standard floor adhesive. I opted instead for a sand cement mix, similar to what the Victorians would have used originally. This filled up the depth and allowed me to tile and grout the same day, however overnight there was a bit of shrinkage and some of the new tiles settled unevenly.

Geometric floor before Milling Barrow in Furness
I racked my head for a solution to both issues and decided the best course of action would be to Mill the clay tiles to remove the Bitumen and smooth down the uneven effect of my tiling. This is not something we would normally do on a clay tile as this system can leave scratches which potentially would look worse that the dirt. After I had milled the Tiles down with a course pad fitted to a heavy buffing machine and removed all the issues I then counteracted any scratches left over using a higher grit milling pad. This solution fully resolved both issues leaving it ready for the final step of sealing.

Geometric floor After Milling Barrow in Furness

Sealing an Original Victorian Tiled Floor

The floor was left to dry off overnight and we returned the next day to seal the tiles using Tile Doctor Colour Grow, which is a matt finish, fully breathable and colour enhancing sealer which really lifts the colour of the stone or in this case clay tile. Colour Grow is impregnating – meaning that it penetrates the pores of the stone to fill them and prevent trapped dirt and stains. We recommend Colour Grow for both internal and external applications and especially for areas where no damp proof membrane is evident, since the sealer allows for the floor to breathe moisture.

Geometric floor After Restoration Barrow in Furness Geometric floor After Restoration Barrow in Furness

There were plenty of problems to overcome and It took a lot of work but I’m pleased to say the floor was transformed by our efforts and now looks fantastic and I’m sure has added a lot of value to this period property.

Hallway Restoration of Bitumen-Stained Victorian Floor in Barrow in Furness

Bitumen Stained Victorian Geometric Hallway Rejuvenated in Barrow in Furness Read More »

Cleaning a Sandstone Fireplace and Victorian Floor Tiles Preston

Cleaning a Sandstone Fireplace and Victorian Floor Tiles Preston

We often get asked to do a combination of jobs at Tile Doctor so we have to be prepared for the unexpected, like getting asked to clean an old Sandstone fireplace whilst your cleaning a Victorian tiled floor at a house in Preston. We normally charge extra for these types of jobs but it depends how much cleaning is required.

Red and Black Victorian Tiles Preston Before Cleaning
This Fireplace had been in use for a number of years and due to its grainy texture was hard to keep clean, dirt and soot had built up on its surface and there was no sealer visible, either that or it had worn off with the heat.

Sandstone Fireplace Preston Before Cleaning

Cleaning and Sealing a Sandstone Fireplace

To clean the uprights and Hearth I applied Tile Doctor Oxy-Gel which being in Gel form and not a liquid, stays in place increasing dwell times and doesn’t drip where it shouldn’t. In this case I let it soak into the stone for about forty minutes before scrubbing it in with a stiff hand brush and steam. Some marks were still visible after this process so we opted for using handheld Diamond blocks in 50.100.200 and then 400 grit to grind off the staining and restore the surface finish. Using these small handheld blocks takes off some of the heavier texture as well as cleaning the stone at the same time, but is really useful to use where chemicals alone struggle to get the results required. Once fully clean the fireplace was rinsed with water a couple of times and the slurry removed using a wet vacuum. After speed drying the stone with a heat gun it was ready for a couple of coats of Tile Doctor Colour Grow, even we were impressed with the results.

Sandstone Fireplace Preston After Cleaning

Cleaning and Sealing a Victorian Tiled Floor

The Red and Black Victorian Tiles were cleaned with a strong dilution of Tile Doctor Pro-Clean which is very similar to Oxy-Gel only in a liquid form. The product was left to soak into the tiles for about ten minutes before being scrubbed in with a black buffing pad attached to a slow speed buffing machine. I used the wet vacuum again to soak up the residue and stubborn stains were retreated until I was satisfied.

Old Victorian floors rarely have a damp proof membrane installed and so it’s not uncommon for damp to rise-up through the ground and tile resulting in white salt deposits being left on the surface. To prevent this process, which is commonly referred to as Efflorescence, Tile Doctor Acid Gel was applied. The solution is scrubbed into the tiles and then rinsed off with clean water and removed with a wet vacuum ready for sealing.

Victorian Tiles can take a while to dry and in this case I left it two days before returning to apply a breathable sealer to protect the tiles from ingrained dirt and staining. In this case a couple of coats of Tile Doctor Colour Grow were applied. If you recall this was the same sealer we used on the fireplace as the customer wished to bring out the colour and have a Matt finish.

Red and Black Victorian Tiles Preston After Cleaning
 

Professional Restoration of a Sandstone Fireplace and Victorian Floor in Lancashire

Cleaning a Sandstone Fireplace and Victorian Floor Tiles Preston Read More »

Original Edwardian Tiles Refreshed and Revitalised in Lytham St Annes

Original Edwardian Tiles Refreshed and Revitalised in Lytham St Annes

We often get asked to restore original Edwardian tiles which, contrary to popular belief, are the same as Victorian tiles in their style and composition. The only discernible difference is the age of the property – whether it was built in the Victorian (1837-1901) or Edwardian period (1901-1910). As such, they can be cleaned and sealed in the same manner.

I recently visited an Edwardian period property in Lytham St Annes, a lovely coastal resort on the Lancashire coast where we have completed many restorative cleaning activities in the past. Along with its sandy beaches, the area is internationally renowned for its golf courses.

The property owner had some original Edwardian tiles which had been laid down in a vestibule and were beginning to show their age. There were several damaged tiles in the area that needed to be replaced and the entire set of tiles needed to be cleaned to achieve the best possible result.

Edwardian Tiled Floor Before Cleaning in Lytham

Cleaning Original Edwardian Tiles

To begin I needed to address the issue of the damaged tiles, fortunately we are always on the lookout for old tiles and have quite a collection we can choose from, were also in touch with a number of companies that still make these tiles and so are able to source replacements one way or another.

Edwardian Tiled Floor During Tile Repair in Lytham
I was therefore able to replace the broken and damaged tiles with suitable replacements that matched well with the original pattern of the floor. They were fixed in place and then once the adhesive had hardened grouted in using a matching grout.

Following this, I applied Tile Doctor Oxy-Gel to the remaining area taking care not to disturb the newly laid tiles. Based on the popular Pro-Clean product, Oxy-Gel is a strong alkaline cleaning product that breaks down dirt and grime and is safe to use on tiles however being in gel form and not liquid it stays where put, which was important the grout was still drying in the repaired area.

Edwardian Tiled Floor Before Cleaning in Lytham
The Oxy-Gel was left to dwell for roughly 30 minutes before scrubbing it in with a stiff hand brush. to the tiles. I carefully rinsed away the resulting slurry and then treated the area with Tile Doctor Acid Gel, which is a blend of phosphoric and hydrochloric acids in gel form. By applying the product, I could reduce the grout haze and efflorescence problems that occur in old properties like this.

Edwardian Tiled Floor During Cleaning in Lytham
Next, I carefully rinsed the floor again with water and soaked up the moisture with a wet vacuum, before leaving it to fully dry out overnight.

Sealing Original Edwardian Tiles

I returned to the property the next day with the intention of sealing the tiles; fortunately, the weather was good and after taking a couple of damp readings I was happy the tiles were completely dry. We must be careful with older buildings which don’t have a damp proof membrane fitted; if there is even a moderate amount of damp present it can cloud the sealer and damage its performance.

I started the sealing process with a single coat of Tile Doctor Colour Grow, which is an impregnating, colour-enhancing sealer that improves the look of the tile as well as adding internal protection. Assisted with a fan to speed up the drying time, this was followed by several coats of Tile Doctor Seal and Go, which is a topical sealer that add further protection and the high-quality sheen finish the customer requested.

Edwardian Tiled Floor After Cleaning in Lytham
The customer was thrilled with the result and very pleased that she could salvage these fantastic original tiles. Another satisfied customer.

Edwardian Tiled Floor After Cleaning in Lytham
 

Professional Restoration of an Original Edwardian Tiled Vestibule in the Fylde District

Original Edwardian Tiles Refreshed and Revitalised in Lytham St Annes Read More »

Old Flagstone Tiled Flooring Resurfaced in Great Harwood

Old Flagstone Tiled Flooring Resurfaced in Great Harwood

This customer in Great Harwood was so fedup with their Flagstone tiled flooring on the ground floor of their property. In fact they were ready to take up the floor, put a new concrete base in place and lay a wood floor down on top. However this is the original floor from when the house was built in 1894 so was not replaceable as such, and the customer really wanted to restore the floor back to its original condition, as well as other material’s in the house, to recreate the Original Victorian feeling that had been missing for many years.

Flagstone Floor Before Restoration Great Harwood Flagstone Floor Before Restoration Great Harwood

We have completed quite a lot of this type of work for customers in the past and we publish all out work on our website and it was one job similar to this that convinced the customer that we had the answer to her problem.

Milling an Old Flagstone Floor

A few years ago Tile Doctor invented a system called Milling to deal with problematic stone floors like this one. The system uses very coarse Diamond pads fitted to heavy machinery to mill the stone until it is a smooth as possible. This action gets rid of years of traffic marks, ingrained dirt as well as old wax and sealers. There’s nothing harder than Diamond so we find this system woks really well on an old damaged floor like this one.

The process will leave the stone looking rough so once finished with the coarse pads we then apply a lighter Diamond grit pad to remove the scratch marks that the heavy diamond grits leave behind. The floor is rinsed between pads and a little water is also used to provide lubrication.

After resolving the stone issues we re-grouted the whole floor and conduct one more final clean using Tile Doctor Neutral Clean before leaving it to dry out ready for sealing a few days later.

Sealing an Old Flagstone Floor

On our return the sealer we chose for these old flagstone was Tile Doctor Colour Grow, it penetrates into the pores of the stone protecting it from within and in the processes lift the natural colours in the Stone.

Colour Grow is a breathable sealer which you need when sealing these old stone floors which won’t have a damp proof membrane installed. A wet look or polishing sealer will eventually spoil in damper wetter weather.

Another advantage of Colour Grow is it leaves a Matt finish which is a more natural look for Sandstone Flagstones like these. They will also be easier to clean as the milling process made the stone much smoother to the touch, so it becomes a lot easier to maintain in the future.

Flagstone Floor Before Restoration Great Harwood Flagstone Floor Before Restoration Great Harwood

The results were fantastic, and the customer is really pleased that they will no longer have to replace the tiles. The appearance and condition of the Flagstone had been improved so much that most people would not believe it had been laid 123 years ago!

Restoring an Old Flagstone Floor in Lancashire

Old Flagstone Tiled Flooring Resurfaced in Great Harwood Read More »

Old Terrazzo Floor Fully Restored as Part of Renovation Work in Llandudno

Old Terrazzo Floor Fully Restored as Part of Renovation Work in Llandudno

The Washington Hotel in Llandudno, North Wales, is a truly historic building and one of the enduring features on the promenade of the sea resort. This beautiful part of Wales was the holiday destination of choice for Lewis Carrol, the famed author of Alice in Wonderland, and you can see several statues of him in and around the town.

The Washington Hotel first opened in 1855, but was rebuilt in 1925 after being destroyed by a fire. The building most recently served as a nightclub, before it closed in 2012. Now, there is ongoing renovation work to turn it into a restaurant.

Mosaic Terrazzo Floor Llandudno Restaurant Before Restoration
As part of this renovation work, we were asked to restore bring the old Terrazzo floor back to life, which was certainly worse for wear after nearly a century of use. It had been covered in carpet, as well as old vinyl tiles, and was very heavily soiled with dirt and ingrained muck. This area of floor would eventually act as the entrance to the restaurant and bar area, so it was important to get this right for the customer.

Mosaic Terrazzo Rotating Door Floor Llandudno Restaurant Before Restoration

Burnishing a Terrazzo Tiled Floor

There were three areas we were asked to restore, covering 36 square meters in total:

• Circular foyer (27 square meters)
• Internal entrance area (2 square meters)
• External entrance stairs: (7 squares meters)

We started the restoration process with the application of a Very Coarse 50 grit diamond pad to tear away all the old carpet and vinyl resin, clearing the area to allow us to work directly on the Terrazzo tiles. With the tiles exposed, we discovered two large, long cracks in the base of the floor, so we filled these with a flexible floor grout. We chose to use this instead of a resin compound because resin isn’t very flexible, and if there is any movement the crack will become exposed again after six to 12 months. A flexible floor grout will move with the contractions and expansions of the base, and if the movement is not too extreme the flexible grout will not crack in the future.

Llandudno Cracked Mosaic Terrazzo Restaurant Floor During Restoration
We then continued through our system of diamond burnishing pads, applying the 100, 200, 400, 800, and 1500 grit pads with a small amount of water as lubricant. Once the floor was fully dry we applied the final 3000 grit pad, which is the finest of the pads and produces a very high quality polished effect on the stone.

Llandudno Mosaic Terrazzo Restaurant Floor During Restoration

Sealing a Terrazzo Tiled Floor

Once the floor had been polished, it needed to be sealed in order to protect it from dirt becoming ingrained into the pores of the stone. We did this using firstly two coats of Tile Doctor Colour Grow, which is our impregnating, colour-enhancing sealer. The sealer works by penetrating the pores of the stone to fill them and block trapped dirt and stains. We then left the floor to dry off fully overnight.

The next day, we returned to the building to apply a crystallization powder known as Tile Doctor Shine Powder, which further enhanced the shine we had built up on the floor and give it extra sealer protection.

Llandudno Mosaic Terrazzo Restaurant Floor During Restoration
The customer was exceptionally happy with our work, as the restoration of the Terrazzo tiled flooring is an essential part of the renovation project overall. We wish them all the best in the eventual opening of the new restaurant!

Mosaic Terrazzo Rotating Door Floor Llandudno Restaurant After Restoration
For aftercare, we recommended to the customer that the floor is maintained with Tile Doctor Stone Soap as this will not only clean the Terrazzo without damaging the sealer like many stronger cleaners, but also maintain its patina as well.

Mosaic Terrazzo Floor Llandudno Restaurant After Restoration
 

Professional Terrazzo Tiled Restoration at a Restaurant in North Wales

Old Terrazzo Floor Fully Restored as Part of Renovation Work in Llandudno Read More »

100+ Year-Old Victorian Mosaic Hallway Rejuvenated in Lytham St Annes

100+ Year-Old Victorian Mosaic Hallway Rejuvenated in Lytham St Annes

Victorian tiled floors are well-known for their colourful and unique patterns which never fail to impress and are a very sought after period feature. Recently I was very impressed with the work that had gone into this hallway floor that I came across at a property in the seaside resort of Lytham St Annes south of Blackpool on the Flyde coast. I was there to restore what I originally believed to be a stone Tesserae Mosaic floor, but after some chemical testing it was revealed to be a traditional Victorian tiled floor which are made of clay.

Original Victorian Tiled Floor Before Cleaning Lytham St Annes
In the case of this floor, each tile was approximately 1cm squared and they had been painstakingly installed throughout a 15m squared area by hand in the 1880s. I can only imagine the time and effort it must have taken to do this, and it is a testament to the Victorian craftsmen of the day that despite having many loose, missing, broken, and dirty tiles, the floor was still in a reasonable condition and could be restored back to its former condition.

Original Victorian Tiled Floor Before Cleaning Lytham St Annes

Cleaning an Original Victorian Tiled Floor

Now, if this had in fact been a stone Tesserae Mosaic floor, I would have cleaned the tiles using different methods. However, since it was a clay Victorian tiled floor, I decided – after conducting some product testing – to clean the whole floor with a black buffing pad in combination with Tile Doctor Oxy-Gel. Oxy-Gel is a powerful high-alkaline formula designed to tackle dirt and stains on Tile, Stone and Grout.

I followed this by steam cleaning the tiles and then gave the floor an acid rinse using Tile Doctor Acid Gel, which is a blend of phosphoric and hydrochloric acids in gel form. This was needed to keep efflorescent salt issues at bay which are a problem with these old floors with no damp proof membrane has been installed.

Sealing an Original Victorian Tiled Floor

My choice of sealer was Tile Doctor Colour Grow, which is a fully breathable and colour enhancing product. The sealer is impregnating – meaning that it penetrates the pores of the stone to fill them and prevent trapped dirt and stains. We recommend Colour Grow for both internal and external applications and especially for areas where no damp proof membrane is evident, since the sealer allows for the floor to breathe moisture.

Original Victorian Tiled Floor After Cleaning Lytham St Annes
Despite the floor being well over a century old it came up really well and the sealer will now add a layer of protection that will keep it that way for some time to come.

Original Victorian Tiled Floor After Cleaning Lytham St Annes
 

Rejuvenating a 100-Year Old Victorian Floor in Lytham St Annes

100+ Year-Old Victorian Mosaic Hallway Rejuvenated in Lytham St Annes Read More »

Victorian Tiled Porch Hidden Under Vinyl Restored in Lytham

Victorian Tiled Porch Hidden Under Vinyl Restored in Lytham

Some Floor Tiles can be too damaged to be able to do anything with, but Victorian Tiles are nearly indestructible and we often find we can restore them to like new condition. Additionally, period features are very much sought after by potential buyers and add a lot of value to a house so well worth taking the effort to restore.

This small Victorian Tiled porch at the entrance to a house in Lytham near Blackpool is a good example of just how resilient these floors can be. There was some damage to it and I suspect at some time in the past a previous owner had decided to cover it up with Linoleum rather than face the expense of repairing it, fortunately for the floor the current owner was keen to restore it.

Victorian Porch Before Restoration Lytham Victorian Porch Before Restoration Lytham

Cleaning a Dirty Victorian Tiled Doorway

The first job was to strip off the old Vinyl covering which had been glued down with some strong adhesive. We carefully scraped off as much as possible by hand and then soaked the floor in Tile Doctor Oxy-Gel which is a strong tile cleaning product which being in a gel doesn’t run off and for stays in position. We left it to dwell on the tiles in order to break down the glue and then scrubbed it in and followed up with a steamer and a rinse with water to remove the soil.

Victorian Porch Before Restoration Lytham
To finish off he cleaning the tiles were treated to an acid rinse by applying Acid Gel which will remove any grout smears and treat any mineral salt issues rising through the floor overnight as the floor dries.

Once the floor was clean and free of all the glue etc. it was time to repair the corner of the floor where several tiles were missing. Before started work I had managed to source replacements from Original Style Tiles who offer a wide range of colours and styles to suit the original floor. I set the replacement tiles in place and then grouted them in.

Victorian Porch Before Restoration Lytham
After the tile adhesive and grout had set I gave the floor a light clean with a damp sponge and then covered the floor with a clean dust sheet before leaving it to fully dry overnight.

Sealing a Victorian Tiled Porch

The next day the floor was checked for any issues and also dampness before moving onto seal the tiles. To seal the tiles, we then applied two coats of Tile Doctor Colour Grow which is a fully breathable sealer that is suitable for internal and external use, it also lifts the colour of the tiles and will prevent them from ingrained dirt in the future making the tiles easy to clean.

Victorian Porch After Restoration Lytham
 

Professional Victorian Tiled Porch Restoration in Lancashire

Victorian Tiled Porch Hidden Under Vinyl Restored in Lytham Read More »

Amtico Vinyl Floor Tiles Cleaned and Sealed in a Heysham Kitchen

Amtico Vinyl Floor Tiles Cleaned and Sealed in a Heysham Kitchen

Photographs below from the maintenance of Amtico Vinyl Floor Tiles in the kitchen of a house in the village of Heysham which is famous for its ferry port that has links to the Isle of Man and Ireland. This Vinyl wasn’t that dirty but it was starting to lose its sheen and when this happens it’s an indication that the sealer has started to wear down leaving it looking patchy in the high traffic areas. Once the sealer has failed then dirt will start to accumulate making it look less appealing, so my customer decided to call Tile Doctor in before it got to that point.

Amtico Vinyl Before Cleaning in Heysham
It wasn’t a big area and unlike a clay or Stone tile, Vinyl is a lot less porous and can be cleaned and sealed within the same day rather than leave it do dry overnight or even longer. This means less hassle for the customer and a better price for doing the work as well. As a guideline, a 10m2 floor area usually takes around two to three hours to deep clean and re-seal, naturally the larger the area the longer it takes.

Deep Cleaning Amtico Vinyl Floor Tiles

We started with a deep cleaning product developed for Tile Doctor called Vinyl strip which as well as leaving a pleasant floral aroma is biodegradable and phosphate free. You dilute the concentrate with ten parts of water to 1 part Vinyl Strip or if you prefer a litre of water to 100ml of product. This was mixed together in a clear container and then applied to the area to be cleaned. It’s left to soak into the floor for a while so it can break down any remaining old sealer and dirt and then scrubbed in using a deck brush.

Amtico Vinyl During Cleaning in Heysham
I find a wet vacuum machine invaluable at this point at this junction, mopping is okay but you really need to make sure all the product is extracted off the surface to be sealed otherwise it will do to the new sealer what it has done to the old. We call this process Neutralisation and a good rinse with fresh water also helps as does having an industrial air mover in place to help speed dry the floor.

Sealing Amtico Vinyl Floor Tiles

You can’t seal the Vinyl until the tiles are dry as dampness can cloud the sealer so if you don’t have an air blower we recommend leaving the floor for six to eight hours. Our air mover is quite large and it soon had the floor dry so we could move onto sealing quite quickly and applied three coats of Vinyl Shine which gave the floor a nice sheen. Each coat must dry out before the next coat can be applied but it’s worth doing correctly as each coat builds up another layer of protection on the Vinyl, again we used an Air blower to speed up the drying process.

Amtico Vinyl After Cleaning and Sealing in Heysham

Amtico Vinyl Floor After Care

Once dried we left the customer with a free bottle of Tile Doctor PH Neutral Tile Cleaner for the regular cleaning of the floor. We always recommend this product for the regular cleaning of sealed surfaces as it’s PH neutral and won’t degrade the sealer like most domestic cleaning products you find on supermarket shelves.

Maintaining Amtico Vinyl Floor Tiles in Lancashire

Amtico Vinyl Floor Tiles Cleaned and Sealed in a Heysham Kitchen Read More »

Flagstone Floor Before and After Milling Haslingden

Milling and Sealing Uneven Flagstone Flooring in Haslingden

Flagstones are a durable Sandstone based material that give a solid feel to any floor, however while large and impressive to look at they can be very rough and un-even. This isn’t so much of a problem when Flagstones are used externally for patios and pathways, but rough surfaces trap dirt and when these tiles are used internally, they are much easier to maintain if the stone is smooth and sealed.

This customer, who lives in the Lancashire town of Haslingden, had this problem with their Flagstone tiled floor and like most things related to tile, stone and grout we have a solution in the form of a process known as milling. This basically involves grinding down the surface of the tile using coarse diamond encrusted pads to make it smooth.

Flagstone Floor Before Milling Haslingdon Flagstone Floor Before Milling Haslingdon

The customer booked me in to get the job done, having seen some previous milling work of ours on our website and liking what we had achieved for other people with similar floors.

Flagstone Floor Before Milling Haslingdon

Milling an Uneven Flagstone Tiled Floor

Milling the stone involves the use of a set of thee millings pads of different grades (50, 100 and 200 grit) which are applied in sequence. You start with the coarse and abrasive 50 grit milling pad and follow this by smoothing this surface with the finer 100 and 200 diamond grit milling pads. Water is used to lubricate and capture the dust which is created during the process resulting in a slurry which needs to be rinsed away and extracted between each pad. The process requires the use of a solid weighted rotary machine and a fair bit of muscle power to guide it.

We successfully managed to mill the Flagstone tiles virtually flat in places and the process removed the unappealing stained and dirty layer of stone that was ruining the appearance of the floor. Interestingly we usually find that by grinding away the old and dirty layer of stone the true colour of the tiles that had been hidden under many years’ worth of muck is revealed. Unfortunately, in this case, due to the darkness of this stone it was difficult to see a great deal of colour change.

Sealing Flagstone Floor Tiles

Finally, the floor needed to be sealed to protect against future instances of staining and ingrained dirt. To do this I sealed the tiles using several coats of Tile Doctor Colour Grow, which is an impregnating, colour enhancing sealer that soaks into the pores of the stone and occupies that space preventing dirt from become ingrained. The sealer also leaves a matte, natural looking finish, which is a perfect match for the rustic character of the Flagstone tiles.

Flagstone Floor After Milling Haslingdon Flagstone Floor After Milling Haslingdon

Now that the floor has been levelled and sealed, the surface is smooth and protected. This means the customer will not be ruining any more mops when the cleaning bucket comes out!

Flagstone Floor After Milling Haslingdon
 

Professional Milling and Sealing of Stained and Uneven Floor in Lancashire

Milling and Sealing Uneven Flagstone Flooring in Haslingden Read More »

Mexican Terracotta Floor Restoration Ormskirk

Cracked Mexican Terracotta Kitchen Tiles Restored in Ormskirk

Cracks can appear in tiles for several different reasons, but in all cases, they spoil the overall appearance of the floor. I was contacted just before Christmas by a customer in the market town of Ormskirk with a significant problem with cracking in their warm and rustic Mexican Terracotta tiles, particularly in and around doorways. The area was quite large at 85 square yards and covered multiple rooms. In general, the tiles were also in need with a deep clean and fresh seal.

Mexican Terracotta Kitchen Floor Ormskirk Before Cleaning
After inspecting the tiles first-hand, I determined that the cracking was most likely due to the addition of an extension: the concrete floors were laid at separate intervals, causing some expansion and contraction issues. The effects are similar to shifting Tectonic plates in the Earth’s crust, if not so drastic (the tiles just tend to crack, rather than causing an earthquake!).

After agreeing on a quote for the work, I set about putting the situation right.

Repairing Cracked Mexican Terracotta Tiles

The more laborious and costly answer to the problem of damaged tiles would be to replace them with new ones, but we have found that implementing an expansion joint in the areas where the concrete floors touch each other is more effective.

Mexican Terracotta Kitchen Floor Ormskirk Showing Cracked Grout
We have done this before many times, using flexible adhesive and grout to fill the cracks and counteract any further movement between the different concrete floors. This repair work was carried or over two days, in order to allow time for the adhesive and then grout to set.

Cleaning Mexican Terracotta Tiles

By the third day the tile repairs were complete, so we started cleaning the whole tiled area. We usually carry out repairs before cleaning to improve the chance of the repair blending in with the existing tile.

You can see from some of the photographs above that the tiles had started to get quite grubby and were proving difficult to keep clean. To clean and remove the old sealer we applied a diluted solution of Tile Doctor Remove and Go to the tiles allowing it soak into the pores for ten minutes before scrubbing it in with a rotary machine fitted with a black pad. The floor was rinsed with water and the resultant slurry was extracted using a wet vacuum.

The next step was to give the grout lines a thorough scrub with a strong solution of Tile Doctor Pro-Clean, which is a reliable alkaline cleaner that works well on grout and tile. The dirty cleaning solution was then extracted with a wet vacuum and the whole floor rinsed with more water to remove any trace of cleaning product. The wet vacuum was then used again to get the floor as dry as possible before leaving for the day.

Mexican Terracotta Kitchen Floor Ormskirk After Cleaning

Sealing Mexican Terracotta Tiles

On the fourth day, we returned to seal the floor, but not before checking first with a damp meter that it had dried completely. This is essential because excess moisture can cloud the sealer and damage its performance.

Mexican Terracotta Kitchen Floor Ormskirk After Repair and Cleaning
Our choice of sealer was Tile Doctor Seal and Go, which provides excellent surface protection along with an aesthetically pleasing deep sheen finish.

Mexican Terracotta Kitchen Floor Ormskirk After and Sealing
As you can see from the photographs above, the result was fantastic. The customer was amazed by the improvement and very pleased that the difficult cracking problem had been resolved. Another satisfied customer!

Mexican Terracotta Kitchen Floor Ormskirk After and Sealing
 

Professional Mexican Terracotta Tile Renovation in Lancashire

Cracked Mexican Terracotta Kitchen Tiles Restored in Ormskirk Read More »

Scroll to Top