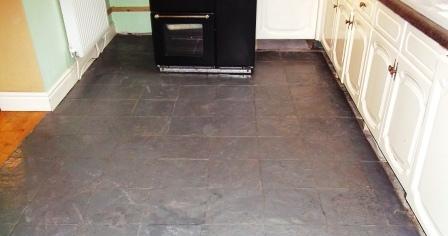
Grout Cleaning

Welcome to my Work History archive where you will find detailed examples of the cleaning and renovation of grout carried out in Lancashire

Cleaning and Renovating Grout

The top layer of grout is porous and can absorb grease, dirt and limescale. Spillages such as wine, lemonades or greasy substances will cause marks and patches in the joints in the floor. Grout between wall-tiles particularly in damp areas like bathrooms will become dirty and unattractive as a result of Mould, Mildew and Limescale.

Mould is one of the most unsightly problems, which usually starts off in the wettest area of the room, this could be the bottom of the shower or bath, then starts to spread and if left unchecked could cover a large area of the wall.

Another common issue we find is a problem known as Grout Haze or Grout Smearing where a thin layer of grout has been left to set on the surface of the tile. Once grout has set it is difficult to remove.

Discolouration of grout joints in bath or shower areas due to continued use of acid formulated shampoos and soaps. This causes yellow orange and pink stains to the grout over even a short period of time. Whilst Grout Joints can be cleaned, badly stained grout may need to be re-coloured.

Protecting your grout in advance with a sealer will prevent most of these issues and although relatively unknown in the UK, protection awareness is growing. Sealing forms an invisible barrier between the grout and the surface, this will then protect your investment for years to come.

We have solutions for all the problems listed above and below you will find detailed examples of work we have carried out in the past to resolve many of these issues. It should give you some idea of what’s involved and what can be achieved with the right techniques and products.


Indian Sandstone Kitchen Floor Renovation Garstang

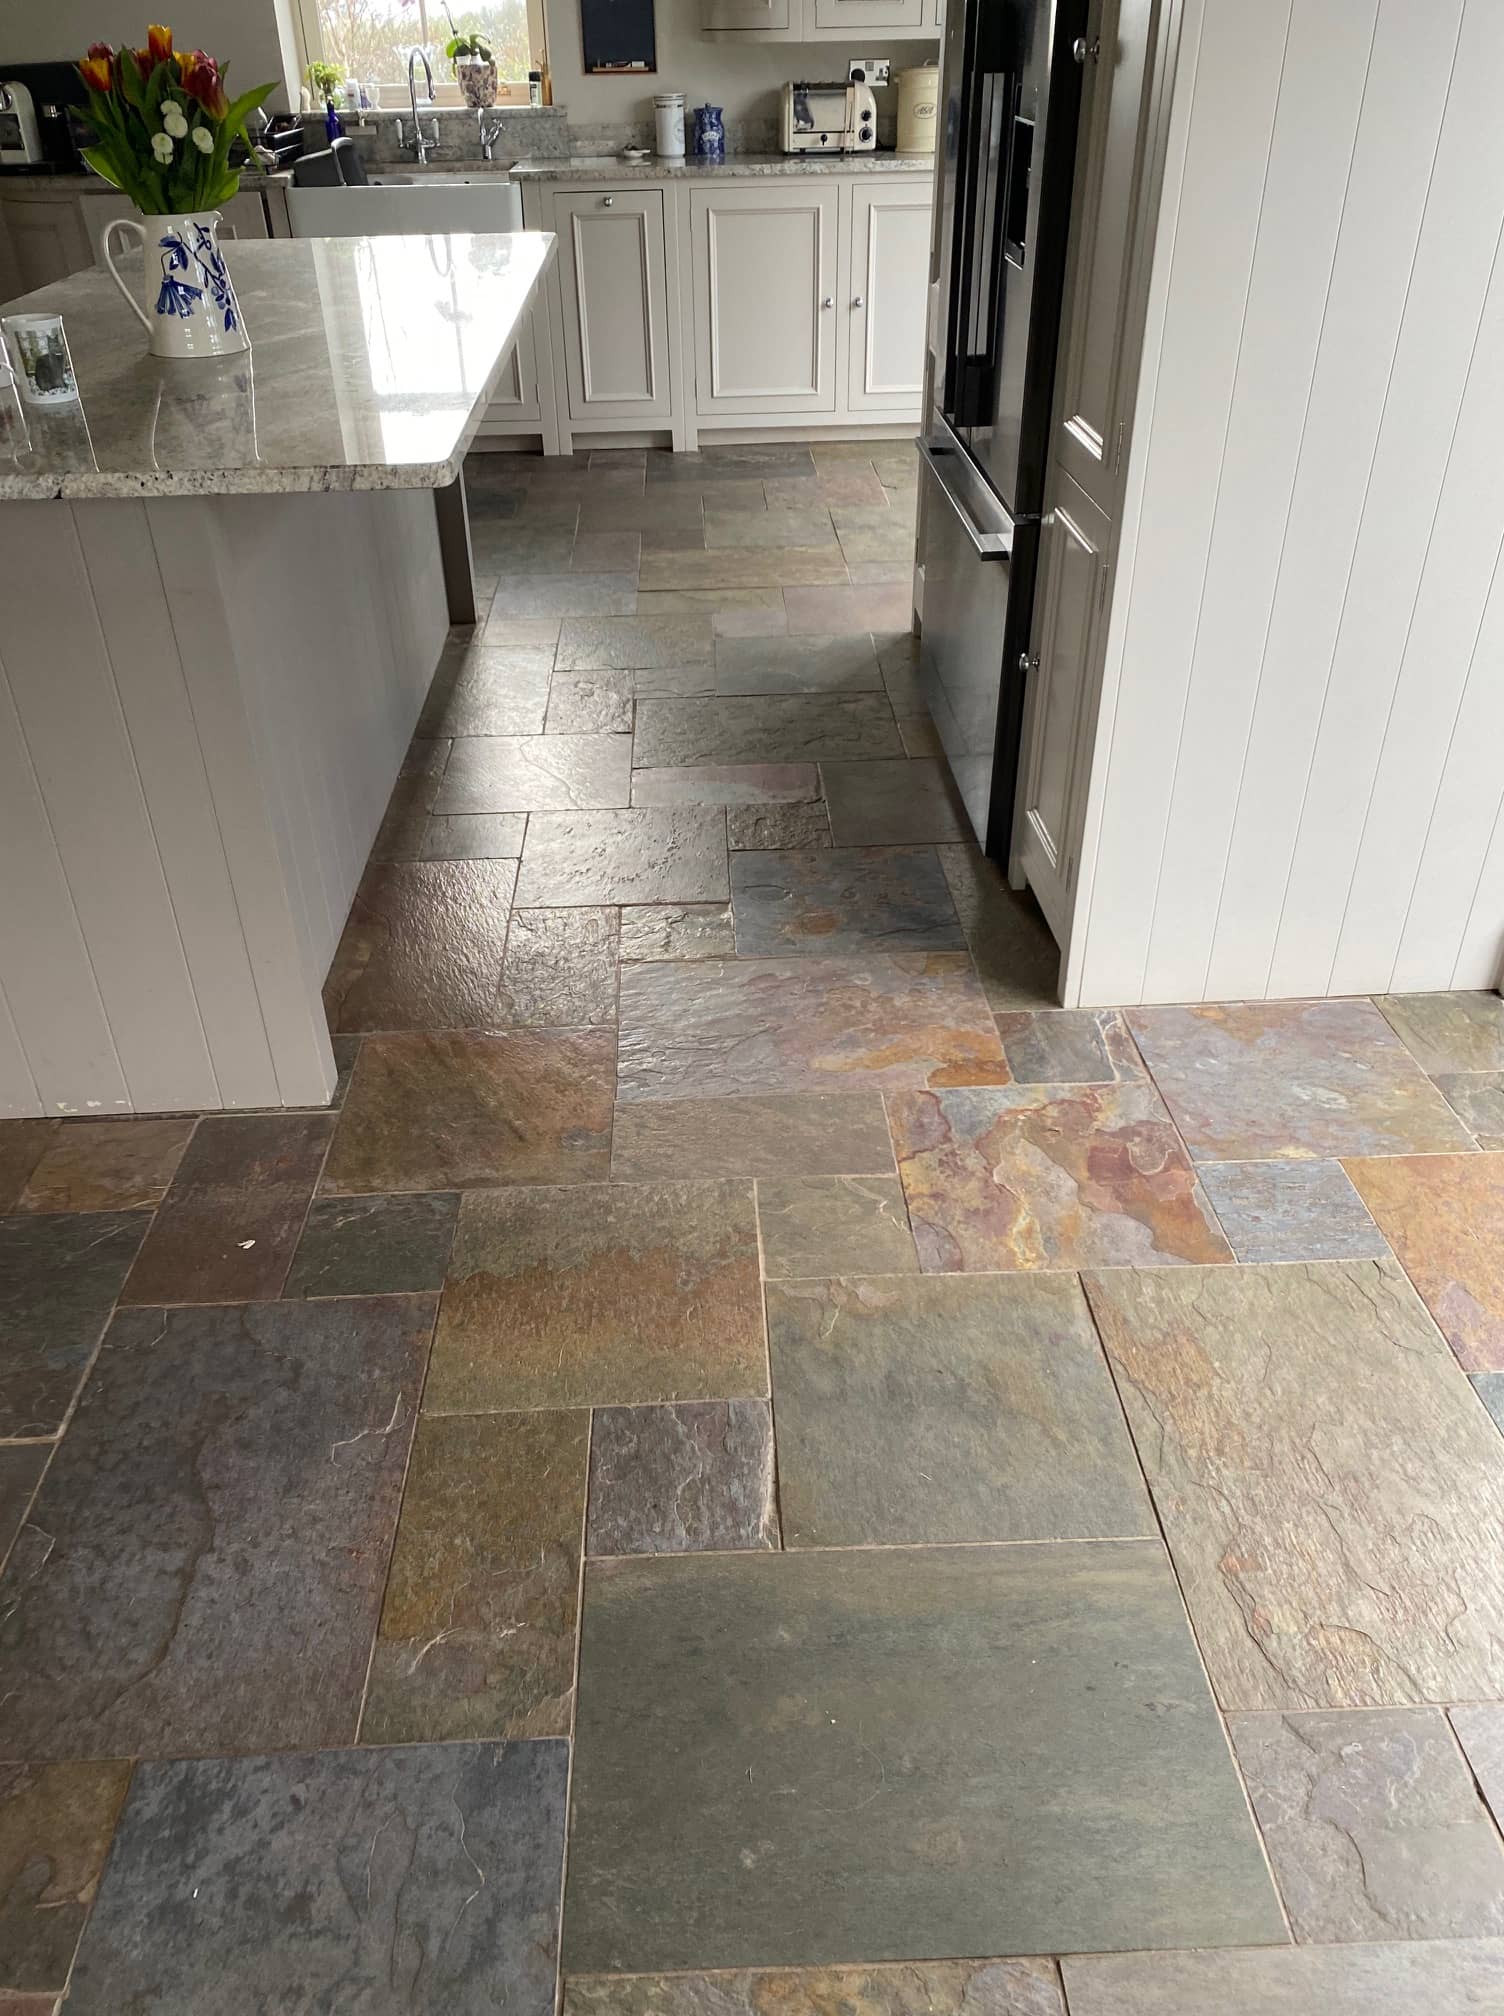
Rough Indian Sandstone Floor Milled and Restored in Garstang

Due to the textured nature of the Indian Sandstone tiles installed their kitchen, this client from Garstang was having trouble keeping their stone floor clean. Having decided enough was enough they contacted Tile Doctor to see what could be done to rectify the problem.

I went over to survey the floor and could see dirt was being trapped in the riven surface of the Sandstone and any sealer put there to protect the stone had long since worn off. I find the best solution for rough stone floors like these is to mill the stone with coarse diamond pads thereby removing the grubby surface layer and revealing a new surface underneath. This action also flattens the stone to remove the roughness and makes it easier to maintain.

Indian Sandstone Kitchen Floor Before Cleaning Garstang

I provided a price for milling the stone, cleaning up the grout lines and then applying a new sealer to protect it going forward. Happy with the price, the client arranged to purchase the required products, and we booked in a date for the work to commence. It was only a small 5 m2 area so I was happy that it could be done by one Tile Doctor over a couple of days.

Cleaning and Restoring an Indian Sandstone Tiled Kitchen Floor

To mill the Sandstone, we use a couple of very coarse milling pads of different grades which are applied to the stone with water for lubrication. The pads are fitted to a rotary floor machine to which extra weight is added to ensure a good contact with the stone. The floor was rinsed with water as I progressed, and the soiling generated was extracted with a wet vacuum.
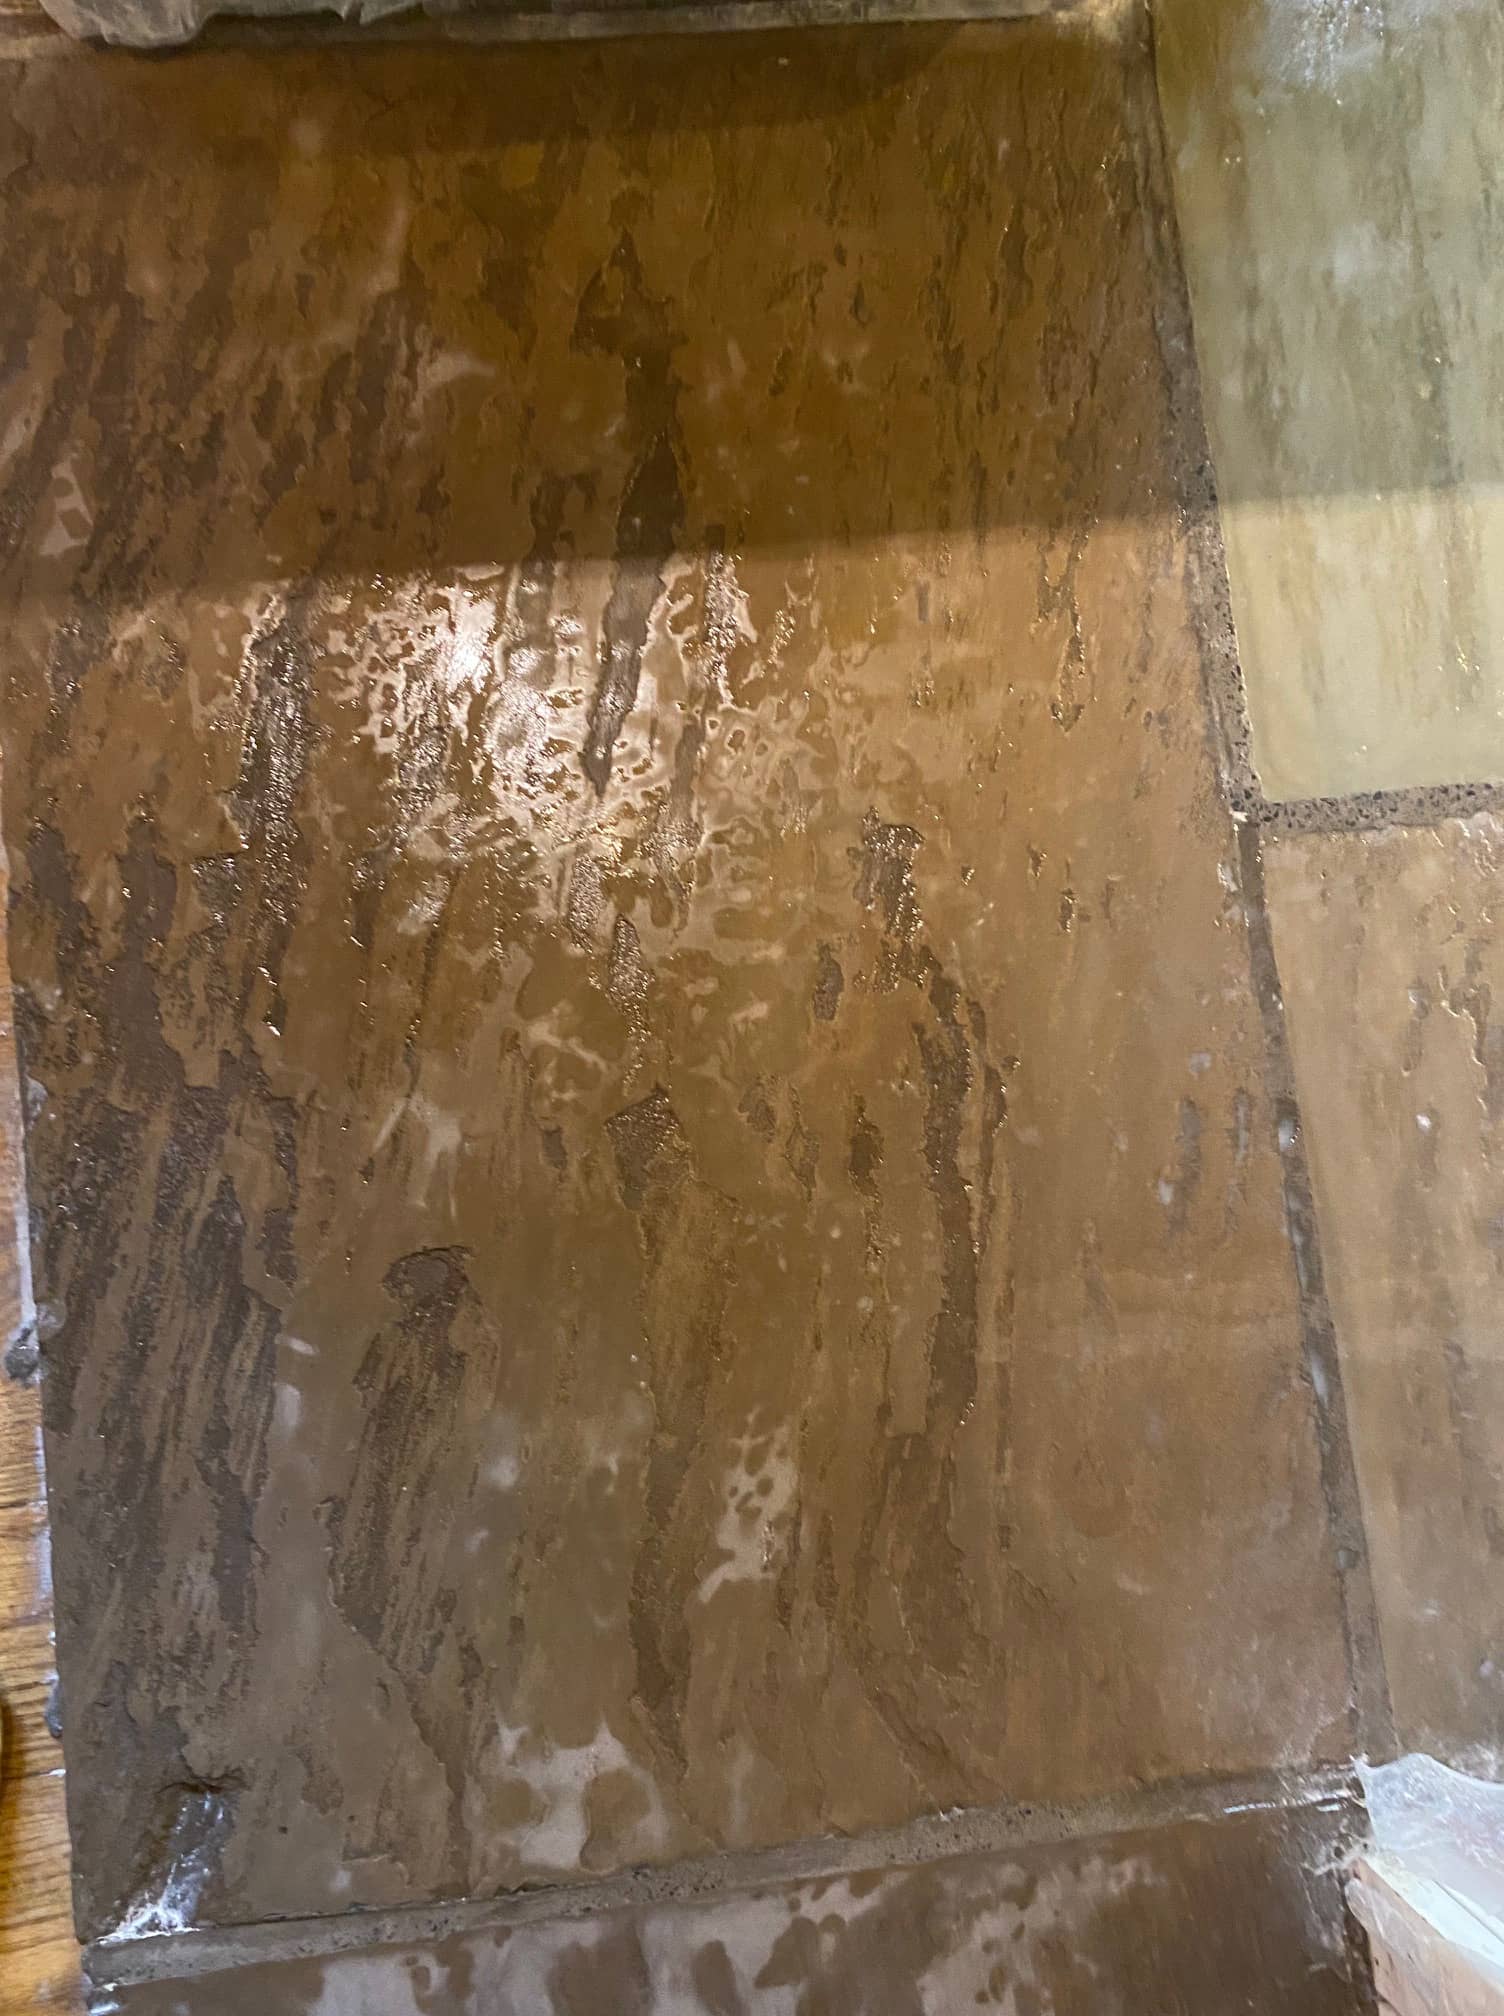
Indian Sandstone Kitchen Floor During Cleaning Garstang

Circular pads do struggle to maintain contact with the edges and especially corners so this is done manually using a set of hand-held diamond blocks. I also scrubbed the grout lines with Tile Doctor Pro-Clean to get the lines as clean as possible.

It’s worth noting that Indian Sandstone is full of iron and a lot harder to mill compared to English Sandstone, Flagstone, and Slate etc. As a result, it took most of the first day to complete this stage.

Sealing an Indian Sandstone Tiled Kitchen Floor

Once milled and cleaned I left the sandstone to dry off overnight and then called back the next day to apply the sealer. For this floor we went with Tile Doctor X-Tra Seal which is a breathable oil-based sealer that contains a colour enhancing formula to improve the general appearance of the stone.
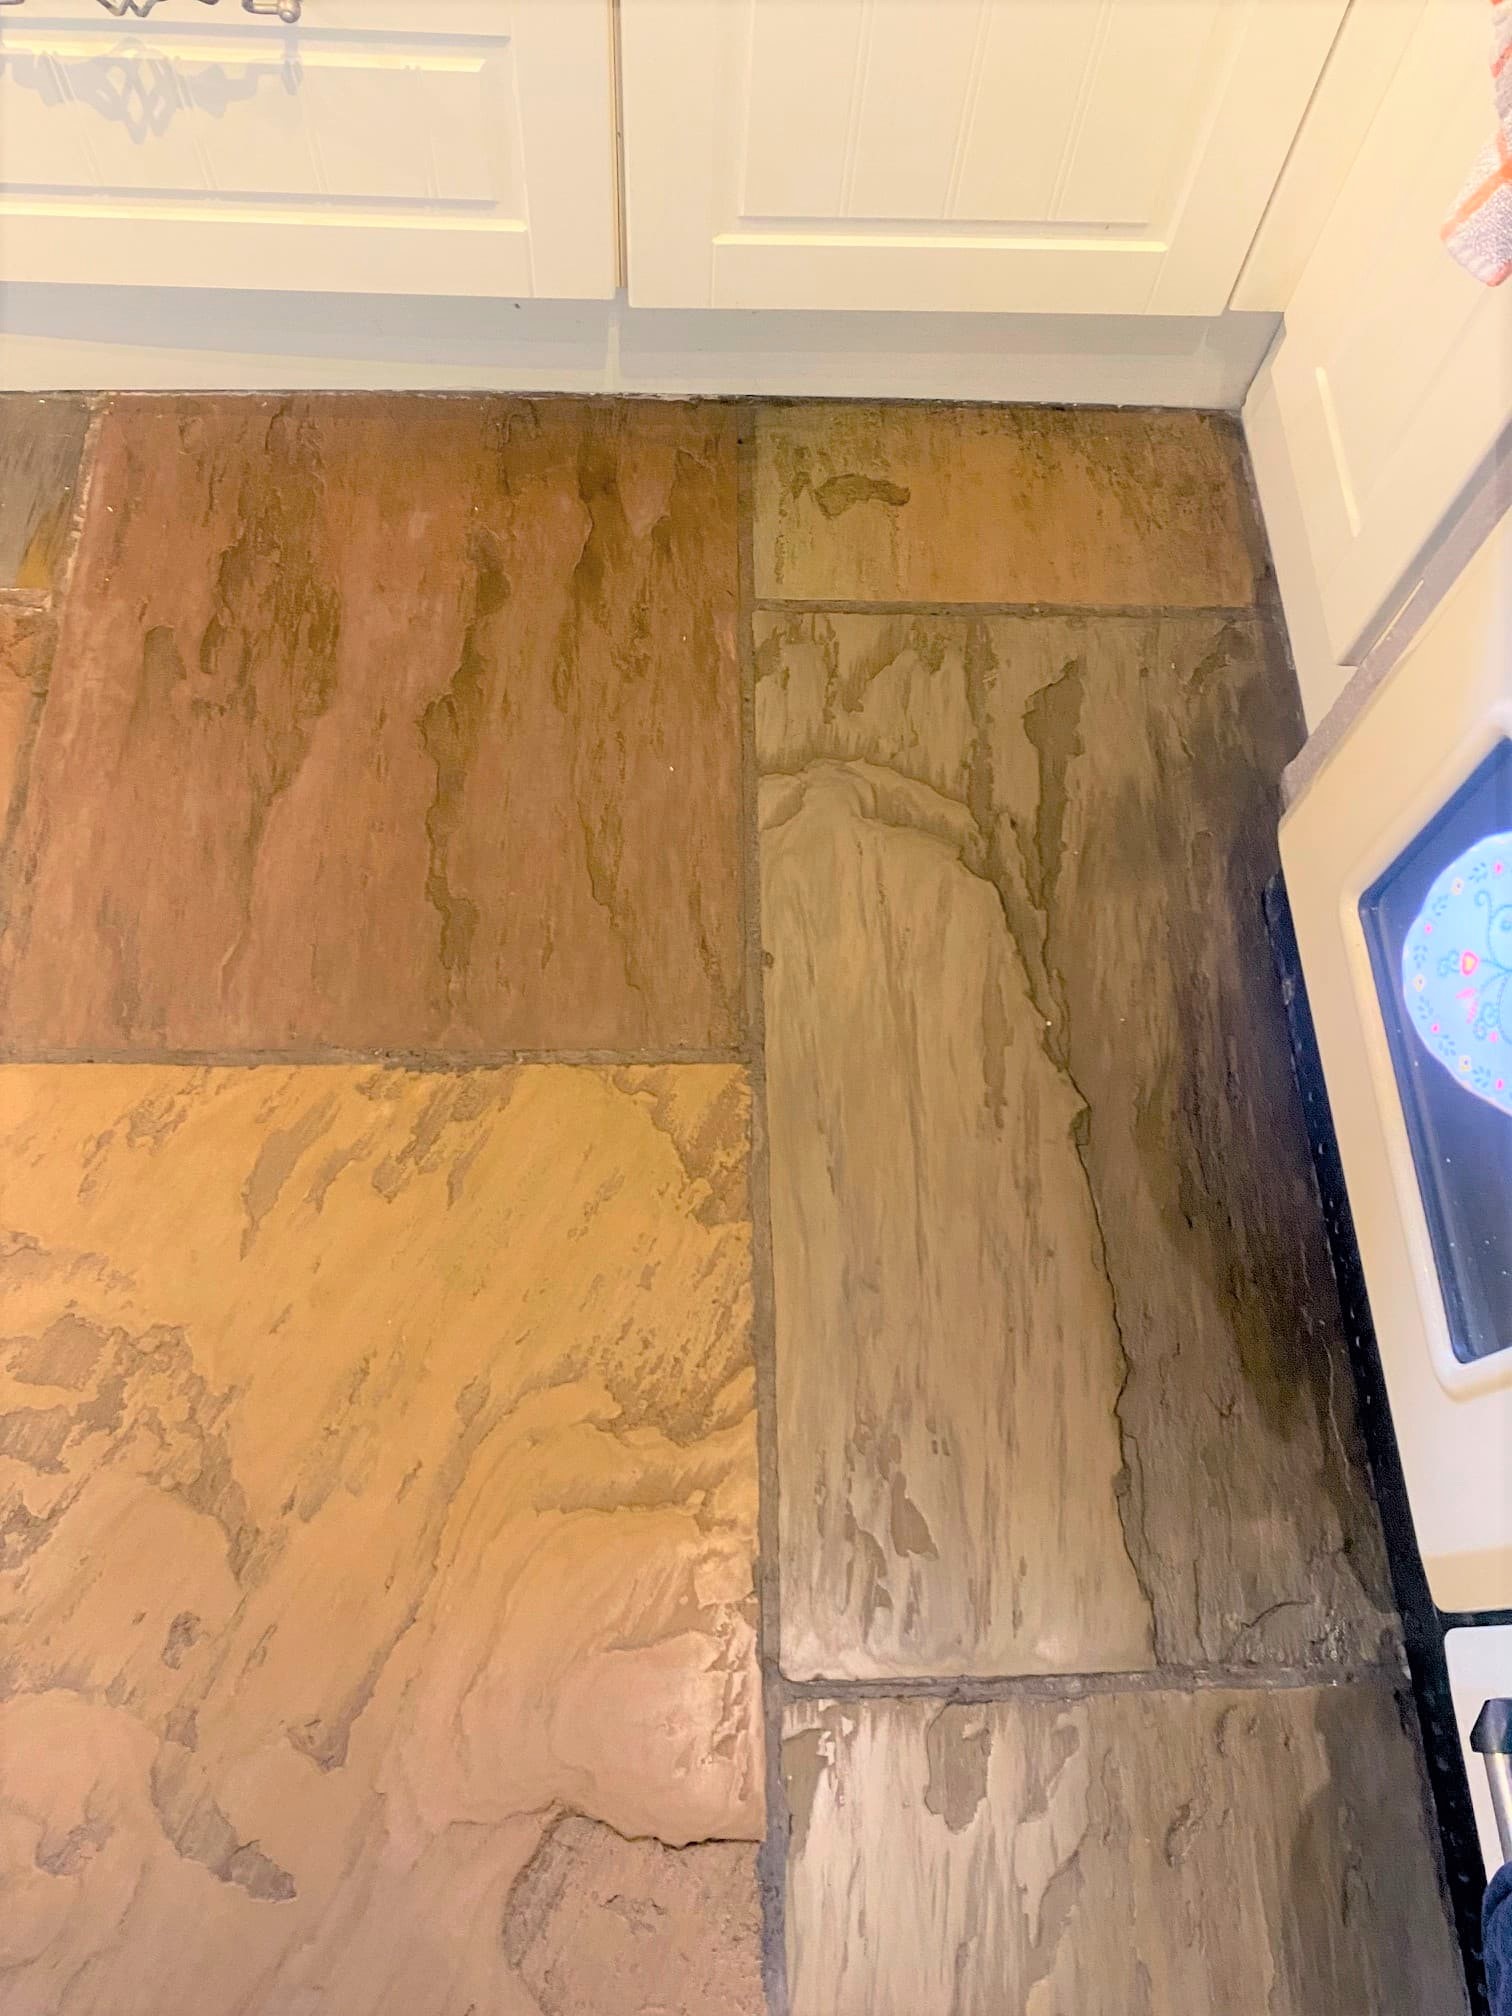
Indian Sandstone Kitchen Floor After Cleaning Garstang

What might not be noticeable from the pictures is the smoothness of the stone after it’s been milled, this makes it a lot easier to clean and makes it a lot less absorbent to dirt and muck etc.

The fresh sealer will maintain its appearance for many many years to come and maybe in another 100 years it will need to be milled again.
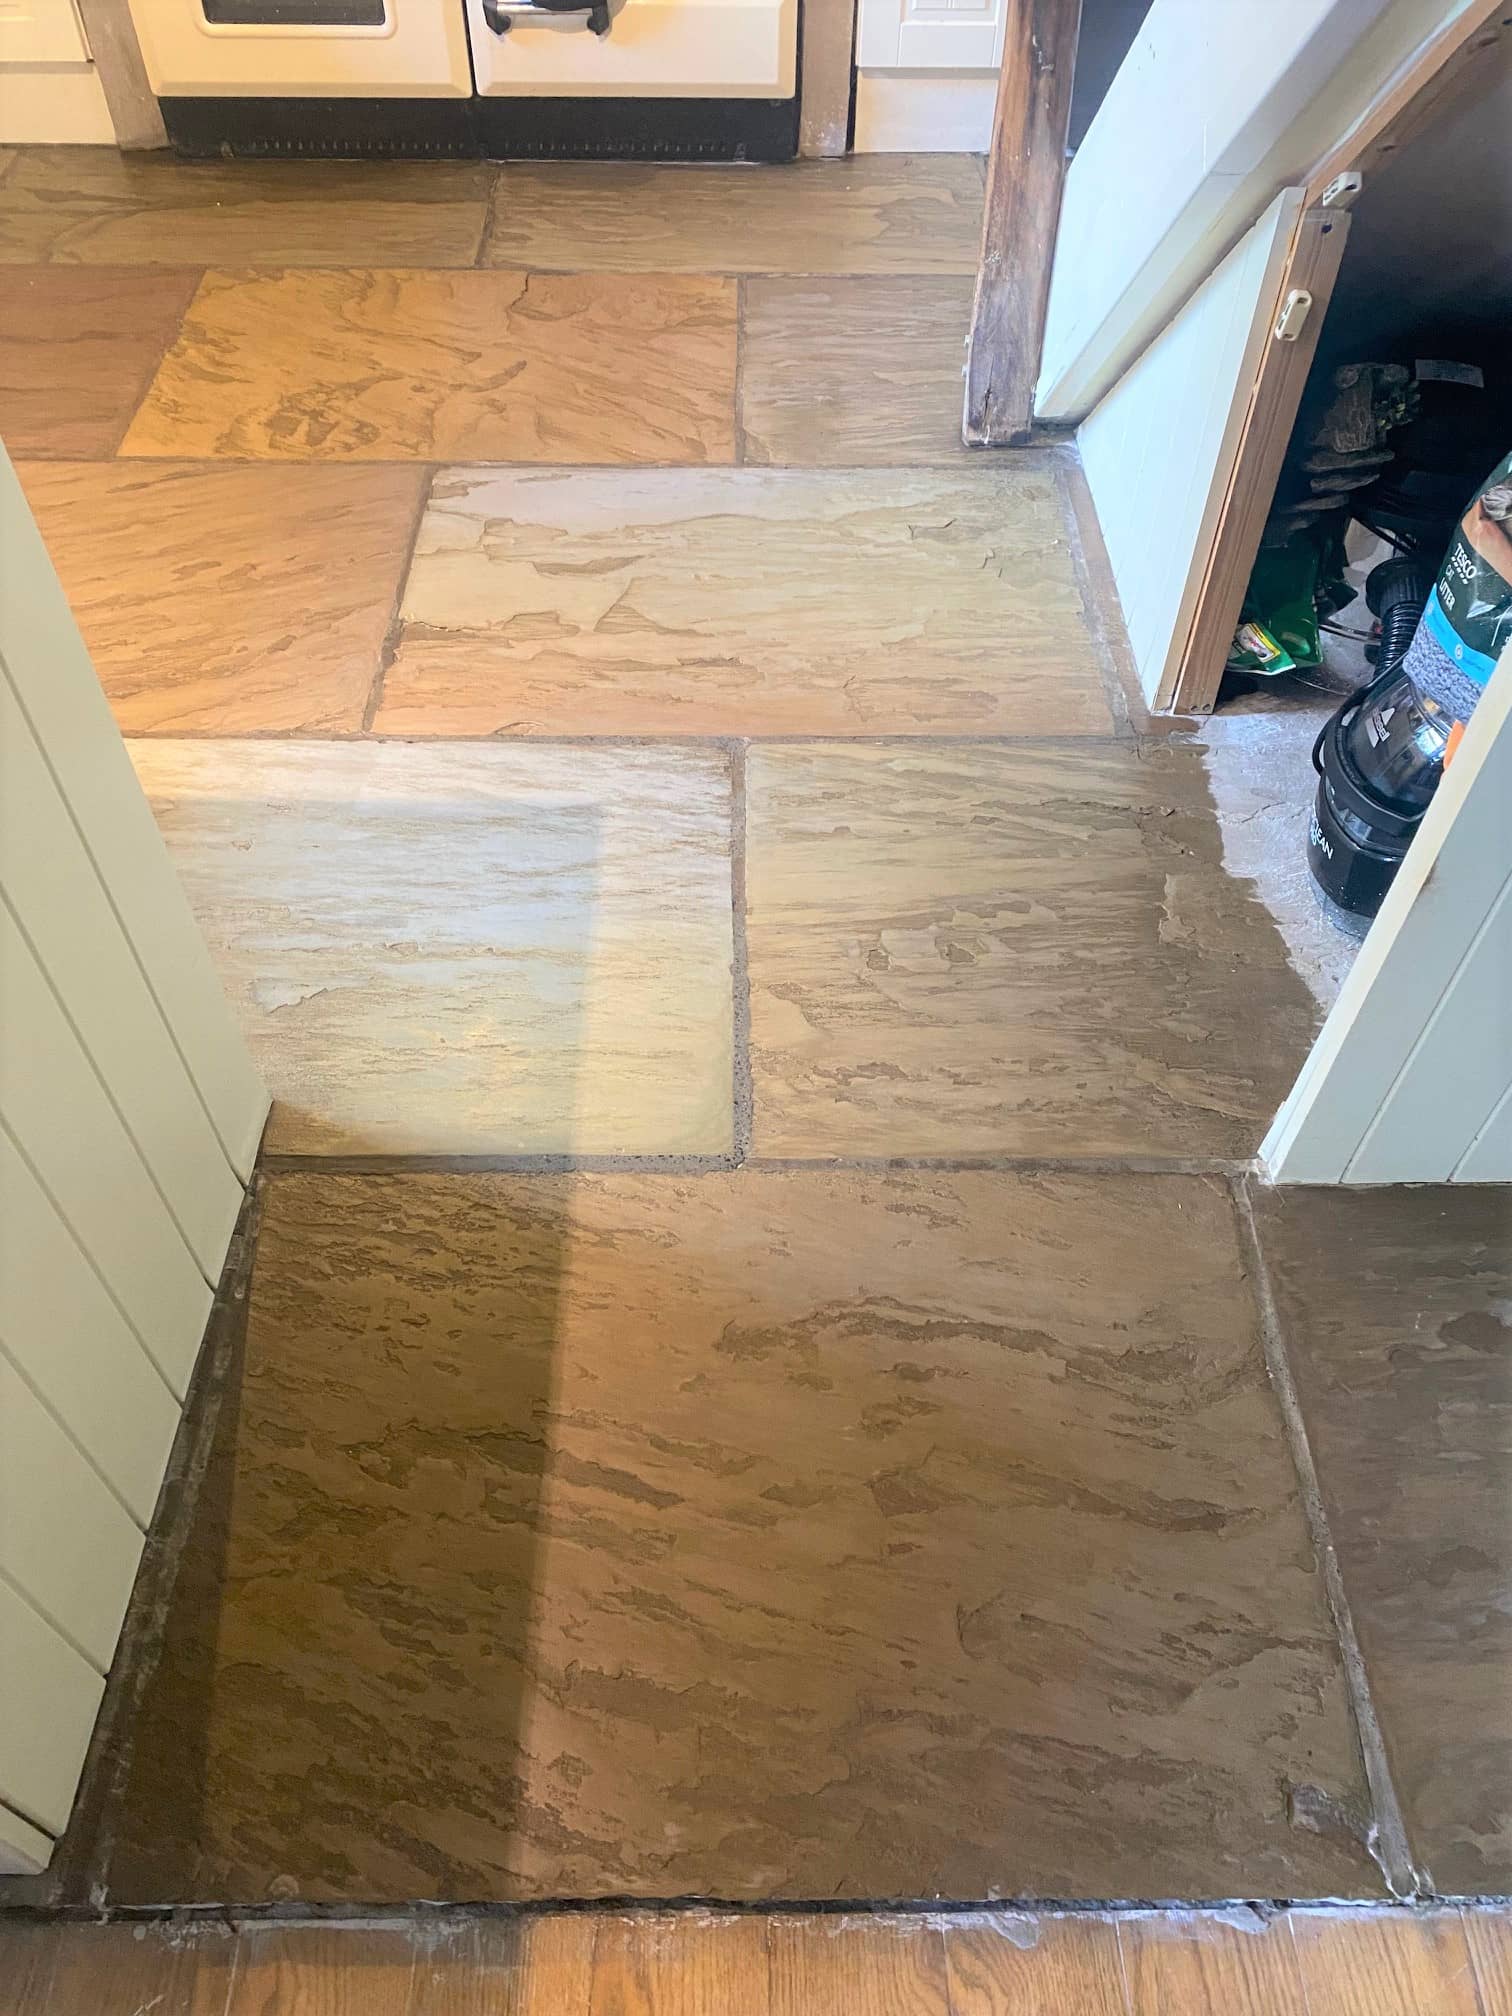
Indian Sandstone Kitchen Floor After Cleaning Garstang

It always helps to use the right product when cleaning stone after it’s been sealed, so we dropped off a bottle of pH Neutral Cleaner for the client which we call Tile Doctor Neutral Tile Cleaner. This will ensure easy maintenance without damaging the sealer.


Professional Restoration of an Indian Sandstone Tiled Kitchen in Lancashire

Rough Indian Sandstone Floor Milled and Restored in Garstang Read More »

Quarry Tiled Floor Renovation Caton Lancaster

Black and Red Dorchester Pattern Quarry Tiled Floor Renovation Caton

A first glance you might not notice much improvement in this Quarry tiled floor that we recently worked on at a Victorian house in Caton near Lancaster. However, look closer and you will see that a pattern has been worn into the tiles from a previous covering most likely carpet underlay.

The sealer on the floor was also due to be replaced so having surveyed the floor on my initial visit I worked out a plan to renovate the Quarry tiles which would include deep cleaning the tile and grout, removing the underlay patterning, and then re-sealing the tiles to keep them protected.

Quarry Tiled Floor Before Cleaning Caton Lancaster

Deep Cleaning a Quarry Tiled Floor

To start neat Tile Doctor Oxy-Gel was applied to the floor and left to soak in for twenty minutes giving it time to break down soils etc. Then a 200-grit Diamond burnishing pad was attached to floor buffing machine which was a heavily weighted for extra grip and run a few times over the tiles. These pads are very aggressive and ideal for cleaning off the pattern left by the carpet underlay.

Oxy-Gel was chosen for this as being in Gel form its more manageable and holds itself against the clay Quarry tile for longer allowing the product work to a much harder, whereas a liquid cleaner generally soaks away into the clay and underneath meaning you need to use more water to remove it later resulting in longer drying times.

Quarry Tiled Floor Before Cleaning Caton Lancaster

After the gel has been scrubbed into the tiles (no water needed at this stage) a wet vacuum Is used to remove the soiling generated during the process. After this initial clean a small amount of water is added to the floor and we go over with the same 200-grit diamond pad extracting the water off the tiles within five minutes of it being applied.

With the Oxy-Gel removed the floor was given and acid rinse using Tile Doctor Acid Gel using the same process as before but this time using a Black scrubbing pad and only allowing it to dwell for 10 minutes. Acidic products are quicker acting on clay and so need less dwell time for it to work. Water was then added and after brushing it in to the floor it was removed using the wet vacuum within five minutes. I sometimes do this job twice as this is the last of the deep cleaning process and will ensure the tiles are free from any debris and dirt before we allow the clay tiles to dry out before sealing.

Before finishing for the day, I took time to apply matching grout where it was missing which was mainly around the edges and sponged off the excess. With this done the floor was left to dry off overnight.

Sealing Quarry Tiles

The next day we conducted a damp test, but despite the use of Gel cleaning products it was still too damp to seal. My client however wanted to seal how the tiles would look with the sealer we were planning to use which was Tile Doctor X-Tra Seal, so to do this three tiles were force dried using an Air blower and a Heat Gun.

With the sealer approved the floor was left for two days so it could fully dry out, the damp test showed a much better reading and we were able to crack on applying the sealer to the whole floor. Only one coat of X-Tra Seal was needed, it’s a thick Oil based product that soaks into the pores of the tile protecting it from within, it also fully breathable so ideal for old floors like this one that don’t have a damp proof membrane. Lastly it contains a colour enhancing formula that in this case improved the deep Red and dark Black colours in the tile.

Quarry Tiled Floor After Cleaning Sealing Caton Lancaster

Lastly for aftercare I recommended Tile Doctor Neutral Tile Cleaner which is a gentle but effective tile and grout cleaning product. You have to be careful when choosing an cleaning product for use on sealed tiles as many are bleach based and simply too strong.

Quarry Tiled Floor After Cleaning Sealing Caton Lancaster


Professional Restoration of a Quarry Tiled Lobby in Lancashire

Black and Red Dorchester Pattern Quarry Tiled Floor Renovation Caton Read More »

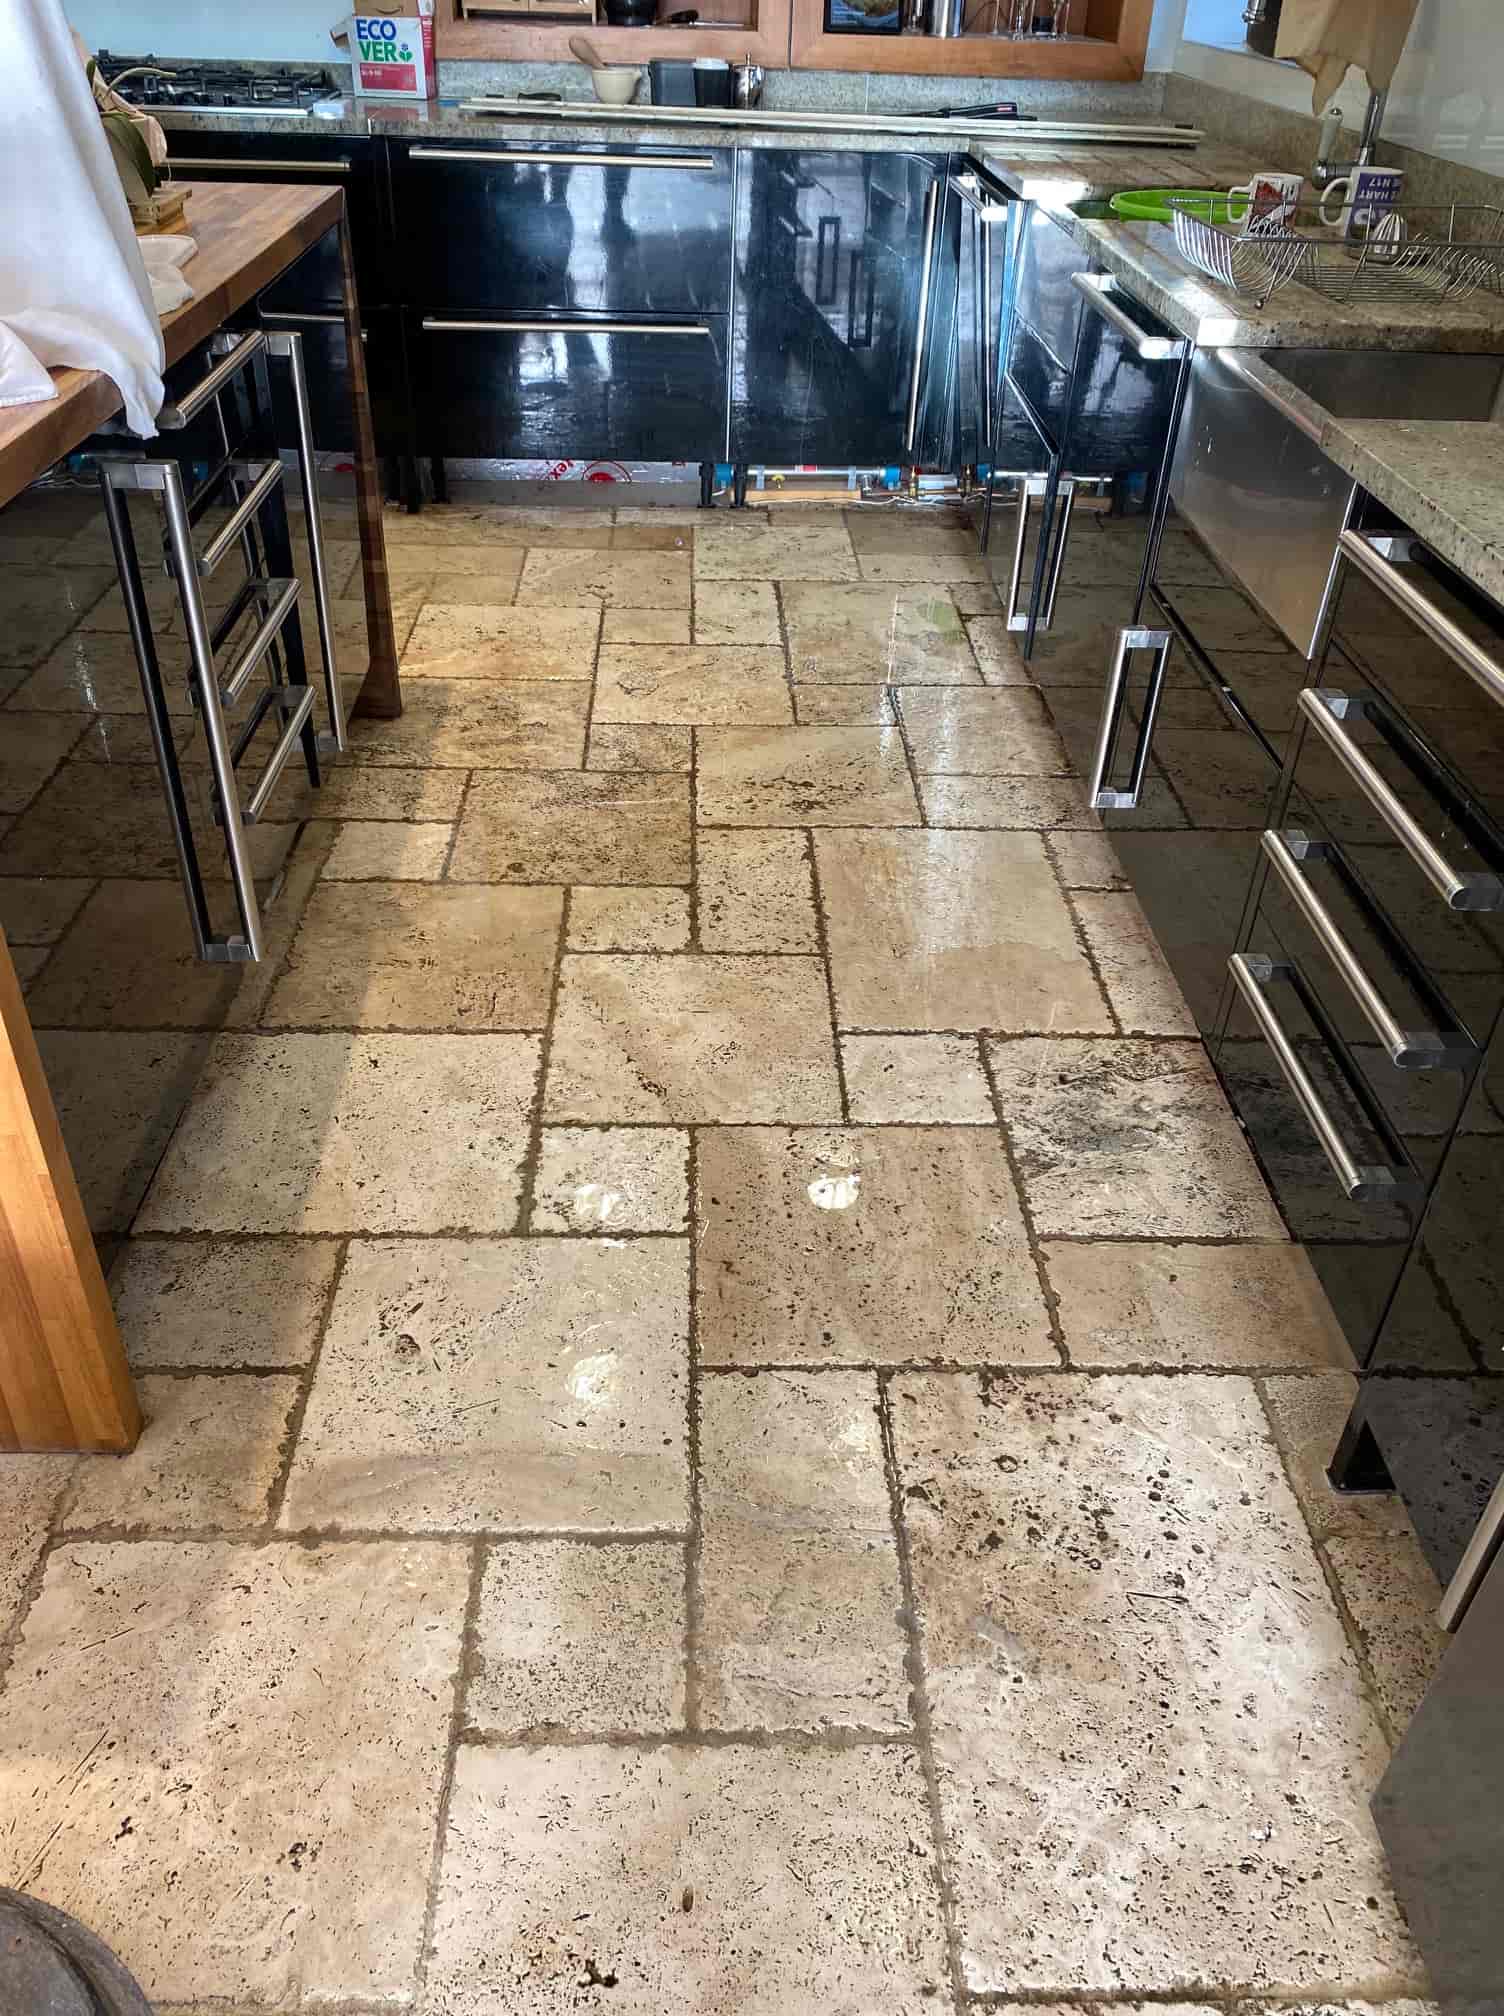
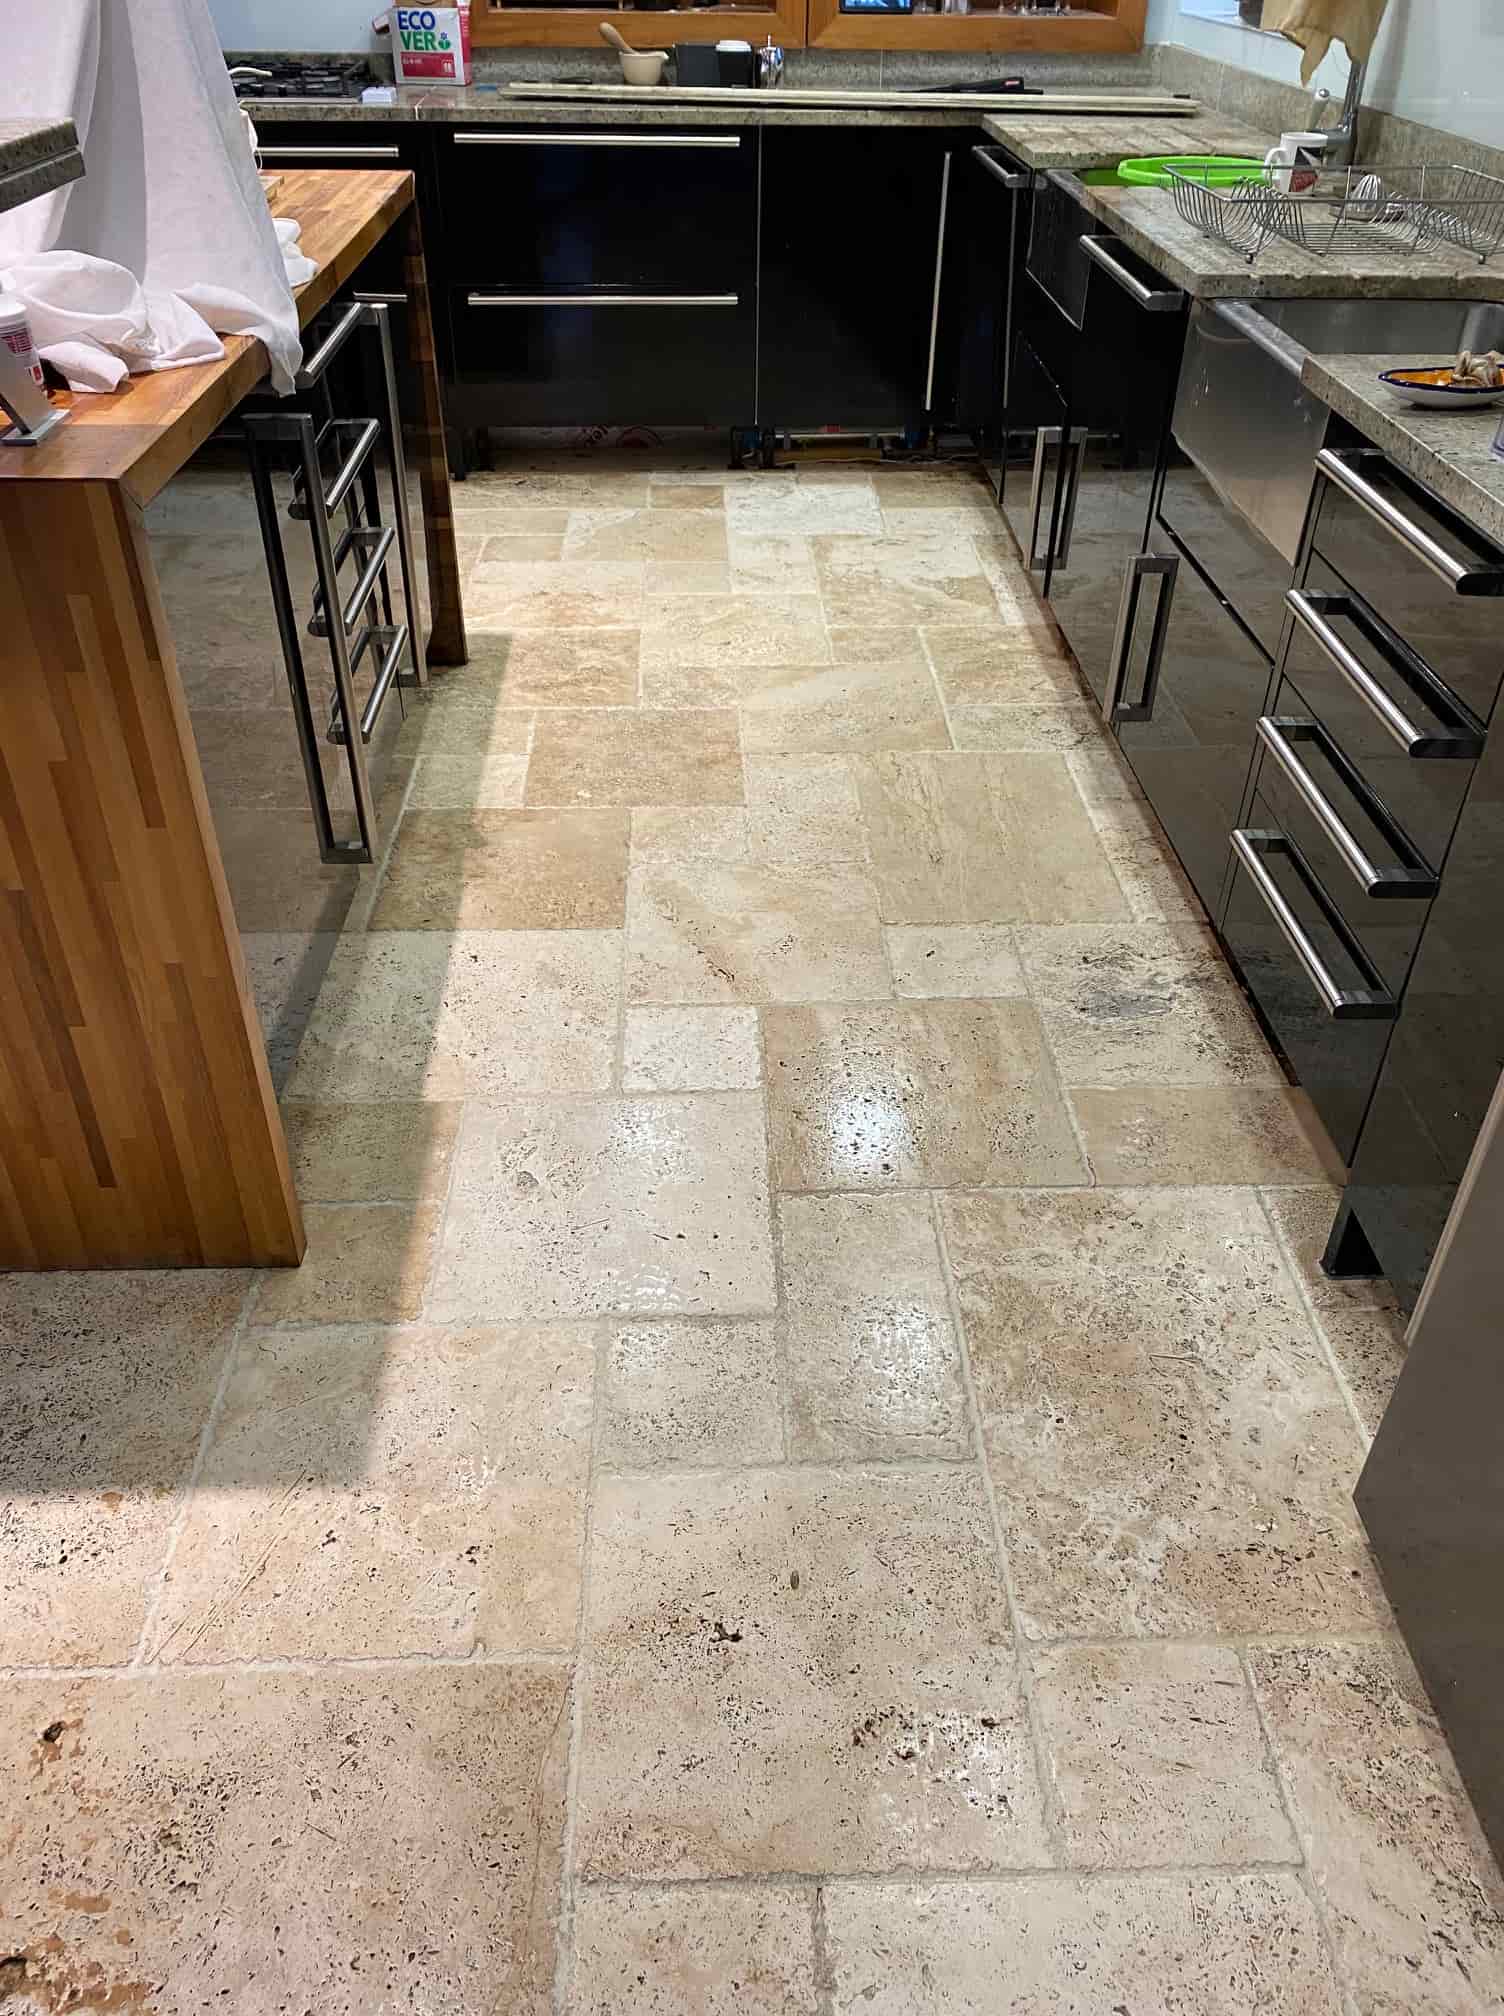
Honed Travertine Kitchen Floor Renovated in Preston

Renovating a Large Stained Travertine Tiled Floor in Preston

This customer in Preston in Lancashire had just moved into a house with a large 60m2 Travertine tiled floor that was installed throughout most of the ground floor. Travertine is a lovely stone but the previous owner had not maintained the sealer on the tiles and as a result it now looked grubby and there was a lot of dirt ingrained in the tiles leaving black staining, especially in the Kitchen.

Honed Unfilled Travertine Kitchen Floor Before Renovation Preston

This is a common problem with all natural stone floors, some are hardier than others but without a protective barrier in place they will attract dirt as the sealer become worn off. The new owner was seriously considering having the tiles ripped up, fortunately however they came across our service and decided to try having them renovated first.

Honed Unfilled Travertine Kitchen Floor Before Renovation Preston

Deep Cleaning a Travertine Tiled Floor

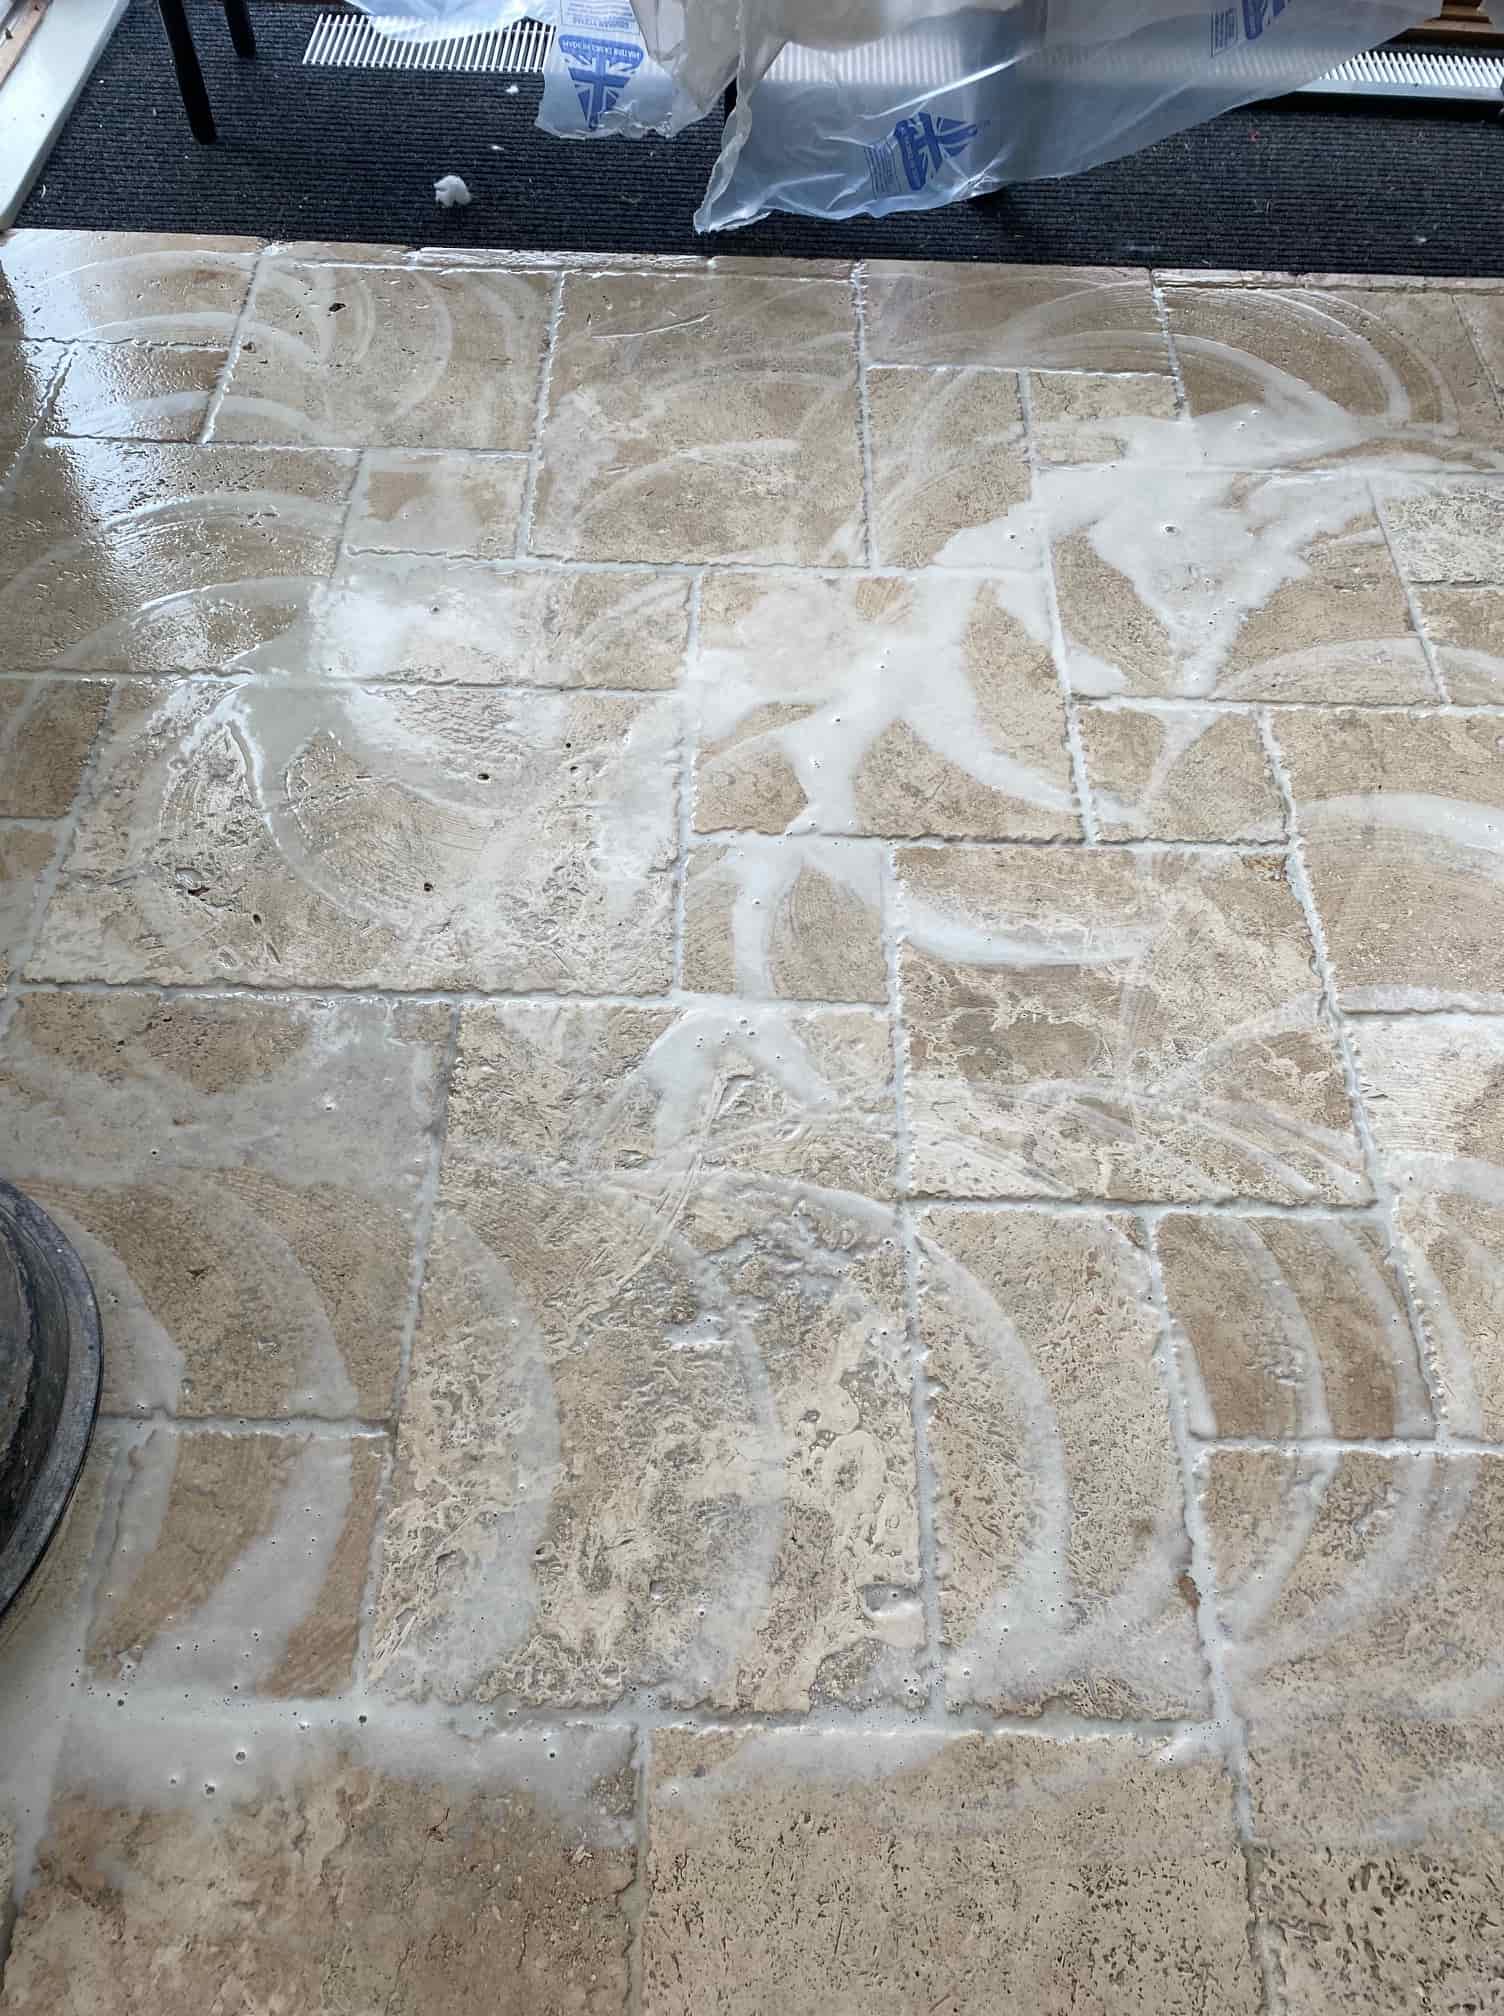
To get the stone clean and bring back the beautiful appearance of the Travertine I used several diamond burnishing pads which are run over the tiles with water for lubrication. The first was a coarse 200-grit pad which is fitted to a rotary floor machine and buffed into the stone in a circular motion. This process generates a lot of slurry which is then rinsed off afterwards and extracted with a wet vacuum.

Honed Unfilled Travertine Kitchen Floor During Renovation Preston

This process was then repeated using finer burnishing pads and continued with a 400-grit, 800-grit and finally a 1500-grit, again each pad was run over the tiles several times and then the slurry extracted as before. It’s a completely abrasive process with no other products needed and the result is a sealer and dirt-free tile.

Honed Unfilled Travertine Kitchen Floor During Renovation Preston

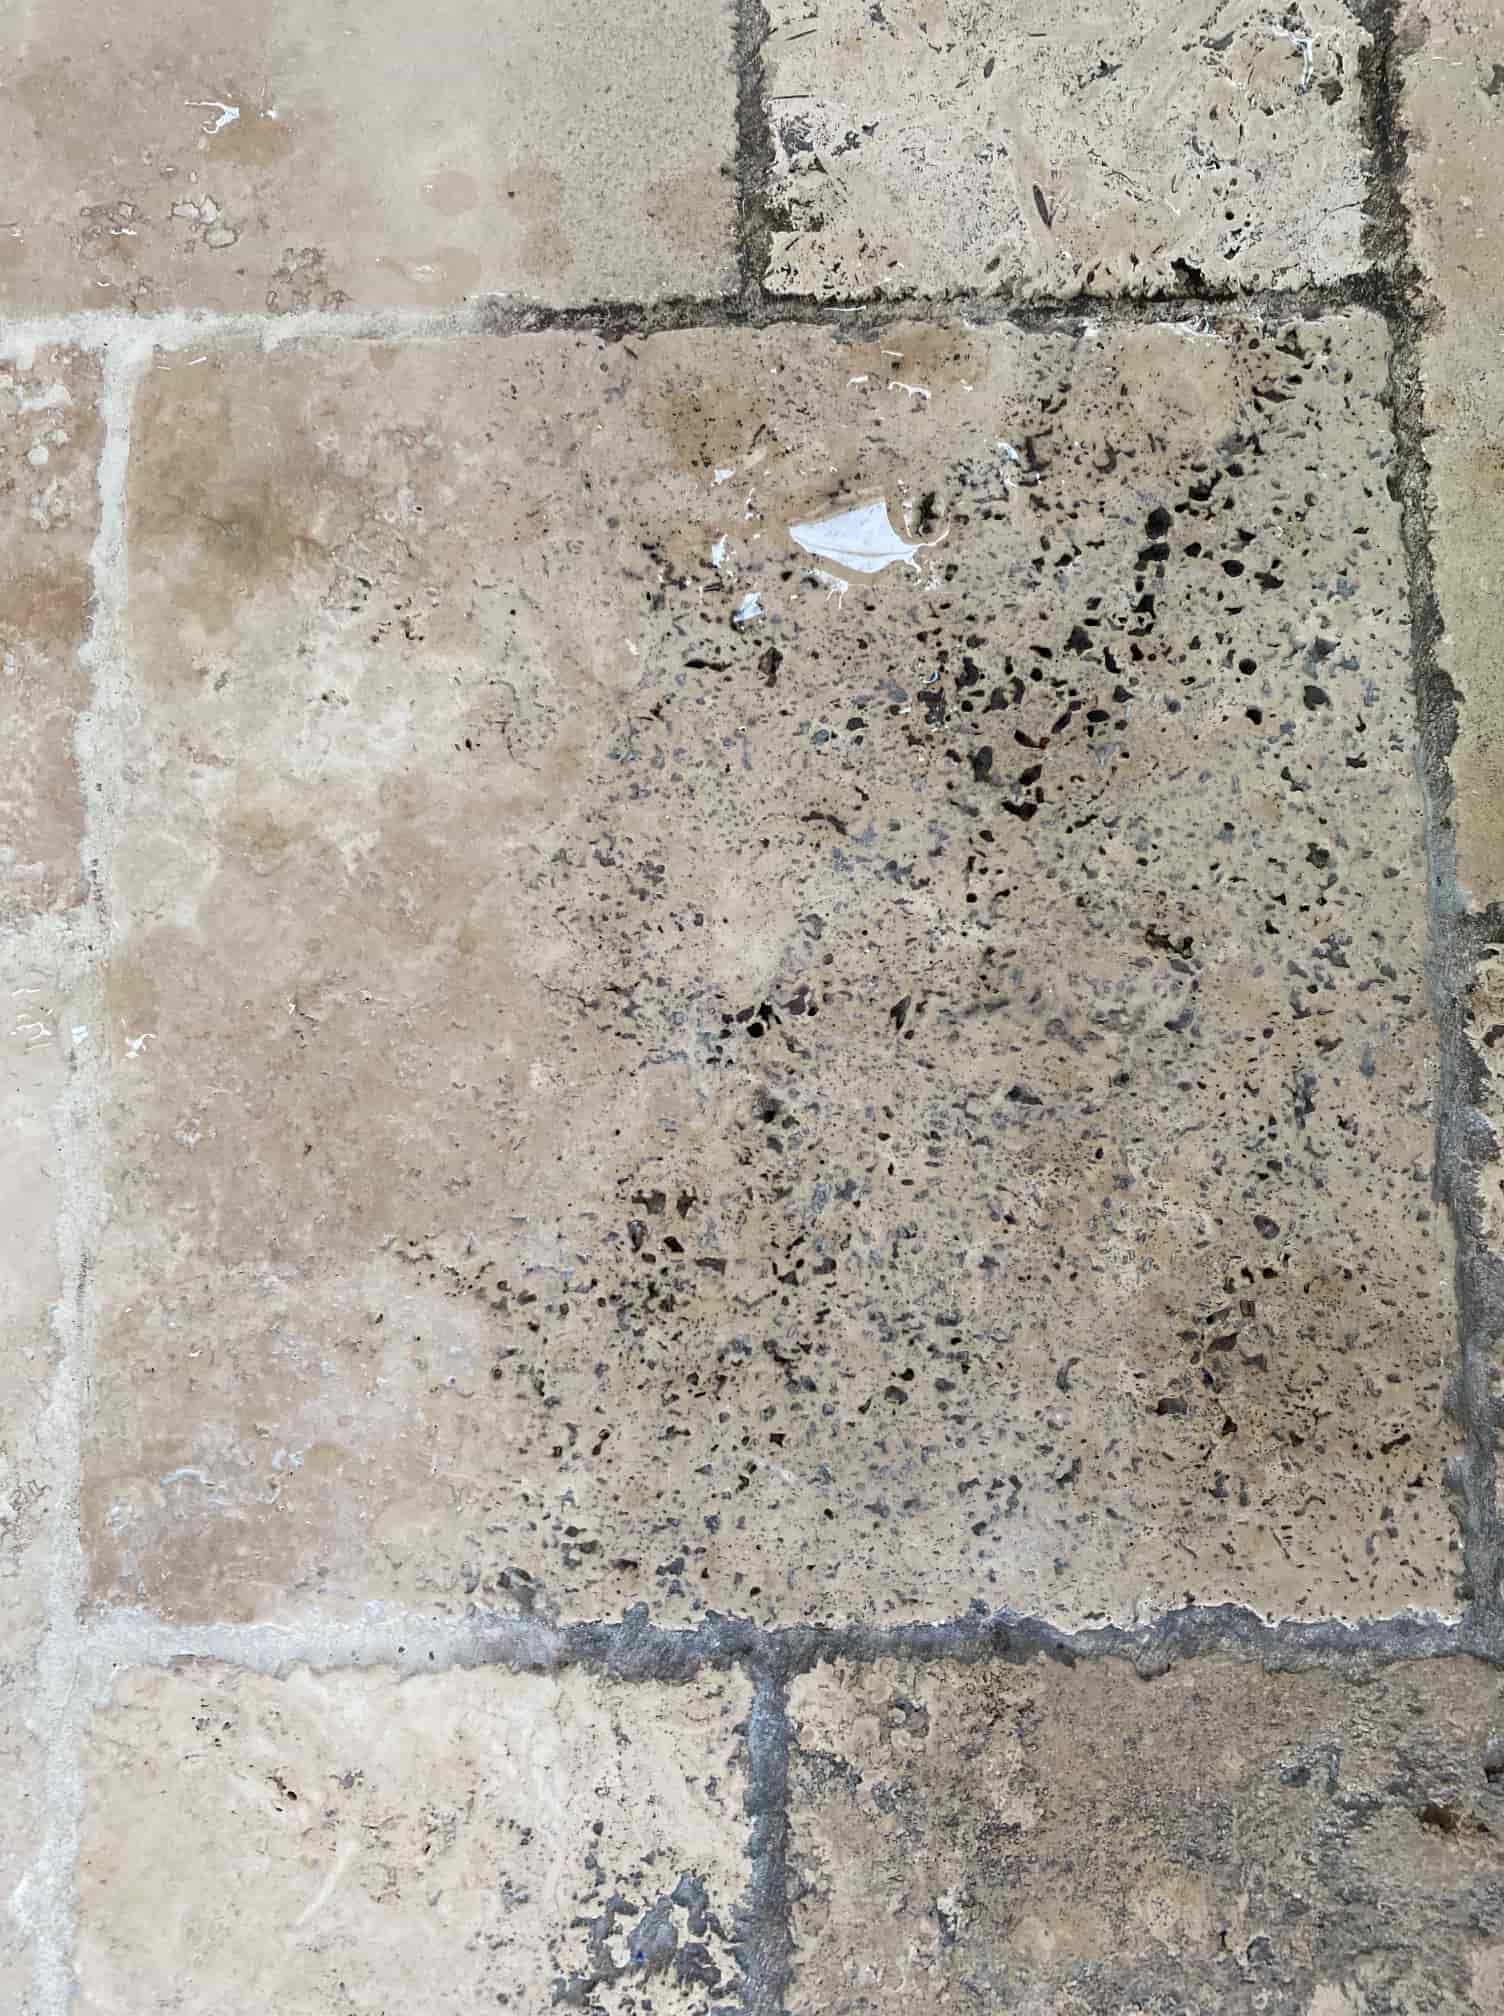
At this point I inspected the floor to see if the pads had been able to clean up the grout as well as the tile. Pads can struggle to reach down into the recess so I often find more work is needed on the grout. As suspected the Travertine had responded well to the treatment however it was clear the grout would need more work and was still stained black in places.

Normally use a grout cleaning product called Tile Doctor Pro-Clean for the grout but on this occasion, I felt something stronger would be needed. So, on this occasion I applied undiluted Tile Doctor Remove and Go along the grout lines and left it to soak in for ten minutes. It was then scrubbed in by hand, rinsed off and the soil remove with the wet vacuum. The grout cleaning had worked a treat and happy with the condition of the floor it was left to dry off overnight.

Sealing a Travertine Tiled Kitchen Floor

The next morning time was spent filling in holes (aka pitting) in the Travertine with colour matching grout before running over the whole floor with a very fine 3000-grit polishing pad to further bring up the appearance of the stone. This is done using a little water sprayed onto the tile a process we call a spray burnish.

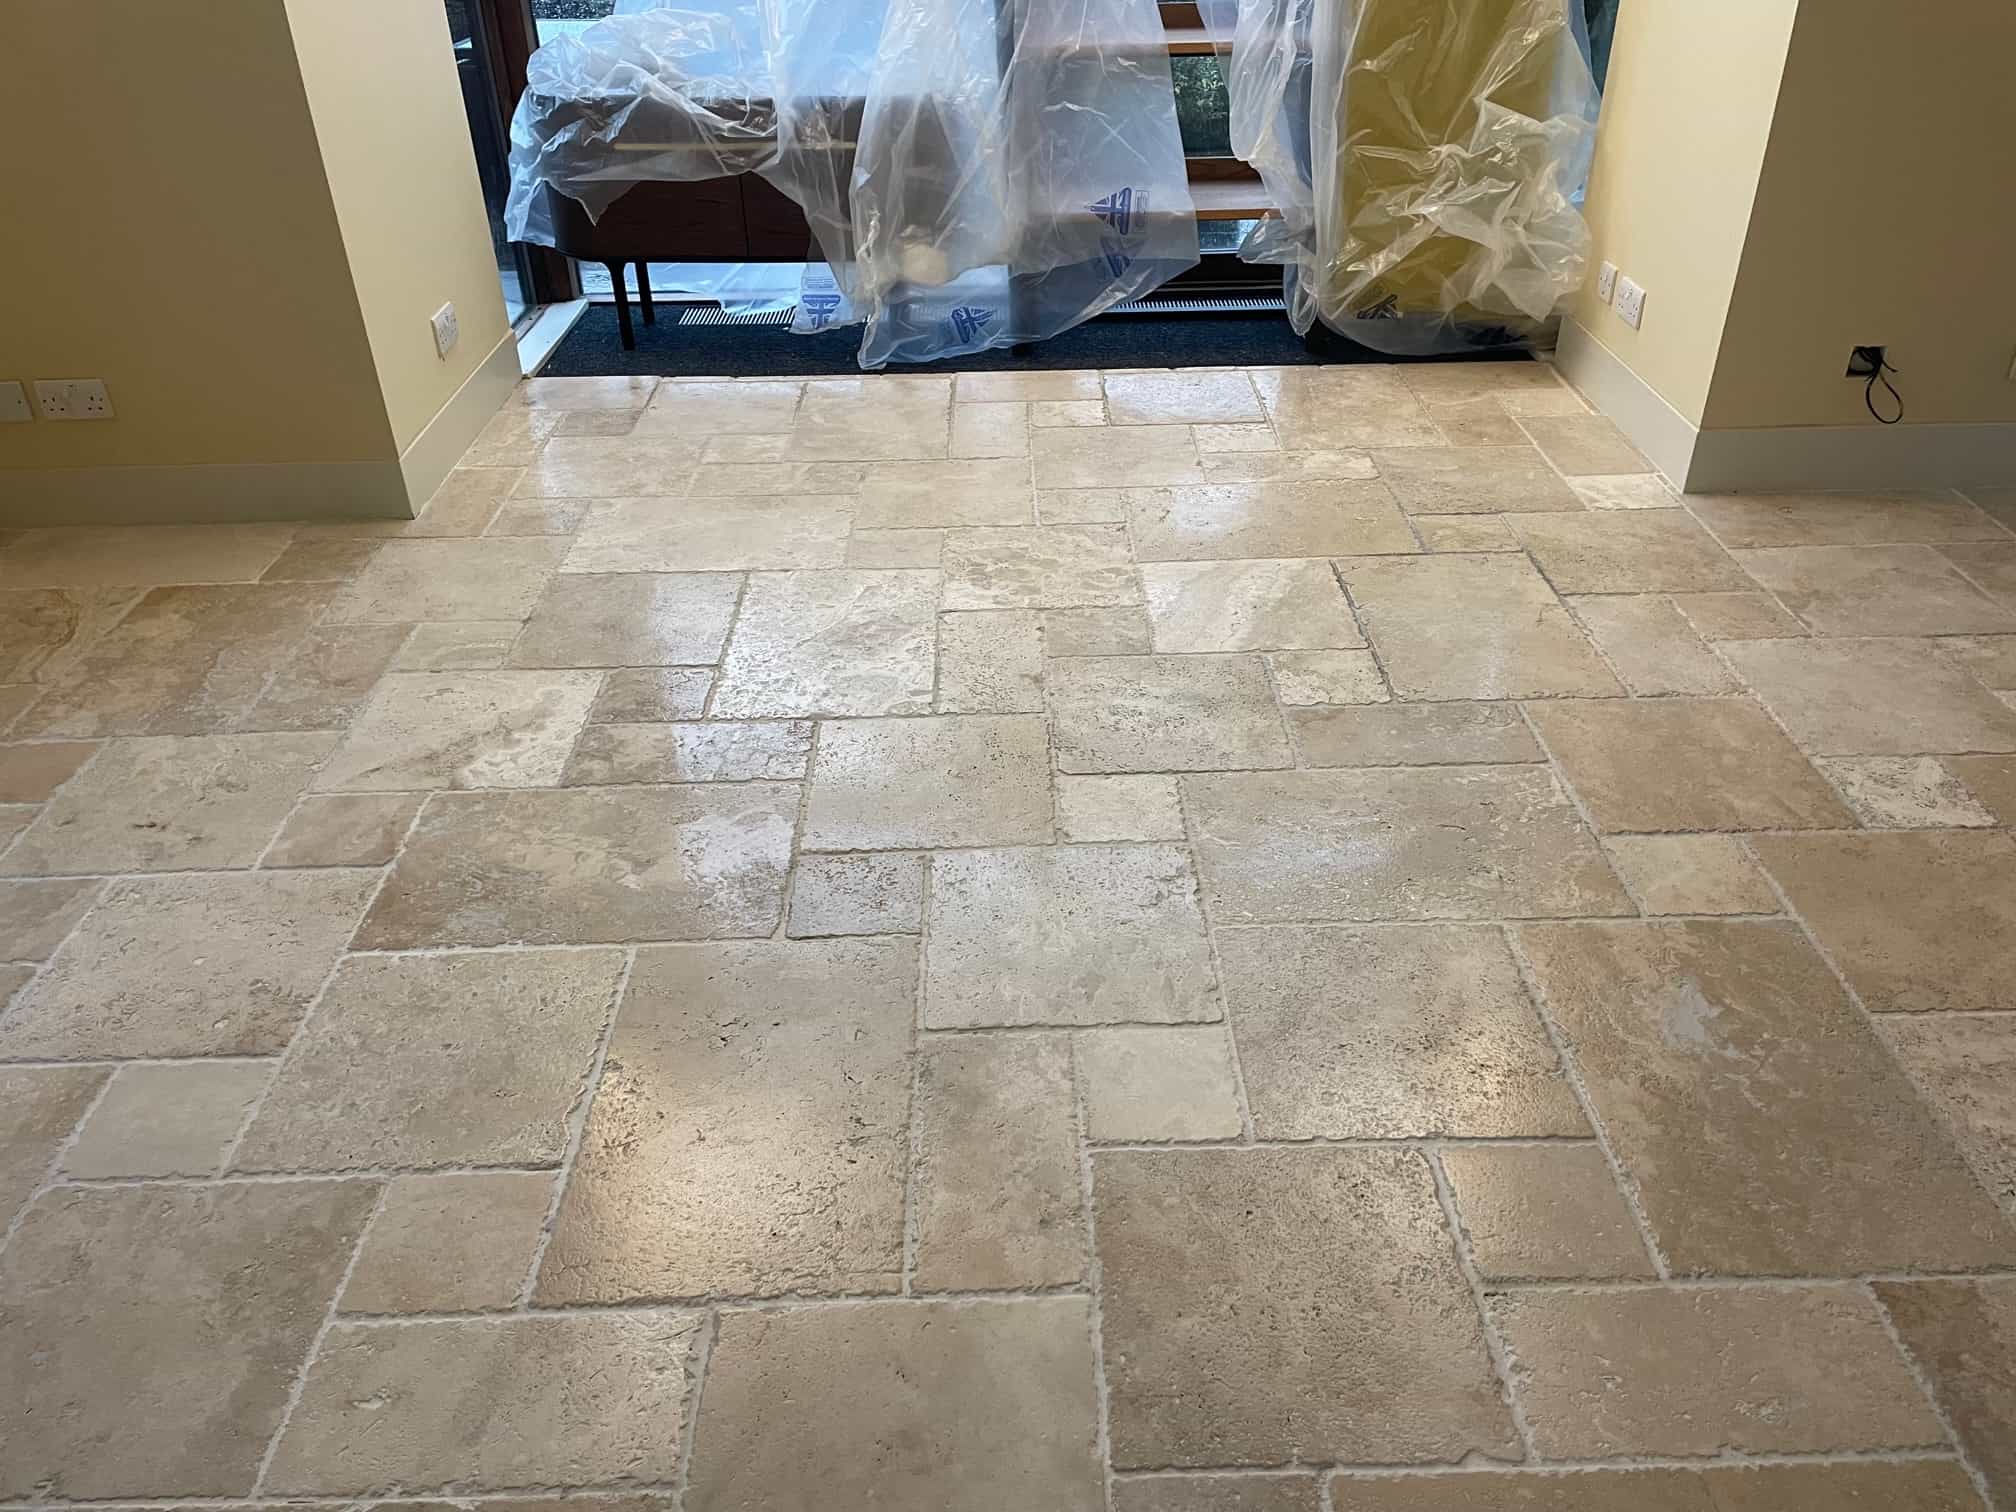
Spray burnishing also leaves the floor dry and ready to be sealed. The owner wanted the Travertine to look as natural as possible so two coats of Tile Doctor Ultra Seal were applied. This is an impregnating sealer which is recommended for use on polished stone and for use in kitchens.

Honed Unfilled Travertine Kitchen Floor After Renovation Preston

Before leaving I took time to discuss aftercare cleaning and how important it is to avoid the use of strong cleaning products (especially bleach) on Travertine, not only will it degrade the sealer but can also harm the stone. For the regular cleaning of sealed Travertine, I recommend using Tile Doctor Stone Soap which is a gentle but effective cleaner that also helps maintain the patina.

Honed Unfilled Travertine Kitchen Floor After Renovation Preston


Professional Renovation of a Travertine Floor Tiles in Lancashire

Renovating a Large Stained Travertine Tiled Floor in Preston Read More »

Copper Slate Tiled Kitchen Floor Cleaned Sealed in Ribchester

Renovating Copper Slate Tiles with a Semi Riven Finish in Ribchester

This Copper Slate tiled floor at a property in the Ribble Valley village of Ribchester had been sealed just twelve months before by another company who used a topical acrylic sealer as the client wanted a shiny finish. However, this was a bad choice for a semi-riven tile and exacerbated by the fact that the client had three large dogs. The topical sealer just couldn’t cope and the shine on the Slate faded in a few months.

Semi Riven Copper Slate Before Cleaning Ribchester

After discussing the problem, I suggested stripping off what was left of the topical seal and then re sealing with a sturdier impregnating sealer. I recommended a product called Tile Doctor X-Tra seal which is a premium product that improves colour and is very durable so much so it can also be used externally. Since releasing this product last year it has proved to be very popular and has proven to be the answer in numerous tricky situations. It also adds a lustre and patina to the stone. The client was happy to go ahead with my quote.

Semi Riven Copper Slate Before Cleaning Ribchester

Cleaning a Semi Riven Copper Slate Tiled Kitchen Floor

My first concern when dealing with a floor situated in a kitchen is to prevent water being absorbed by the kitchen base units and plinths. Normally the plinths can be removed but if not, the solution is to run a bead of silicone around the area of concern. MDF is easily blown by moisture, and it doesn’t take us long to add so it’s well worth doing.

Semi Riven Copper Slate Before Cleaning Ribchester

The cleaning started with the application of a strong dilution of Tile Doctor Pro-Clean which was scrubbed into the floor to remove the old sealer. On this occasion it was scrubbed in using a 200-grit milling pad fitted to a rotary machine. As well as stripping off the old sealer this action deep cleans the tile and grout. A lot of soil is released during the process, and this is brushed and rinsed away with clean water and extracted using a wet vacuum.

The next step was to give the floor an Acid Rinse using a product called Tile Doctor Grout Clean-up, this not only cleans the grout but also neutralised the pH of the floor after cleaning with The Tile Doctor Pro-Clean which is an alkaline product.

An acid wash removes grout smears, unwanted mineral deposits and roughens the stone at a microscopic level to provide a better bond for the sealer. You must be careful what you use it on, and we wouldn’t recommend it for use on acid sensitive materials such as Limestone, Marble, or Travertine. Grout Clean-up is however safe to use on Slate, but I wouldn’t leave it on for a long period of time.

After another rinse with water the wet vacuum was deployed again to remove as much moisture from the floor as possible. The floor was then left to dry out fully overnight.

Sealing a Semi Riven Copper Slate Kitchen Floor

The next day after confirming the floor was dry, work started with the application of what would be two coats of Tile Doctor X-Tra seal. X-Tra seal is an impregnating sealer that soaks into the pores of the Slate ensuring dirt cannot reside there.

Semi Riven Copper Slate After Cleaning Ribchester

I would be the first to admit that a topical sealer would have resulted in a shiner finish but clearly this was not a practical choice when you have 3 big dogs who will run around the floor and tear at the sealer with their claws. Topical sealers as the name suggest sit on the surface and are simply not a very practical option for this situation.

Semi Riven Copper Slate After Cleaning Ribchester

Once completed the Copper colour in the Slate was really enhanced, the grout looked much cleaner and overall, the floor looked great; more importantly the client was very happy with the work we had carried out.

For the cleaning of sealed Slate tiles, I recommend the use of Tile Doctor Neutral Clean which is pH neutral and gentle enough for regularly use. Its also provided in concentrated form so a small amount goes a long way. Many of the floor cleaning products you find in supermarkets are bleach based and far too strong for use on a sealed tile resulting in premature damage to the sealer. I forgot to ask what they had been using to clean the floor previously, but this may also have been a factor in why the previous sealer only lasted a few months.


Professional Restoration of a Semi Riven Copper Slate Kitchen Floor in Lancashire

Renovating Copper Slate Tiles with a Semi Riven Finish in Ribchester Read More »

Bolivian Black Slate Floor Before After Renovation Blackpool

Renovating a Bolivian Black Slate floor in Blackpool

This kitchen floor in Blackpool was laid 20 years prior and comprised of Bolivian Black Slate inlaid with White Ceramic Tozzettos. The slate was now looking dull and unloved and the owner now wanted the floor deep cleaning and resealing to restore its appearance.

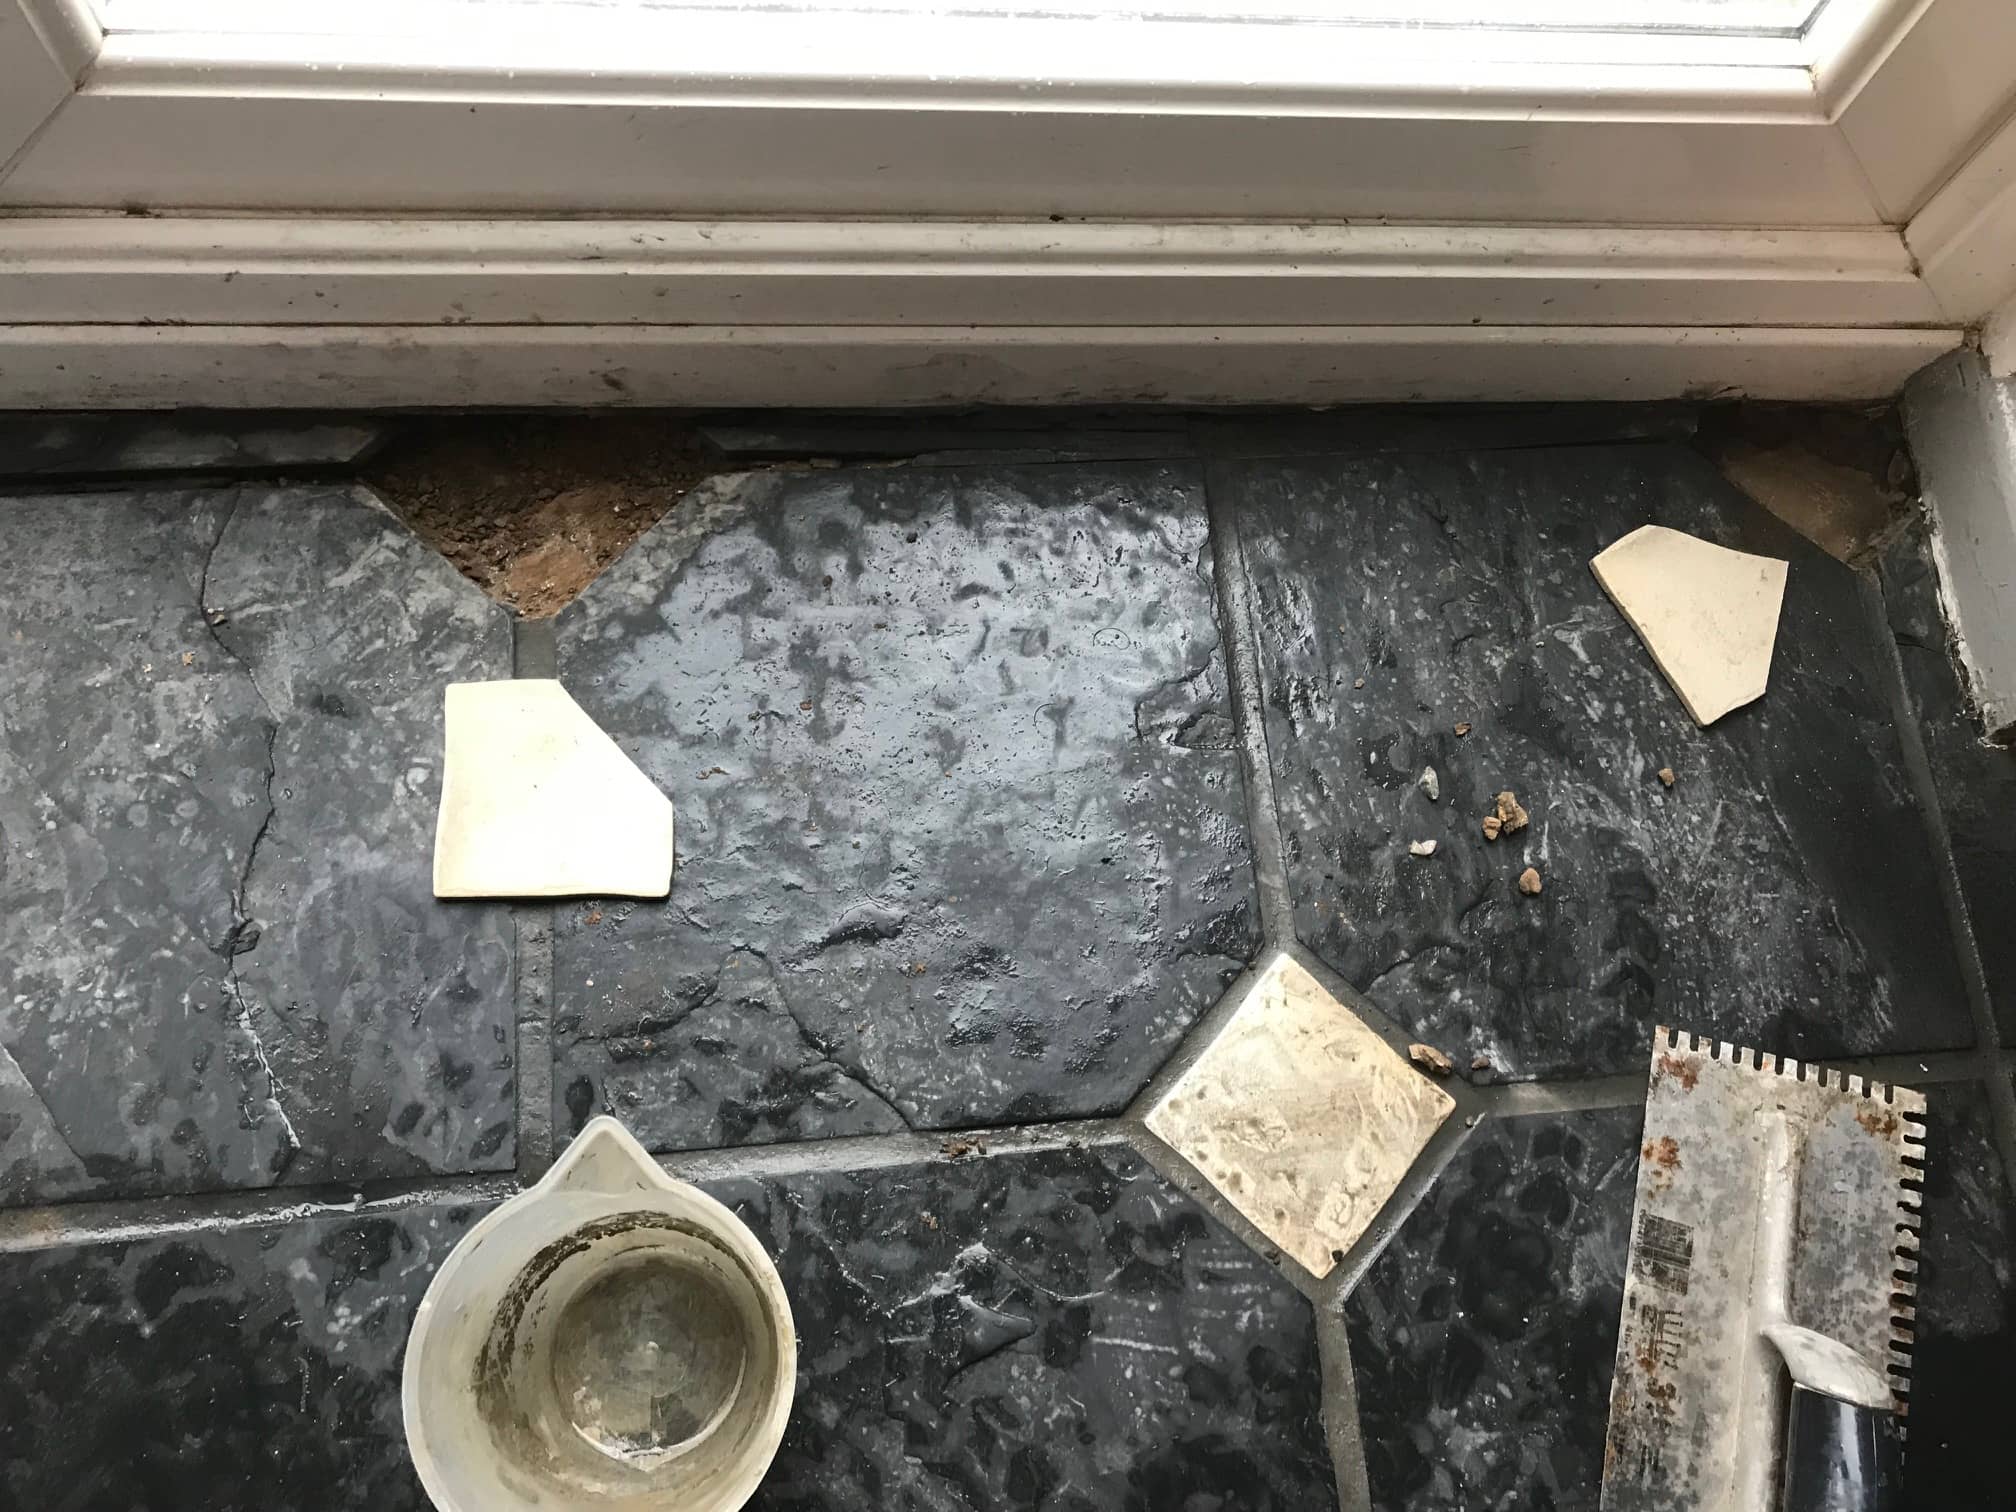
We visited the property in Blackpool to inspect the floor and discuss what would be needed to restore the floor. It was clear that the old seal had worn away with use which left the stone vulnerable to ingrained dirt and hard to keep clean. Additionally, there were a few broken tiles near the glazed patio doors that would need replacing but the rest of the floor was solid and just in need of some love and care.

Bolivian Black Slate with White Ceramic Tozzettos Before Cleaning Blackpool Bolivian Black Slate with White Ceramic Tozzettos Before Cleaning Blackpool

We discussed the process which would involve tile replacement, tile and grout cleaning and then sealing. I worked out a price to complete the job which was accepted and booked in for later in the month.

Cleaning and Repairing a Bolivian Slate Kitchen Floor

We cleaned the tiles with a strong dilution of Tile Doctor Remove and Go which was sprayed onto the floor and left to soak in for ten minutes before being scrubbed in. To scrub the floor, I used a rotary buffing machine fitted with a with a black scrubbing pad and approximately 15kg of additional weight to give the pad more bite. This removed what was left of the original matt sealer which was still evident in the less used parts of the floor. This process released the ingrained dirt from the stone into the cleaning solution which was then rinsed off the floor and extracted with a wet vacuum.

The grout was then deep cleaned with Tile Doctor Pro-Clean which was scrubbed in with a narrow brush and finished with a wire brush on some of the more stained grout lines. After this the wet vacuum was used again machine to extract the loose dirt and sediment and the floor rinsed down with water a few times to restore the pH balance in the floor. With the cleaning finished the floor now needed to dry off so it would be ready for sealing the next day.

Bolivian Black Slate with White Ceramic Tozzettos During Repair Blackpool

Next step was to turn my attention to the cracked tiles near the patio door. I suspect the patio doors were not an original feature and there had been some settlement over the years in the underlying cement. The cracked tiles were removed, and old adhesive and grout scraped out. Fortunately, the customer still had some spares, so these were laid in place with rapid setting adhesive and then grouted in.

Bolivian Black Slate with White Ceramic Tozzettos Before Cleaning Blackpool

Sealing a Bolivian Tiled Kitchen Floor

On the 2nd day we applied a tester of 2 coats of Tile Doctor Seal and Go in a corner area as the customer wasn’t sure if she should stick with a matt colour enhanced finish or satin. The customer liked the satin finish, so we applied four further coats of the Tile Doctor Seal and Go throughout. Each coat is left to dry before applying the next so this process can take some time.

The floor looked fabulous when finished in fact the customer said it almost looked like new, which wasn’t bad for a floor that was 20 years old!

Bolivian Black Slate with White Ceramic Tozzettos After Cleaning Blackpool Bolivian Black Slate with White Ceramic Tozzettos After Cleaning Blackpool

As usual before leaving we discussed aftercare which for the regular cleaning of the Slate I recommend Tile Doctor Neutral Cleaner. Neutral Cleaner as its name suggest is pH neutral so it won’t damage the sealer which can be a problem for cleaning products you find in supermarkets which are basically too strong. You really do need to check the label when choosing a cleaning product for a natural stone or sealed floor as many products are made from a derivative of a bleach which will erode the sealer prematurely with regular use.

Bolivian Black Slate with White Ceramic Tozzettos After Cleaning Blackpool


Professional Restoration of Black Slate Kitchen Tiles in Lancashire

Renovating a Bolivian Black Slate floor in Blackpool Read More »

Sandstone Floor Grout Before After Restoration Ulverston

Grout Colour Restoration on a Ceramic Kitchen Floor Ulverston

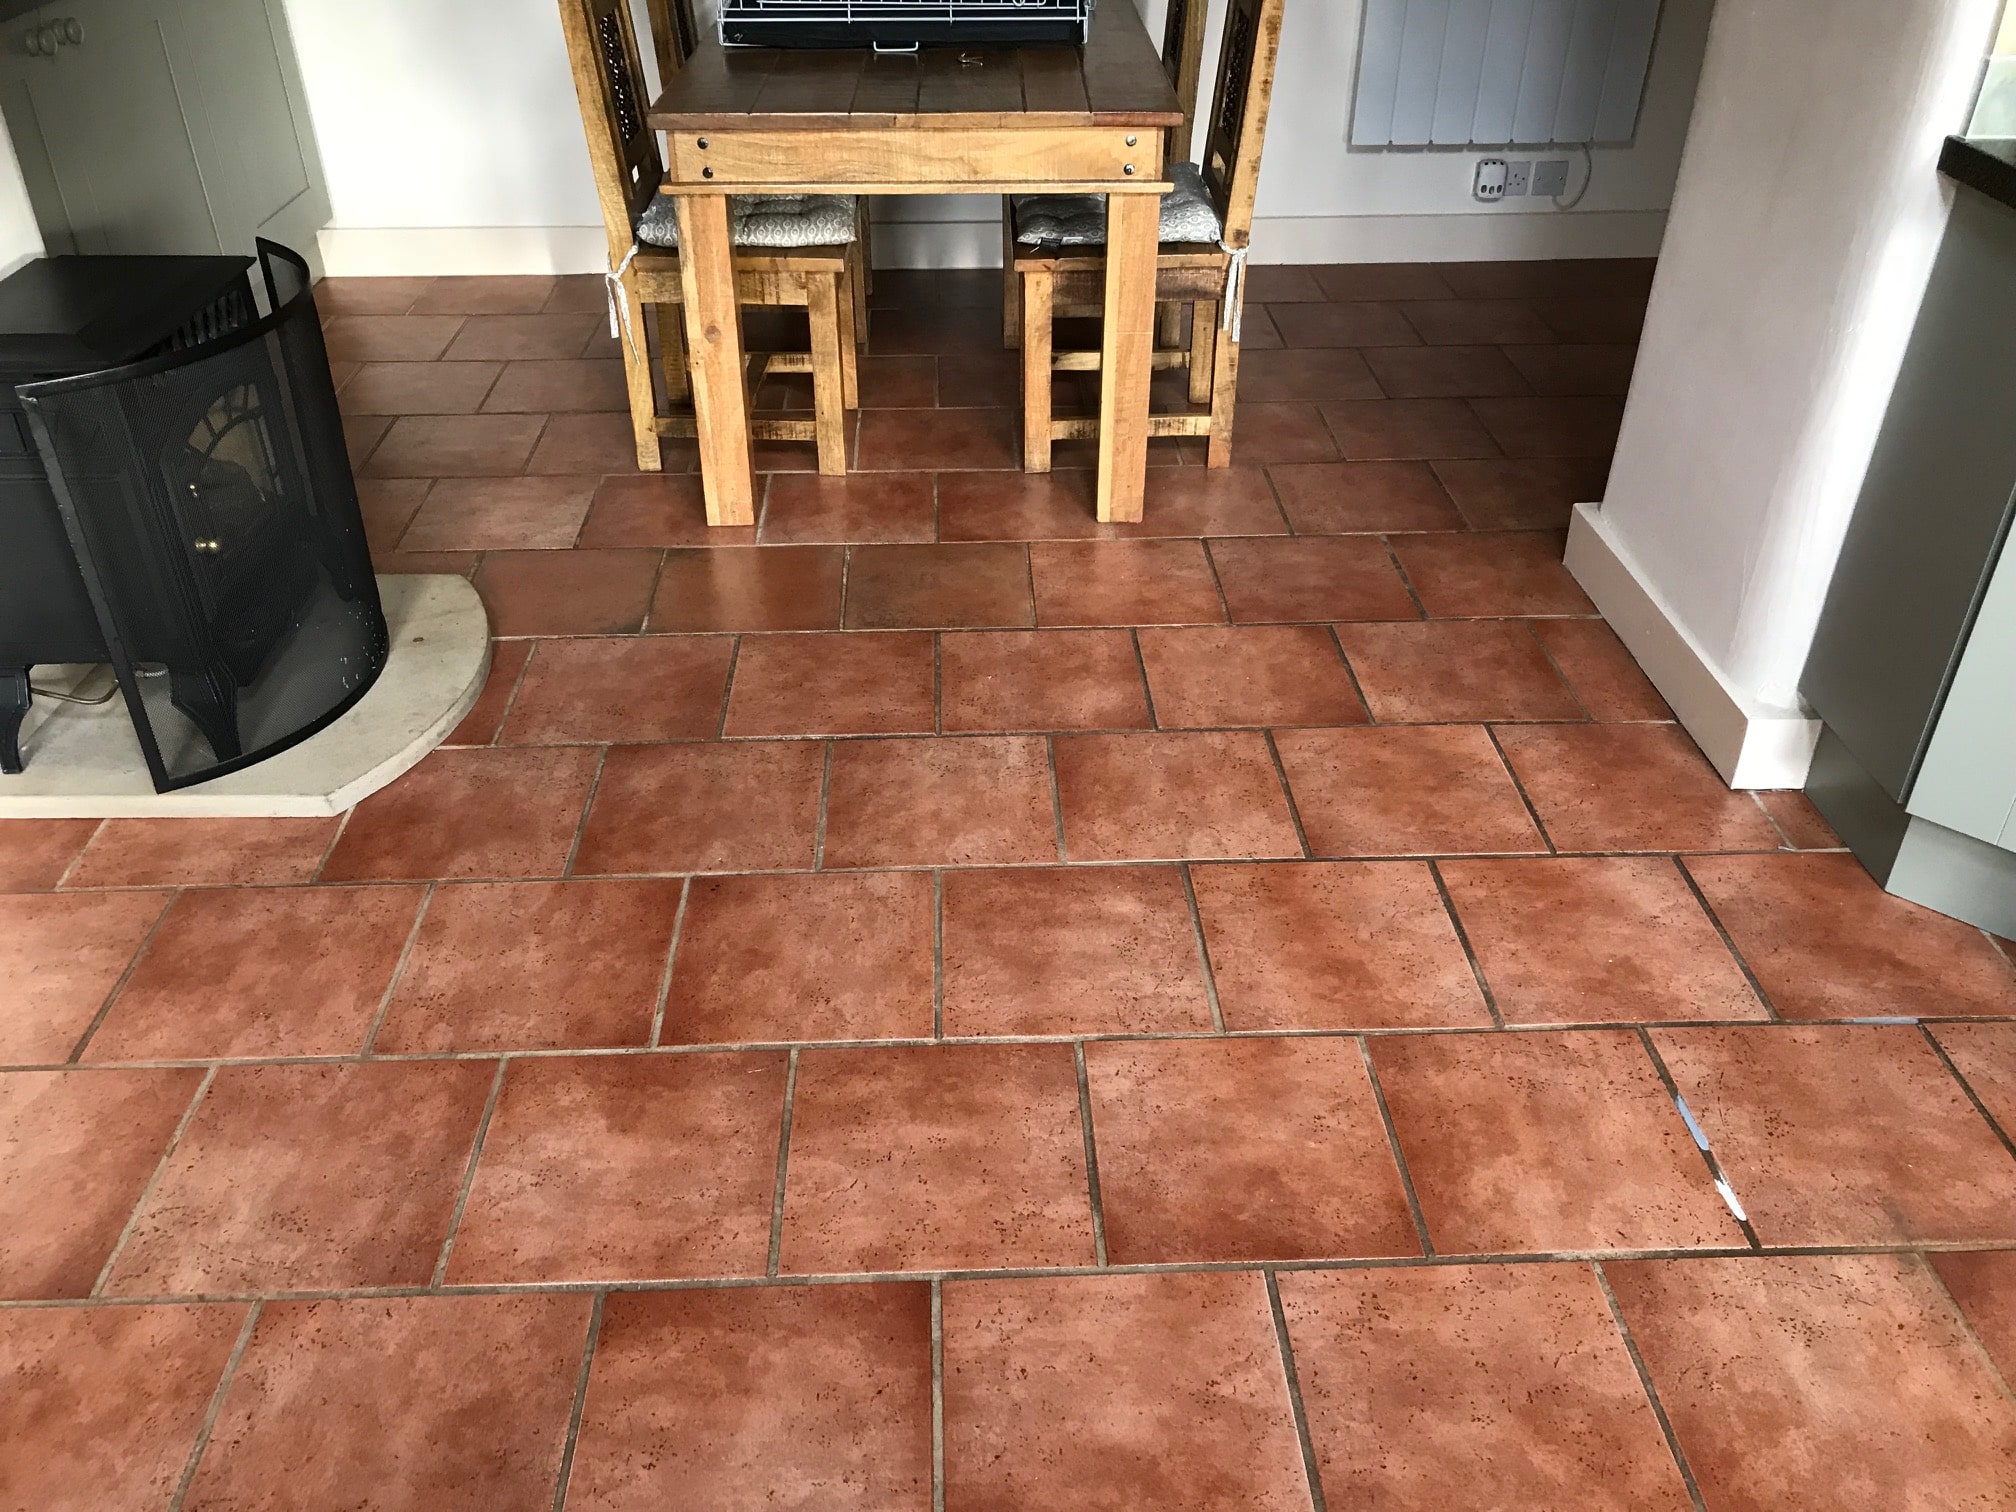
This client got in touch to see if we could clean the grout in her large kitchen floor which was tiled with Terracotta style Ceramic tiles. As per usual we visited the property first which was in the market town of Ulverston to survey the floor and get a better idea of what was required.

Ceramic Tiled Kitchen Floor Before Grout Colouring Ulverston

Believe it or not the grout had originally been Sandstone in colour, but poor cleaning practices had reduced the colour back to grey as all floor grouts (apart from white) are basically a cement grey with a colour dye added. I suspect the customer had been using a strong bleach-based product to clean the floor with which as well as removing colour can also lead to dehydration resulting in cracking. It’s work knowing that even the “Green Cleaning Products” on the market generally contain at least 5% of “non-ionic surfactants” which can also impact grout with constant use.

Ceramic Tiled Kitchen Floor Before Grout Colouring Ulverston Ceramic Tiled Kitchen Floor Before Grout Colouring Ulverston

Our recommendation was to re-colour the grout using a durable Tile Doctor Grout Colourant which seals and rejuvenates existing grout and is available in ten popular colours. The client was happy that we could improve the appearance of the floor, we agreed a price and scheduled the work in which would take two days to complete.

Cleaning and Colouring Grout on a Ceramic Tiled Kitchen Floor

It was a large 45m2 kitchen and so it took most of the first day just to clean the grout using Tile Doctor Grout Colourant Pre-Treater. This is an effective ready-to-use acidic cleaner which is designed to lightly etch and clean the grout joints so that you achieve a superior bond with the colourant. The product comes in a spray bottle so its just a question of spraying it onto the tile, leaving it for five minutes and then scrubbing it in with a brush. Afterwards you rinse it off with water and extract with a wet vacuum.

We worked our way across the large floor area in sections leaving an air blower in place over the completed section to accelerate the drying process. Once we managed to get a cleaned area dry, we started to apply the first coat of Grout Colourant. The colourant is relatively easy to apply with a small brush, you just need to ensure that any excess that gets on the tile is wiped off before it dries.

Once the second of coat of grout colourant had been applied and had dried the floor was inspected and touched up further where required. Before leaving we gave the floor a dry polish with our buffing machine just so it all looked spick and span before we handed the floor back to the customer. There was no need to seal the floor, Ceramic tiles won’t accept a sealer and the grout will now be protected by the colourant which acts like a barrier.

Ceramic Tiled Kitchen Floor After Grout Colouring Ulverston Ceramic Tiled Kitchen Floor After Grout Colouring Ulverston

The transformation to the floor was huge as you can see in the pictures. My customer was over the moon with the results and left the following feedback:

‘I can recommend the professional services of Russell and team, nothing was too much trouble and the job was completed on time with excellent results’
Karen. Ulverston

Ceramic Tiled Kitchen Floor After Grout Colouring Ulverston


Professional Grout Restoration of a Ceramic Tiled Kitchen Floor in Lancashire

Grout Colour Restoration on a Ceramic Kitchen Floor Ulverston Read More »

Mexican Terracotta Tiled kitchen Before and After Renovation Penwortham

Stripping Wax from Mexican Terracotta Kitchen Tiles in Penwortham

My client from Penwortham, on the outskirts of Preston on the south bank of the River Ribble contacted me about their Mexican Terracotta kitchen floor as you can see from the photographs below was in a bit of a state.

Mexican Terracotta Floor Penwortham Before Cleaning
On the pictures you will see numerous white marks which have happened due to the use of bleach-based supermarket cleaning products on the tiles. The bleach has upset the original wax polish and over time layer after layer of new polish has been applied to try and hide it, but they had also continued to use the wrong cleaner, so the problem simply became worse. The floor was otherwise in good condition with very little damage, although the grout had also discoloured and needed deep cleaning.

Mexican Terracotta Floor Penwortham Before Cleaning

Stripping Wax off a Mexican Terracotta Tiles

Luckily Tile Doctor have recently brought out a new product called Tile Doctor Wax Away which is specifically formulated to remove layers and layers of compacted wax polish. It was the first time we had used it on a situation this bad before to it was in for a good test. I’m please to say Wax Away didn’t disappoint and is designed to melts the formula that makes the wax stick together. So, with the aid of a stiff deck brush the product was scrubbed into the floor and then extracted off the floor with an industrial wet vacuum.

Mexican Terracotta Floor Penwortham During Cleaning
With the old layers of wax removed the white markings that were spoiling the look of the surface disappeared. Stubborn areas had to be retreated but once all the wax slurry was removed using the wet vacuum you could see the improvement in the floor.

The grout was then cleaned using a Tile Doctor Pro-Clean scrubbed into the grout line using a stiff brush, one done the soiled cleaning solution was rinsed off the floor with water and extracted using the wet vacuum. The only thing we couldn’t fix was the damage done to the grout by the bleaching agent which hydrates grout and turns it white. It often cracks the grout as well with long term usage as in this case. We did offer to apply a grout colourant over this once the sealer had fully dried, but this was an added cost the client didn’t want to bare which was understandable. This is a service we could return in the future to complete if the client wished.

Sealing Mexican Terracotta Kitchen Floor

Once cleaned, we fully rinsed with water to remove any chemicals and left the kitchen floor to dry out overnight. Returning the following morning to seal the floor. Before starting the sealing process however I wanted to be sure the floor was indeed dry, so I ran a few checked with a moisture meter in different spots. Once satisfied we moved on to the sealing process.

Terracotta tiles being made of clay are very porous and so seven coats of sealer were applied before it was fully sealed. We used Tile Doctor Seal and Go for this, it’s an excellent choice for Terracotta as it brings out the true hue and texture of the clay as well as adding a nice subtle shine. The new sealer will make the floor much easier to maintain than the old wax polish they had previously been using.

Mexican Terracotta Floor Penwortham After Cleaning
For regular cleaning of sealed floors, we recommend using Tile Doctor Ph Neutral Tile Cleaner. Most supermarket cleaning products are acidic which will prematurely degrade the sealer over time.

As you can see from the after photos the floor was left looking much cleaner and brighter and the horrible white marks were no where to be seen. The client was very happy with the final result.

Mexican Terracotta Floor Penwortham After Cleaning
 

Professional Clean and Seal of a Mexican Terracotta Tiled Floor in Lancashire

Stripping Wax from Mexican Terracotta Kitchen Tiles in Penwortham Read More »

Copper Slate Tiled Floor Before and After Cleaning and Sealing Heysham

Rough Copper Slate Tiled Floor Renovated in Heysham

This customer in the coastal village of Heysham had recently had these beautiful Copper Slate Tiles laid by a builder who had been working on the house. As part of the work he also sealed them with a solvent aerosol sealer. Floor tiles experience a lot of wear from foot traffic and as a result the sealer only lasted about two weeks before it had worn off and dirt had started to penetrate the pores of the stone. The photos below were taken two months after they were sealed.

Rough Slate Before Cleaning Heysham
Aerosol sealers are only good for wall Tiles where they experience minimum contact, we usually only recommend their use for shower cubicle or wet rooms and they need constant topping up every 6 months or so. In our experience floor surfaces receive a lot of abrasion from the traffic of shoes and so on which will diminish an aerosol applied sealer very quickly.

Rough Slate Before Cleaning Heysham

Cleaning Rough Copper Slate Tiles

It makes sense to clean tiled floors before applying a sealer otherwise you simply trap the dirt under the seal which will reduce its appearance. So before re-sealing the floor with something more effective it was treated to an abrasive clean using a 200-grit diamond encrusted floor burnishing pad fitted to a weighted buffer machine. The pad was run over the whole floor using water to lubricate and with the machine running at slow speed to reduce splashing.

Next step was to clean the recessed grout which pads can struggle to reach, this was done by applying a dilution of Tile Doctor Pro-Clean along the grout lines and then scrubbing it in with a stiff grout brush by hand. Once done the residue from the tile and grout cleaning was rinsed off the floor with water and then extracted with a wet vacuum.

Sealing Rough Copper Slate Tiles

The floor was left to dry off completely overnight and I returned the next day to re-seal, this time with a more suitable product. My sealer of choice for Slate is Tile Doctor Seal and Go which will not only protect the stone from dirt and staining but also adds a very pleasing sheen finish. The new sealer really brought out the black and copper colours in the stone and now looks amazing.

Rough Slate After Cleaning Heysham
For long-term care I always recommend customers avoid the use of steam cleaners and acidic or strong alkaline cleaning products which can prematurely reduce the life of the sealer resulting in dirt becoming trapped in the pores of the stone again. Naturally Tile Doctor have designed a product for this which is called Tile Doctor Neutral Tile Cleaner, supplied in concentrated form when diluted with water it becomes pH neutral and safe to use on sealed surfaces. I always leave my customers with a complimentary bottle after cleaning their floor, so they are reminded what to use.

Rough Copper Slate After Cleaning Heysham

Professional Slate Floor Maintenance in Lancashire

Rough Copper Slate Tiled Floor Renovated in Heysham Read More »

Mexican Terracotta Before and After Cleaning Sealing Elswick

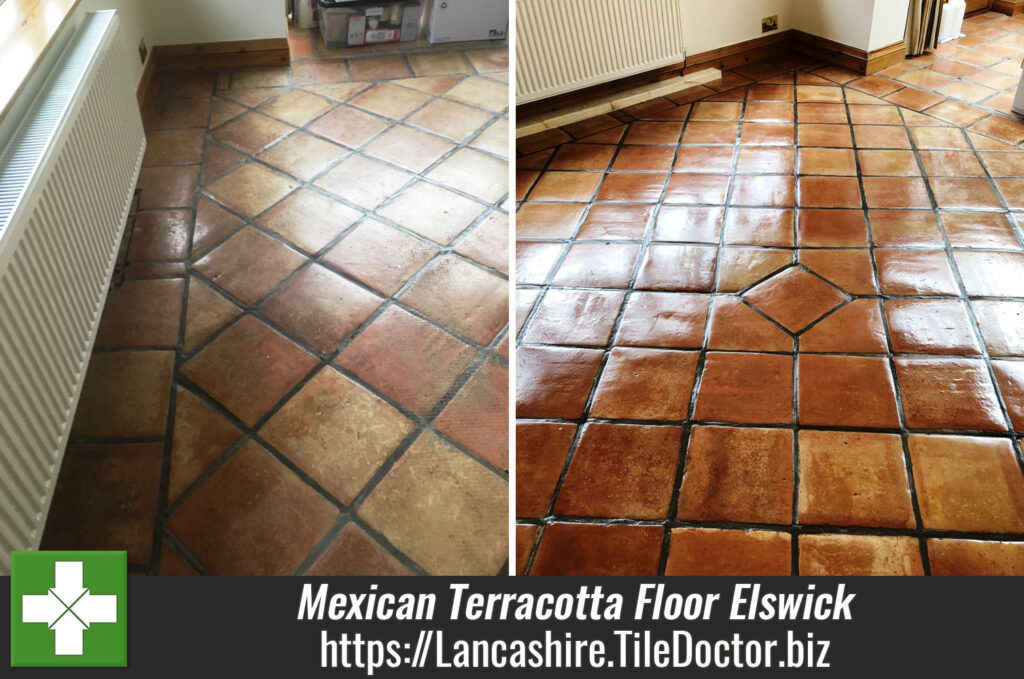
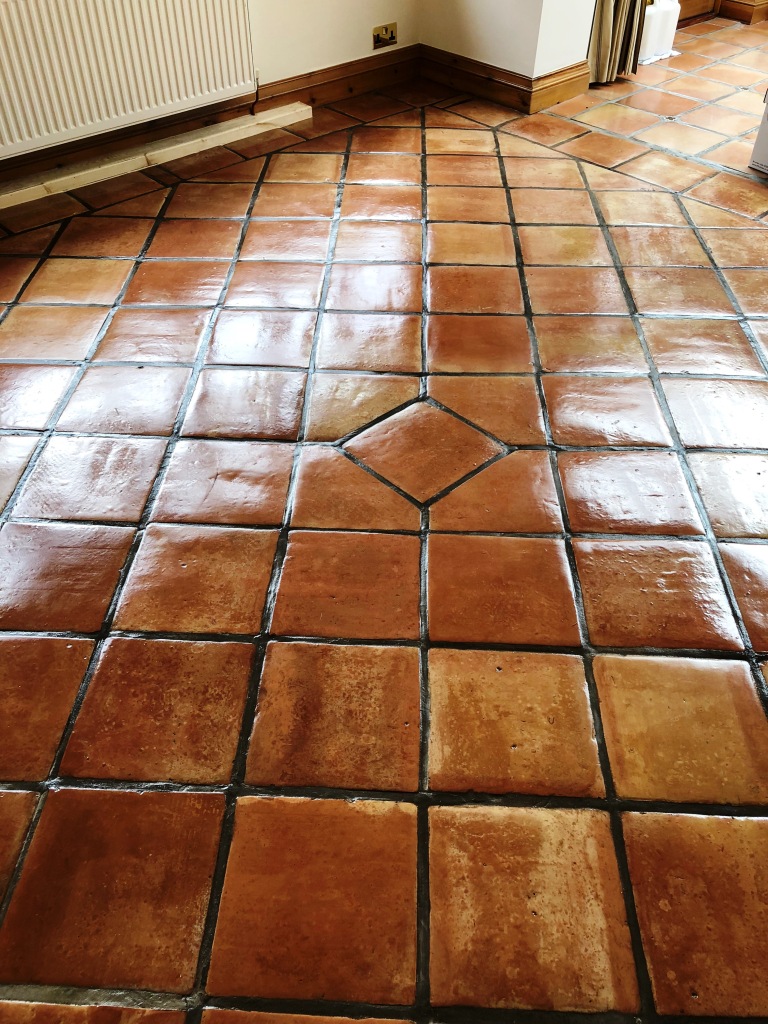
Carpet Covered Mexican Terracotta Floor Restored in Elswick

Mexican Terracotta is quite a difficult tile to deal with, mainly due to the fact it is very porous clay and partly fired, unlike a Spanish or French equivalent which is fully fired and a lot less porous as a result. Although difficult to maintain they are full of character and colour so it’s understandable why they are so popular.

Mexican Terracotta Before Cleaning Elswick
This particular Mexican Terracotta floor was installed in the kitchen and garden room of a house in Elswick near Preston around twenty years prior. The house had recently changed hands and the new owner wanted the floor in the garden room renovating, it had been covered with a carpet in the past and had now lost all its colour due to ingrained dirt.

Mexican Terracotta Before Cleaning Elswick Mexican Terracotta Before Cleaning Elswick

Cleaning Mexican Terracotta Tiles

You can see from some of the photographs that the tiles were quite grubby, so I knew we would have to give this floor a really deep clean to get the dirt out. I felt the best way forward would be to apply Tile Doctor Oxy Gel to the Terracotta and leave it to soak in. This product is a very strong gel version of Tile Doctor Pro-Clean, our popular tile and grout cleaner and needs a lot of dwell time to break down fully what was left of the sealer, carpet adhesive and extract the dirt from the pores of the clay.

The product was then worked into the tile and grout using a black scrubbing pad fitted to a rotary floor buffer running at a slow speed. This action worked as predicted and the now soiled cleaning solution was extracted from the floor using a wet vacuum. A lot of rinsing with water was required after this to remove all the dirt and traces of product from the tiles. I wanted to ensure all traces of the alkaline cleaning solution were rinsed from the pores of the clay, if we left any of this in the clay it could cause issues with the new sealer.

Sealing Mexican Terracotta Tiles

The floor was left to fully dry out which can take some time with Terracotta so after returning to seal the floor damp meter readings were taken first so we could be sure it had dried completely. This is essential because excess moisture can cloud the sealer and damage its performance.

Our choice of sealer was Tile Doctor Seal and Go, which provides excellent surface protection along with an aesthetically pleasing deep sheen finish that the customer wanted. The sealer is also water based so you don’t get that solvent smell as it dries.

Mexican Terracotta Before Cleaning Elswick
As you can see from the photographs, the result was fantastic, and it just goes to show even a twenty-year-old Terracotta floor can be rejuvenated and make it look like almost new.

Excellent results on terracotta tiled floor that had had carpet laid on top so was covered with glue and pretty dirty! Wouldn’t hesitate to use them again.
Caroline M, Nr Preston

Mexican Terracotta Before Cleaning Elswick
 

Professional Mexican Terracotta Tile Renovation in Lancashire

Carpet Covered Mexican Terracotta Floor Restored in Elswick Read More »

Bathrooms at Decoy Cottages Ireland Before and After Cleaning

Restoring Eight Bathrooms at Self-Catering Cottages in County Meath

At Tile a Doctor, we often get asked about doing work abroad – and we are more than happy to oblige under the right circumstances for customers who are interested in benefiting from our services. I myself have been as far as France, Mallorca and Addis Ababa in Ethiopia

On this occasion the job was in County Meath in the Republic of Ireland, colloquially known as The Royal County” due to its history as the seat of the High King of Ireland.

Decoy Cottages Ireland
The customer was looking to struggling to restore the tiled shower cubicles and bathrooms in eight different apartments at their luxury, five-star holiday accommodation known as Decoy Cottages, but was struggling to find a local tradesman who specialises in replacing silicone to the standard required.

The last time it had been done was by a local builder who had made a bit of a mess of it, so you can understand the customer’s concern. Applying silicone sounds straight-forward but there is an art to it, in-fact this is something we focus on in our Tile Doctor training program. He found Tile Doctor online and, after the discussing the project in more detail and sharing examples of our previous work, we agreed a date and price for the job to be completed.

Bathrooms at Decoy Cottages Ireland Before Cleaning Bathrooms at Decoy Cottages Ireland Before Cleaning

With a deposit put down to cover travel costs, we went across on the ferry to Ireland, arriving the day before we were scheduled to start in order settle in.

Ferry Crossing to Dublin

Restoring Several Tiled Shower Cubicles and Bathrooms

As I’ve mentioned, we had eight apartments in total to restore. In each case we started by stripping out all the mouldy silicone, before cleaning the grout lines carefully with Tile Doctor Grout Clean-Up. Grout Clean-up was perfect product for this situation, as it’s an acidic cleaner that can remove grout smears, soap scum and hard water stains.

Once we were satisfied each area was clean, we set about installing fresh silicone sealant in an ivory colour which matched more effectively to the overall colour scheme than the original white silicone.

Bathrooms at Decoy Cottages Ireland After Cleaning
In total it took us took five days in total to strip, clean and re-silicone the eight bathrooms and eight shower cubicles. Naturally, this was quite a lot of work, but we managed it in the time given, and certainly to the customer’s satisfaction.

Bathrooms at Decoy Cottages Ireland After Cleaning
We did such a good job In fact we were asked to quote for more work and the customer left the following feedback on our website:

“Excellent and efficient service provided by Russell and his lovely wife Heidi. They worked really hard to rejuvenate the shower rooms and bathrooms at my self-catering holiday homes and did a fantastic job. Would highly recommend, in fact they are coming back to do my floors later in the year!”

Professional Bathroom Restoration at Self-Catering Apartments in County Meath

Restoring Eight Bathrooms at Self-Catering Cottages in County Meath Read More »

Mosaic tiled worktop after grout colouring

Grout Colouring and Cleaning of a Mosaic Tiled Kitchen Worktop in Silverdale

Tiled kitchen worktops work really well, but just like any other kind of tiled surface they will need regular cleaning and maintenance to keep them looking great. Kitchen worktops in particular can fall into poor condition quickly when exposed to all manner of dirt and stains resulting from food preparation, with the grout lines often suffering the most which if you have tiles in your shower is a problem I’m sure you will be familiar with.

Mosaic tiled worktop before grout colouring
The grout lines on this Mosaic tiled kitchen worktop had become discoloured following years of exposure to soaps and washing up liquid from the nearby sink, as well as, most likely, food and drink spillages. The property was in the picturesque village of Silverdale, Morecambe Bay, and the owner had decided it was time to have the worktop professionally refreshed. This was a job that would only take a few hours to complete, and would involve both grout cleaning and recolouring.

Mosaic tiled worktop before grout colouring

Cleaning and Recolouring Dirty Grout for a Mosaic Worktop

Before beginning the restoration, I had to decide upon the best method. I realised that if I took out the grout to replace it completely I may have dislodged or even damaged the tiles – especially considering that they are at least 30 years old and give the age of the tiles it would be difficult if not impossible to find replacements if they were damaged.

As a result, I opted to clean the tiles and grout using Tile Doctor Oxy Gel. This product is a strong alkaline-based cleaner in gel form designed to break down dirt and grime, including soap scum and mildew stains. While it can be used on both horizontal and vertical surfaces, it is particularly suitable for the latter as the gel is able to dwell for a long time without running down the wall. Oxy Gel proved to be very effective in restoring the grout lines to top form, but I chose to follow by steam cleaning the area to get rid of any bacteria.

Mosaic tiled worktop during grout colouring
To finish the restoration, I recoloured the grout lines using our fresh White grout colourant – one of 10 available colours. Tile Doctor’s grout colourant seals and rejuvenates existing grout joints, and is equally effective for interior or exterior applications, including bathrooms and kitchens. The colourant was left for a little while to cure, before I polished off the excess with white sponge pads.

Mosaic tiled worktop after grout colouring
The result was a quick and effective transformation for the Mosaic tiled kitchen worktop that left the customer very happy!

Professional Mosaic Tiled Kitchen Worktop Restoration in Lancashire

Grout Colouring and Cleaning of a Mosaic Tiled Kitchen Worktop in Silverdale Read More »

Ceramic Bathroom Tile and Grout Cleaned with Mould Away in Galgate

Cleaning and Sealing a Mouldy Ceramic Tiled Shower in Galgate

If you have a tiled shower area in your home, it’s very likely you’ve experienced problems with the grout becoming excessively dirty and ridden with displeasing black spots of mould. The underlying issue is due to inadequate ventilation which can be a real problem in modern insulated houses and occasionally the grout can get so imbued with contamination that the problem needs to be resolved professionally.

Ceramic Bathroom Tile and Grout Cleaned with Mould in Galgate
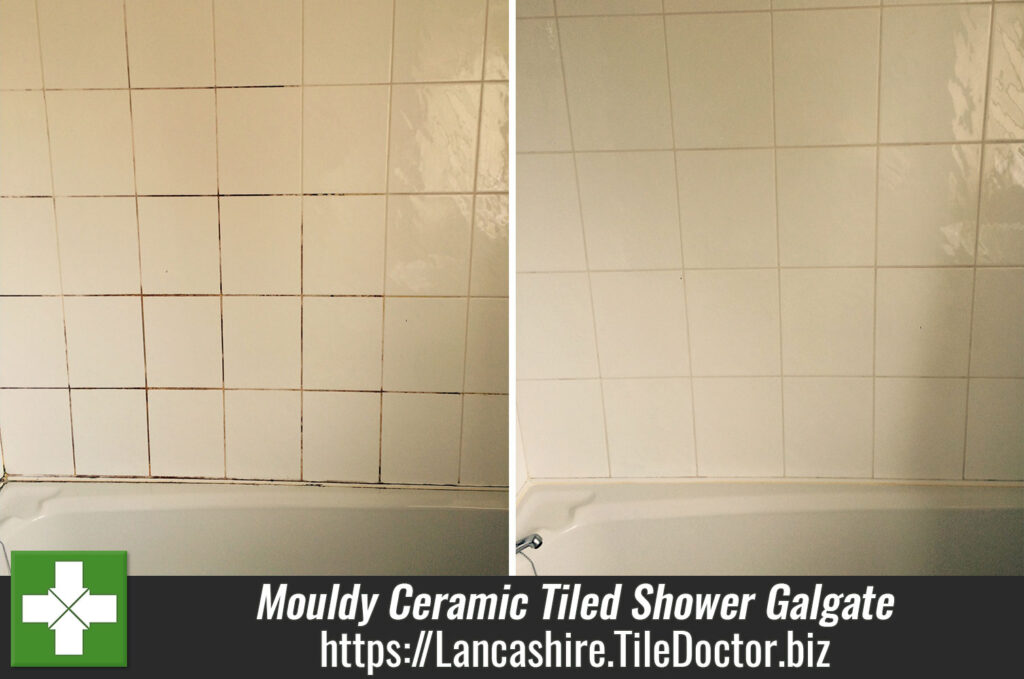
In the case of this Ceramic tiled shower area, located at a property in Galgate, Lancashire, mould had turned the grout black and had got into the sealant strip around the base. The property owner had tried using the run-of-the-mill cleaning products you can buy in superstores, but they simply couldn’t get the job done. So, she contacted me to see what could be done.

Cleaning Mouldy Ceramic Shower Tiles

At Tile Doctor, we come across the problem of mouldy shower tiles very often. Excess soaps and shampoos – many of which contain chemicals that harmful to the grout – can quickly build-up if not removed, causing mould and soap scum to emerge quickly, and before you know it, you have a problem like this one.

Thankfully, with the right strength product and cleaning methods, mould can be removed quite easily. The cleaning product used here was Tile Doctor Mould Away, which does what it says on the bottle and can quickly remove mould and black spots from grout and silicone. I applied Mould Away to the grout and surrounding Ceramic tiles and left it to dwell for a short period, before starting to clean the affected areas carefully using soft nail brushes and a small amount of water.

Ceramic Bathroom Tile and Grout Cleaned with Mould in Galgate
Sometimes it is necessary to repeat this process several times to achieve the best possible results, but in this case two attempts was all it took to get the grout looking like new once again.

Ceramic Bathroom Tile and Grout Part Cleaned with Mould Away in Galgate

Sealing Grout

Following the cleaning, the area was rinsed thoroughly with water, before bring dried off quickly with a heat gun on a low setting. I then sealed the grout with a single coat of Tile Doctor Wall Grout Sealer, which is a water-based sealer designed to protect against water, oil and acid-based contaminants, and stop them from spoiling the appearance of the grout. It also provides a transparent finish that does not diminish the original colouring of the grout. To add the finishing touches, I polished off the Ceramic tiles as these were already fully glazed and did not require any extra sealer.

Ceramic Bathroom Tile and Grout Cleaned with Mould Away in Galgate
The before and after photos are a testament to how significantly the condition and appearance of the grout was quickly improved and needless to say, the customer was very satisfied with the result.

Ceramic Bathroom Tile and Grout Cleaned After Cleaning Mould Away in Galgate
 

Dealing with Mouldy Grout and Sealant in Lancashire

Cleaning and Sealing a Mouldy Ceramic Tiled Shower in Galgate Read More »

Grout Colouring Preston After

Grout Cleaning and Colouring for a Ceramic Terracotta Tiled Floor in Preston

Well maintained grout is fundamental to achieving a great looking tiled floor, whatever your choice of tile or stone. Even if the tiles themselves are in reasonably good condition, dirty and damaged grout lines can really upset the overall appearance of the floor.

Such was the case with this Ceramic Terracotta tiled floor in the bustling Lancashire town of Preston. The property owner recently had a new kitchen installed, but chose not to have new tiles fitted since the original tiles (dating back a good 15 years) were still in fantastic physical condition, with no chips or breaks. This is quite surprising considering that the kitchen is typically one of the main areas of traffic in any house however Ceramic and Porcelain tiles are very durable.

The grout, however, told a different story: it was very dirty and even missing in parts. Over the years it had come away and was replaced with new grout, however, this had left the whole floor with a displeasing patchy finish. Upon closer inspection it also became clear that the tiles themselves could do with a deep clean. I stepped in to discuss what could be done to improve the appearance of the floor and recommended a deep clean and grout colouring.

Grout Colouring Preston Before

Cleaning Ceramic Terracotta Tiles and Grout

Tile Doctor Pro Clean, a versatile high alkaline cleaner, was my choice of product for removing the dirt from the tiles. I applied it liberally across the floor before scrubbing it in with a scrubbing pad fitted to a rotary machine. Pro Clean is a go-to product for the removal of dirt, stains and other muck on most kinds of natural stone floor, and is capable of dealing with small amounts of soil to heavy buildup.

Once the tiles had been cleaned I turned special attention to the grout. I cleaned it with a product called Grout Colourant Pre-Treatment Cleaner, which is slightly acidic to break down ingrained dirt and tackle inherent grout smears, while ensuring that grout colourant bonds to the grout once it is applied.

Colouring Grout for Ceramic Terracotta a Tiles

The job took two days to complete as it was quite a large floor stretching into several rooms. The floor also needed to dry off overnight once I had completed the cleaning process, so I decided to call back the next day once it had dried completely. Upon my return I proceeded to colour the freshly cleaned grout by applying one coat of natural grey colourant. Sometimes two coats might be required for blending purposes, but not on this occasion.

The customer was very happy with the results. She had, in fact, thought of ripping up the old tiles as part of the kitchen restoration, but she decided not to since she really likes the tiles. A restoration by the Lancashire Tile Doctor was the appropriate and much less expensive choice!

Grout Colouring Preston After
 

Professional Grout Cleaning and Colouring of a Ceramic Floor in Lancashire

Grout Cleaning and Colouring for a Ceramic Terracotta Tiled Floor in Preston Read More »

Grout Colouring Morecambe 2 After

Tiled Floor Restored In Morecambe With Quick And Effective Grout Colouring

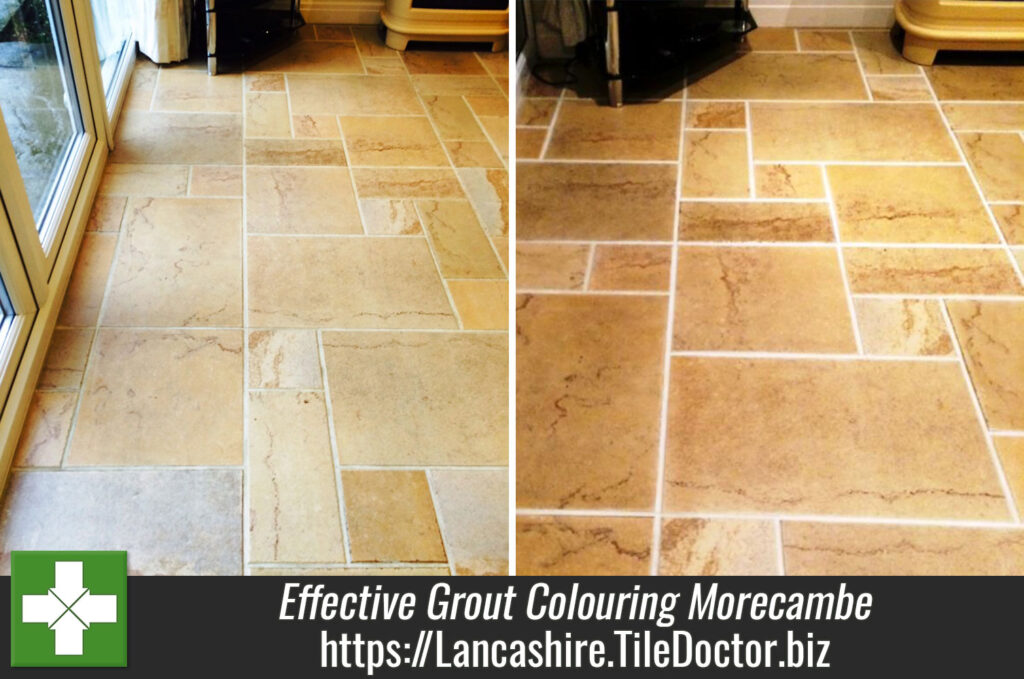
Details below of a Grout colouring job I recently completed at a house in Morecambe. In this instance, the grout had become stained, and my client was no longer happy with it.

There are a number of reasons grout can lose its appearance including the build-up of mould in damp and unvented areas, staining from liquids accidentally spilt on the floor and surprisingly if you have a coloured grout it can lose its colour due to the bleach found in common types of household cleaning products. Grout contains lime which is acid-sensitive and will react to acidic cleaning products so for general cleaning do use a pH Neutral Cleaning product.

Grout Colouring Morecambe 1 Before Grout Colouring Morecambe 2 Before

To tackle the stained grout I first tried Tile Doctor Pro-Clean which can be used at different levels of concentration to increase its potency. In this case however when this grout dried it went back to being patchy so then the only answer was to restore its appearance using a Grout Colouring kit.

Grout Cleaning and Colouring

To form a better bond with the Grout Colourant I first treated the grout with a Tile Doctor Pre-Treat Cleaner, which is very slightly acidic and effectively etches the grout. If you have a particularly acid-sensitive stone tile (Limestone, for example), it is recommended to use Tile Doctor Oxy-Pro cleaner instead as this won’t upset the stone, yet still clean the Grout ready for colouring.

Once the Grout had dried (which is some cases can be several hours), I applied a thin coating of the Grout Colourant, as a thin coat dries quicker and provides a more even finish. A second coat was then added, before polishing off the excess from the edges of the tiles. After about half an hour the Grout Colourant was dry to the touch (at this stage you should be able to walk on the floor). Note that if you are Grout colouring a wall tile in a shower cubicle, it is best to leave the area for 24 hours before using the shower.

Grout Colouring Morecambe 2 After Grout Colouring Morecambe 2 After

As you can see from the photographs, the result was very effective, and needless to say my client was very happy with the rejuvenated appearance of her grout.

Professional Grout Cleaning and Colouring in Lancashire

Tiled Floor Restored In Morecambe With Quick And Effective Grout Colouring Read More »

Shower Cubicle Grout Colouring in Preston After

Grout Cleaning and Colouring Bathroom Wall Tiles in Preston

I recently paid a visit to a customer at a house in the town of Preston to restore the colour of the grout in their bathroom which due to years of using strong cleaning products had bleached the grout of any colour. The tiles themselves were not the issue they seemed fine but the grout was looking Tired; we discussed the options and decided the best course of action would be to apply a grout colourant. Two different colours were chosen, white for the shower area and Sandstone for the toilet area.

WC Grout Colouring in Preston Before Shower Cubicle Grout Colouring in Preston Before

Colouring Wall Grout

Before applying the grout colourant it’s important to give the grout a deep clean using the Pre-Treater that comes with the kit; the solution is sprayed on and scrubbed in by hand before being rinsed off with water.

Once the grout had dried I started to apply the Grout colour which restores the colour and seals the grout as well, thus making it easier to clean afterwards. Grout colouring is fiddly work but you do get the gratification of an instant change. Once done I called the customer in who was delighted with the new effect as Grout colour if used correctly looks very natural and not as if someone has painted the grout making it look false.

WC Grout Colouring in Preston After Shower Cubicle Grout Colouring in Preston After

We discussed using the correct type of cleaning product for aftercare as this seemed to be the issue to start with and I recommended Tile Doctor Aqua-Pro as this can be sprayed onto the Tiles and mopped off which is ideal where a small amount of water is required. For regular cleaning Tile Doctor Neutral cleaner was also mentioned as this is diluted into water where more cleaning is needed and mopped onto the floor area.

Grout Colouring Wall Grout in Lancashire

Grout Cleaning and Colouring Bathroom Wall Tiles in Preston Read More »

Chorley Tile and Grout Before and After Cleaning

Kitchen Tile and Grout Cleaning in Chorley

We received a call to visit a house in Chorley where the grout in the kitchen tiles had gone black with the build-up of dirt and the owner was having trouble cleaning it. Porcelain and Ceramic tiles are a great choice for kitchens as they are very easy to clean however what most people don’t realise is that the top layer of grout is actually porous and can becomes stained with dirt. With the agreement of the home owner I did a test clean using a strong cleaning product called Tile Doctor Remove and Go leaving it to dwell on the tile and grout before scrubbing it in by hand and then washing off the soiled solution; you can see from the photograph below that the tile and grout cleaned up nicely so I was booked to do the job the following week.

Chorley Tile and Grout Cleaning Test

Cleaning Tile and Grout

On my return I repeated the earlier process on the whole floor cleaning the grout with Remove and Go and working it in along the grout lines with a stiff grout brush making sure to thoroughly scrub every grout joint working in small sections at a time.

Chorley Tile and Grout Before Cleaning
Once I was happy with the grout in a section the floor would be rinsed off with clean water and a wet vacuum was used to remove the dirty water. I did this all over the floor until all the grout joints were clean retreating areas that needed extra attention.

Chorley Tile and Grout During Cleaning
The next step was to give the ceramic tiles a good clean by applying a strong general Tile and Grout cleaning product called Tile Doctor Pro-Clean. The solution was scrubbed onto the floor and left to dwell for ten minutes scrubbed some more and then rinsed off. The floor was then washed down with clean water three times to make sure all the cleaning products had been removed and then dried with a wet vacuum. I then left the floor to completely dry for a couple of hours and came back later to check all the grout joints were clean and followed up with a bit of detail work on corners and edges rinsing the floor again when I had finished.

Chorley Tile and Grout After Cleaning
I managed to complete the job in a day and with all the cleaning the tile and grout came up much lighter than before making it look like a new floor had been installed. The customer was really happy with the final result and left the following feedback on the Tile Doctor feedback system.

Heidi cleaned a very dirty tiled floor back to its original state and it now looks superb. She was extremely professional and courteous but just as important she didn’t leave a mess like a lot of tradesmen do!!! I would have no hesitation in recommending Heidi to any of my friends to carry out similar work. A job well done!!!
Chris Palmer, Chorley

Chorley Tile and Grout Before and After Cleaning
 

Cleaning Tile and Grout in Lancashire

Kitchen Tile and Grout Cleaning in Chorley Read More »

Grout Colouring in Leyland After

Grout Colouring porcelain tiled kitchen floor in Leyland

A customer in Leyland near Preston reported a grouting issue with their porcelain tiled kitchen floor, the tiles were fine but the grout had become discoloured and grey, they were also finding it difficult to keep clean. This is not an unusual story for Porcelain or Ceramic tiled floors which are generally very low maintenance and you find the grout needs attention before the tiles do.

Grout Colouring in Leyland Before

Applying Grout Colourant

On arrival I set up my equipment and cleaned the floor to make sure all the grout joints were free from any dirt etc., I then did a colour test on a less obvious part of the floor with the grout colour. I wanted to make sure the colourant would take to the grout and also to make sure the customer was happy with her colour choice.

The process for grout colouring is fairly tedious but straightforward, it involves giving the bottle a good shake and applying a small amount to a toothbrush and working the grout colorant into joints using a back-and-forth motion. I find the best way to apply it is by working in small areas and adding thin even coats to limit the amount of grout colorant that gets on the tile. They were large format tiles covering 9m2 so I only needed one bottle of buff grout colourant to do the entire floor.

After the Grout Colorant dries (it takes between twenty and sixty minutes depending on how warm the house) you mist the surface with water and let stand for five minutes, excess grout colorant is then removed from the tile surface using a white nylon scrub pad.

Grout Colouring in Leyland During
The floor was ready for surface traffic in 2 hours but there was a white mist over the floor which you can get with porcelain tiles so I fitted a white buffing pad to my rotary floor polishing machine and buffed the floor to remove the power and water marks, once finished the floor looked like new. Before leaving I left the customer with some after care instructions and how to keep it floor looking good for the future.

Grout Colouring in Leyland After
 

Grout Colouring in Leyland, Lancashire

Grout Colouring porcelain tiled kitchen floor in Leyland Read More »

Grout colouring Preston Ceramic Wall Tile After

Grout Cleaning and Colouring 25m2 of Tiles in Preston

Oddly Enough I had sold these Ceramic tiles to the customer in Preston when I used to work at a local Tile Shop many years prior. I had also been back to clean and seal the grout on his floor tiles originally in 2007 and then again in January 2010 when we used a Grout Colourant on them. It’s nice to get called back like this as it shows they appreciate the service you provide; for this visit the request was to freshen up the floor tiles and also the Ceramic Kitchen wall tile and Grout which had become ingrained with Grease from the cooker.

Grout colouring Preston Ceramic Wall Tile Before

Cleaning Tile and Grout

The total area was approximately 25m2 and it took me a day and half to give the Tile and Grout a deep clean. For the most part I used Tile Doctor Pro-Clean but for the wall tiles where Grout Colourant has been applied I used Tile Doctor OxyPro which is a ready to use Tile and Grout cleaner that comes in a spray bottle, when applying any liquid to a wall its best to mix it with air in a spray bottle as this makes it lighter and helps it stick and soak into the to the tile and grout as opposed to running down it. It was noticeable that the grout colour was mainly intact and it had just needed a good clean on the whole apart from maybe near the cooker which I topped up with new Grout colour in the original shade.

Applying Grout Colourant

Once everything had been rinsed and the grout had dried I was able to apply the grout colourant using my colour applicator (toothbrush). You have to be fairly methodical doing this so it can take a while, you can remove excess colourant by spraying plain water and scrubbing with a white pad (don’t used a coloured pad as you can transfer the dye from the coloured pad to the surface).

Grout colouring Preston Ceramic Wall Tile After
 

Cleaning and Colouring of Grouts in Lancashire

Grout Cleaning and Colouring 25m2 of Tiles in Preston Read More »

Grout Colouring After

Grout Colouring in Chorley

The surface of grout is porous and as a result it can get so dirty it becomes impossible to clean it successfully, even our most powerful cleaners struggle if it gets to this stage. If you get to this point you could use the flat end of a screwdriver to scrape out the grout and re-grout the whole floor to ensure a consistent colour, naturally this is arduous work and can be time consuming however there is a second option and that is to apply a Grout Colourant instead. The grout colouring products we use not only change the colour but it also provides a protective barrier that seals the grout as well ensuring it keeps it appearance well into the future.

Grout Colouring Before

Preparing the Grout

Before applying a Grout Colour it’s important to ensure the grout is clean of grease and any sealer that may have been applied to the adjacent tile; Tile Doctor Pro-Clean is a strong alkaline cleaner that’s good for this purpose, for best results you should allow the cleaner to dwell for a while and then get into the grout joints by hand with a stiff brush. Last step is to rinse the floor down with clean water to remove any chemical that might upset the colourant, I recommend the use of a wet vacuum at this point to remove liquids from the floor.

Grout Colouring During

Applying the Grout Colour

Once the grout has dried you can start applying the colourant which is a relatively straightforward process of squeezing the product onto a toothbrush and running it onto the grout. Don’t be tempted to use an old toothbrush for this purpose as it may contaminate the colourant leading to discolouration in the finish. The product sets in a couple of hours so I was able to do the whole floor in a day.

Grout Colouring After
 

Colouring Grout in Lancashire

Grout Colouring in Chorley Read More »

Bathroom Grout Colouring After

Lancaster Grout Colouring

Grout Colouring a Ceramic Floor in Lancaster

Here are some details of a small 4m2 Tile Cleaning and Grout Colouring job we did in a shower room in Lancaster. The tiles were recently laid and unfortunately the 5mm wide grout had discoloured because the tiler had used the same bucket to mix the adhesive with and some of the remnants from that had got into the grout mix. If the tiler had used a separate bucket this wouldn’t have happened. The tiler didn’t know what to do to rectify the problem so Tile Doctor got the call. He had done a good job on the rest of the bathroom and the customer didn’t want to upset him over it any further so she was quite happy to pay me to sort the problem out, as long as it didn’t look false.

Ceramic Tiled Bathroom floor before Grout Colouring
Before Grout Colouring

First I cleaned the grout with the pre-treater spray that comes with the kit and washed off the excess with water. Although the directions recommend leaving the grout to dry for 2 hours I left it for 30 minutes followed by a blast from my heat gun to dry any dark wet spots, this speeds up the process immensely.

Applying the Grout Colouring

Next I applied the Grout Colourant, fortunately the tiles were ceramic and the excess grout colourant came off the tiles very easily where I had got some on by accident. The kit came with a special white abrasive cloth which is excellent at removing excess grout colourant from the tiles. I often find unglazed tiles or stone and even some porcelain tiles are slightly porous on the surface and if the grout colourant gets on to these tiles then it can be quite hard to get off. I find it’s always best to do a test first on a couple of rows, if you get any on the tiles, don’t leave it on for more than 10 to 15 minutes as it sets very hard. Porous stones should always be sealed beforehand as it will make them a lot easier to clean. Its worth noting that the Grout Colourant acts as a barrier and so will never need to be sealed, it’s also completely washable.

Bathroom Grout Colouring After
Tiled Ceramic Floor after Grout Colouring

Grout Colouring a Ceramic Tiled Bathroom floor in Lancaster

Lancaster Grout Colouring Read More »

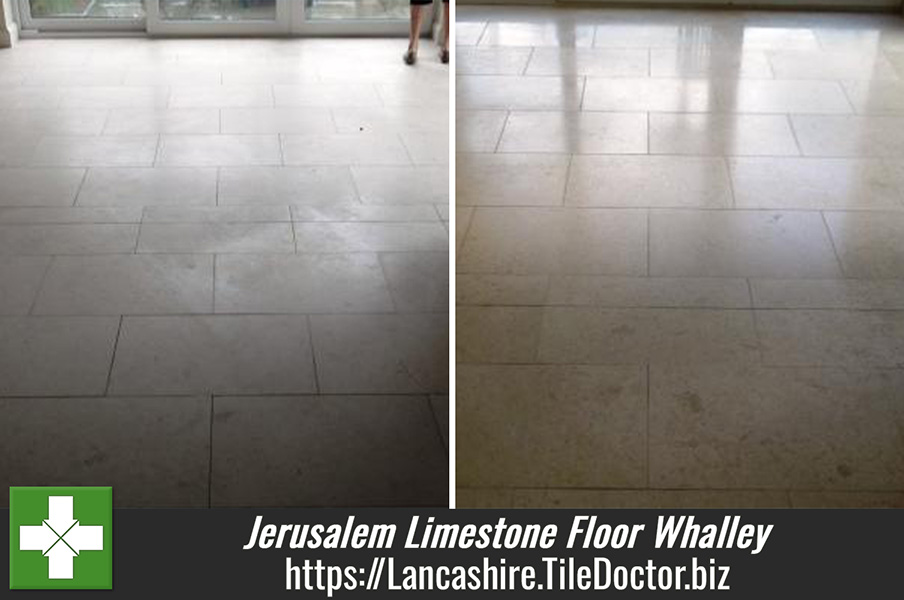
Jerusalem Limestone Floor After Cleaning by Tile Doctor Lancashire

Jerusalem Limestone Floor in Whalley, Lancashire

Few pictures below of a Jerusalem Limestone Floor refresh that we did in Whalley, Lancashire; hopefully you can see the improvement in the photographs.

The first photograph below shows a crack in one of the Limestone floor tiles.

Jerusalem Limestone before and after repair by Tile Doctor Lancashire
Jerusalem Limestone Before and after Repair

To repair the crack we applied Mapei Ultra-Color thinly grained Grout using the Jasmine 130 colour and spread on the Tiles, polished off with a sponge and then allowed to dry.

Jerusalem Limestone Floor Before Cleaning by Tile Doctor Lancashire
Jerusalem Limestone Floor Before Cleaning

To polish the floor we used a Green Burnishing Pad and then sealed using Tile Doctor Colour Grow which is a colour intensifying sealer that provides durable surface protection as well as allowing the surface to breath.

Jerusalem Limestone Floor After Cleaning by Tile Doctor Lancashire
Jerusalem Limestone Floor After Cleaning

Needless to say the customer was very pleased with the results

Jerusalem Limestone Floor in Whalley, Lancashire Read More »

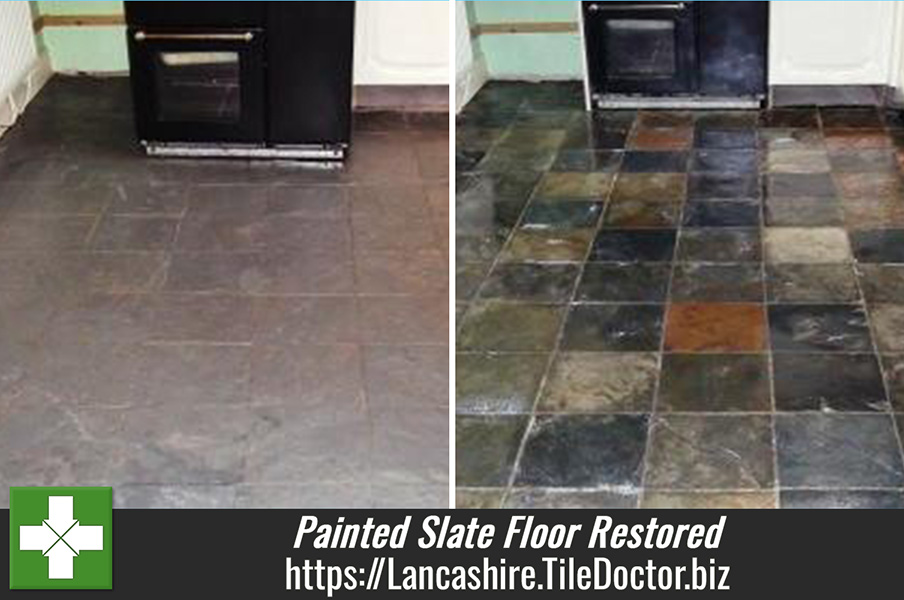
Kitchen Slate Floor After Restoration

Painted Slate Floor Restored

Recently restored a Slate floor in a kitchen which was covered in paint, grout haze and cement.  The answer was to mill the slate which got rid of the paint and the roughness of the slate and 90%of the Grout haze.

Painted Slate Floor before Restoration
Painted Slate Floor before Restoration by Tile Doctor Lancashire

We used Tile Doctor Grout Clean-Up to remove the remaining grout haze, rinsed the tiles down with water and then left them to dry overnight.   Once dry (the next day) we applied 5 coats of Tile Doctor seal and Go, which gave them a sheen and lifted the deep colour in the Slate, which had not been diversely afftected by the use of the Milling pads but instead help to lift the colour out of the Slate instead, this system works equally well with Sandstone.

Kitchen Slate Floor After Restoration


Painted Slate Floor Restored Read More »

=================================

Lancashire Tile Doctor

================================= Read More »

Scroll to Top