Preston Tile Cleaning

Preston Tile Cleaning

Welcome to my Work History archive where you will find examples of the cleaning and renovation of tiles carried out in Preston.

Geometric Victorian Tiled Kitchen Floor Restored Clitheroe

1920 Geometric Victorian Floor Fully Restored in Clitheroe

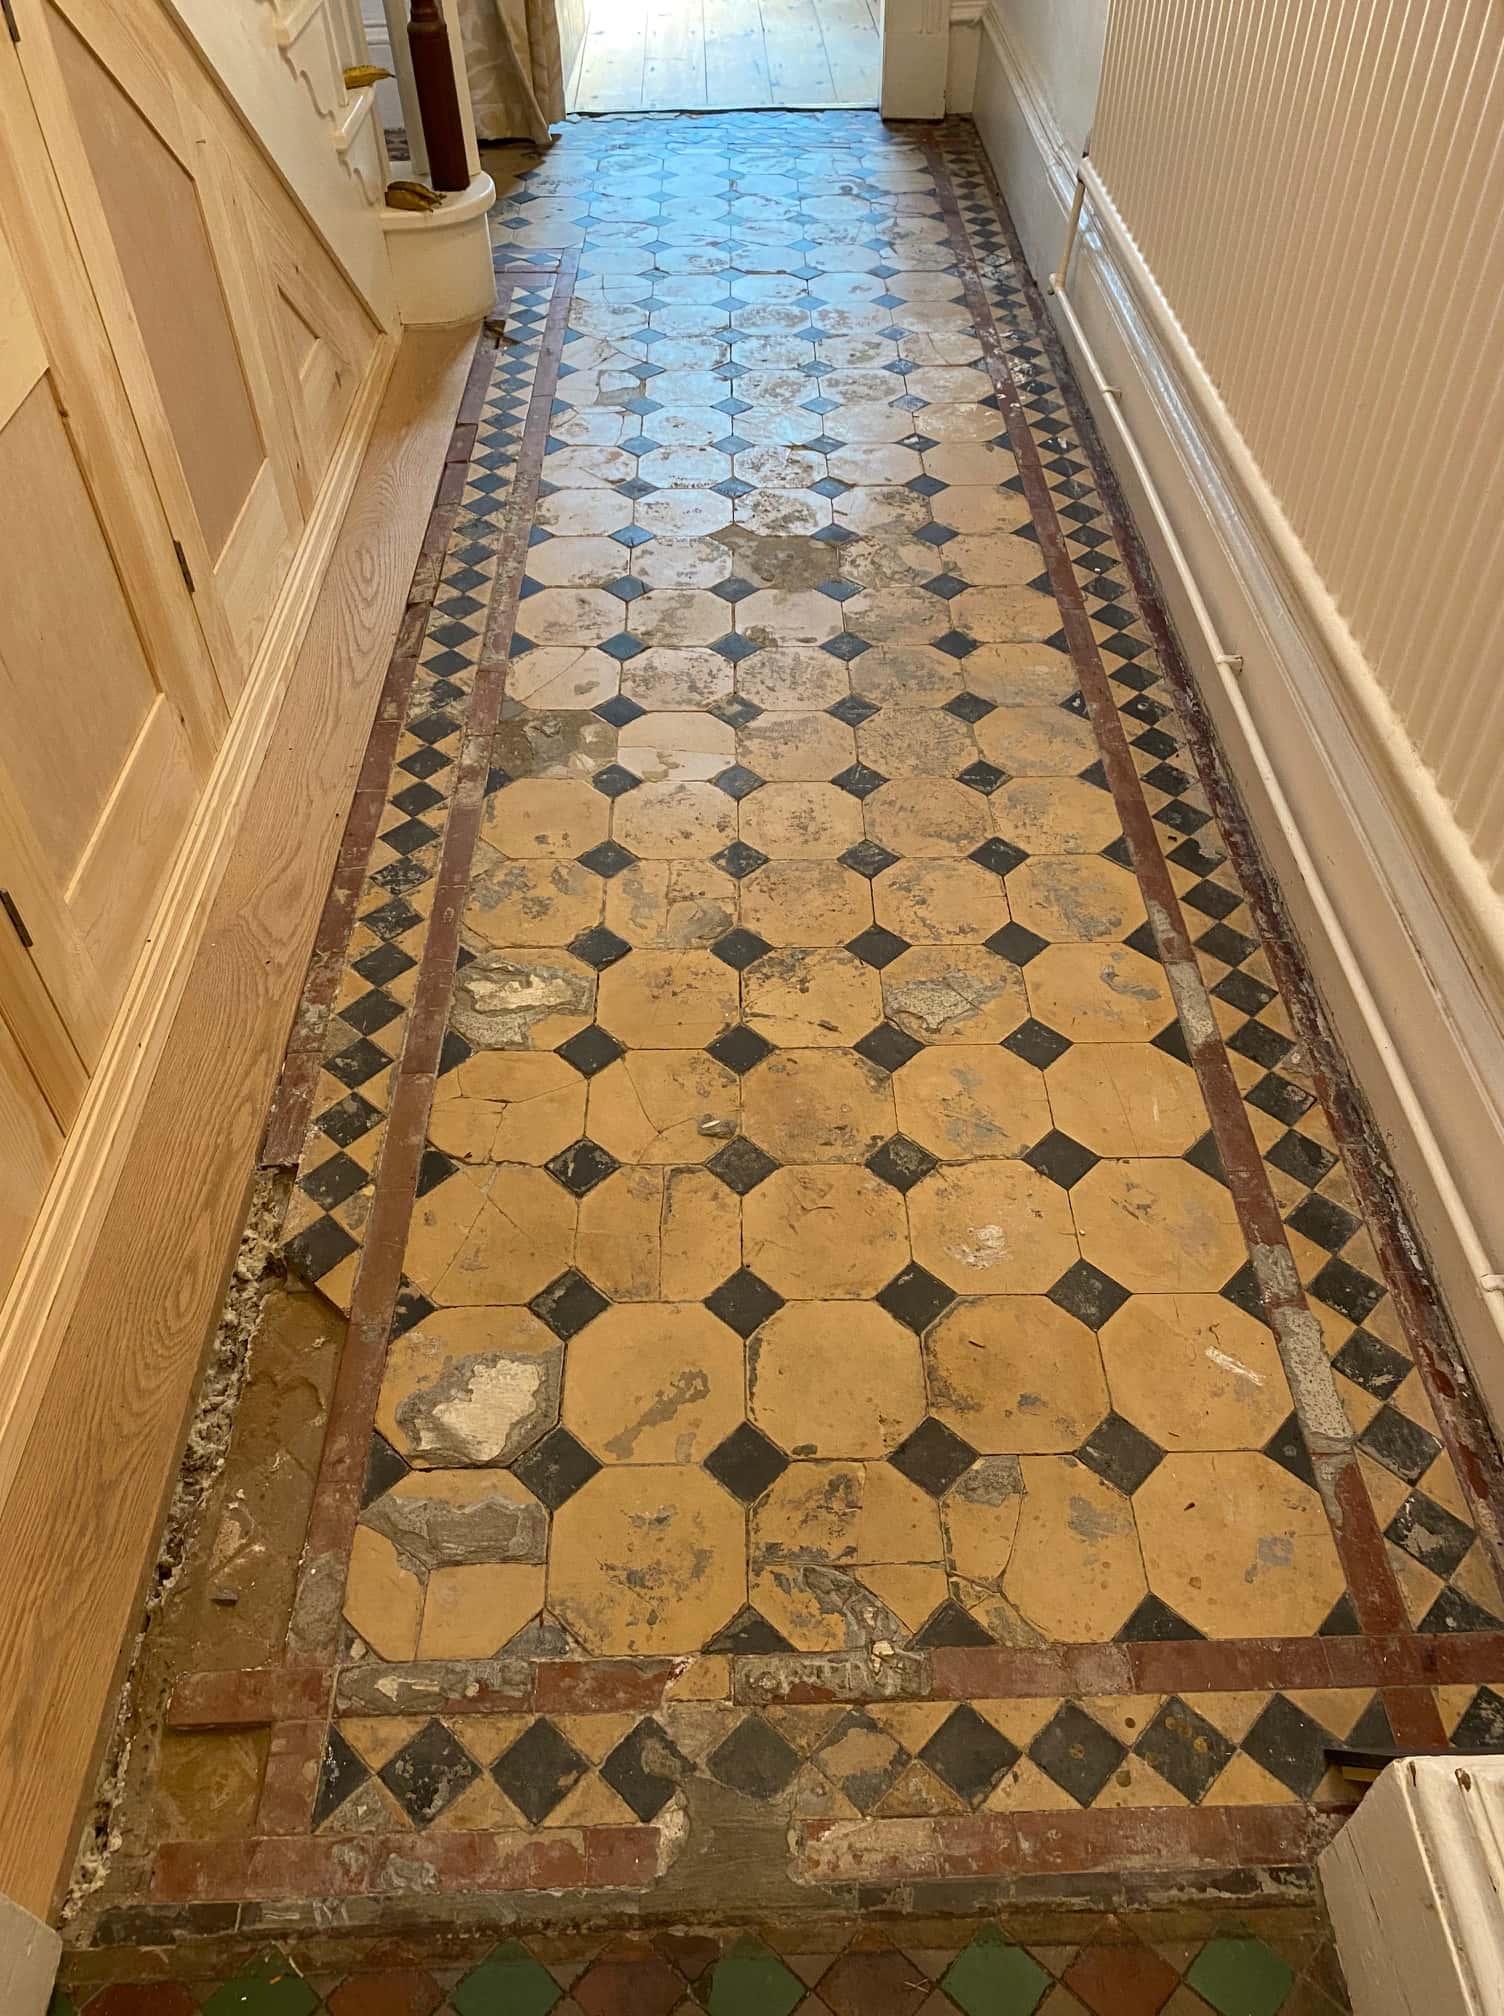
This property in Clitheroe dates to the 1920’s and the current owner wanted to have original Victorian Tiles in the Kitchen restored in time for the installation of new units. You can see form the photographs that the old tiles were in quite a state with 100 years of grime and some parts of the floor were missing large sections of tiling altogether.

Geometric Victorain Tile Before Restoration Clitheroe

It was clearly going to be a big project with lots of tiling required however unphased by the complexity I was happy to do the work and looked forward to seeing it completed with a new kitchen fitted. The work would need to be completed in two parts starting with the reconstruction and initial cleaning of the floor and then returning after the new kitchen units had been fitted to finish the restoration.

Geometric Victorain Tile Before Restoration Clitheroe

Restoring a 1920’s Victorian Floor in Clitheroe Part 1

On our first visit to the property the tiles were given the first of what would be several deep cleans. This involved soaking the tiles in a strong concentration of Tile Doctor Pro-Clean, leaving it to soak in for ten minutes and then working the solution into the floor using a 200-grit diamond encrusted burnishing pad fitted to a rotary buffer machine. The cleaning solution soon turned black with the dirt that was flushed out of the tile, this was then rinsed off and extracted with a wet vacuum.

The initial clean had to be repeated several times to get the tiles in a reasonable condition. Then with the initial clean completed attention was turned to the tiling work which involved relaying large sections of tiles that would be hidden by the new units to the other parts of the floor where there were none. The location of the new units had been marked out with black tape so we were able to identify where we could lift tiles from. Doing it this way rather than using replacements meant that the whole floor would be original and in keeping with the 100-year-old building.

Geometric Victorain Tile During Restoration Clitheroe

This work took several days and once complete the floor was left covered to protect it whilst the new kitchen was being fitted.

Restoring a 1920’s Victorian Floor in Clitheroe Part 2

On our return a few weeks later, it had become apparent that the design of the kitchen had changed slightly so more tiling work was needed to rectify the problem. Once done the second part of the clean was carried out with a focus on the White tiles which were proving very stubborn to get White again.

The customer wanted it perfect as did we, but I had stated from the outset that with tiles of this age and an unknown history it would be impossible to guarantee the outcome and this is more likely with White and the Sand coloured tiles which are more liable to staining. You will see on the after photos some of the White tiles are more off White in colour which I can assure you this isn’t due to a lack of effort on our part and when it comes to taking on old flooring like this one, there’s only so much cleaning we can do until you realised that this is the best it will get. Fact is you don’t know for sure how well these types of job are going to go until you get stuck in and sometimes even a small pre-test clean can be very misleading and this is what was proven to be the case here.

Sealing a Victorian Tiled Hallway Floor

With the cleaning completed the next step was to apply a sealer to the tiles to protect them from further staining and ingrained dirt. To do this a couple of coats of Tile Doctor Colour Grow were applied. This product is a fully breathable sealer which restores the colour and allows for the floor to breathe, which is an absolutely necesity on an old floor like this one which will not have a damp proof membrane installed.

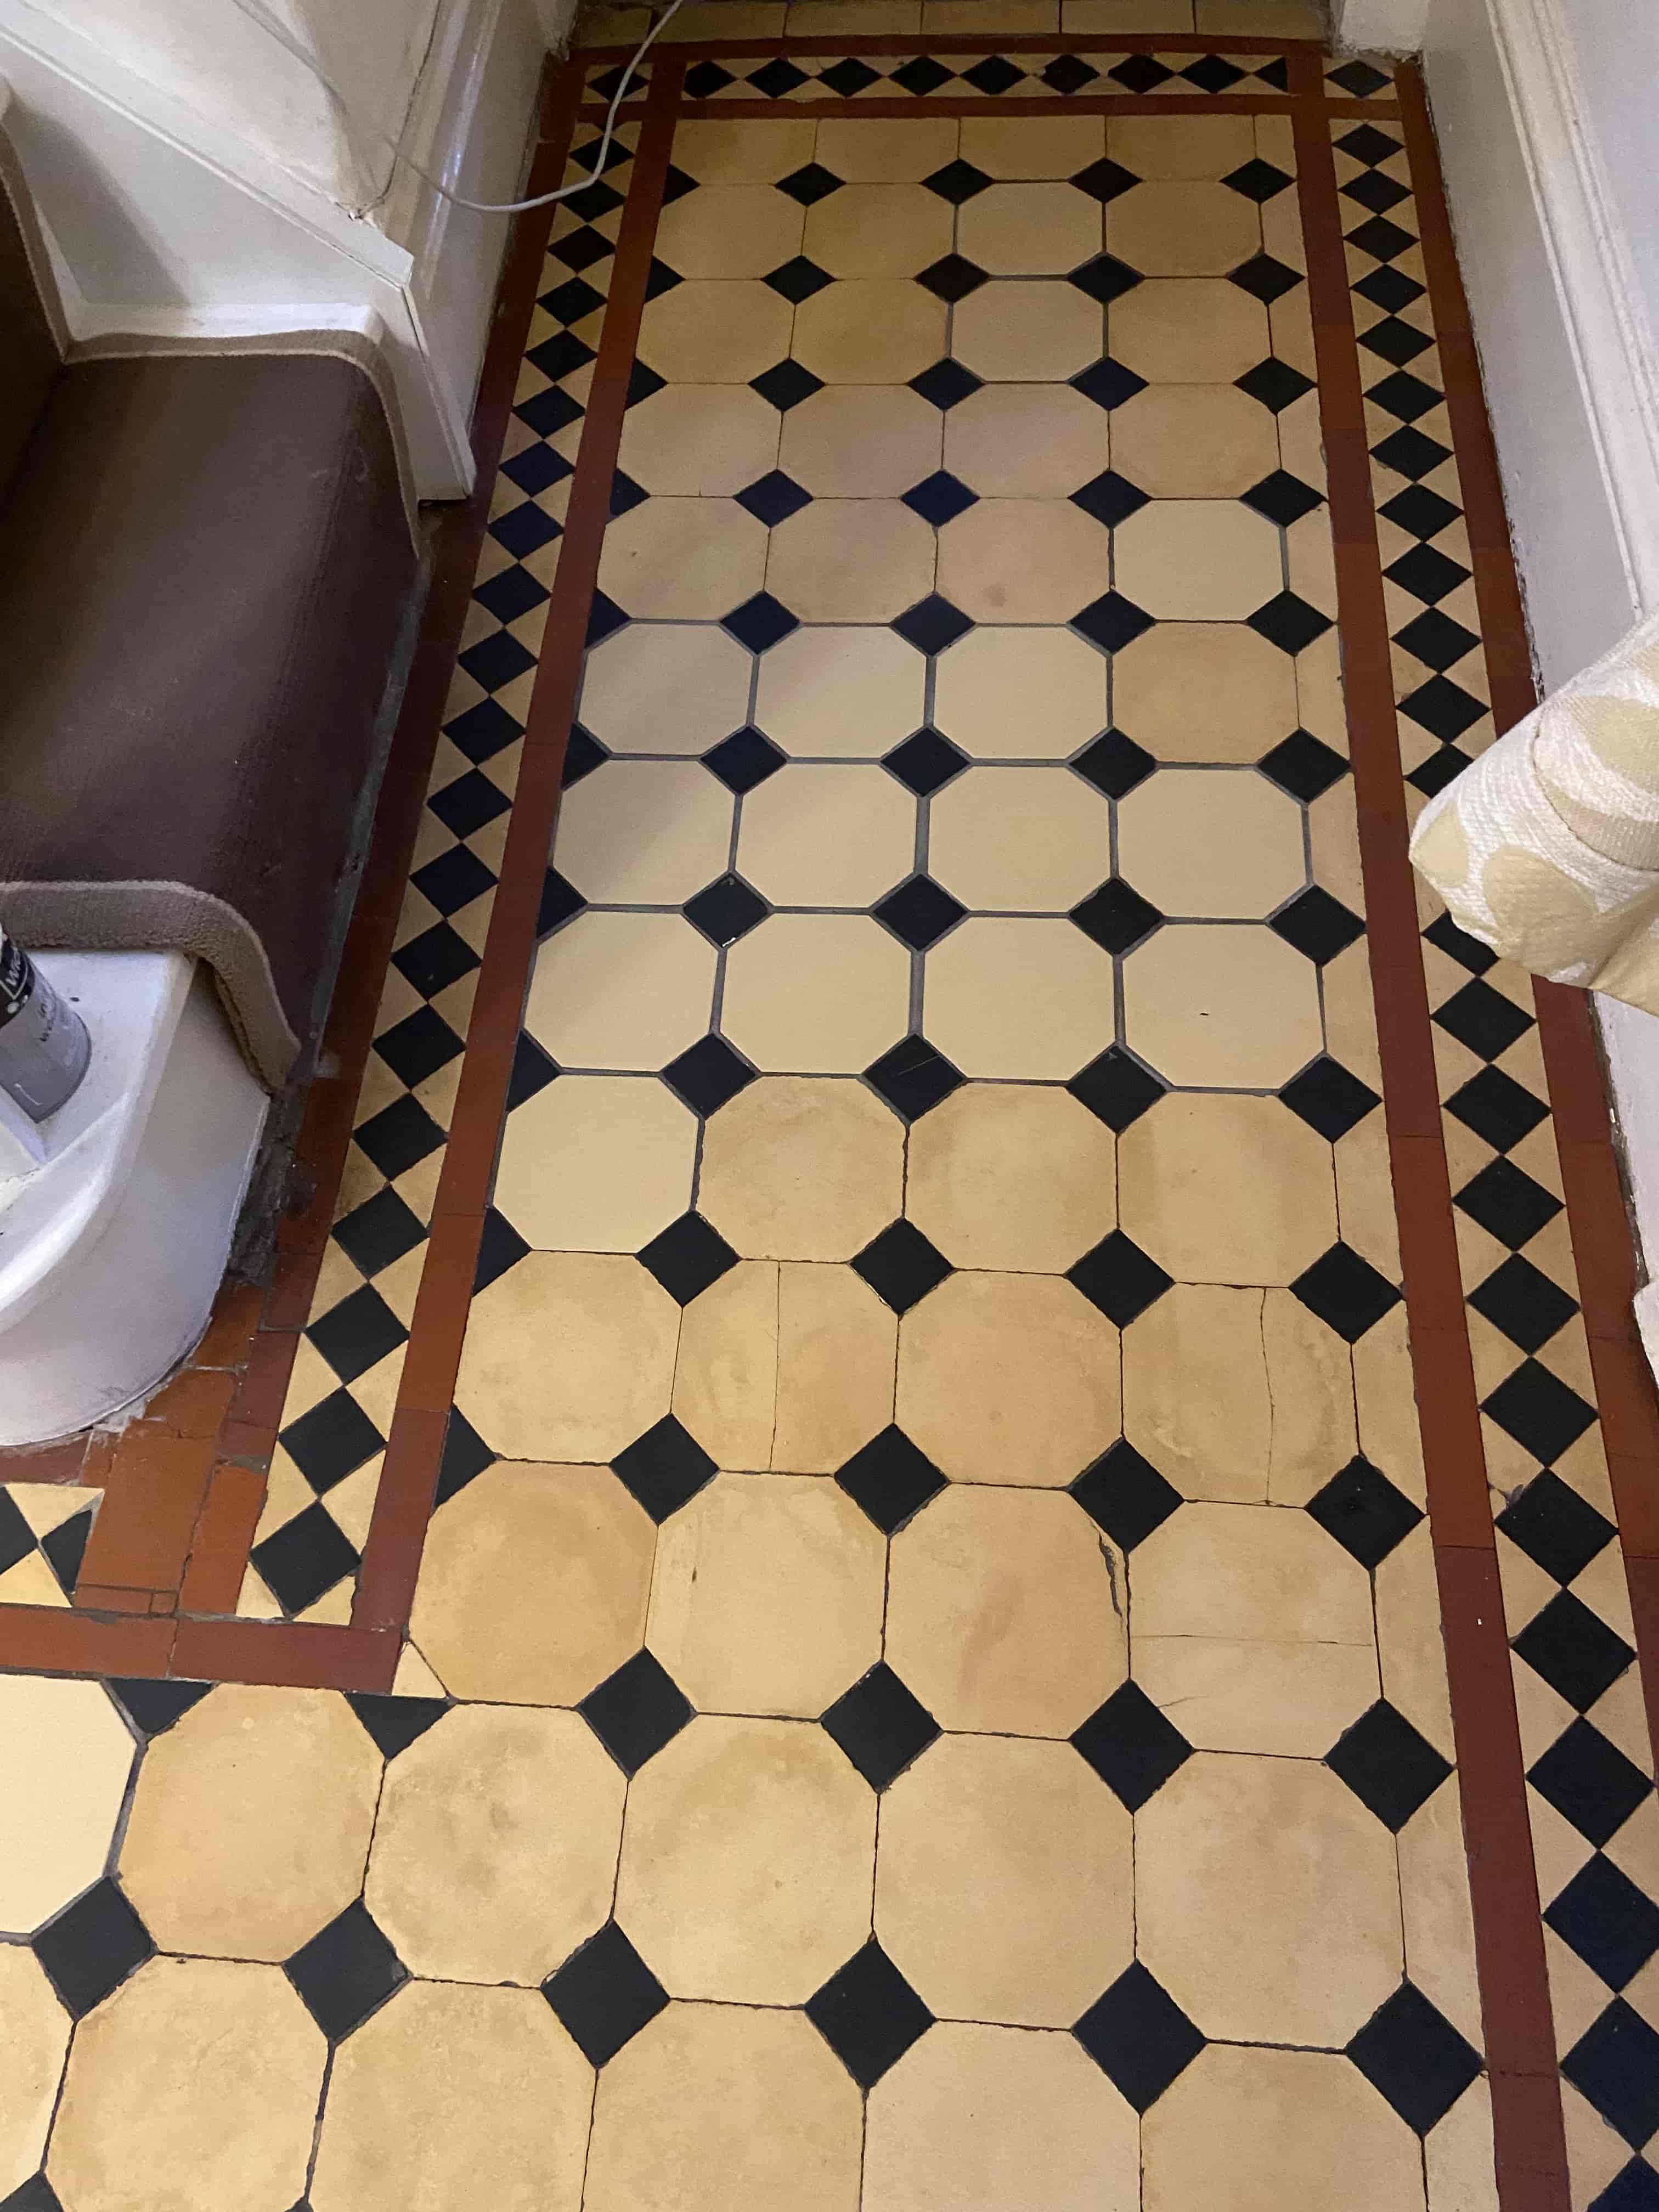
Geometric Victorain Tile After Restoration Clitheroe Geometric Victorain Tile After Restoration Clitheroe

As you can see from the photographs the Kitchen was completely transformed by the time we had finished. The customer was happy with the overall result and the White tiles although not perfect showed a lot of character befitting their age.
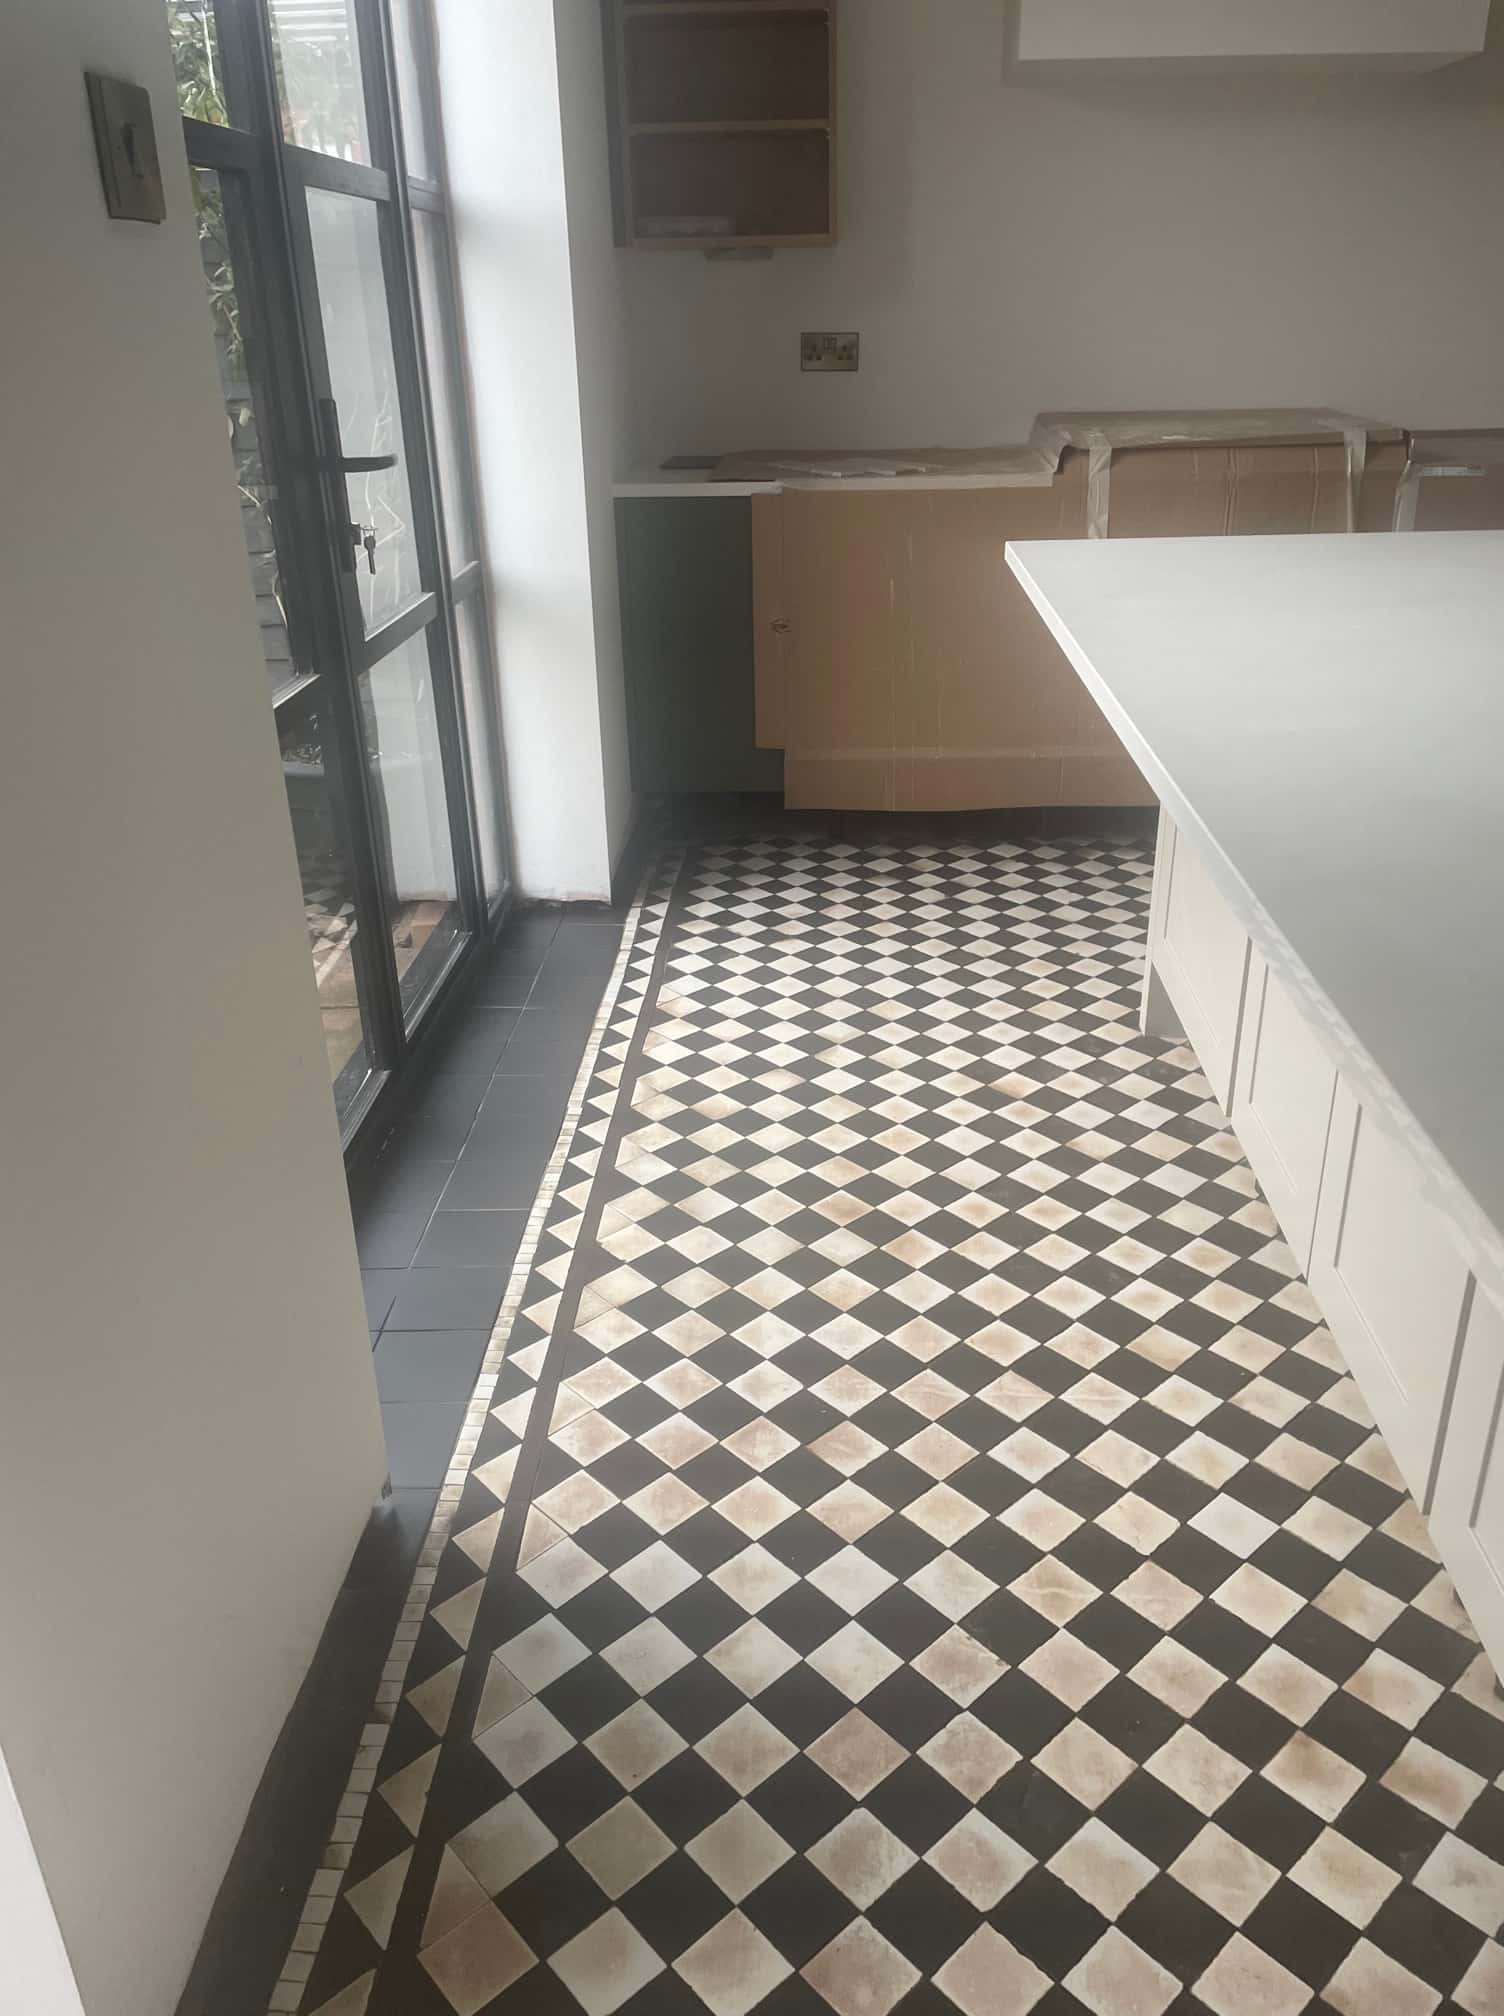
Geometric Victorain Tile After Restoration Clitheroe Geometric Victorain Tile After Restoration Clitheroe

For aftercare we always advise our customers to use Tile Doctor pH Neutral tile cleaner as it’s specially designed for cleaning sealed surfaces without damaging the sealer which can be the case with stronger bleach-based floor cleaning products you find in supermarkets many of which contain bleach and are simply too strong for use on a sealed floor.


Professional Restoration of a Victorian Tiled Hallway in Lancashire

1920 Geometric Victorian Floor Fully Restored in Clitheroe Read More »

Honed Travertine Kitchen Floor Renovated in Preston

Renovating a Large Stained Travertine Tiled Floor in Preston

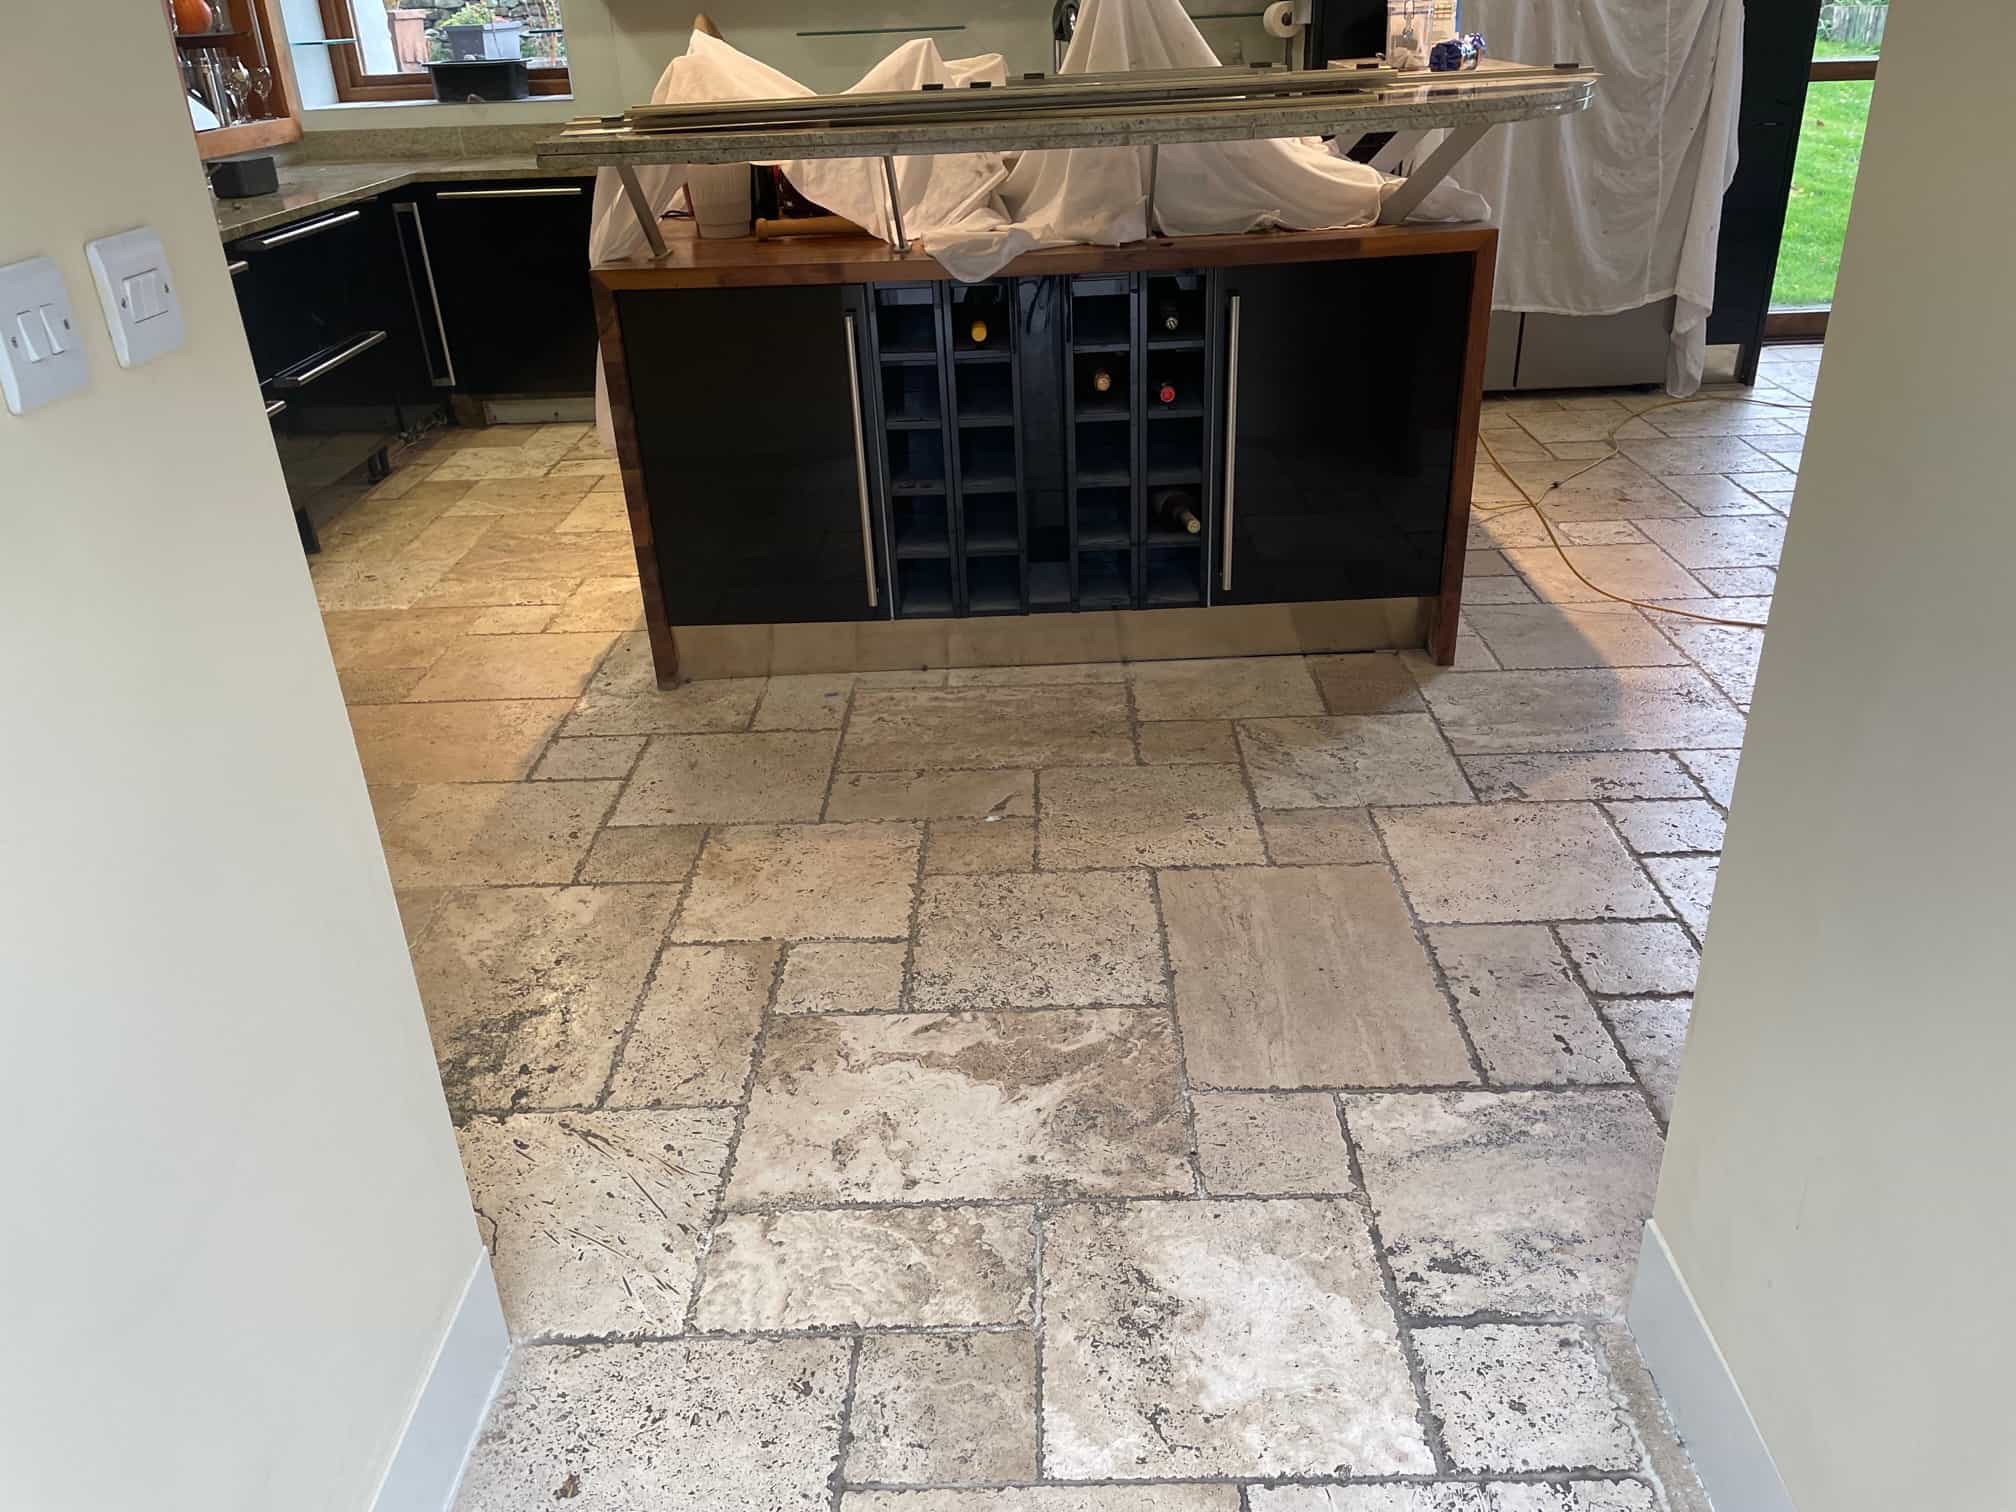
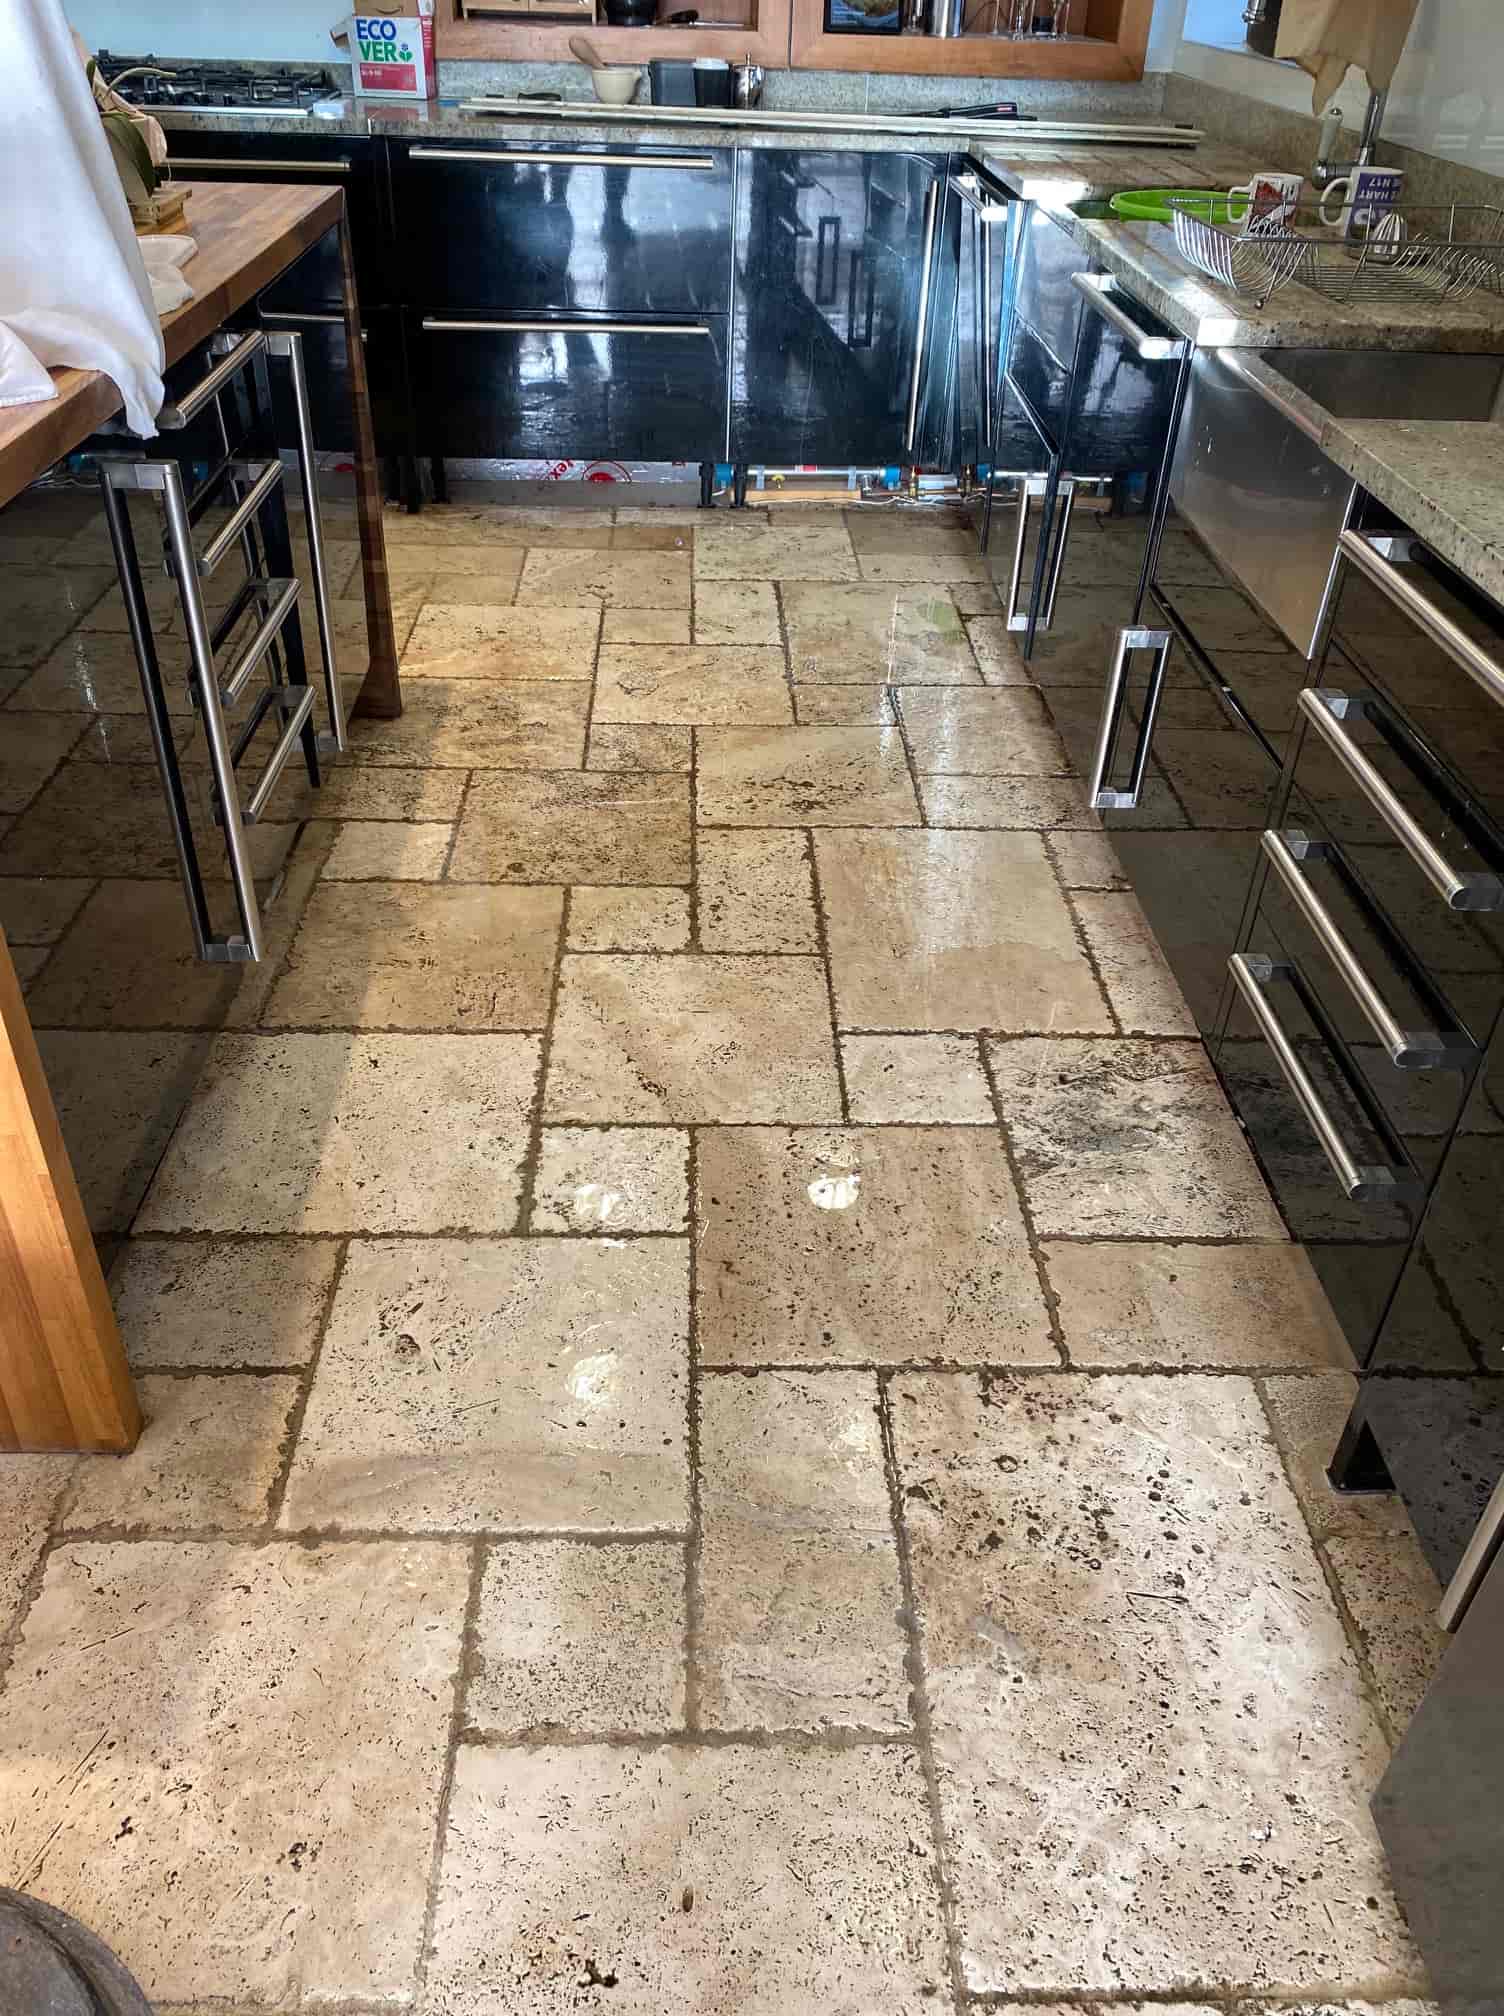
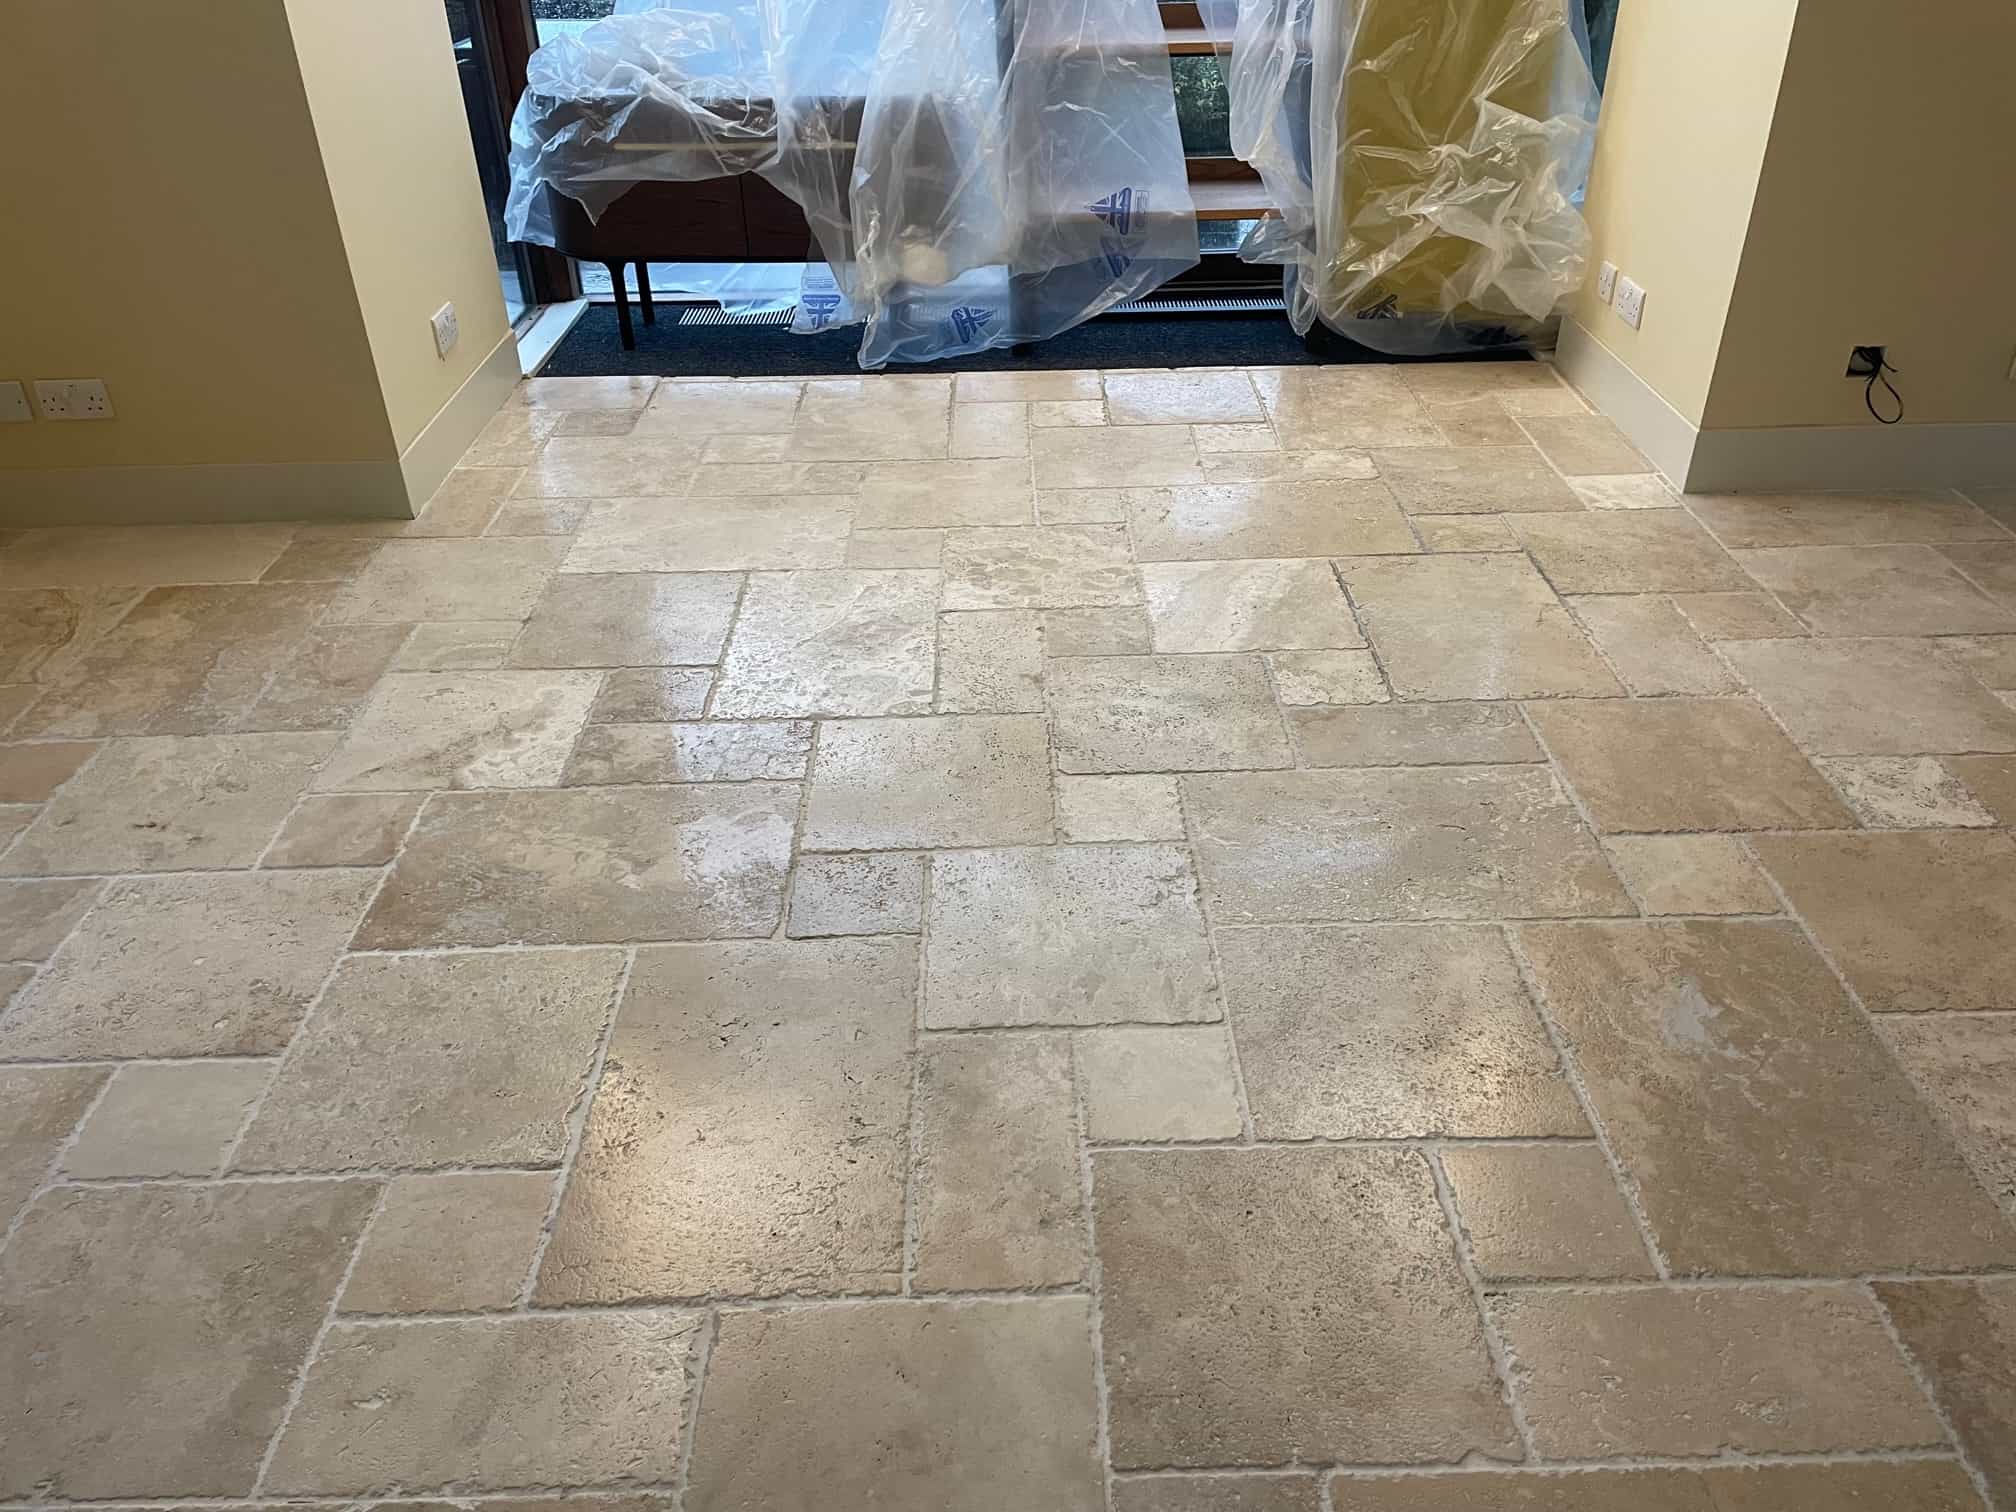
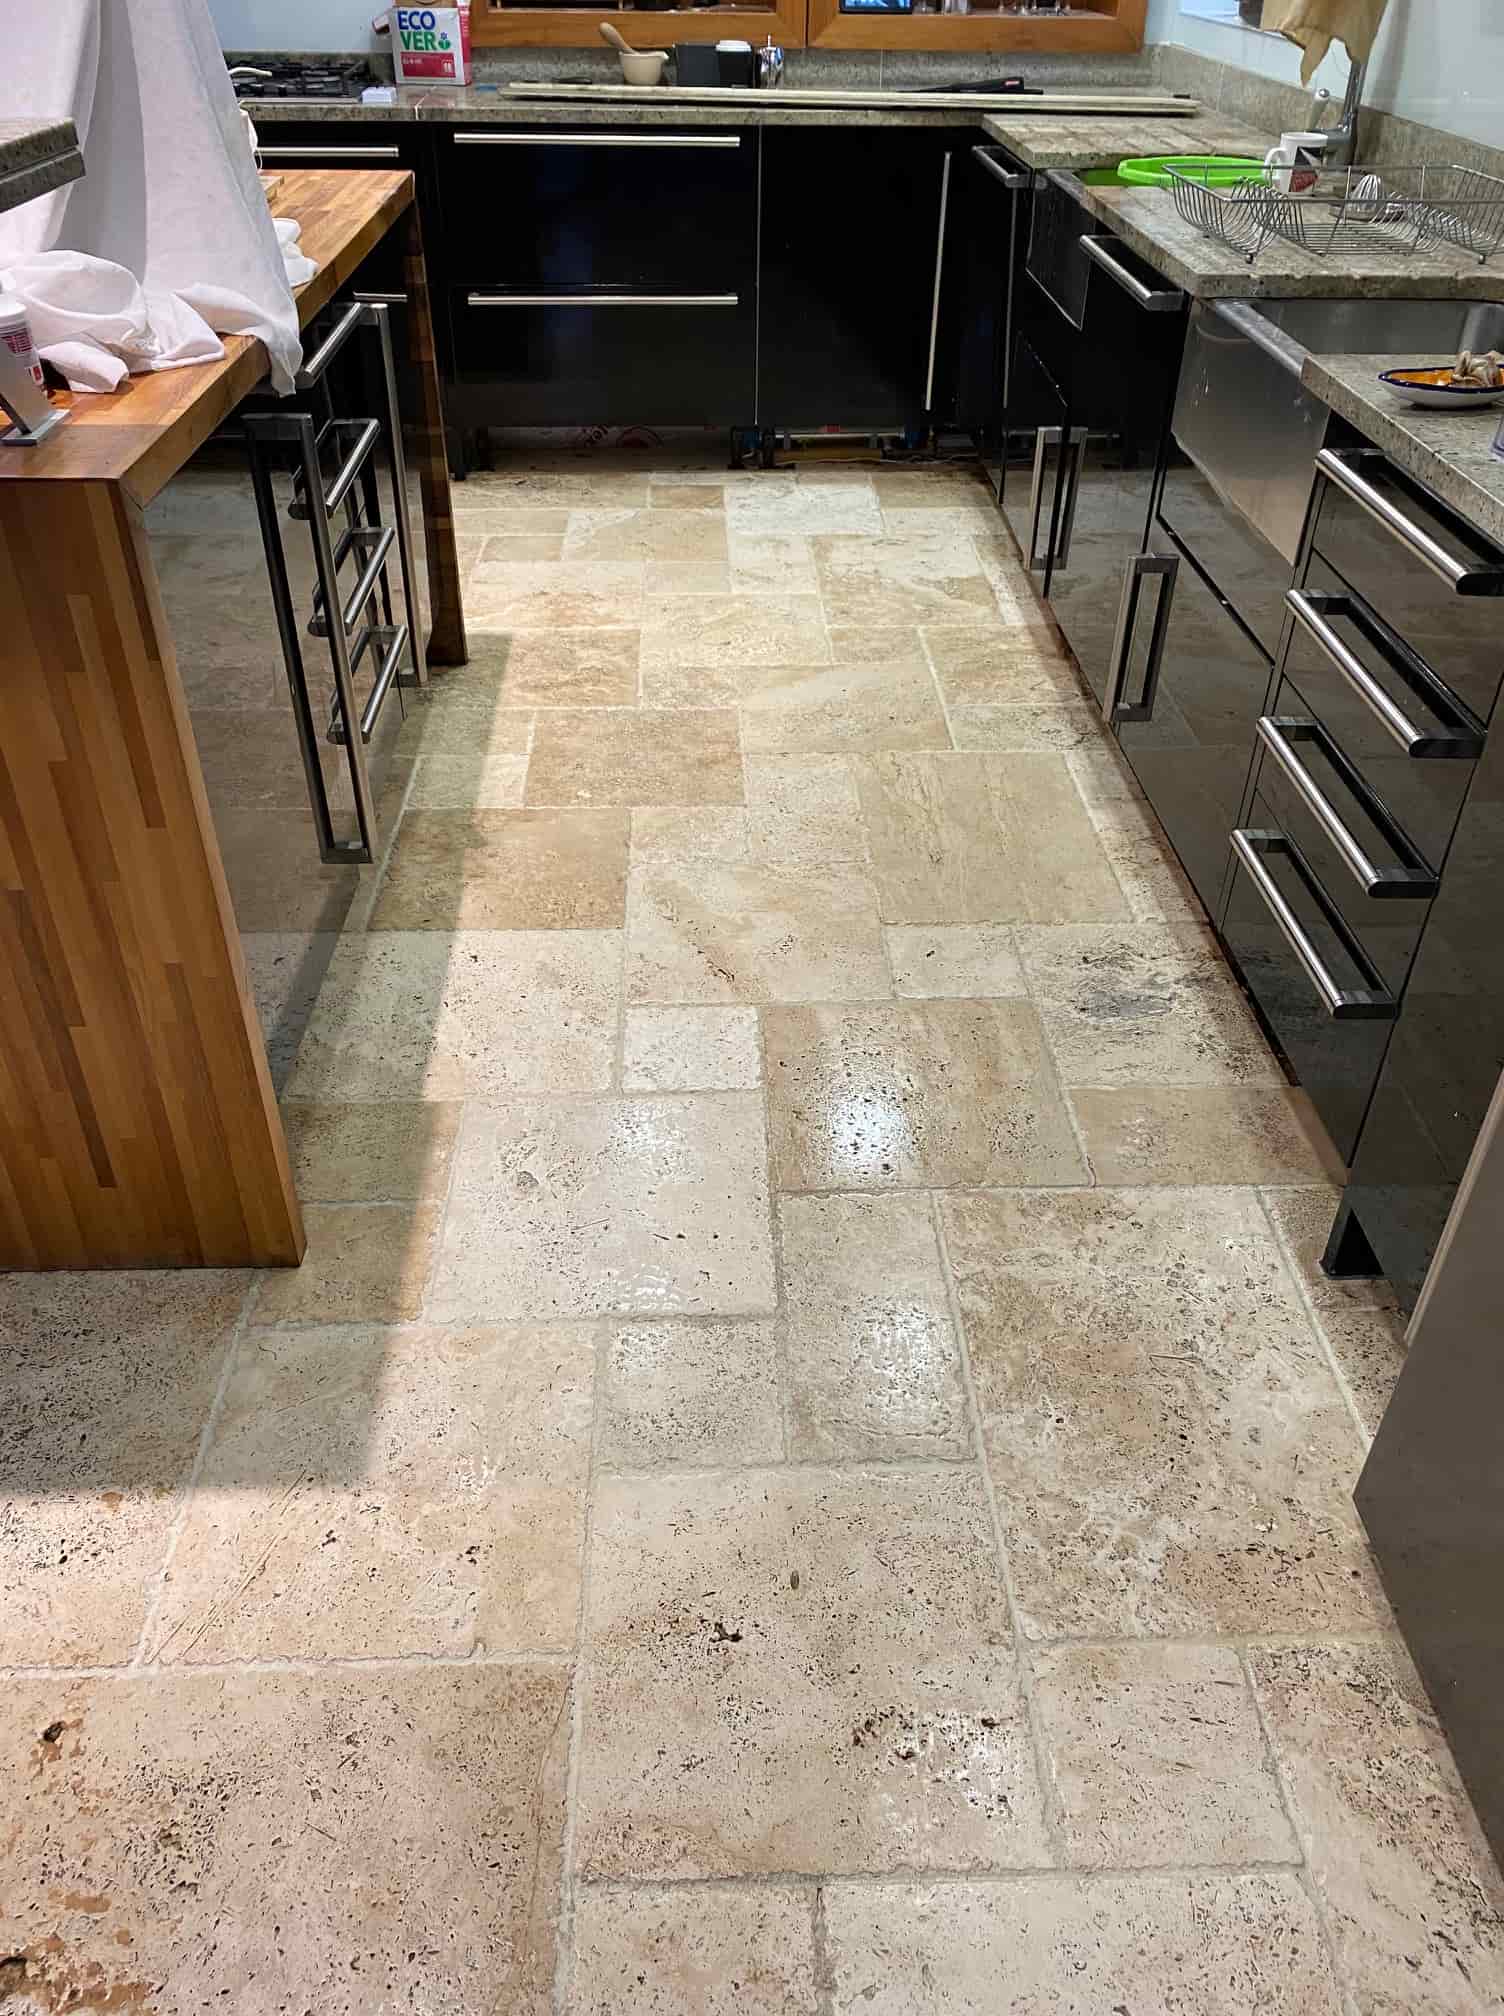
This customer in Preston in Lancashire had just moved into a house with a large 60m2 Travertine tiled floor that was installed throughout most of the ground floor. Travertine is a lovely stone but the previous owner had not maintained the sealer on the tiles and as a result it now looked grubby and there was a lot of dirt ingrained in the tiles leaving black staining, especially in the Kitchen.

Honed Unfilled Travertine Kitchen Floor Before Renovation Preston

This is a common problem with all natural stone floors, some are hardier than others but without a protective barrier in place they will attract dirt as the sealer become worn off. The new owner was seriously considering having the tiles ripped up, fortunately however they came across our service and decided to try having them renovated first.

Honed Unfilled Travertine Kitchen Floor Before Renovation Preston

Deep Cleaning a Travertine Tiled Floor

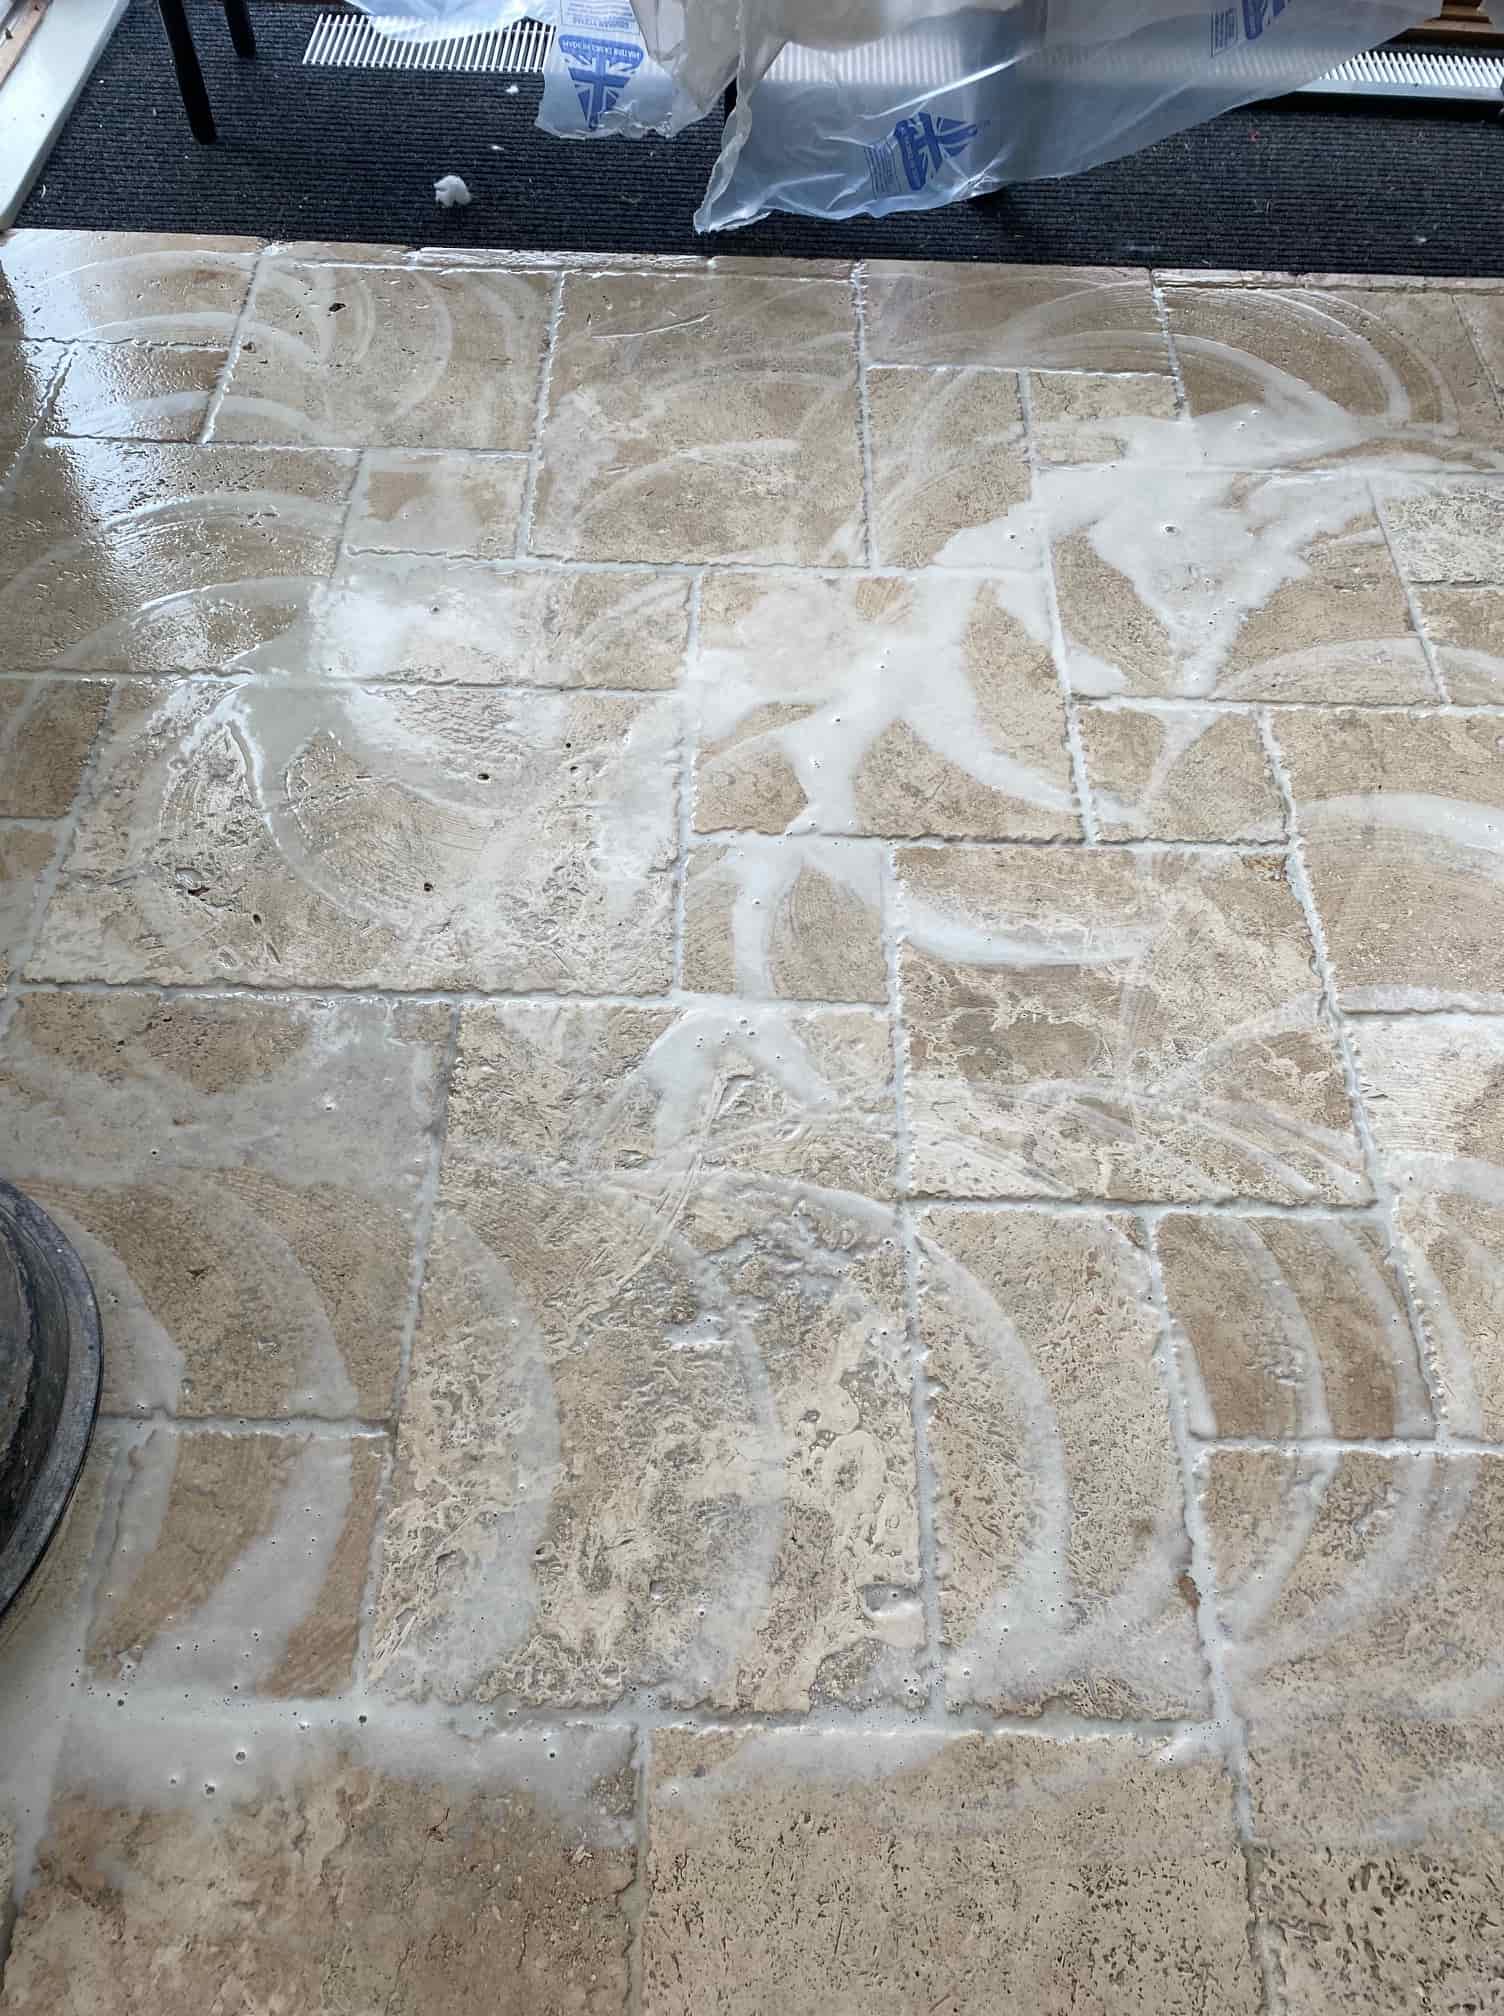
To get the stone clean and bring back the beautiful appearance of the Travertine I used several diamond burnishing pads which are run over the tiles with water for lubrication. The first was a coarse 200-grit pad which is fitted to a rotary floor machine and buffed into the stone in a circular motion. This process generates a lot of slurry which is then rinsed off afterwards and extracted with a wet vacuum.

Honed Unfilled Travertine Kitchen Floor During Renovation Preston

This process was then repeated using finer burnishing pads and continued with a 400-grit, 800-grit and finally a 1500-grit, again each pad was run over the tiles several times and then the slurry extracted as before. It’s a completely abrasive process with no other products needed and the result is a sealer and dirt-free tile.

Honed Unfilled Travertine Kitchen Floor During Renovation Preston

At this point I inspected the floor to see if the pads had been able to clean up the grout as well as the tile. Pads can struggle to reach down into the recess so I often find more work is needed on the grout. As suspected the Travertine had responded well to the treatment however it was clear the grout would need more work and was still stained black in places.

Normally use a grout cleaning product called Tile Doctor Pro-Clean for the grout but on this occasion, I felt something stronger would be needed. So, on this occasion I applied undiluted Tile Doctor Remove and Go along the grout lines and left it to soak in for ten minutes. It was then scrubbed in by hand, rinsed off and the soil remove with the wet vacuum. The grout cleaning had worked a treat and happy with the condition of the floor it was left to dry off overnight.

Sealing a Travertine Tiled Kitchen Floor

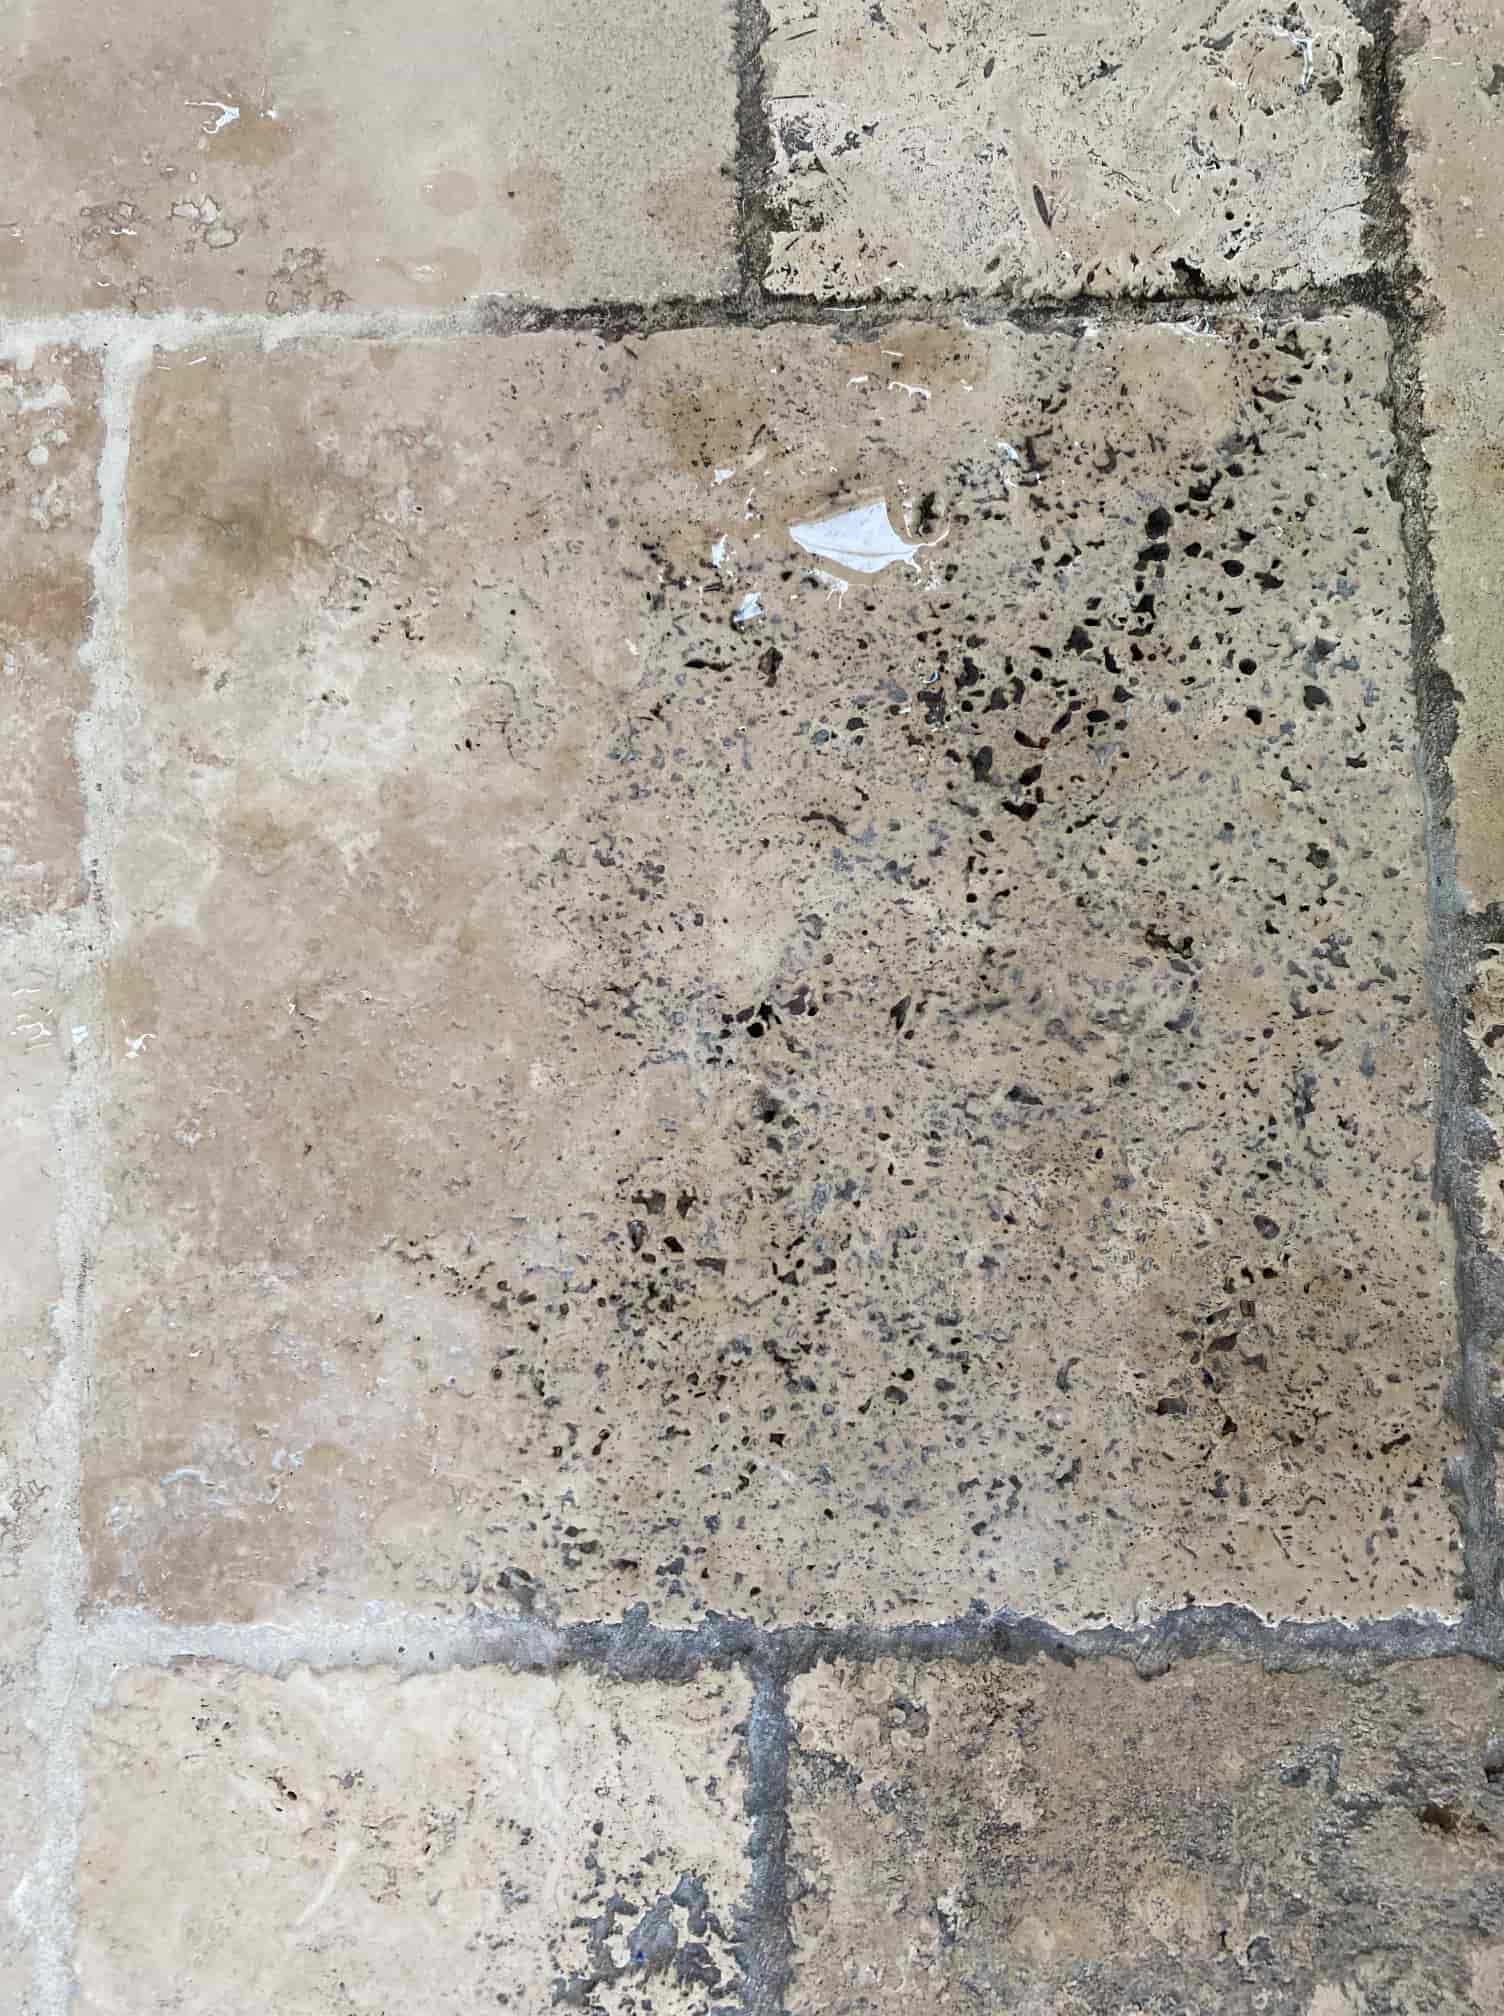
The next morning time was spent filling in holes (aka pitting) in the Travertine with colour matching grout before running over the whole floor with a very fine 3000-grit polishing pad to further bring up the appearance of the stone. This is done using a little water sprayed onto the tile a process we call a spray burnish.

Spray burnishing also leaves the floor dry and ready to be sealed. The owner wanted the Travertine to look as natural as possible so two coats of Tile Doctor Ultra Seal were applied. This is an impregnating sealer which is recommended for use on polished stone and for use in kitchens.

Honed Unfilled Travertine Kitchen Floor After Renovation Preston

Before leaving I took time to discuss aftercare cleaning and how important it is to avoid the use of strong cleaning products (especially bleach) on Travertine, not only will it degrade the sealer but can also harm the stone. For the regular cleaning of sealed Travertine, I recommend using Tile Doctor Stone Soap which is a gentle but effective cleaner that also helps maintain the patina.

Honed Unfilled Travertine Kitchen Floor After Renovation Preston


Professional Renovation of a Travertine Floor Tiles in Lancashire

Renovating a Large Stained Travertine Tiled Floor in Preston Read More »

Copper Slate Tiled Kitchen Floor Cleaned Sealed in Ribchester

Renovating Copper Slate Tiles with a Semi Riven Finish in Ribchester

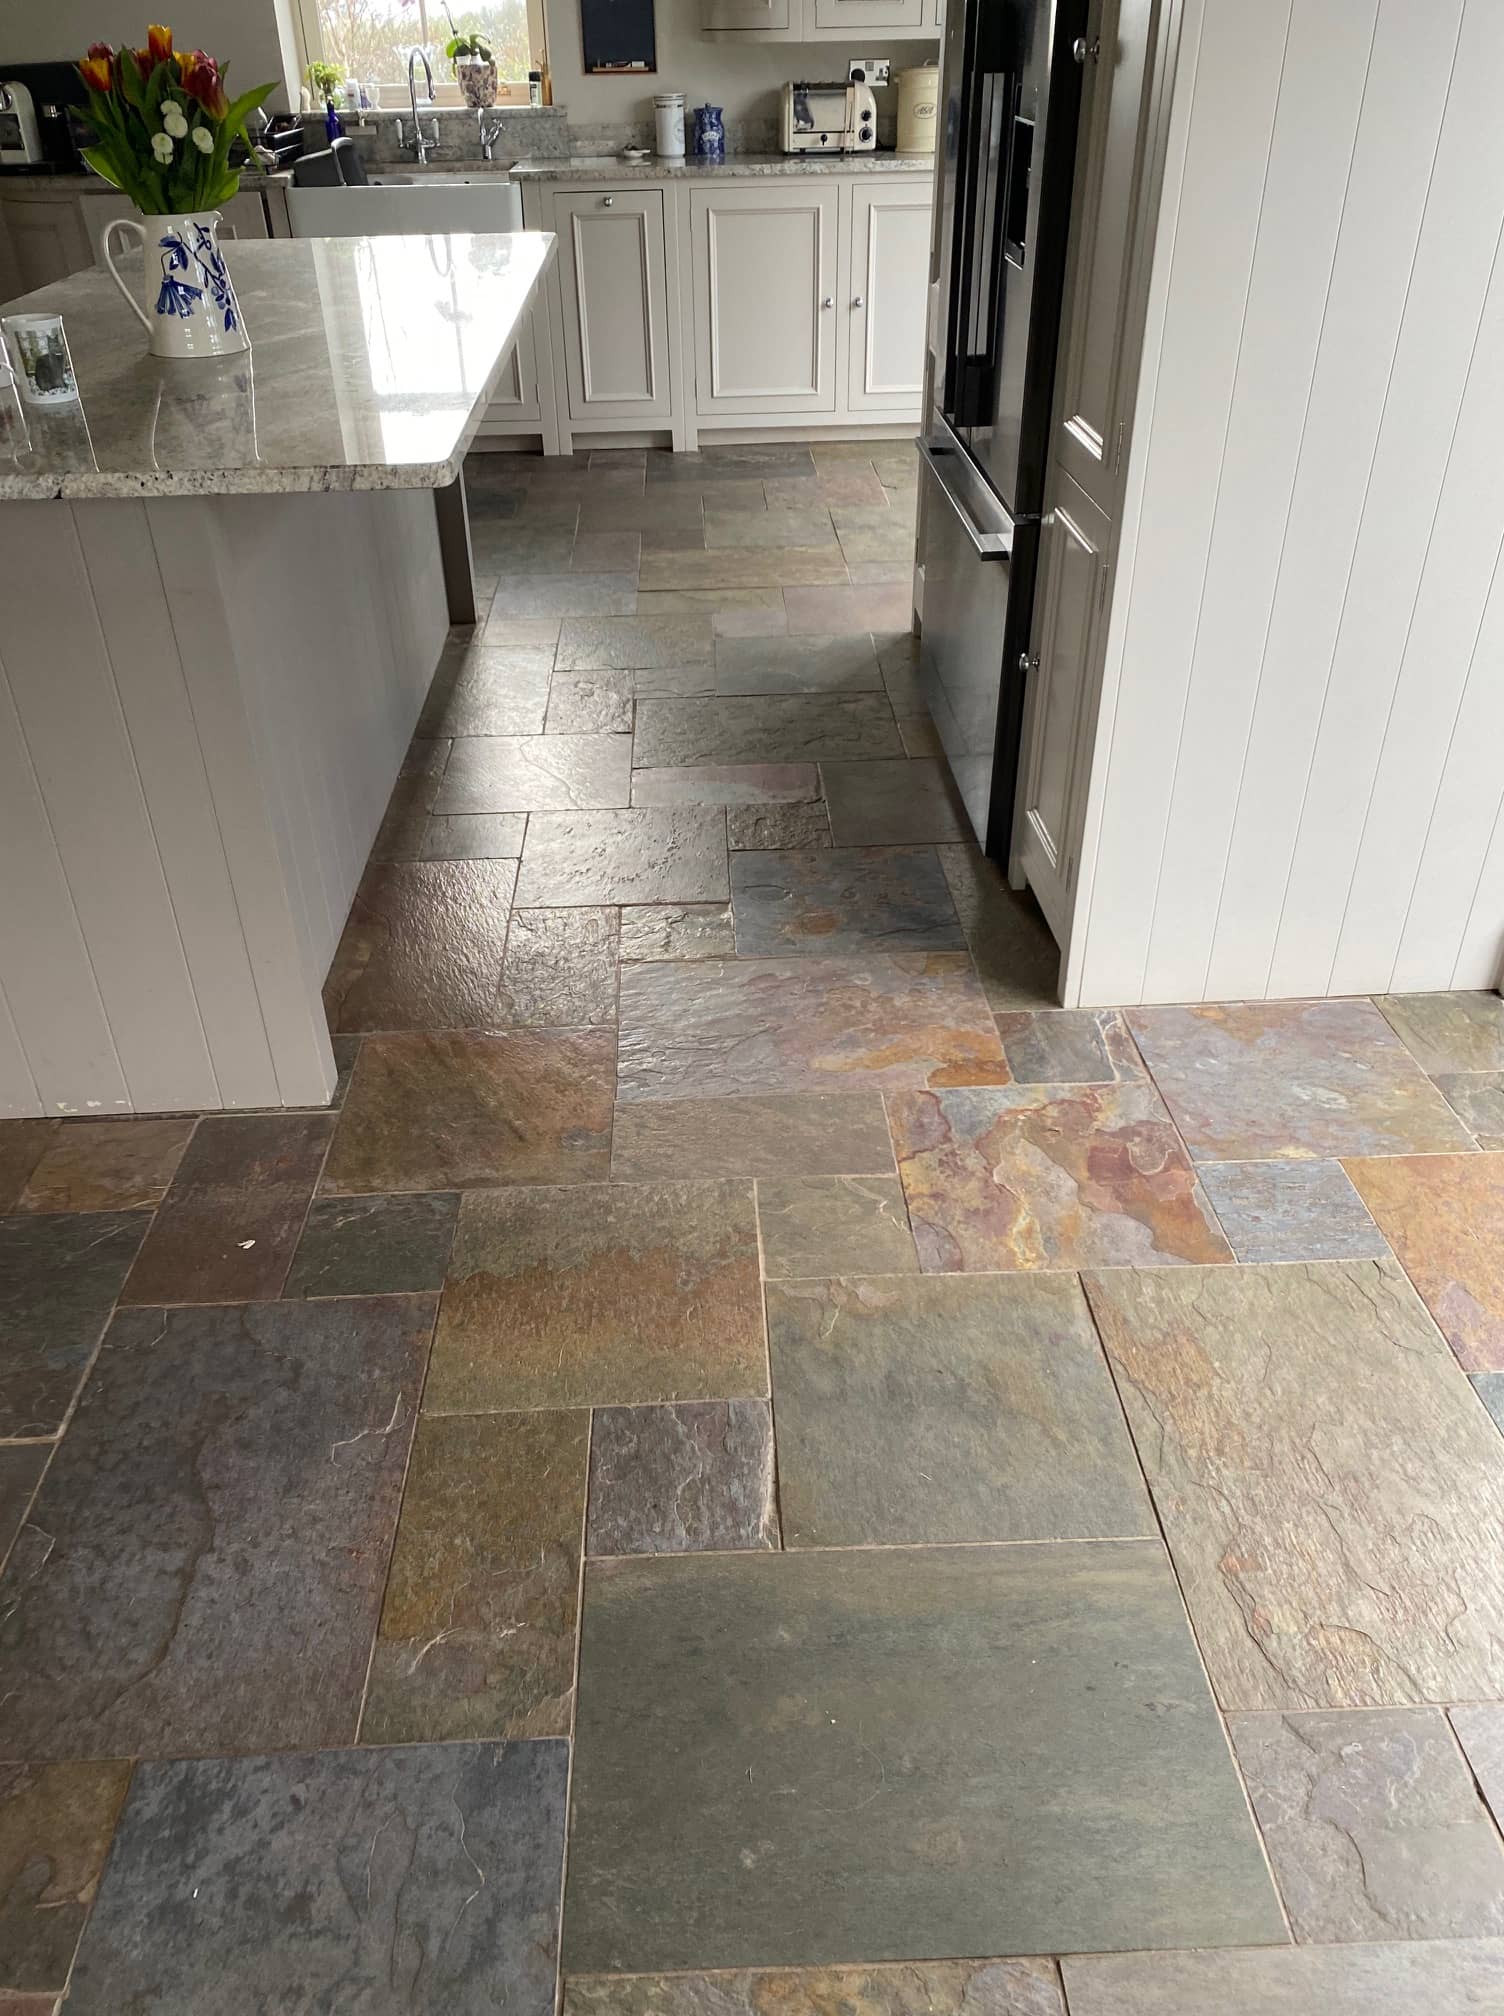
This Copper Slate tiled floor at a property in the Ribble Valley village of Ribchester had been sealed just twelve months before by another company who used a topical acrylic sealer as the client wanted a shiny finish. However, this was a bad choice for a semi-riven tile and exacerbated by the fact that the client had three large dogs. The topical sealer just couldn’t cope and the shine on the Slate faded in a few months.

Semi Riven Copper Slate Before Cleaning Ribchester

After discussing the problem, I suggested stripping off what was left of the topical seal and then re sealing with a sturdier impregnating sealer. I recommended a product called Tile Doctor X-Tra seal which is a premium product that improves colour and is very durable so much so it can also be used externally. Since releasing this product last year it has proved to be very popular and has proven to be the answer in numerous tricky situations. It also adds a lustre and patina to the stone. The client was happy to go ahead with my quote.

Semi Riven Copper Slate Before Cleaning Ribchester

Cleaning a Semi Riven Copper Slate Tiled Kitchen Floor

My first concern when dealing with a floor situated in a kitchen is to prevent water being absorbed by the kitchen base units and plinths. Normally the plinths can be removed but if not, the solution is to run a bead of silicone around the area of concern. MDF is easily blown by moisture, and it doesn’t take us long to add so it’s well worth doing.

Semi Riven Copper Slate Before Cleaning Ribchester

The cleaning started with the application of a strong dilution of Tile Doctor Pro-Clean which was scrubbed into the floor to remove the old sealer. On this occasion it was scrubbed in using a 200-grit milling pad fitted to a rotary machine. As well as stripping off the old sealer this action deep cleans the tile and grout. A lot of soil is released during the process, and this is brushed and rinsed away with clean water and extracted using a wet vacuum.

The next step was to give the floor an Acid Rinse using a product called Tile Doctor Grout Clean-up, this not only cleans the grout but also neutralised the pH of the floor after cleaning with The Tile Doctor Pro-Clean which is an alkaline product.

An acid wash removes grout smears, unwanted mineral deposits and roughens the stone at a microscopic level to provide a better bond for the sealer. You must be careful what you use it on, and we wouldn’t recommend it for use on acid sensitive materials such as Limestone, Marble, or Travertine. Grout Clean-up is however safe to use on Slate, but I wouldn’t leave it on for a long period of time.

After another rinse with water the wet vacuum was deployed again to remove as much moisture from the floor as possible. The floor was then left to dry out fully overnight.

Sealing a Semi Riven Copper Slate Kitchen Floor

The next day after confirming the floor was dry, work started with the application of what would be two coats of Tile Doctor X-Tra seal. X-Tra seal is an impregnating sealer that soaks into the pores of the Slate ensuring dirt cannot reside there.

Semi Riven Copper Slate After Cleaning Ribchester

I would be the first to admit that a topical sealer would have resulted in a shiner finish but clearly this was not a practical choice when you have 3 big dogs who will run around the floor and tear at the sealer with their claws. Topical sealers as the name suggest sit on the surface and are simply not a very practical option for this situation.

Semi Riven Copper Slate After Cleaning Ribchester

Once completed the Copper colour in the Slate was really enhanced, the grout looked much cleaner and overall, the floor looked great; more importantly the client was very happy with the work we had carried out.

For the cleaning of sealed Slate tiles, I recommend the use of Tile Doctor Neutral Clean which is pH neutral and gentle enough for regularly use. Its also provided in concentrated form so a small amount goes a long way. Many of the floor cleaning products you find in supermarkets are bleach based and far too strong for use on a sealed tile resulting in premature damage to the sealer. I forgot to ask what they had been using to clean the floor previously, but this may also have been a factor in why the previous sealer only lasted a few months.


Professional Restoration of a Semi Riven Copper Slate Kitchen Floor in Lancashire

Renovating Copper Slate Tiles with a Semi Riven Finish in Ribchester Read More »

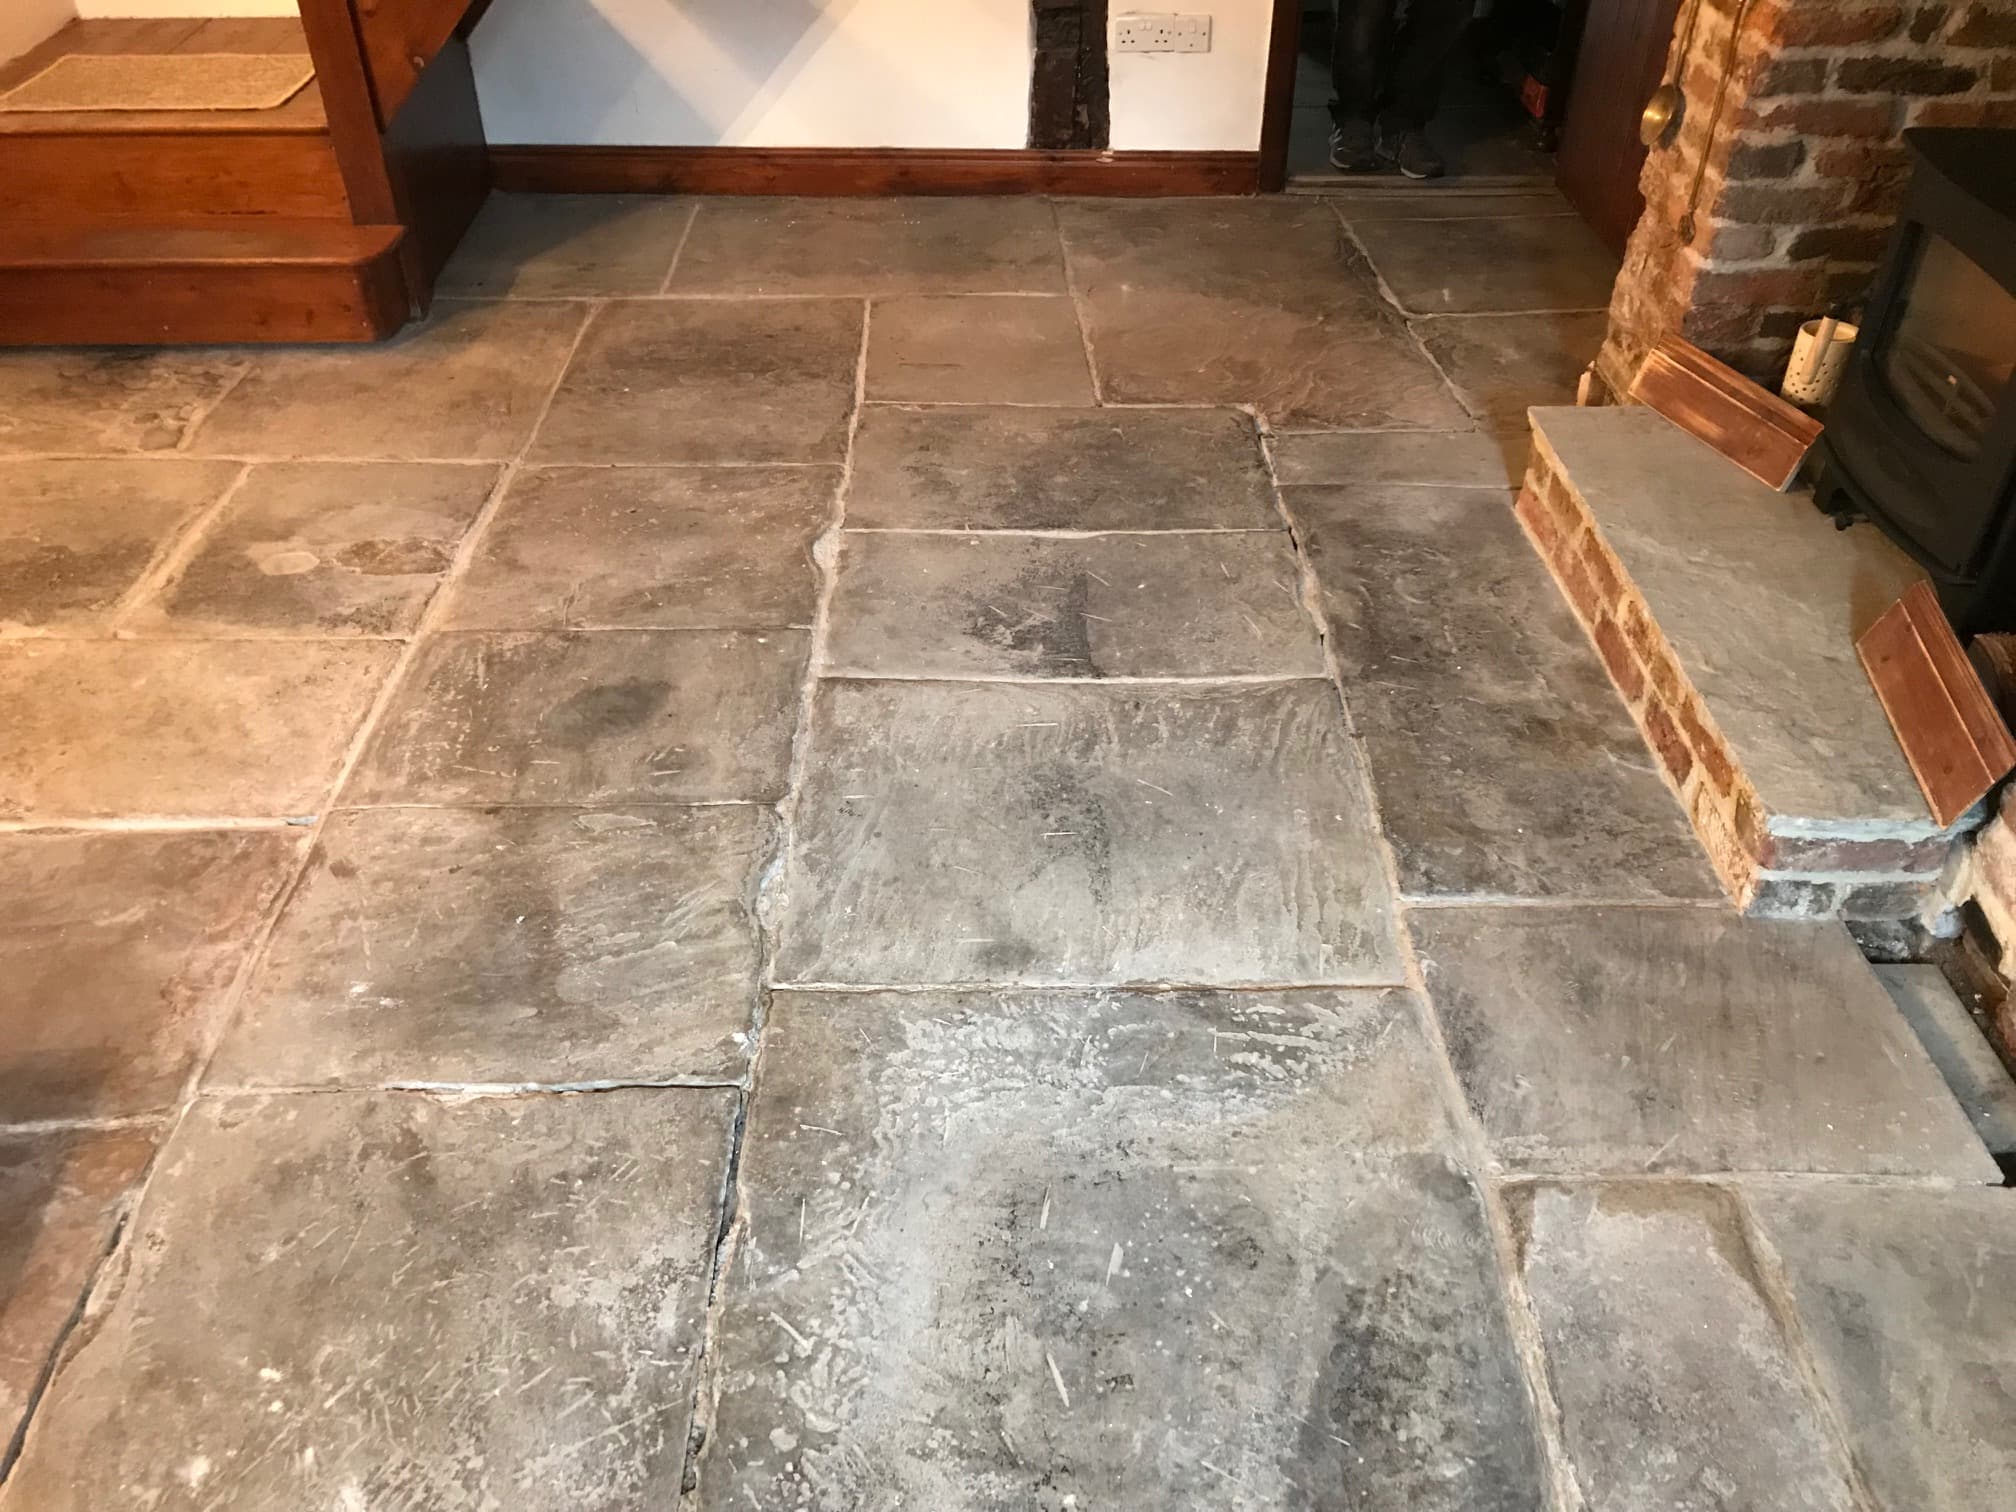
Sandstone Flagstone Floor Restoration Preston

Flaking Sandstone Flagstone Floor Restored in Preston

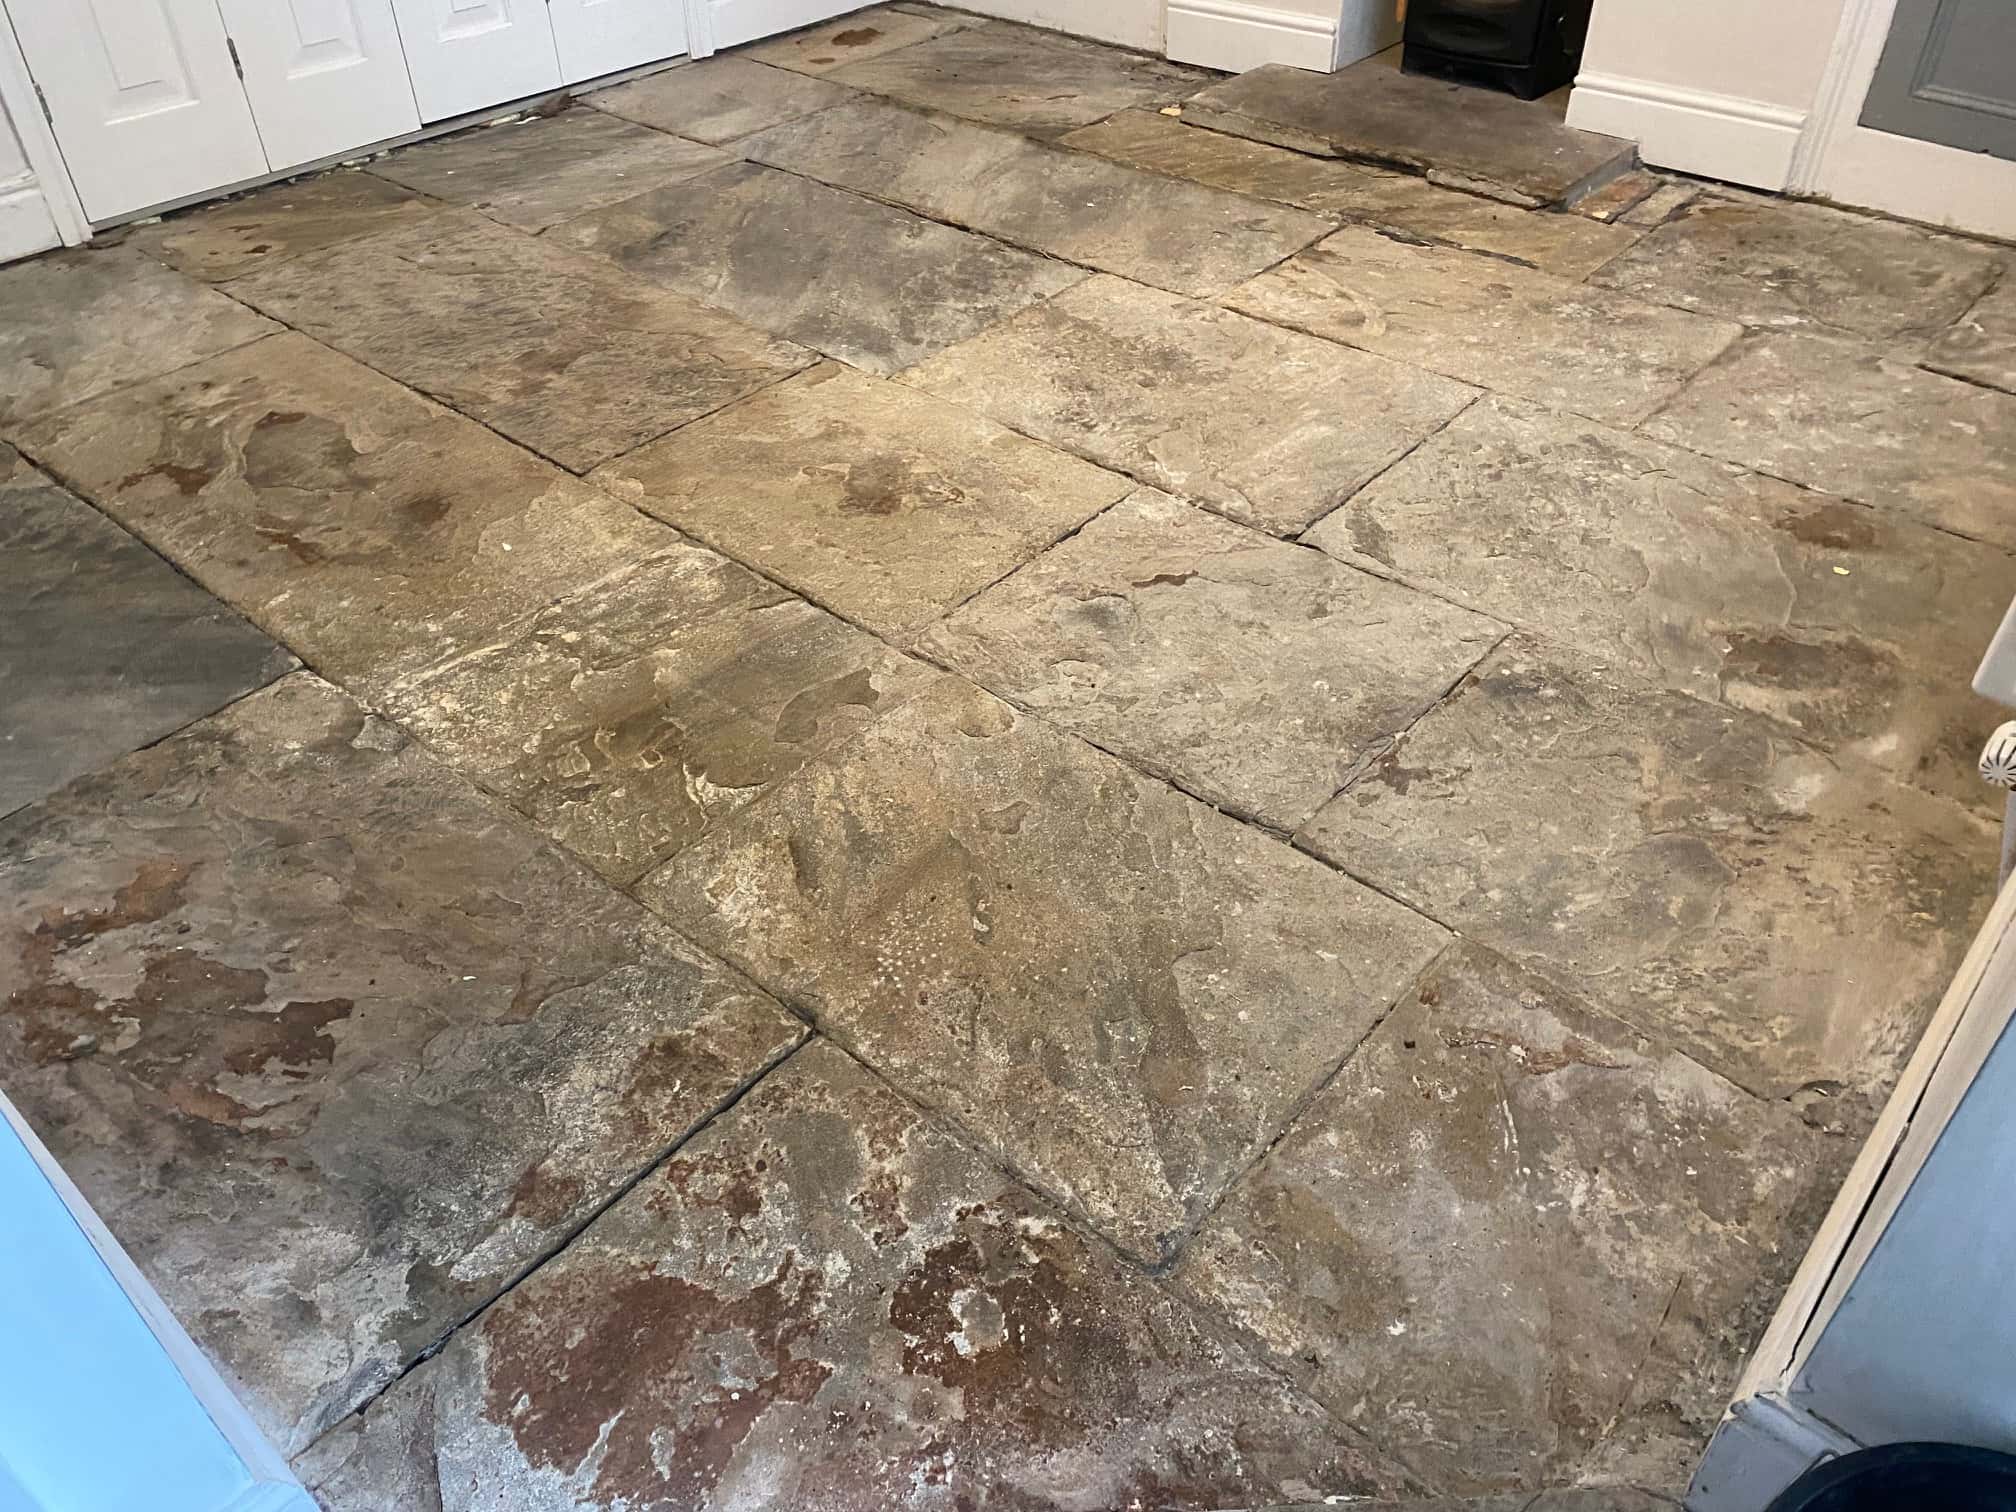
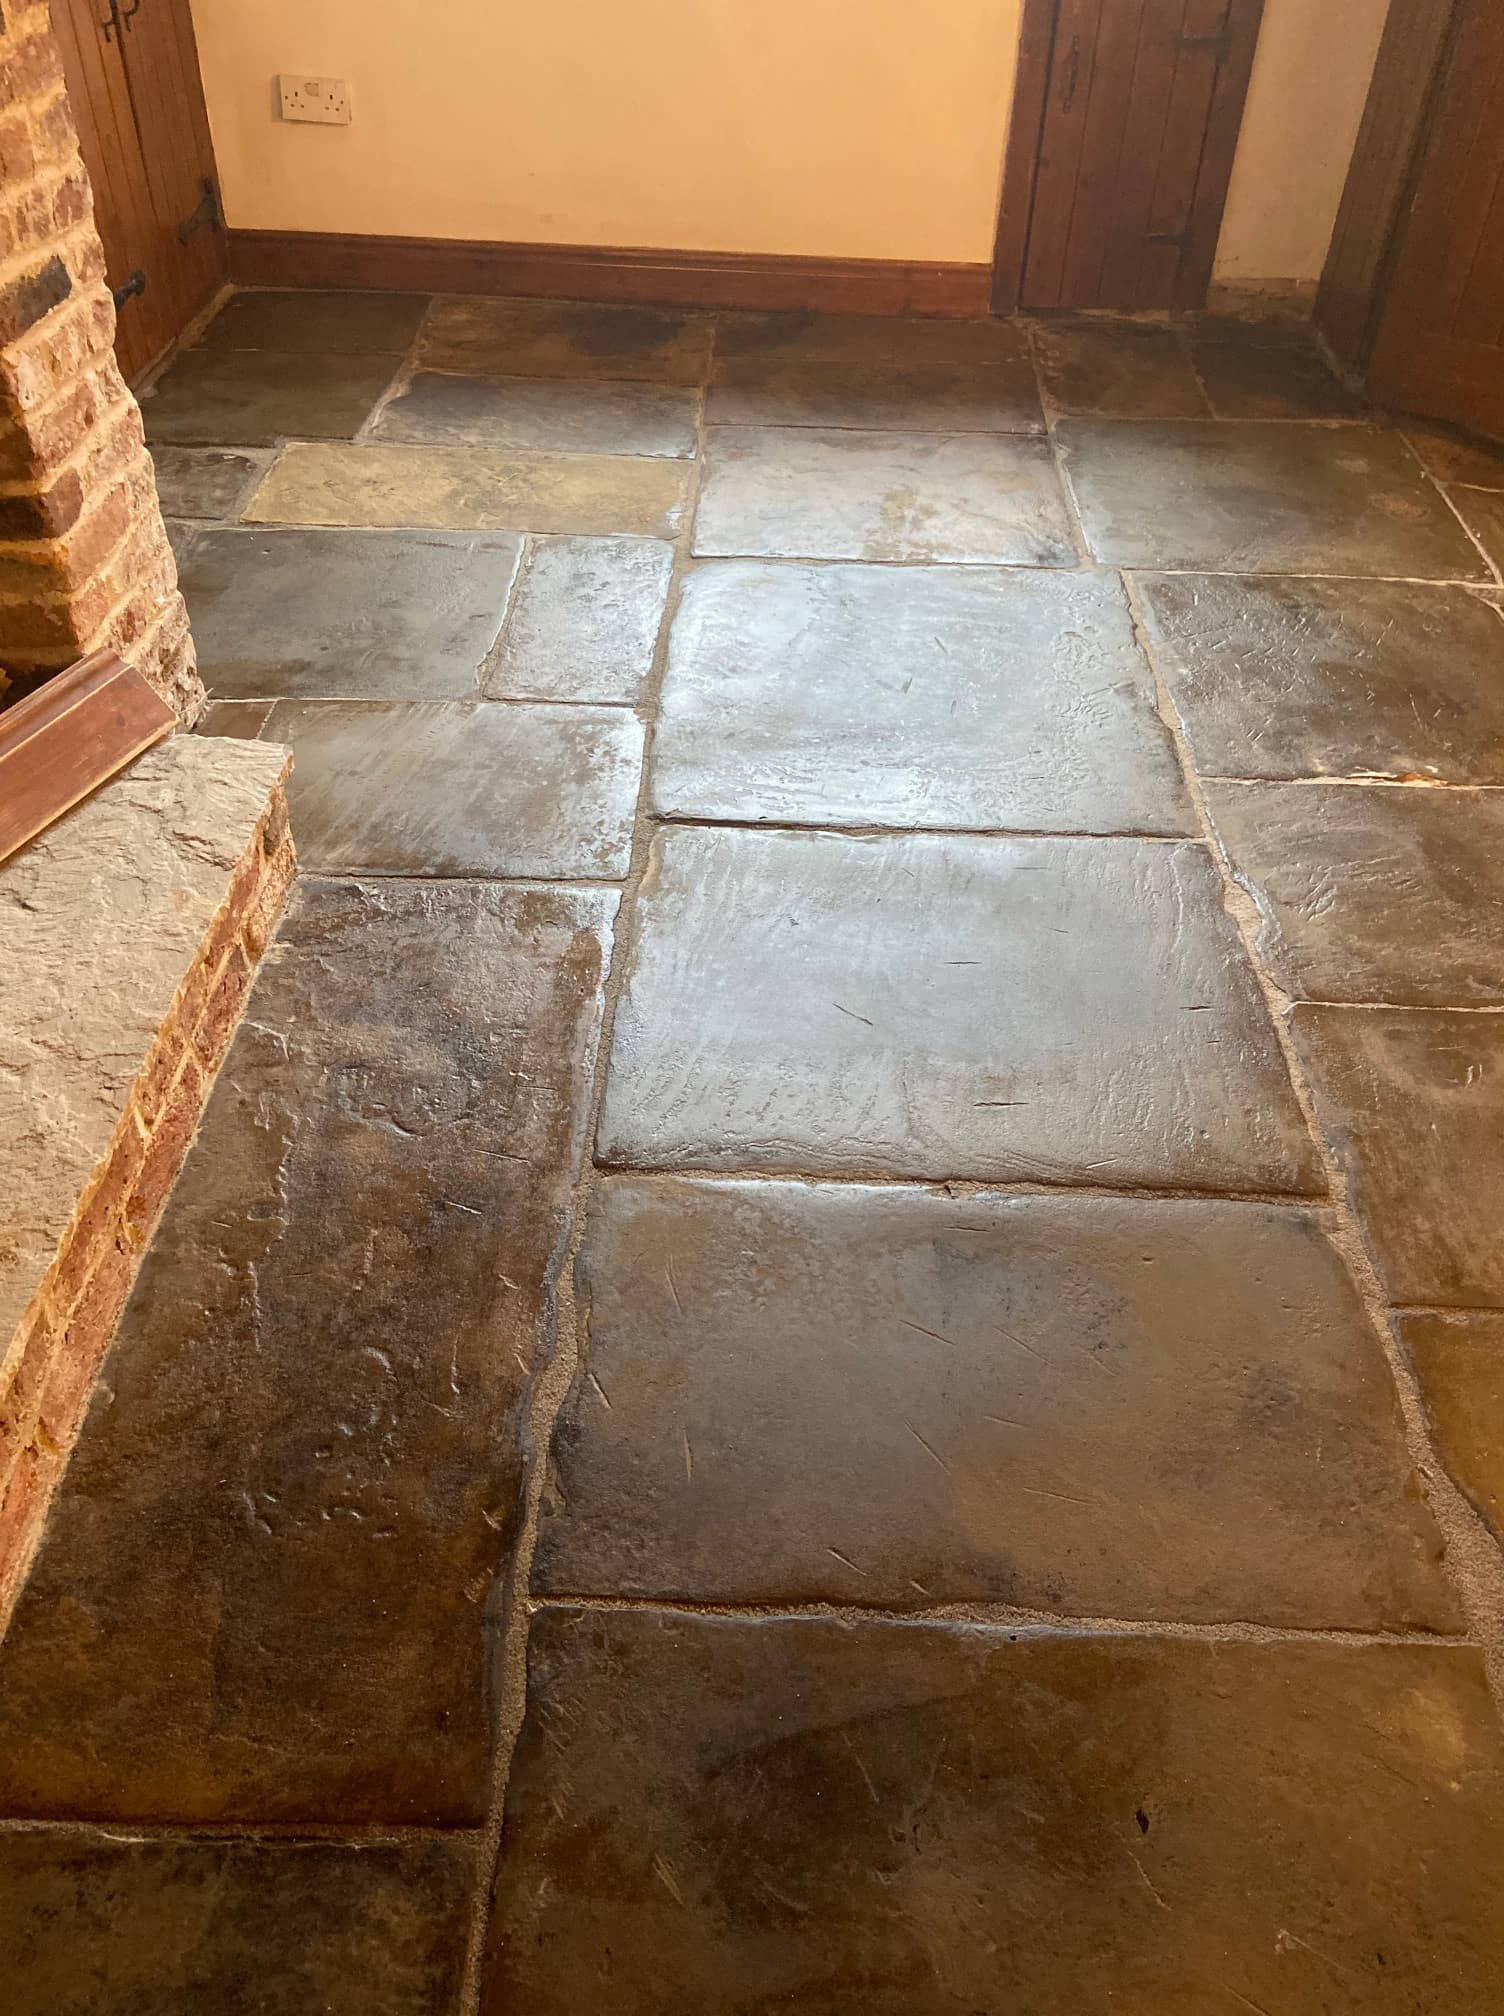
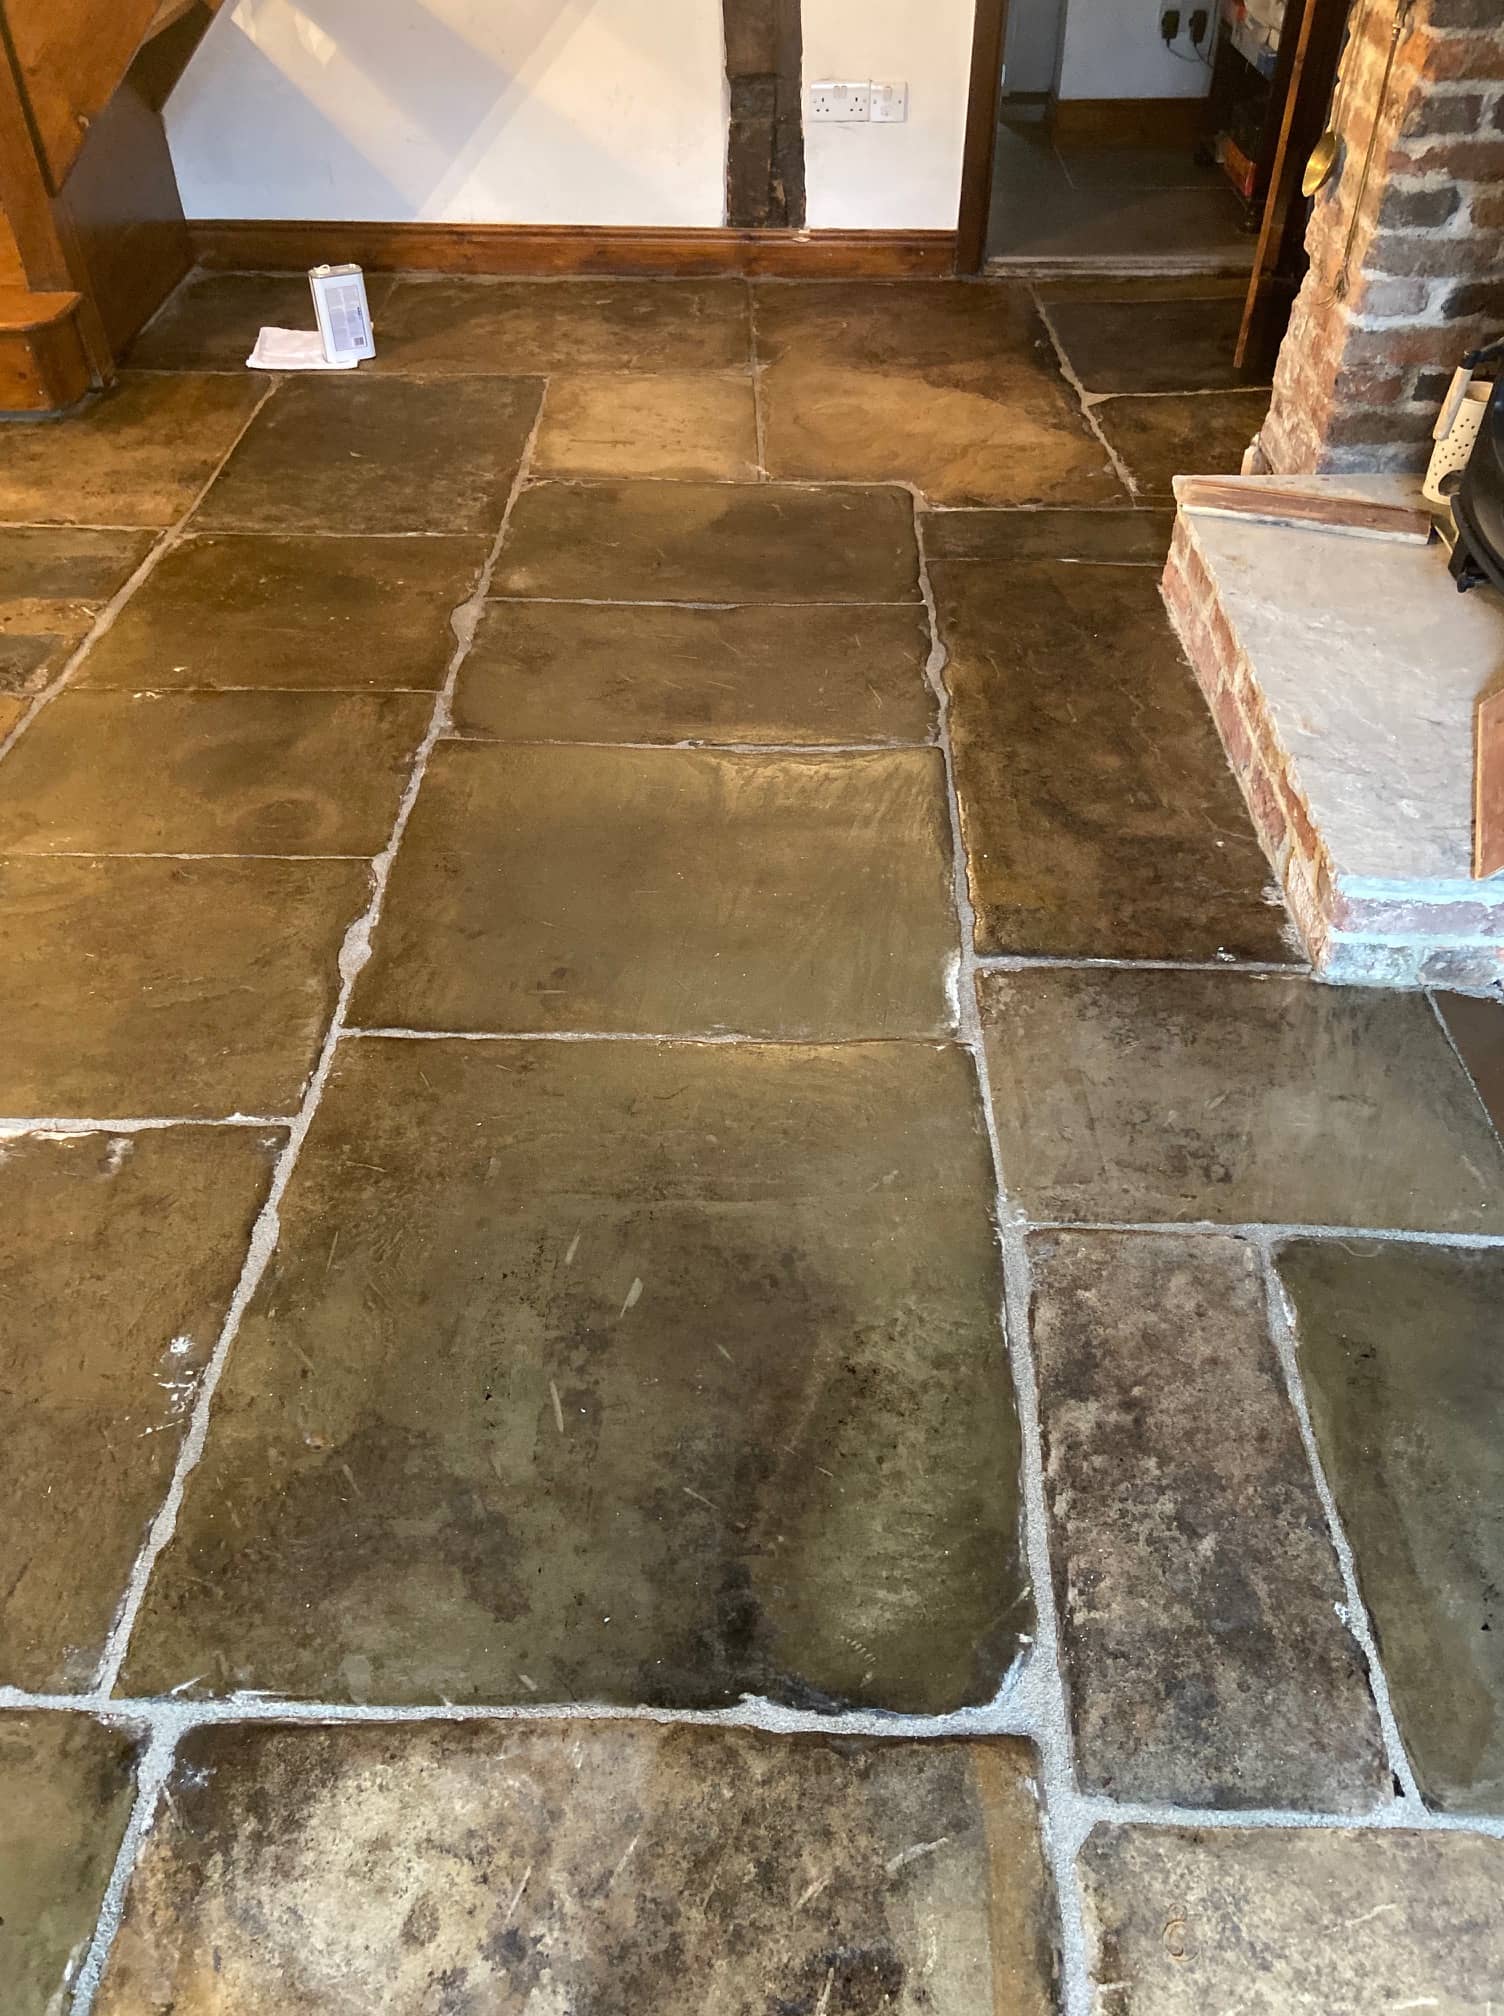
The pictures below are of a 12m2 Sandstone Flagged floor at a property in Prestonwere the surface of the stone was flaking off. The floor looked terrible and more importantly my customer mentioned that visitors had occasionally tripped on the uneven stone, and this was causing some concern.

Flagstone Floor Preston Before Renovation

The most likely cause of the surface flaking or shaling was due to water damage at some point in the stone’s history and probably well before the flagstones were laid. However here at Tile Doctor we have developed a solution for this problem called Milling. The process involves applying very abrasive floor pads to the stone in order cut back approximately 3 to 5mm of damaged stone from the top of the slab to reveal a fresh surface underneath. Essentially it will reface the stone and, in the process remove heavy lippage to leave a smoother beautiful surface that is easier to clean and maintain.

Another job which we agreed to do was to knock out the old pointing (what there was of it) and apply fresh. With the Sandstone flagstones smoothed, new pointing and stone sealed the floor was going to be transformed and unrecognisable once completed.

Milling a Flaking Sandstone Flagged Floor

Milling Sandstone flagstones involves the use of a set of thee coarse millings pads of different grades (50, 100 and 200 grit). They are applied to the stone in sequence beginning with the 50-grit pad and applied using a weighted heavy duty floor buffer. This generates a lot of dust, so water is used to lubricate and keep the dust down. During the process the water turns into a murky brown slurry which needs to be rinsed off and extracted using a wet vacuum as you go.

With the shaling removed it was then a question of polishing up the surface of the stone with the finer 100 and then 200-grit milling pads. Again, water is used to lubricate and capture the dust created during the process and then rinsed away and extracted with the wet vacuum.

Flagstone Floor Preston During Renovation

The process successfully managed to remove all the flaking material, flatten out the lippage and remove the unappealing surface.

When it comes to repointing old flagstone floors, I find a lot of builders and tilers I speak to usually recommend Limecrete or similar which is staple for old floors as its breathable, but I find it difficult to work with and it takes a long time to cure fully. Another problem is every time the floor is given a decent clean, some of the White Limecrete rinses out and into the stone.

Personally, I like to use a German product called VDW800, its fully breathable, has a reliable working time, its easy to apply and does a great job. I’ll put a link to a video about it in this post so you can see how to use it. It’s not a Tile Doctor product but I’m more than happy to endorse it.

Flagstone Floor Preston During Renovation

Sealing Flagstone Floor Tiles

The stone and fresh mortar was left to dry out for 48 hours to ensure it would be dry before completing the last stage of applying a sealer. Before starting with sealing, I gave the floor light clean to remove any loose mortar from the pointing.

One done I sealed the sandstone using several coats of Tile Doctor Colour Grow, which is an impregnating product that soaks into the pores of the stone and occupies that space preventing dirt from become ingrained. Colour Grow as its name suggests also improves the appearance of the stone by enhancing its natural colours. The sealer also leaves a matt finish, which is a perfect match for the rustic character of the old stone.

Flagstone Floor Preston After Renovation

For aftercare I recommend using a pH neutral tile cleaner such as Tile Doctor Neutral Tile Cleaner, many supermarket products are very strong and contain bleach, using something like that on a sealed floor will reduce the life of the sealer.

Flagstone Floor Preston After Renovation


Professional Transformation of a Flaking and Uneven Stone Floor in Lancashire

Flaking Sandstone Flagstone Floor Restored in Preston Read More »

Damaged Victorian Tiled Hallway Floor Restored Preston

Restoration of a Damaged Victorian Hallway Floor in Preston

Cleaning and Repairing a Victorian Tiled Hallway Floor

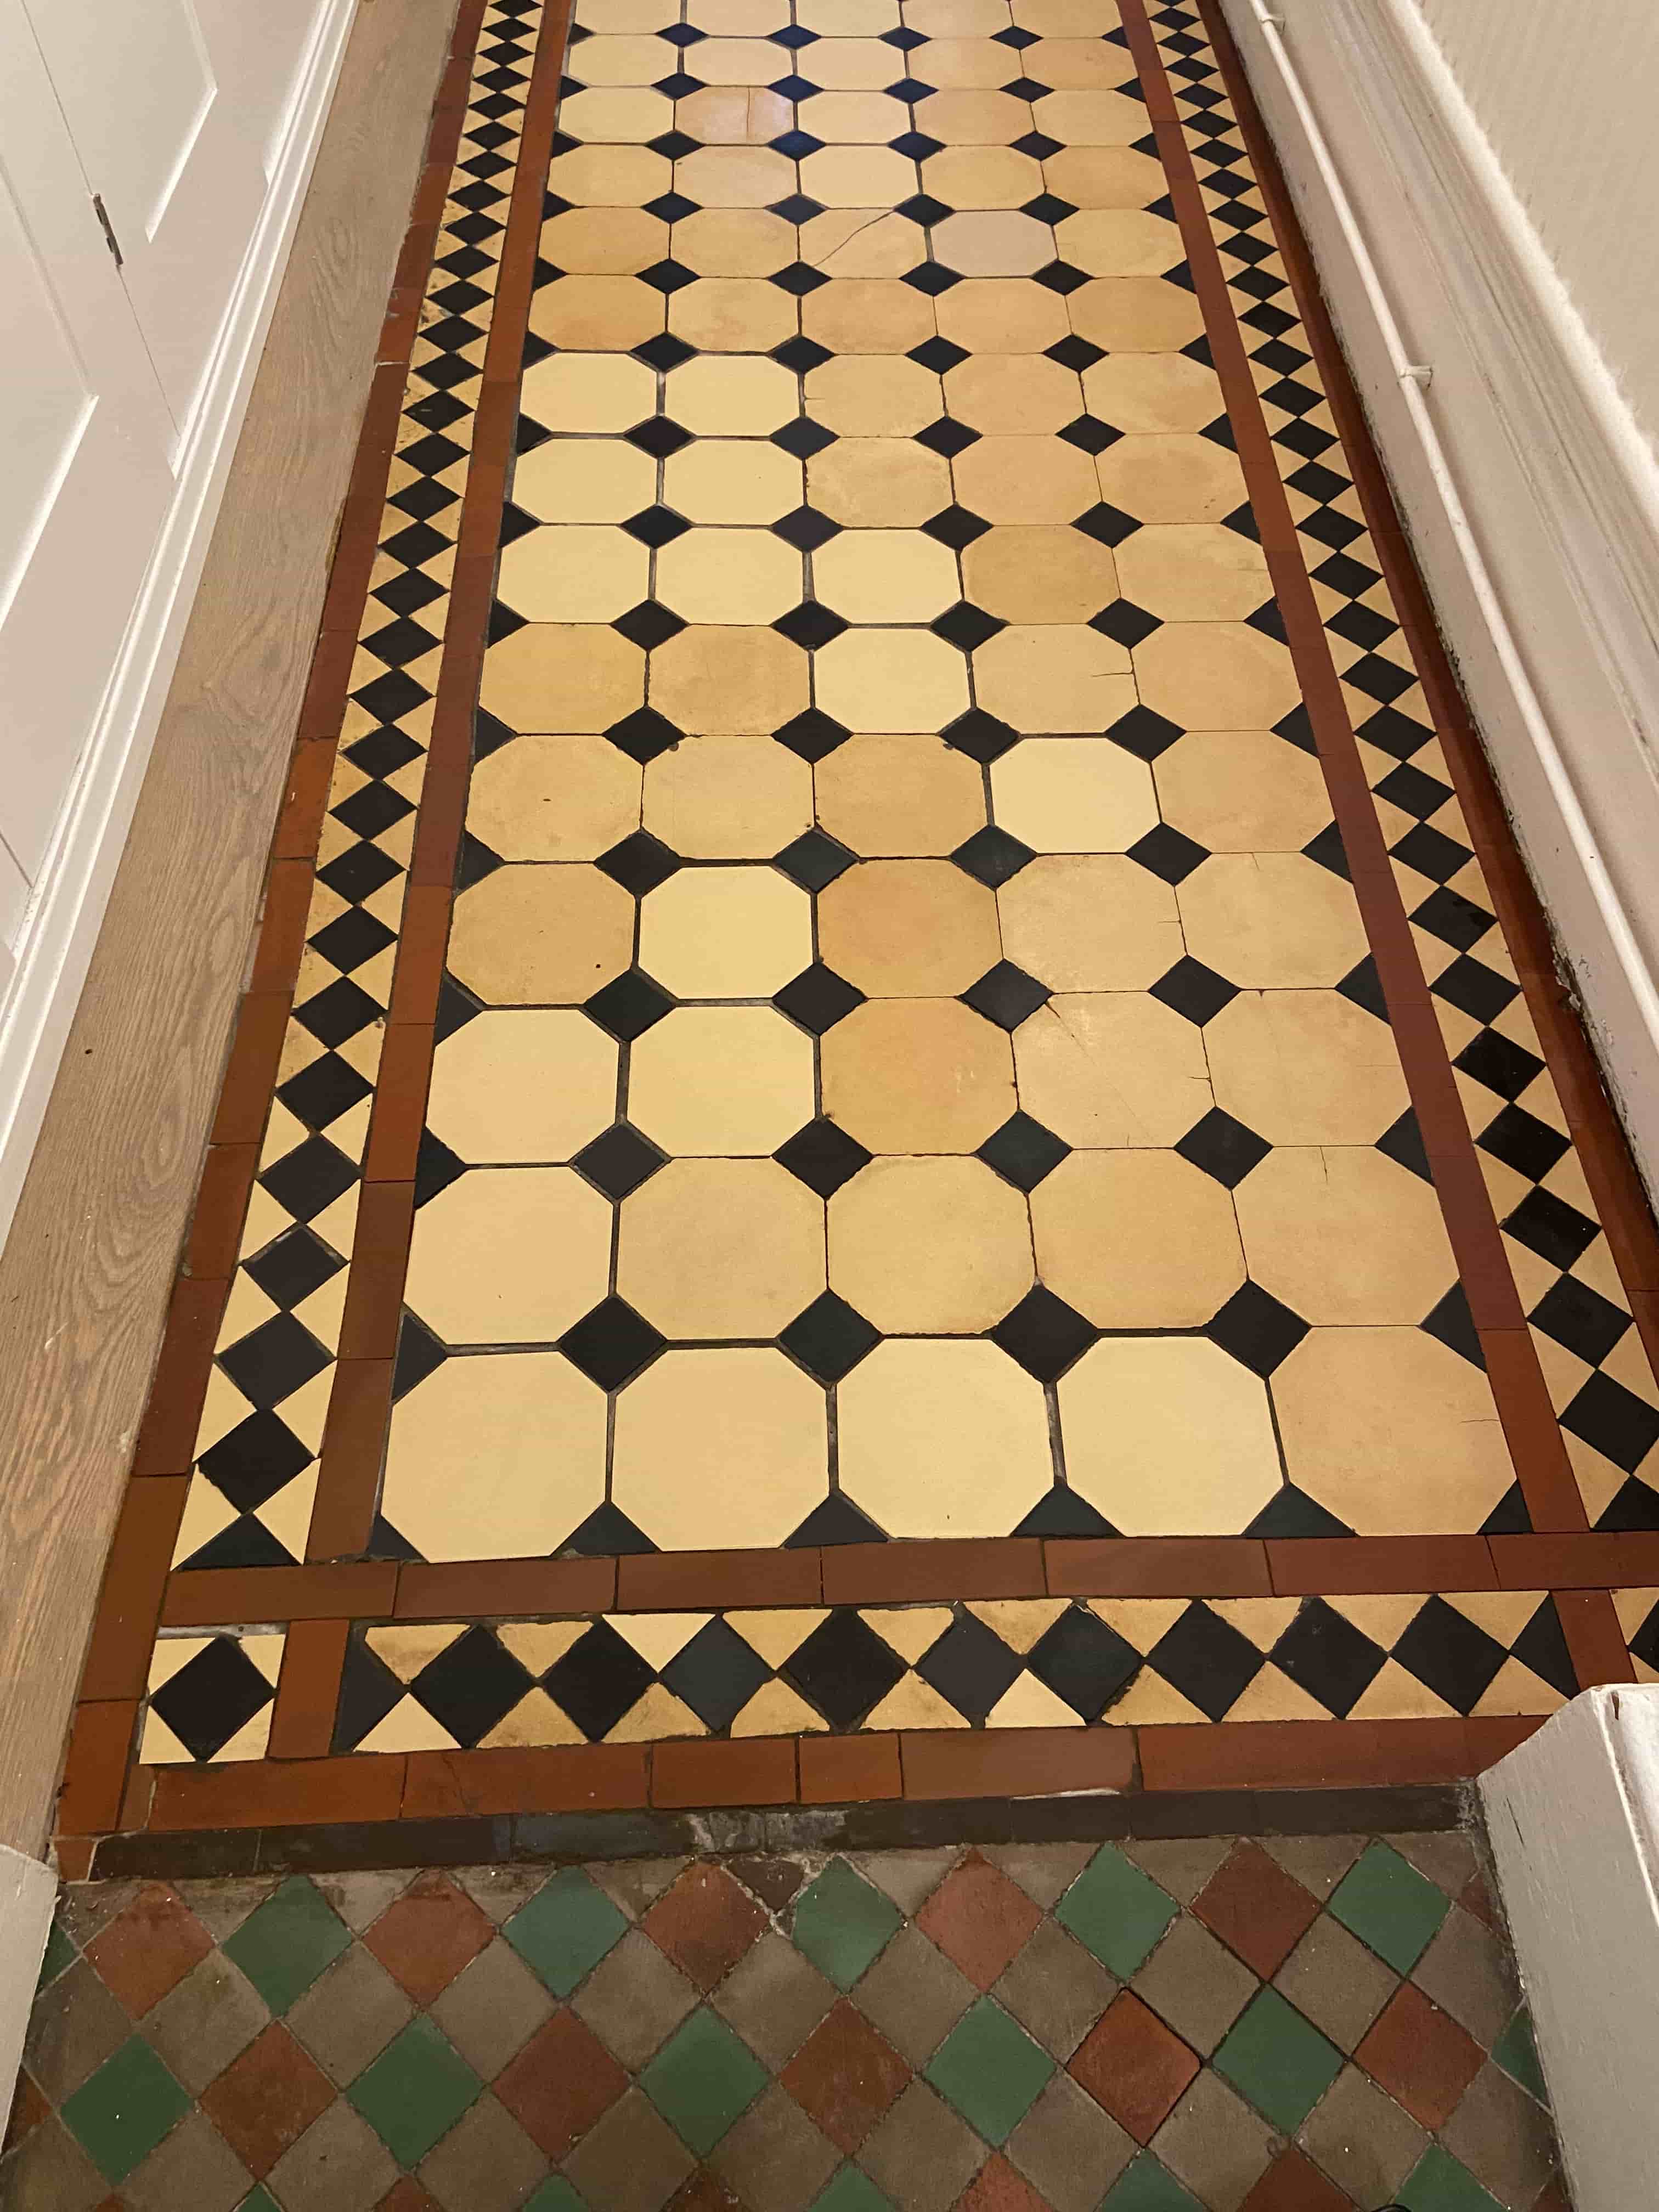
Detailed below is the restoration of a Victorian tiled hallway floor that we started back in June in Preston. Although we started in June there was so much damage to the subfloor and the tiles it took some time to complete, additionally, the client did not like the colour samples of the replacement tiles we had brought along and so decided to source their own which took some time.

Damaged Victorian Tiled Hallway Floor Before Restoration Preston

Deep Cleaning a Victorian Tiled Hallway

Three months later with replacement tiles now sourced we were given the go ahead to start the restoration. The first day’s focus was cleaning the original floor using very coarse 100-grit and 200-grit Diamond pads fitted to a rotary buffer machine and applied to the floor using a strong dilution of Tile Doctor Remove and Go to add extra cleaning power. Tile edges were given special attention using a flex machine fitted with small diamond grit pads.

Damaged Victorian Tiled Hallway Floor Before Restoration Preston

The floor was rinsed with water to remove the soil generated and this was followed up with an acid rinse using a 1:3 dilution of Tile Doctor Grout Clean Up. This last step in the cleaning process is especially recommend for old floors like this which don’t have a damp proof membrane and can suffer from efflorescence issues.

Replacing Damaged Victorian Tiles

The next stage focused on repairing the floor and started by carefully knocking out all the broken and chipped tiles. We had previously estimated over 30 tiles needed replacing and so the client had bought two boxes, meaning I had plenty of spares to work with.

Before tiling however, the subfloor had suffered over the years and needed attention first. To deal with this the damaged areas were raked out, cleaned up and then back filled with rapid setting self-levelling screed from Mapie adhesives. Once the sub-base was fixed then we put the new tiles back in, they were not an exact match, about 5mm too short and lighter in tone, but the colour was pretty close.

Tiling an old Victorian floor like this can be a bit like dominoes as you move one out of place 2 decent ones come loose and then they also need refixing. Some of the tiles had hair line cracks in them and once they were loose, they just cracked in half. As such the 20 spare tiles that I thought were spare came into good use and I actually ended up using all of them. I could have done with a few more so it was decided to reset the last four broken tiles and grout them in. Luckily for me the client was very understanding about the nature of tile restoration and had accepted that there would be some imperfections and they were not expecting a new floor.

The Tiles were fixed down using Ultralite Rapid Flex (another product from Mapie) and then grouted using the same adhesive (not a grout, as they did not have grout back in the day, just cement and screed).

The floor was left this to cure overnight, and we came back the next day to finish the clean using a 200-grit diamond pad fitted to a buffing machine and lubricated with water, then one last acid rinse to get the tiles as clean as possible and remove any lingering grout haze. This last clean helps to blend the new tiles in with the original.

Sealing a Victorian Tiled Hallway Floor

Before applying a protective sealer, the floor was left to dry for a couple of days, the tiles need to be thoroughly dry before sealing or you can end up with a patchy appearance.

For this floor with no damp proof membrane, it was important to use a fully breathable sealer that will allow moisture to rise through the tile and evaporate at the surface, so Tile Doctor Colour Grow was chosen. This is a good choice for old floors like this as its fully breathable, head wearing, and it contains a colour enhancer that improves the overall appearance of the tile.

Damaged Victorian Tiled Hallway Floor After Restoration Preston

Three coats of Tile Doctor Colour Grow which is a fully breathable, colour enhancing sealer hat works by soaking into the pores of the tile protecting it from within. It has a matt finish, and it works really well with all clay tiles and is ideal for these types of floors.

Damaged Victorian Tiled Hallway Floor After Restoration Preston

You can probably spot the lighter coloured tiles in the after photos on this page, however it’s a very subtle difference and I think they have blended in quite well with the original. Certainly, my client was very pleased with the newly restored floor, its completely transformed from when we first visited the client, and the floor has now gained character and history. For aftercare we recommend Tile Doctor Neutral Cleaner, its an effective pH neutral product that is compatible with the new sealer.


Professional Restoration of a Victorian Tiled Hallway in Lancashire

Restoration of a Damaged Victorian Hallway Floor in Preston Read More »

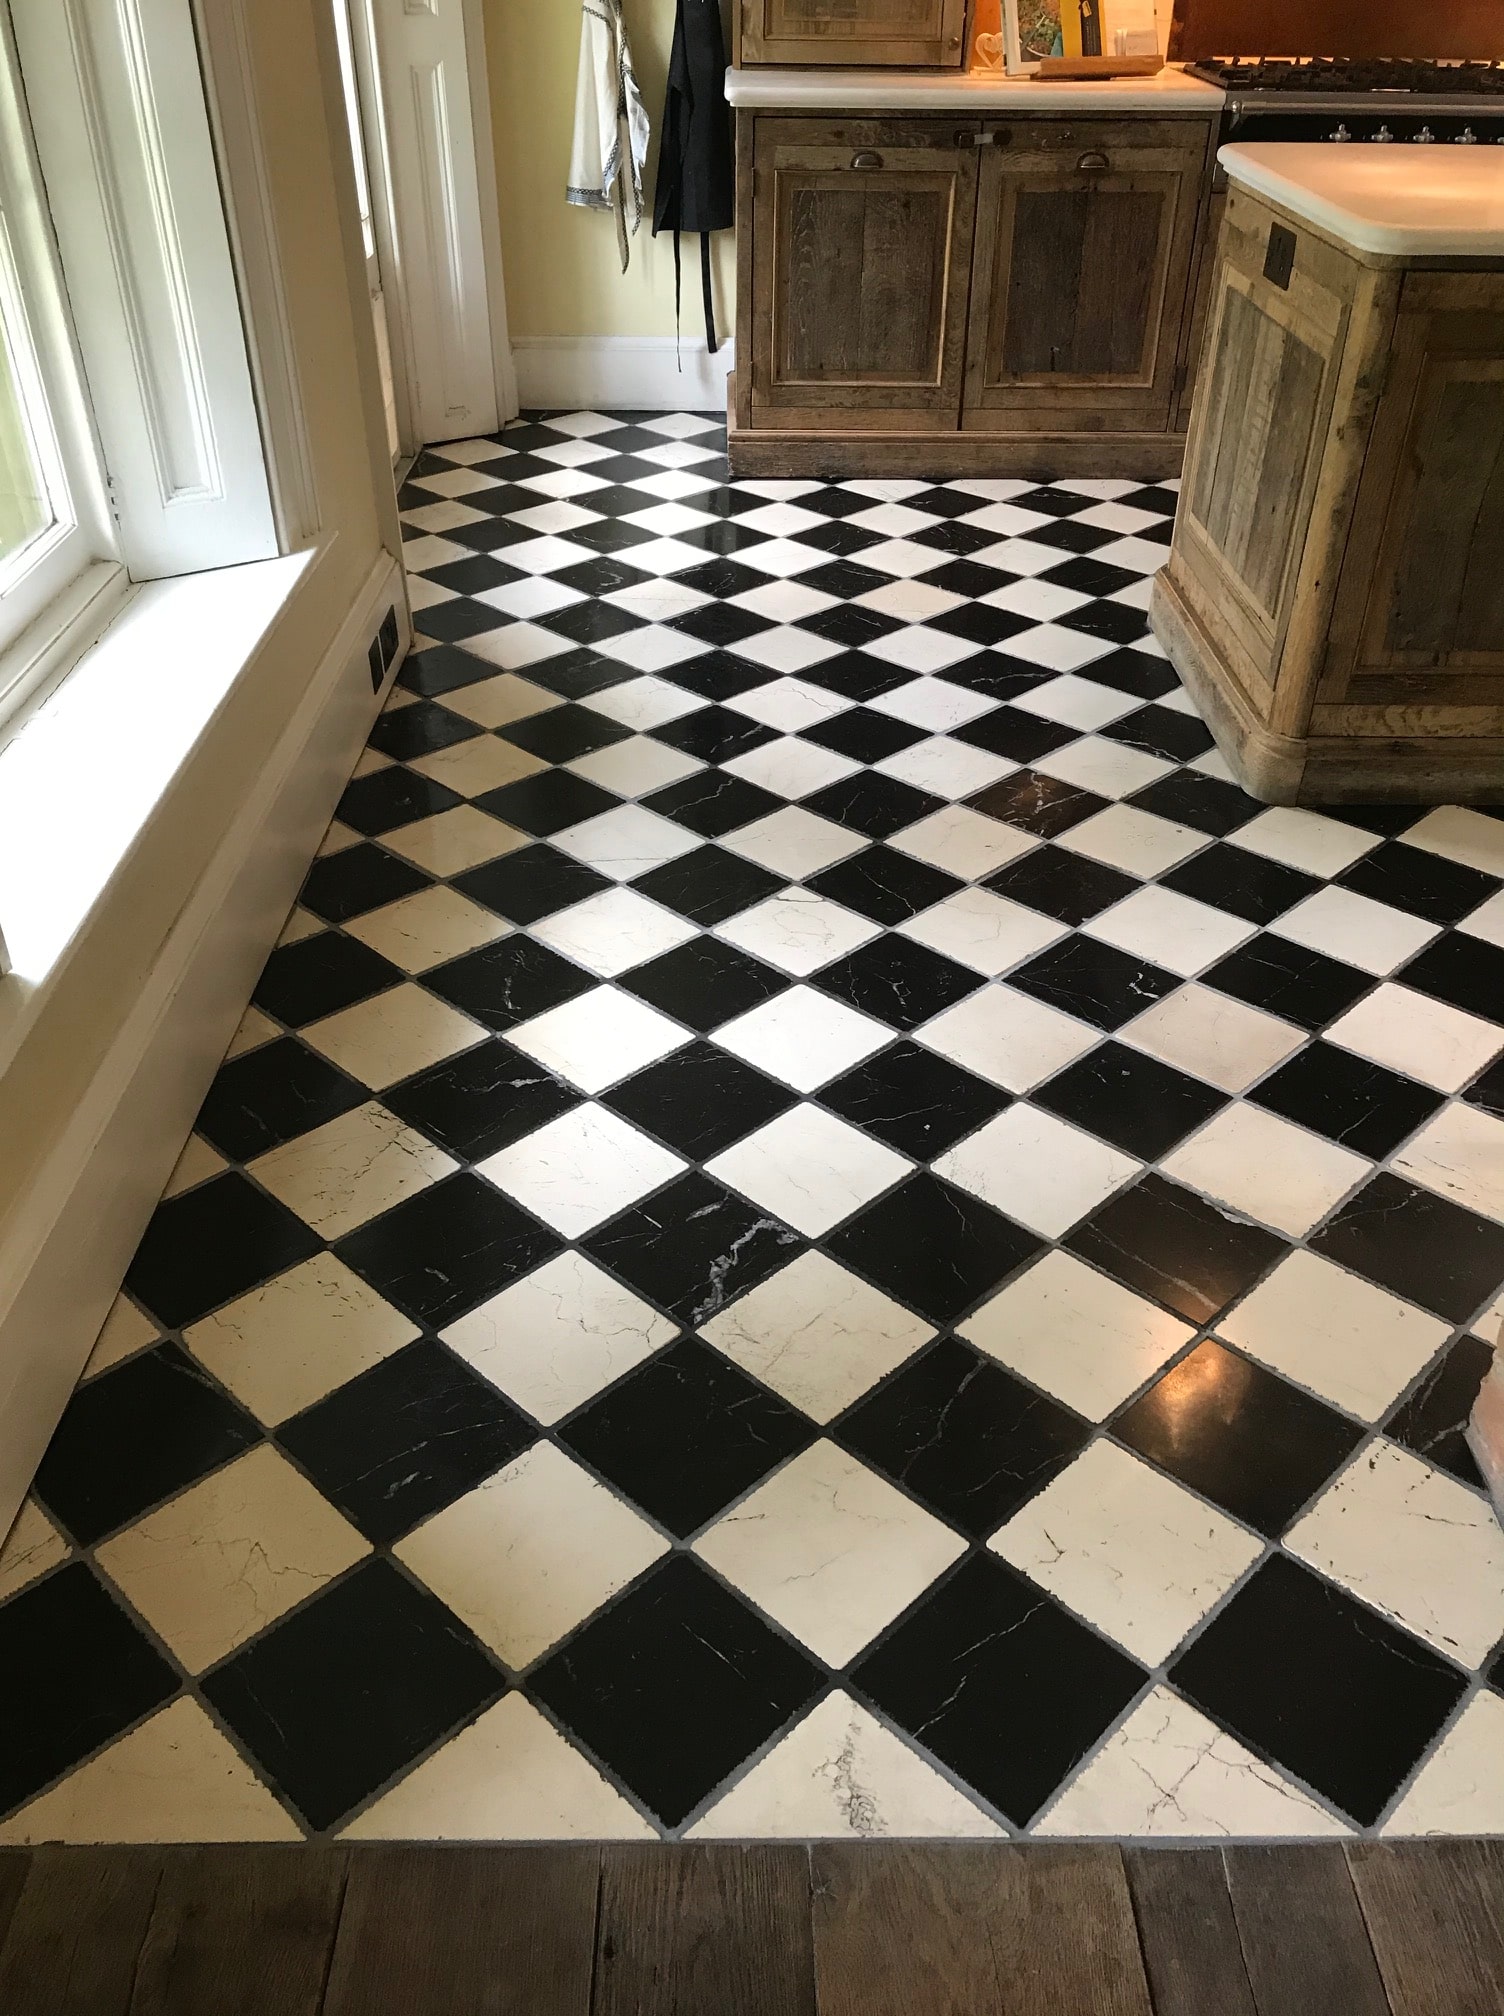
Marble Tiled Floor Before After Renovation Bamber Bridge

Classic Black and White Marble Floor Renovated in Bamber Bridge

The tiles shown in the photographs below are classic distressed Black and White Italian Marble installed in the kitchen of a property in Bamber Bridge which is South of Preston. Some of the tiles had an issue with loose grout which I suspect was due to the suspended wooden floor and a small amount of movement had resulted in the grout cracking.

Classic Black and White Marble Kitchen Floor Before Renovation Bamber Bridge

Ideally more support would be needed under the floor to prevent this, in the meantime however I recommended removing the grout and replacing with a flexible grout product that could cope with the movement. The tiles also needed a clean, polish and reseal so it made sense to address the issue with the grout as part of the work.

Cleaning and Re-grouting a Marble Tiled Kitchen Floor

Working as a two-man team we started by cleaning the floor with a set of diamond burnishing pads starting with a coarse 400-grit, followed by 800 and 1500 grit. Water was used to lubricate the process and the floor was rinsed with water between pads with the fine slurry generated by the process extracted using a wet vacuum. These pads remove ingrained dirt and then slowly refine the appearance of the Marble building up its polished appearance in the process.

The next step was to rake out all the grout which as discussed was compromised and needed replacing. We had to be very careful when removing the grout due to the electric heating mat under the floor, any damage to that would require ripping the floor up. With the old grout removed and the floor cleaned the floor was then grouted using Mapei Ultra-colour which is a flexible and fully waterproof grout more than suitable for this situation.

Between us we managed to pack a lot into day one which was tough, however with the hardest tasks out of the way day two should be a lot easier.

Classic Black and White Marble Kitchen Floor During Grouting Bamber Bridge

Sealing a Marble Tiled Kitchen Floor

Day two started with an initial clean making sure to remove any excess grout smeared on the surface that can affect the look of the tile if not removed. This was followed by the application of the last of the set of burnishing pads which is a 3,000-grit pad that really brings up the polish on the marble. You only need a small amount of water sprayed onto the floor when applying this last pad so by late morning the floor was dry and ready for sealing. The customer wanted a better sheen appearance than they previously had, fortunately we find the Diamond burnishing pads do this well, they also tighten up the pores of the stone as well which means less sealer is needed.

The floor was then sealed with Tile Doctor Colour Grow which is an impregnating sealer that improves colour and soaks into the stone occupying the pores and thereby preventing dirt from becoming ingrained. Once complete the floor looked great and the client was very happy.

Classic Black and White Marble Kitchen Floor After Cleaning Bamber Bridge Classic Black and White Marble Kitchen Floor After Renovation Bamber Bridge

Sealers and Polish do wear down with use over time so before leaving I discussed our annual maintenance plan option which will ensure the appearance of the Marble floor always looks good. The plan involves returning once a year to further polish the floor with a high-grade burnishing pad and to add more sealer if required. We also discussed the use of Tile Doctor Stone Soap for regular cleaning, it is a pH neutral cleaner which is ideal for stone floors like Marble which are acid sensitive.

Classic Black and White Marble Kitchen Floor After Grouting Renovation Bamber Bridge


Professional Restoration of a Marble Tiled Kitchen in Lancashire

Classic Black and White Marble Floor Renovated in Bamber Bridge Read More »
Flagstone Floor Before After Restoration Whalley

Renovating Flood Damaged Flagstone Floor in a Whalley Listed Building

This Flagstone floor was under water in 2015 due to a flood that affected the beautiful village of Whalley resulting in many residents being evacuated from their homes. Four years later and the floor had settled in places and large chunks of Limecrete pointing had become loose. As you can imagine the floor hadn’t been the same since.

It took a while before the customer could get back into the house and the insurance assessor said that because this was an original floor and the building was grade 2 listed the flagstone floor had to stay in place. There is no guarantee from the local council that the house and adjacent streets won’t get flooded again in the future, but this type of floor is probably the most hardwearing for this situation so is best left in place. Wood flooring, carpet, vinyl etc will not stand up to another flood and would have to be replaced every time.

Flagstone-Floor Before Restoration in Whalley Flagstone-Floor Before Restoration in Whalley

I was asked to come up with some solutions for renovating the flagstone floor and replacing the Limecrete pointing which was tricky as whatever replaced the Limecrete pointing needed to be fully breathable as did the sealer that went on the stone.

After some research we decided to use a German product called VDW 800 for the pointing instead of Limecrete. it’s designed to be fully breathable (permeable) and suitable for outside use such as patios and porches etc which made it ideal for a floor that may face flooding again. Its highly flexible, durable and comes in four colours. It can be cleaned via a pressure washer on a wide fan and it won’t loosen, so I was confident that if another flood hit the town all this floor would need was a clean down.

The client was very happy to hear this news and wanted us to go ahead as soon as possible and get the floor restored. With a restoration plan worked out we agreed a date for our return to complete the work.

Cleaning and Repointing a Flagstone Floor

On our return our first course of action was to clean the stone using a 100 and 200-grit milling pads which were run several times over each flagstone using water for lubrication. The resulting slurry was removed using a wet vacuum and the floor was then treated to an acid rinse using Tile Doctor Grout Clean-up. After a rinse with water and extraction with the wet vacuum the flagstones were given a final clean using a 400-grit diamond burnishing pad.

With the floor now clean we set about removing the old pointing using an 8lb pneumatic drill, whilst noisy it did make quick work of the task. After a another clean to remove the debris the floor was repointed using the VDW 800 product mentioned earlier. The floor was then left to dry overnight.

Flagstone-Floor During Restoration in Whalley Flagstone-Floor During Restoration in Whalley

Sealing a Flagstone Tiled Floor in Lancashire

I came back the next day to review the previous days work and ensure I was happy with the state of the floor before applying a sealer. This is important as otherwise you risk sealing in dirt which would affect the appearance. It’s tricky to tell when a floor it wet and on this occasion I felt the stone would benefit from another clean so I cleaned the floor one last time using a black buffing pad and water. The water was then removed as before with a wet vacuum.

Flagstone-Floor After Restoration in Whalley Flagstone-Floor After Restoration in Whalley

The floor was left to fully dry out for a further 24 hours and I called back one more time to review the floor and apply three coats of Tile Doctor Colour Grow which is a breathable sealer that also enhances the natural colours in the stone.

Once finished the floor looked great again and the clients were over the moon with the result. Fingers crossed there would be no further flooding in the future, however even if there was the new grout should stand up to it.


Professional Restoration of a Flood Damaged Flagstone Floor in Lancashire

Renovating Flood Damaged Flagstone Floor in a Whalley Listed Building Read More »

Mexican Terracotta Tiled kitchen Before and After Renovation Penwortham

Stripping Wax from Mexican Terracotta Kitchen Tiles in Penwortham

My client from Penwortham, on the outskirts of Preston on the south bank of the River Ribble contacted me about their Mexican Terracotta kitchen floor as you can see from the photographs below was in a bit of a state.

Mexican Terracotta Floor Penwortham Before Cleaning
On the pictures you will see numerous white marks which have happened due to the use of bleach-based supermarket cleaning products on the tiles. The bleach has upset the original wax polish and over time layer after layer of new polish has been applied to try and hide it, but they had also continued to use the wrong cleaner, so the problem simply became worse. The floor was otherwise in good condition with very little damage, although the grout had also discoloured and needed deep cleaning.

Mexican Terracotta Floor Penwortham Before Cleaning

Stripping Wax off a Mexican Terracotta Tiles

Luckily Tile Doctor have recently brought out a new product called Tile Doctor Wax Away which is specifically formulated to remove layers and layers of compacted wax polish. It was the first time we had used it on a situation this bad before to it was in for a good test. I’m please to say Wax Away didn’t disappoint and is designed to melts the formula that makes the wax stick together. So, with the aid of a stiff deck brush the product was scrubbed into the floor and then extracted off the floor with an industrial wet vacuum.

Mexican Terracotta Floor Penwortham During Cleaning
With the old layers of wax removed the white markings that were spoiling the look of the surface disappeared. Stubborn areas had to be retreated but once all the wax slurry was removed using the wet vacuum you could see the improvement in the floor.

The grout was then cleaned using a Tile Doctor Pro-Clean scrubbed into the grout line using a stiff brush, one done the soiled cleaning solution was rinsed off the floor with water and extracted using the wet vacuum. The only thing we couldn’t fix was the damage done to the grout by the bleaching agent which hydrates grout and turns it white. It often cracks the grout as well with long term usage as in this case. We did offer to apply a grout colourant over this once the sealer had fully dried, but this was an added cost the client didn’t want to bare which was understandable. This is a service we could return in the future to complete if the client wished.

Sealing Mexican Terracotta Kitchen Floor

Once cleaned, we fully rinsed with water to remove any chemicals and left the kitchen floor to dry out overnight. Returning the following morning to seal the floor. Before starting the sealing process however I wanted to be sure the floor was indeed dry, so I ran a few checked with a moisture meter in different spots. Once satisfied we moved on to the sealing process.

Terracotta tiles being made of clay are very porous and so seven coats of sealer were applied before it was fully sealed. We used Tile Doctor Seal and Go for this, it’s an excellent choice for Terracotta as it brings out the true hue and texture of the clay as well as adding a nice subtle shine. The new sealer will make the floor much easier to maintain than the old wax polish they had previously been using.

Mexican Terracotta Floor Penwortham After Cleaning
For regular cleaning of sealed floors, we recommend using Tile Doctor Ph Neutral Tile Cleaner. Most supermarket cleaning products are acidic which will prematurely degrade the sealer over time.

As you can see from the after photos the floor was left looking much cleaner and brighter and the horrible white marks were no where to be seen. The client was very happy with the final result.

Mexican Terracotta Floor Penwortham After Cleaning
 

Professional Clean and Seal of a Mexican Terracotta Tiled Floor in Lancashire

Stripping Wax from Mexican Terracotta Kitchen Tiles in Penwortham Read More »

Carpet Covered Mexican Terracotta Floor Restored in Elswick

Carpet Covered Mexican Terracotta Floor Restored in Elswick

Mexican Terracotta is quite a difficult tile to deal with, mainly due to the fact it is very porous clay and partly fired, unlike a Spanish or French equivalent which is fully fired and a lot less porous as a result. Although difficult to maintain they are full of character and colour so it’s understandable why they are so popular.

Mexican Terracotta Before Cleaning Elswick
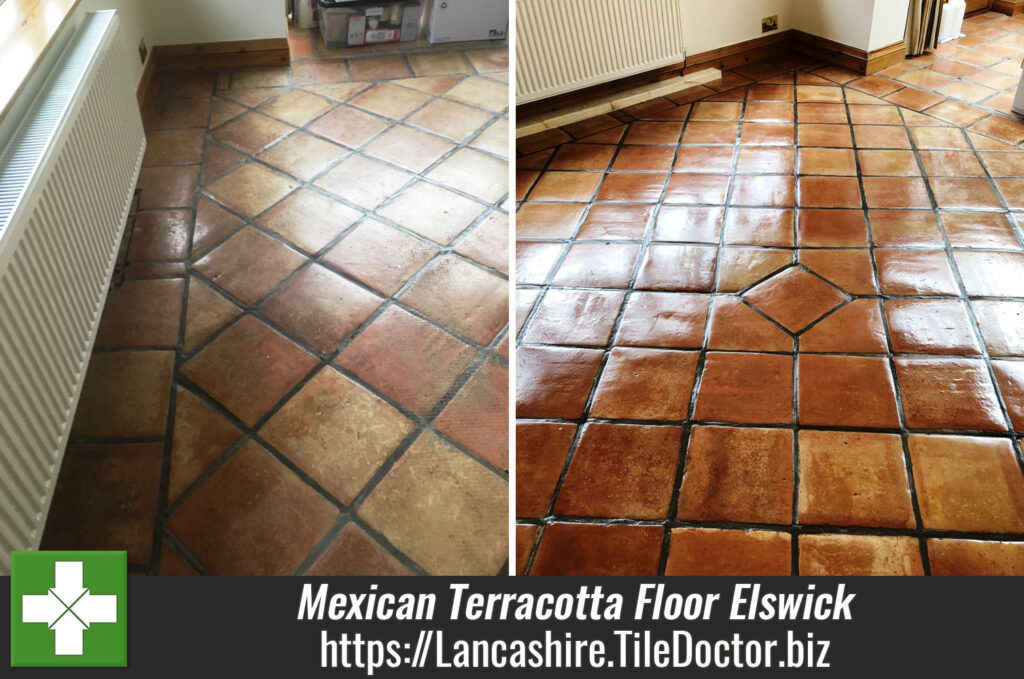
This particular Mexican Terracotta floor was installed in the kitchen and garden room of a house in Elswick near Preston around twenty years prior. The house had recently changed hands and the new owner wanted the floor in the garden room renovating, it had been covered with a carpet in the past and had now lost all its colour due to ingrained dirt.

Mexican Terracotta Before Cleaning Elswick Mexican Terracotta Before Cleaning Elswick

Cleaning Mexican Terracotta Tiles

You can see from some of the photographs that the tiles were quite grubby, so I knew we would have to give this floor a really deep clean to get the dirt out. I felt the best way forward would be to apply Tile Doctor Oxy Gel to the Terracotta and leave it to soak in. This product is a very strong gel version of Tile Doctor Pro-Clean, our popular tile and grout cleaner and needs a lot of dwell time to break down fully what was left of the sealer, carpet adhesive and extract the dirt from the pores of the clay.

The product was then worked into the tile and grout using a black scrubbing pad fitted to a rotary floor buffer running at a slow speed. This action worked as predicted and the now soiled cleaning solution was extracted from the floor using a wet vacuum. A lot of rinsing with water was required after this to remove all the dirt and traces of product from the tiles. I wanted to ensure all traces of the alkaline cleaning solution were rinsed from the pores of the clay, if we left any of this in the clay it could cause issues with the new sealer.

Sealing Mexican Terracotta Tiles

The floor was left to fully dry out which can take some time with Terracotta so after returning to seal the floor damp meter readings were taken first so we could be sure it had dried completely. This is essential because excess moisture can cloud the sealer and damage its performance.

Our choice of sealer was Tile Doctor Seal and Go, which provides excellent surface protection along with an aesthetically pleasing deep sheen finish that the customer wanted. The sealer is also water based so you don’t get that solvent smell as it dries.

Mexican Terracotta Before Cleaning Elswick
As you can see from the photographs, the result was fantastic, and it just goes to show even a twenty-year-old Terracotta floor can be rejuvenated and make it look like almost new.

Excellent results on terracotta tiled floor that had had carpet laid on top so was covered with glue and pretty dirty! Wouldn’t hesitate to use them again.
Caroline M, Nr Preston

Mexican Terracotta Before Cleaning Elswick
 

Professional Mexican Terracotta Tile Renovation in Lancashire

Carpet Covered Mexican Terracotta Floor Restored in Elswick Read More »

Cleaning a Sandstone Fireplace and Victorian Floor Tiles Preston

Cleaning a Sandstone Fireplace and Victorian Floor Tiles Preston

We often get asked to do a combination of jobs at Tile Doctor so we have to be prepared for the unexpected, like getting asked to clean an old Sandstone fireplace whilst your cleaning a Victorian tiled floor at a house in Preston. We normally charge extra for these types of jobs but it depends how much cleaning is required.

Red and Black Victorian Tiles Preston Before Cleaning
This Fireplace had been in use for a number of years and due to its grainy texture was hard to keep clean, dirt and soot had built up on its surface and there was no sealer visible, either that or it had worn off with the heat.

Sandstone Fireplace Preston Before Cleaning

Cleaning and Sealing a Sandstone Fireplace

To clean the uprights and Hearth I applied Tile Doctor Oxy-Gel which being in Gel form and not a liquid, stays in place increasing dwell times and doesn’t drip where it shouldn’t. In this case I let it soak into the stone for about forty minutes before scrubbing it in with a stiff hand brush and steam. Some marks were still visible after this process so we opted for using handheld Diamond blocks in 50.100.200 and then 400 grit to grind off the staining and restore the surface finish. Using these small handheld blocks takes off some of the heavier texture as well as cleaning the stone at the same time, but is really useful to use where chemicals alone struggle to get the results required. Once fully clean the fireplace was rinsed with water a couple of times and the slurry removed using a wet vacuum. After speed drying the stone with a heat gun it was ready for a couple of coats of Tile Doctor Colour Grow, even we were impressed with the results.

Sandstone Fireplace Preston After Cleaning

Cleaning and Sealing a Victorian Tiled Floor

The Red and Black Victorian Tiles were cleaned with a strong dilution of Tile Doctor Pro-Clean which is very similar to Oxy-Gel only in a liquid form. The product was left to soak into the tiles for about ten minutes before being scrubbed in with a black buffing pad attached to a slow speed buffing machine. I used the wet vacuum again to soak up the residue and stubborn stains were retreated until I was satisfied.

Old Victorian floors rarely have a damp proof membrane installed and so it’s not uncommon for damp to rise-up through the ground and tile resulting in white salt deposits being left on the surface. To prevent this process, which is commonly referred to as Efflorescence, Tile Doctor Acid Gel was applied. The solution is scrubbed into the tiles and then rinsed off with clean water and removed with a wet vacuum ready for sealing.

Victorian Tiles can take a while to dry and in this case I left it two days before returning to apply a breathable sealer to protect the tiles from ingrained dirt and staining. In this case a couple of coats of Tile Doctor Colour Grow were applied. If you recall this was the same sealer we used on the fireplace as the customer wished to bring out the colour and have a Matt finish.

Red and Black Victorian Tiles Preston After Cleaning
 

Professional Restoration of a Sandstone Fireplace and Victorian Floor in Lancashire

Cleaning a Sandstone Fireplace and Victorian Floor Tiles Preston Read More »

Flagstone Floor Before and After Milling Haslingden

Milling and Sealing Uneven Flagstone Flooring in Haslingden

Flagstones are a durable Sandstone based material that give a solid feel to any floor, however while large and impressive to look at they can be very rough and un-even. This isn’t so much of a problem when Flagstones are used externally for patios and pathways, but rough surfaces trap dirt and when these tiles are used internally, they are much easier to maintain if the stone is smooth and sealed.

This customer, who lives in the Lancashire town of Haslingden, had this problem with their Flagstone tiled floor and like most things related to tile, stone and grout we have a solution in the form of a process known as milling. This basically involves grinding down the surface of the tile using coarse diamond encrusted pads to make it smooth.

Flagstone Floor Before Milling Haslingdon Flagstone Floor Before Milling Haslingdon

The customer booked me in to get the job done, having seen some previous milling work of ours on our website and liking what we had achieved for other people with similar floors.

Flagstone Floor Before Milling Haslingdon

Milling an Uneven Flagstone Tiled Floor

Milling the stone involves the use of a set of thee millings pads of different grades (50, 100 and 200 grit) which are applied in sequence. You start with the coarse and abrasive 50 grit milling pad and follow this by smoothing this surface with the finer 100 and 200 diamond grit milling pads. Water is used to lubricate and capture the dust which is created during the process resulting in a slurry which needs to be rinsed away and extracted between each pad. The process requires the use of a solid weighted rotary machine and a fair bit of muscle power to guide it.

We successfully managed to mill the Flagstone tiles virtually flat in places and the process removed the unappealing stained and dirty layer of stone that was ruining the appearance of the floor. Interestingly we usually find that by grinding away the old and dirty layer of stone the true colour of the tiles that had been hidden under many years’ worth of muck is revealed. Unfortunately, in this case, due to the darkness of this stone it was difficult to see a great deal of colour change.

Sealing Flagstone Floor Tiles

Finally, the floor needed to be sealed to protect against future instances of staining and ingrained dirt. To do this I sealed the tiles using several coats of Tile Doctor Colour Grow, which is an impregnating, colour enhancing sealer that soaks into the pores of the stone and occupies that space preventing dirt from become ingrained. The sealer also leaves a matte, natural looking finish, which is a perfect match for the rustic character of the Flagstone tiles.

Flagstone Floor After Milling Haslingdon Flagstone Floor After Milling Haslingdon

Now that the floor has been levelled and sealed, the surface is smooth and protected. This means the customer will not be ruining any more mops when the cleaning bucket comes out!

Flagstone Floor After Milling Haslingdon
 

Professional Milling and Sealing of Stained and Uneven Floor in Lancashire

Milling and Sealing Uneven Flagstone Flooring in Haslingden Read More »

Mexican Terracotta Floor Restoration Ormskirk

Cracked Mexican Terracotta Kitchen Tiles Restored in Ormskirk

Cracks can appear in tiles for several different reasons, but in all cases, they spoil the overall appearance of the floor. I was contacted just before Christmas by a customer in the market town of Ormskirk with a significant problem with cracking in their warm and rustic Mexican Terracotta tiles, particularly in and around doorways. The area was quite large at 85 square yards and covered multiple rooms. In general, the tiles were also in need with a deep clean and fresh seal.

Mexican Terracotta Kitchen Floor Ormskirk Before Cleaning
After inspecting the tiles first-hand, I determined that the cracking was most likely due to the addition of an extension: the concrete floors were laid at separate intervals, causing some expansion and contraction issues. The effects are similar to shifting Tectonic plates in the Earth’s crust, if not so drastic (the tiles just tend to crack, rather than causing an earthquake!).

After agreeing on a quote for the work, I set about putting the situation right.

Repairing Cracked Mexican Terracotta Tiles

The more laborious and costly answer to the problem of damaged tiles would be to replace them with new ones, but we have found that implementing an expansion joint in the areas where the concrete floors touch each other is more effective.

Mexican Terracotta Kitchen Floor Ormskirk Showing Cracked Grout
We have done this before many times, using flexible adhesive and grout to fill the cracks and counteract any further movement between the different concrete floors. This repair work was carried or over two days, in order to allow time for the adhesive and then grout to set.

Cleaning Mexican Terracotta Tiles

By the third day the tile repairs were complete, so we started cleaning the whole tiled area. We usually carry out repairs before cleaning to improve the chance of the repair blending in with the existing tile.

You can see from some of the photographs above that the tiles had started to get quite grubby and were proving difficult to keep clean. To clean and remove the old sealer we applied a diluted solution of Tile Doctor Remove and Go to the tiles allowing it soak into the pores for ten minutes before scrubbing it in with a rotary machine fitted with a black pad. The floor was rinsed with water and the resultant slurry was extracted using a wet vacuum.

The next step was to give the grout lines a thorough scrub with a strong solution of Tile Doctor Pro-Clean, which is a reliable alkaline cleaner that works well on grout and tile. The dirty cleaning solution was then extracted with a wet vacuum and the whole floor rinsed with more water to remove any trace of cleaning product. The wet vacuum was then used again to get the floor as dry as possible before leaving for the day.

Mexican Terracotta Kitchen Floor Ormskirk After Cleaning

Sealing Mexican Terracotta Tiles

On the fourth day, we returned to seal the floor, but not before checking first with a damp meter that it had dried completely. This is essential because excess moisture can cloud the sealer and damage its performance.

Mexican Terracotta Kitchen Floor Ormskirk After Repair and Cleaning
Our choice of sealer was Tile Doctor Seal and Go, which provides excellent surface protection along with an aesthetically pleasing deep sheen finish.

Mexican Terracotta Kitchen Floor Ormskirk After and Sealing
As you can see from the photographs above, the result was fantastic. The customer was amazed by the improvement and very pleased that the difficult cracking problem had been resolved. Another satisfied customer!

Mexican Terracotta Kitchen Floor Ormskirk After and Sealing
 

Professional Mexican Terracotta Tile Renovation in Lancashire

Cracked Mexican Terracotta Kitchen Tiles Restored in Ormskirk Read More »
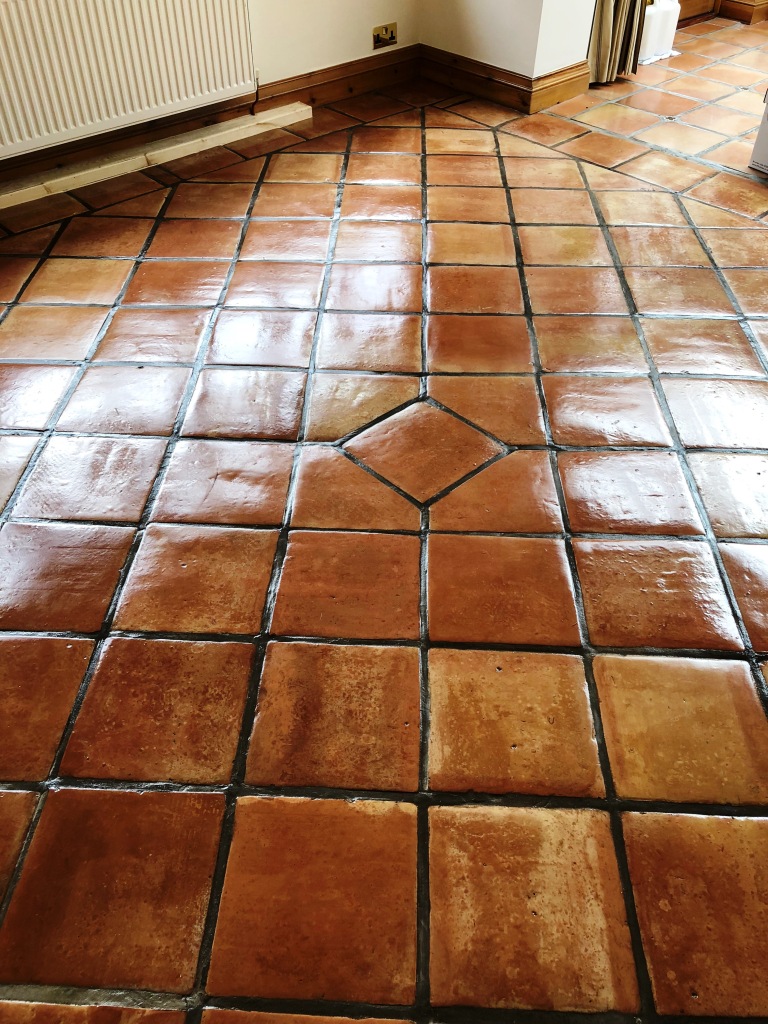
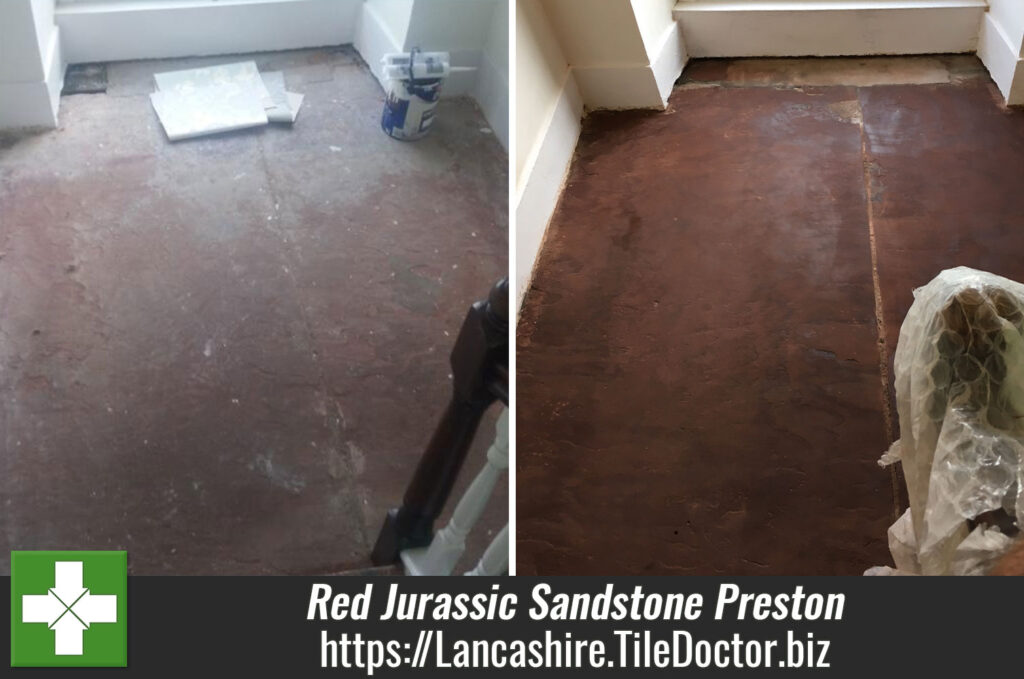
Restoring Red Jurassic Sandstone Steps and Landing in Preston

Restoring Red Jurassic Sandstone Steps and Landing in Preston

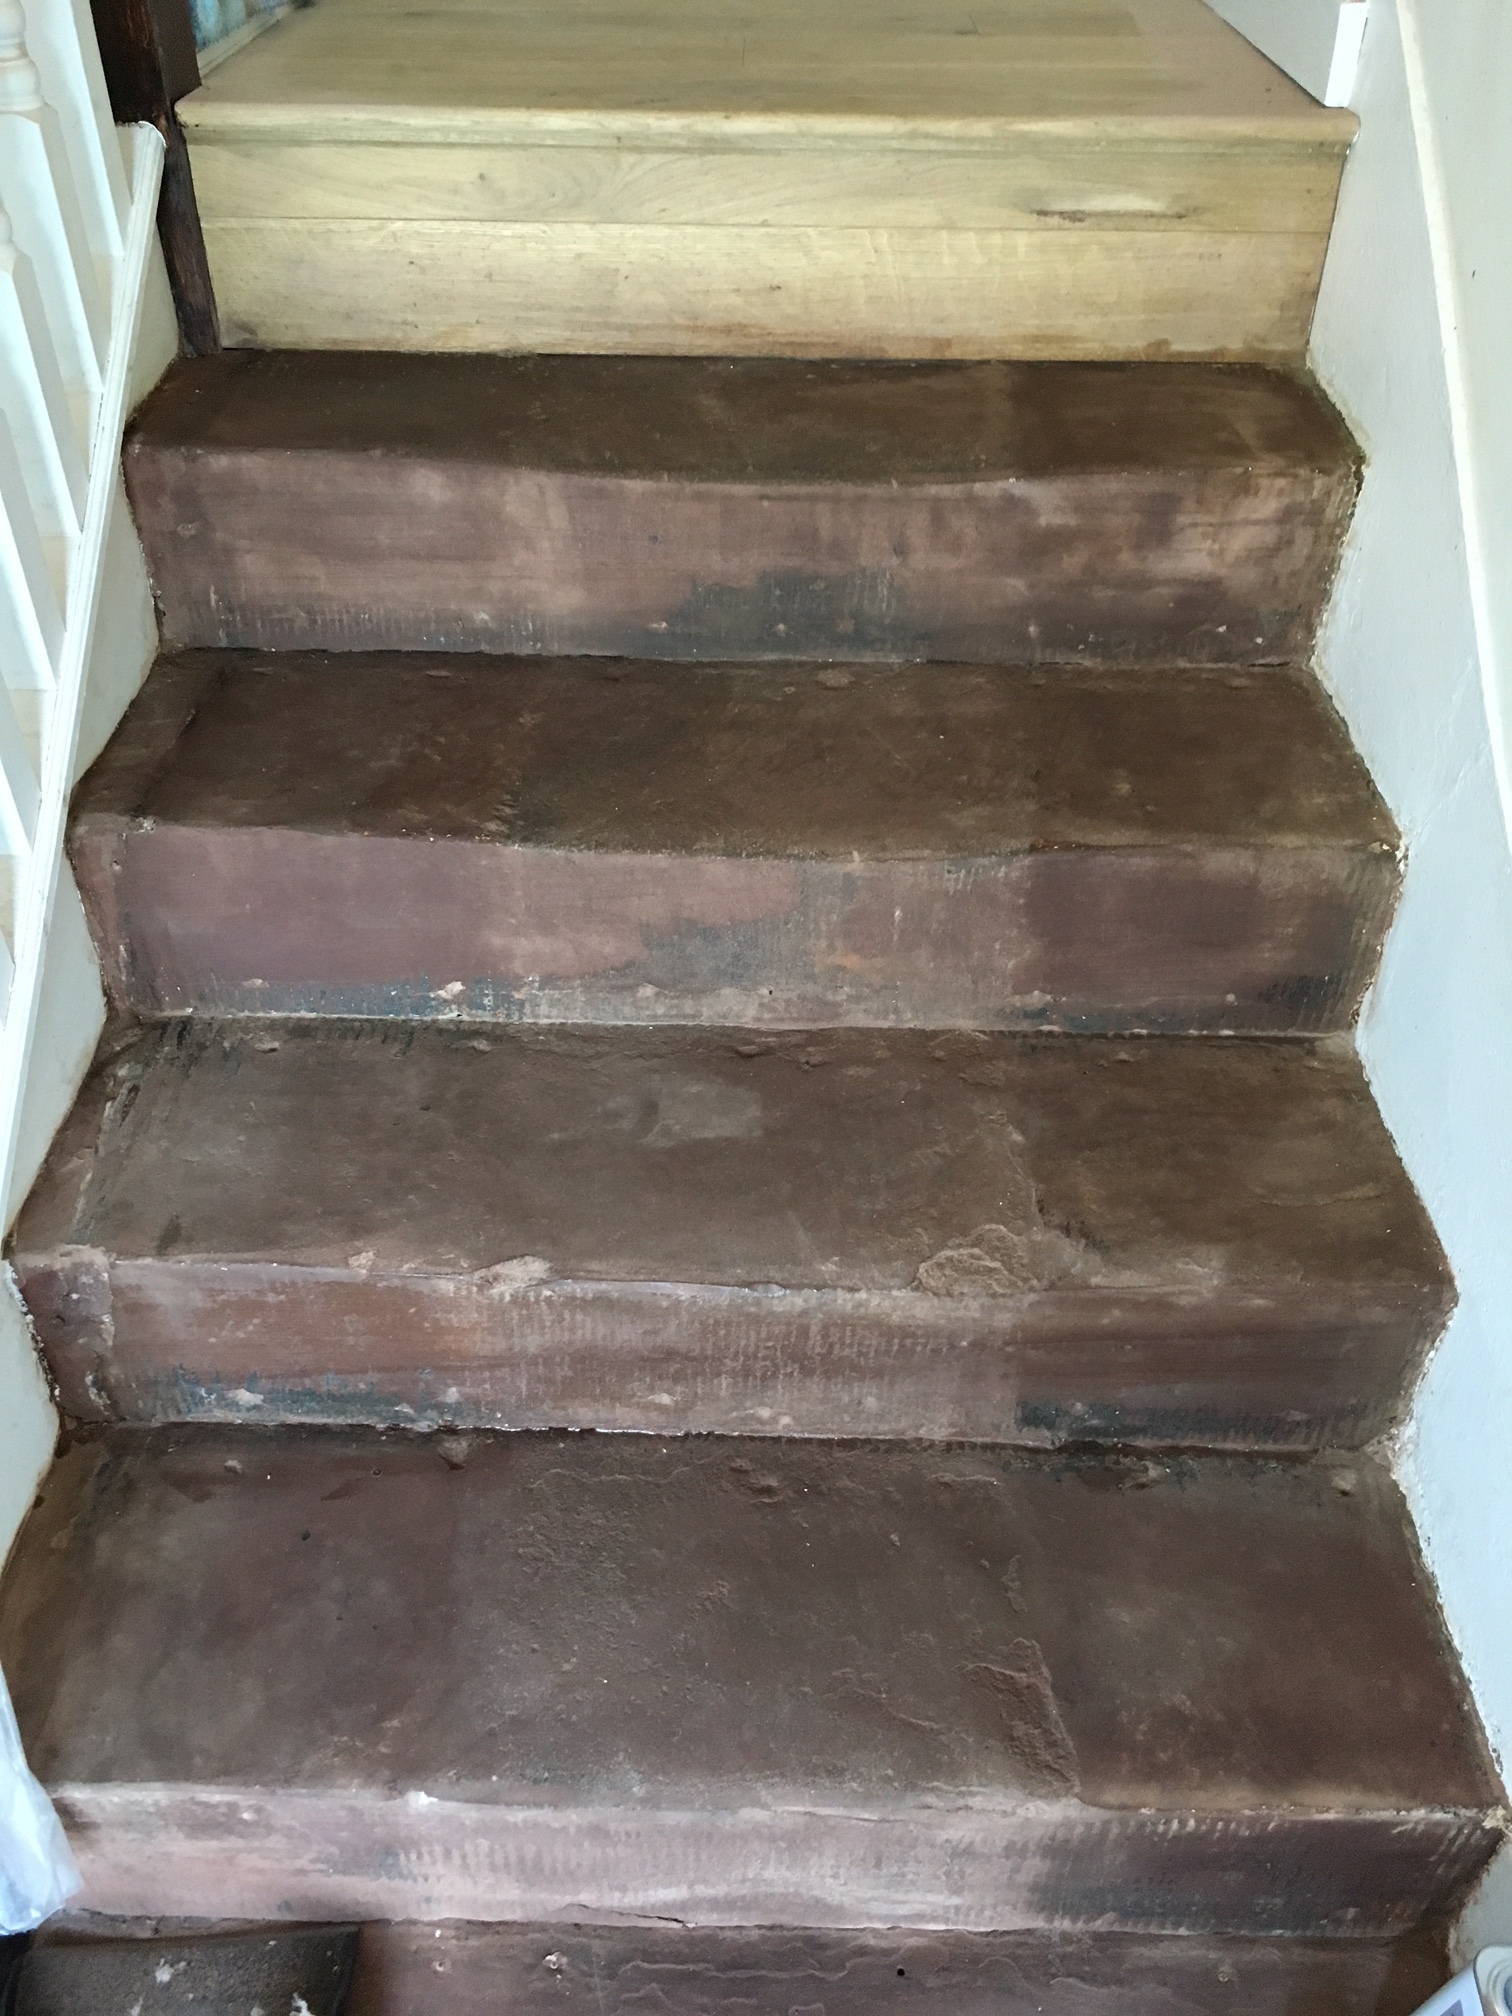
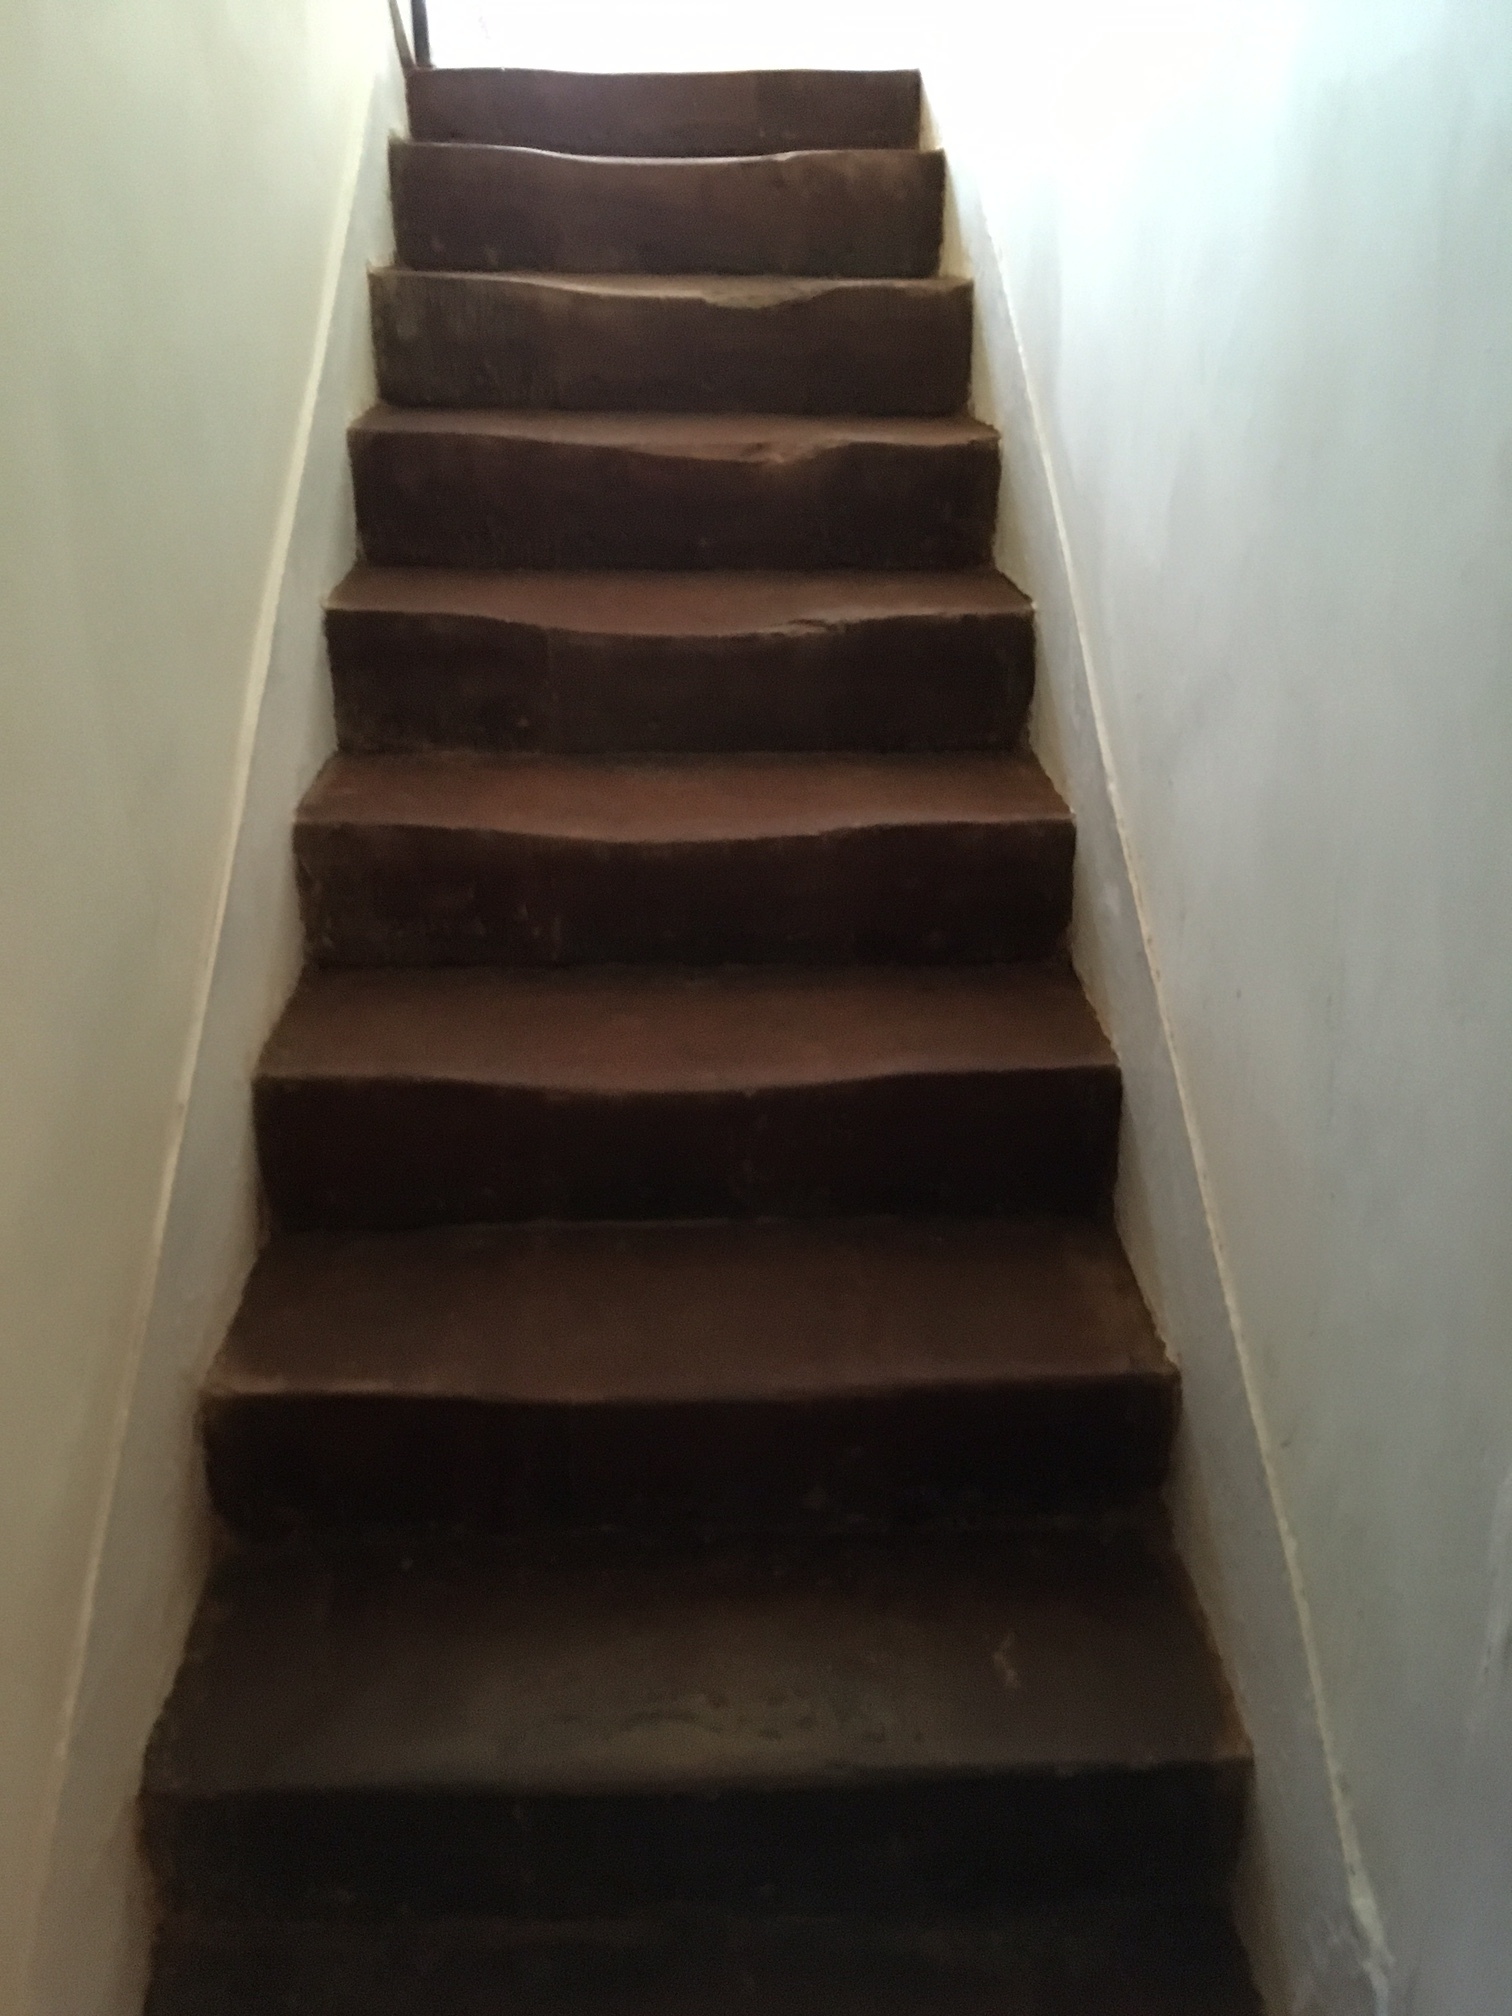
We often get called out when other trades with less experience in stone cleaning fail to make a difference which was the case with these Red Jurassic Sandstone Stone steps at a house in Preston which had been stained with paint splashes and years of grime. The customer had tried several solutions to restore these steps including having a go themselves buy applying some Chemicals from a local Tile Shop, however again this didn’t achieve the results the customer wanted so they called us after we were recommended to them.

Red jurassic sandstone steps before Red jurassic sandstone landing before cleaning

Burnishing Red Jurassic Sandstone

I took a look at the Sandstone and tested a few methods before deciding to go with a process called Burnishing which involves the application of diamond encrusted burnishing pads. The pads come in a set of four and are applied in sequence from Coarse, through medium, fine and super fine; you need to use a little water to lubricate as you go and also rinse with water between the application of each pad. Naturally due to the tight space I couldn’t use a set of full size pads, only he smaller 6 inch pads which fit a small hand buffer.

Red jurassic sandstone steps after burnishing

Sealing an Indian Sandstone Tiled Floor

The floor was left to dry off overnight and then I returned the next day to seal the whole floor with two coats of our impregnating sealer Tile Doctor Colour Grow. The sealer fills the pores of the stone to prevent ingrained dirt and stains, while also emphasising the natural colours in the stone.

Red jurassic sandstone steps after sealing Red jurassic sandstone landing after sealing

The full process successfully restored the red colour in the Sandstone and have come up quite well considering they are over 300 years old.

Professional Restoration of Old Sandstone Steps Lancashire

Restoring Red Jurassic Sandstone Steps and Landing in Preston Read More »

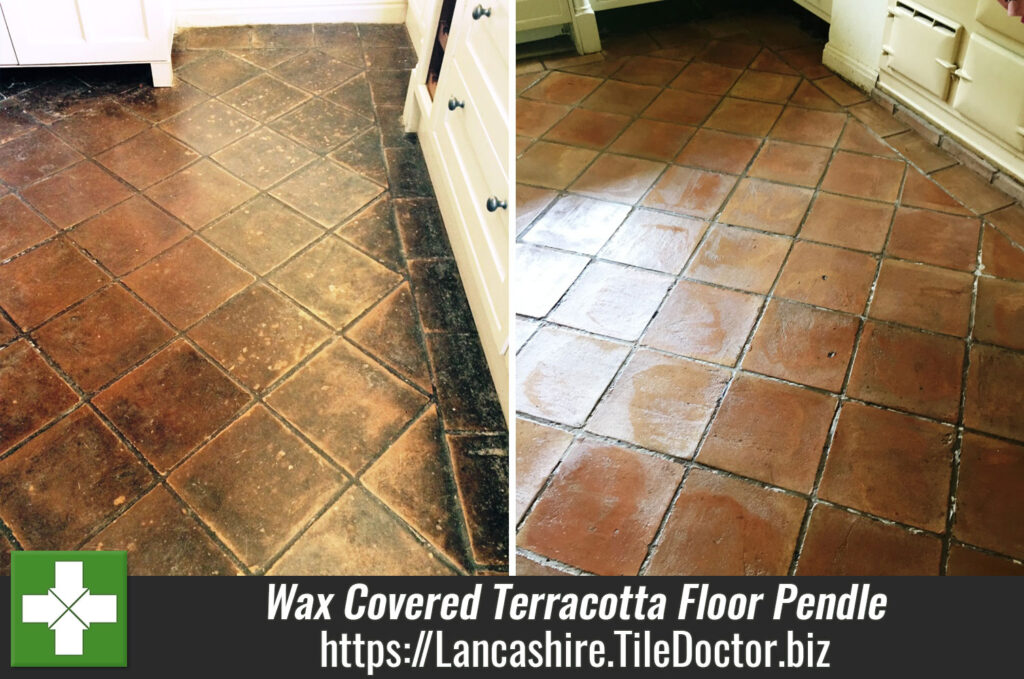
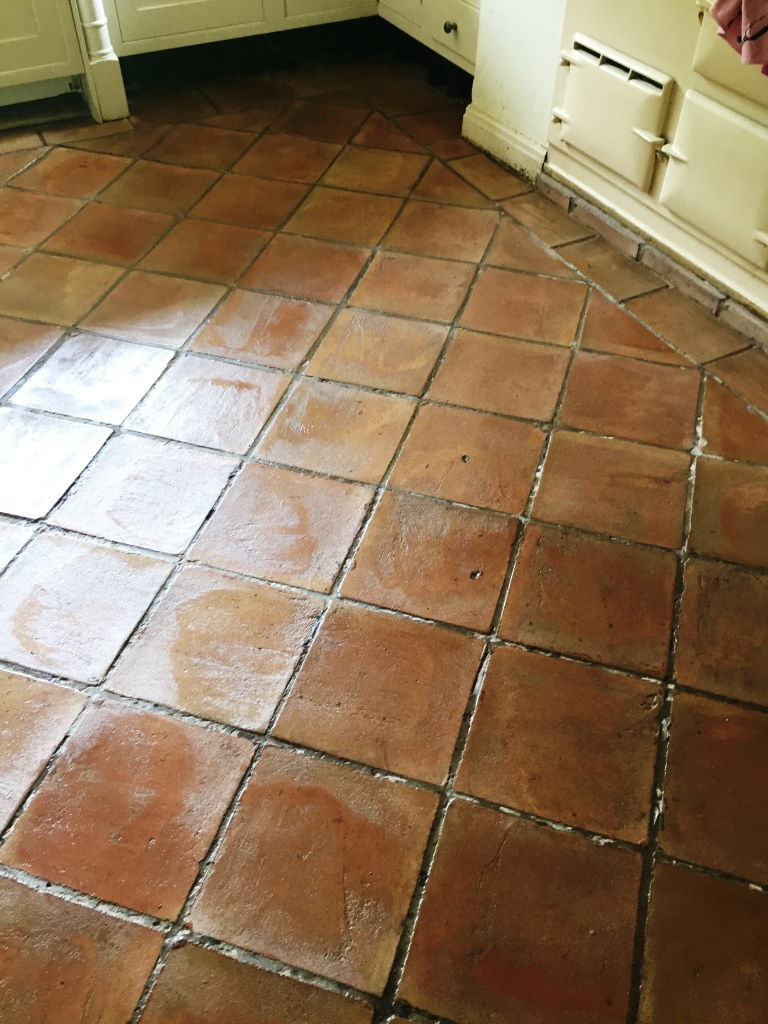
Wax Covered Terracotta Tiled Floor Restored to New in Pendle

Wax Covered Terracotta Tiled Floor Restored to New in Pendle

These Terracotta tiles, located at a property in the town of Pendle, Lancashire had the unique circumstances of being covered by a thick layer of wax which had turned black over the years. Anyone from the Lancs area will have heard of the famous Pendle Witch Trials, and we would need to channel some serious magic to successfully remove the unsightly wax.

The wax had been settled on the tiles for many years, proving difficult to remove even for a seasoned tile cleaning professional, especially since Terracotta has a high porosity and therefore allows the muck to become more easily ingrained. We had to employ all of our years of experience to get the job done. Here’s how we did it.

Black Terracotta in Pendle Before Cleaning Black Terracotta in Pendle Before Cleaning

Cleaning a Wax Covered Terracotta Tiled Floor

Our main product of choice when dealing with the heavy wax build-up was the strong alkaline gel cleaner, Tile Doctor Oxy-Gel. Oxy-Gel is a stripper and degreaser that functions very similarly to our liquid alkaline cleaner, Tile Doctor Pro Clean, the main difference being that Oxy-Gel is in gel form, making it usable on vertical and sloped surfaces.

The thicker consistency of Oxy-Gel would make for a better foil for the thick buildup of wax: we applied it to the tiles and worked it in using a series of buffing pads fitted to a buffing machine. We also employed the assistance of a steaming machine that helped to soften the wax and make it easier to break down. A lot of rinsing with clean water was required, and several wet-vax machines were used to remove the excess cleaning residue, but it quickly became clear that we had finally achieved the result the customer was hoping for.

Black Terracotta in Pendle After Cleaning Before Sealing

Sealing a Terracotta Tiled Floor

As was to be expected, the new unveiled tiles were very dull and lifeless, having not been sealed properly for a number of years. To restore the colour and lustre to the tiles we opted to use two different sealers. The first was one coat of Tile Doctor Colour Grow, an impregnating sealer which penetrates into the pores of the Terracotta to block dirt from becoming trapped. It also contains colour intensifying properties which really brought out the natural reddish shades in the stone.

The second was Tile Doctor Seal and Go, which differs from its impregnating counterpart in that it is a topical sealer. This means that it forms a layer of protection of the surface of the tiles, as opposed to in the pores of the stone. Seal and Go eliminates the need for two-step sealing by providing both a protective layer and a durable, aesthetic sheen finish in the same product.

As you can see from the last two photographs, this combination of sealers really helped in getting these Terracotta tiles looking at their best again after years of neglect under the layer of black wax. We left our very happy customer with some advice to only use pH neutral cleaners for aftercare as general maintenance producers, including bleaches and washing up liquids can reduce the life of the sealer.

Black Terracotta in Pendle After Cleaning and Sealing Black Terracotta in Pendle After Cleaning and Sealing


Professional Restoration of a Wax Covered Terracotta Kitchen Floor in Lancashire

Wax Covered Terracotta Tiled Floor Restored to New in Pendle Read More »
Grout Colouring Preston After

Grout Cleaning and Colouring for a Ceramic Terracotta Tiled Floor in Preston

Well maintained grout is fundamental to achieving a great looking tiled floor, whatever your choice of tile or stone. Even if the tiles themselves are in reasonably good condition, dirty and damaged grout lines can really upset the overall appearance of the floor.

Such was the case with this Ceramic Terracotta tiled floor in the bustling Lancashire town of Preston. The property owner recently had a new kitchen installed, but chose not to have new tiles fitted since the original tiles (dating back a good 15 years) were still in fantastic physical condition, with no chips or breaks. This is quite surprising considering that the kitchen is typically one of the main areas of traffic in any house however Ceramic and Porcelain tiles are very durable.

The grout, however, told a different story: it was very dirty and even missing in parts. Over the years it had come away and was replaced with new grout, however, this had left the whole floor with a displeasing patchy finish. Upon closer inspection it also became clear that the tiles themselves could do with a deep clean. I stepped in to discuss what could be done to improve the appearance of the floor and recommended a deep clean and grout colouring.

Grout Colouring Preston Before

Cleaning Ceramic Terracotta Tiles and Grout

Tile Doctor Pro Clean, a versatile high alkaline cleaner, was my choice of product for removing the dirt from the tiles. I applied it liberally across the floor before scrubbing it in with a scrubbing pad fitted to a rotary machine. Pro Clean is a go-to product for the removal of dirt, stains and other muck on most kinds of natural stone floor, and is capable of dealing with small amounts of soil to heavy buildup.

Once the tiles had been cleaned I turned special attention to the grout. I cleaned it with a product called Grout Colourant Pre-Treatment Cleaner, which is slightly acidic to break down ingrained dirt and tackle inherent grout smears, while ensuring that grout colourant bonds to the grout once it is applied.

Colouring Grout for Ceramic Terracotta a Tiles

The job took two days to complete as it was quite a large floor stretching into several rooms. The floor also needed to dry off overnight once I had completed the cleaning process, so I decided to call back the next day once it had dried completely. Upon my return I proceeded to colour the freshly cleaned grout by applying one coat of natural grey colourant. Sometimes two coats might be required for blending purposes, but not on this occasion.

The customer was very happy with the results. She had, in fact, thought of ripping up the old tiles as part of the kitchen restoration, but she decided not to since she really likes the tiles. A restoration by the Lancashire Tile Doctor was the appropriate and much less expensive choice!

Grout Colouring Preston After
 

Professional Grout Cleaning and Colouring of a Ceramic Floor in Lancashire

Grout Cleaning and Colouring for a Ceramic Terracotta Tiled Floor in Preston Read More »

Travertine Table Top After Restoration Preston

Travertine Table Top Restoration In Preston

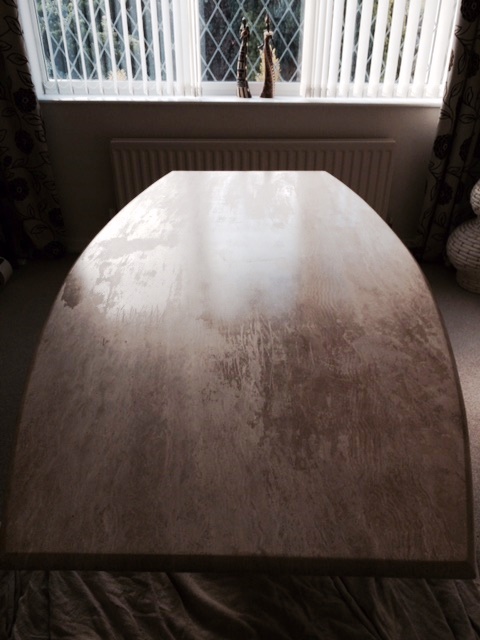
Here’s a quick job I did at a house in the town of Preston, located on the north bank of the River Ribble. My customer had a Travertine table top that had become dull and lost its shine however being a polished stone I knew it should be possible to burnish the shine back.

Travertine is very popular for both commercial and residential use, as it is a natural material with unique features and characters that distinguish it from other types of stone. It can be used for floor tile, kitchen flooring, bathroom wall tile, patios and, in like in this case, table tops.

Travertine Table Top Before Restoration Preston

Burnishing a Travertine table top

My first main task was to restore a nice polished finish to the table top. I did this using a system of four small six inch Tile Doctor Diamond encrusted burnishing pads. The pads come in different grits and attached to a small hand held buffing machine are used in turn with a little water starting with a Coarse grit before moving on to pads with Medium, Fine and Very Fine grits. Despite being quite a physical task, the impact the process of burnishing can have on a dull surface in a short space of time is incredible (as the photos show).

Travertine Table Top During Restoration Preston

Sealing a Travertine table top

After completing the burnishing, the second half of the job centred on sealing the newly polished table top. This was done using one coat of Tile Doctor Ultra-Seal, which is a solvent-based, penetrating sealer specially designed to provide maximum protection against dirt and stains.

Ultra-Seal is particularly useful for sealing table tops in kitchens upon which food is prepared and served. It also accentuates the natural look of the Travertine while allowing the stone to breathe moisture. The product is suitable for use on most types of natural stone, including Marble, Granite, Slate, Travertine, Limestone, and more.

Travertine Table Top After Restoration Preston
 

Putting the shine back on a Travertine stone table top in Lancashire

Travertine Table Top Restoration In Preston Read More »

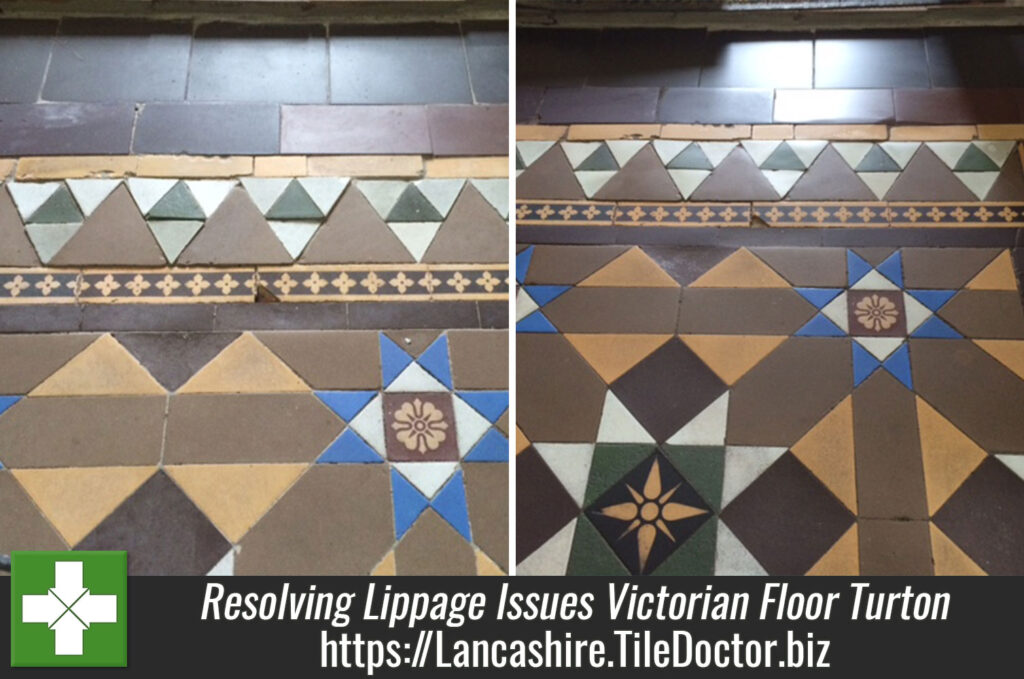
Victorian Tile Lippage Turton After

Resolving Lippage Issues With Uneven Victorian Floor Tiles In Turton

Recently Heidi and I worked on a Victorian tiled hallway floor at a house in Turton, Lancashire, an area which lies on the southern slopes of the West Pennine Moors. Victorian tile floors are commonly found in the reception area and hallways of older houses and public buildings, many of which date back to the reign of Queen Victoria (hence ‘Victorian’ tiles). It was during this time that the tile industry really started to boom.

Victorian Tile Lippage Turton Before
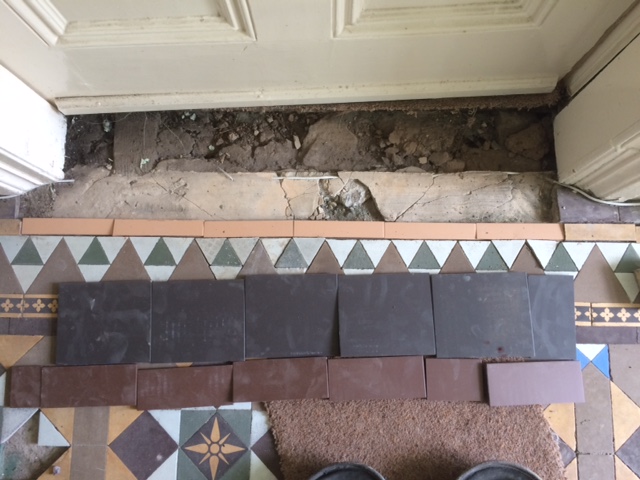
Upon inspection it was evident that the floor in question had suffered from some settlement in the past resulting in a crack in the base under the tiles which had lifted one side and dropped the other; this is quite common in old houses resulting in some of the tiles becoming loose and would need to be fixed back in place before the floor could be given a good clean and re-seal.

Victorian Tile Lippage Turton Before

Removing Lippage from Victorian Tiles

The concrete floor under the tile was patched as best as could be without pulling up more of the floor and the tiles were fixed in place, unfortunately however many of the triangular tiles in the adjacent border would not lay flat resulting in a lippage issue between them which naturally the customer was not very happy about.

Victorian Tile Lippage Turton Tiles Relaid
Not wishing to cause the customer the extra expense of pulling up more tiles and relaying the concrete subfloor I left the tiles to fully set and then came back a few days later with a handheld Flex Machine fitted with a small 220 Grit Diamond pad to grind the tiles flat. As the pictures show, this made the difference and the diamond did not scratch the tiles despite the surface being dry.

Diamond pads are usually used on stone floors but after some investigation back at the Tile Doctor training centre we also realised they can be used on other types of tile including Victorian.

Once this was resolved the entire floor was given a thorough clean using a strong dilution of Tile Doctor Pro-Clean worked in with a scrubbing pad. As well as cleaning the tile and grout it also removed any remaining sealer which is important if you don’t know the history of the floor as the previous coating maybe incompatible with the new sealer. Once done the floor was given a thorough rinse with water which was then extracted from the floor with a wet vacuum.

Victorian Tile Lippage Turton During Grinding

Sealing Victorian Tiles

The floor was left to dry and I returned later to seal the tiles with a couple of coats of Tile Doctor Colour Grow which is an impregnating sealer that soaks into the pores of the tile and intensifies colour whilst also providing durable protection from within. Normally I use Seal and Go on Victorian Tiles however in this case the customer had specified a matt finish.

Victorian Tile Lippage Turton After
The results were fantastic and the client was very pleased with the now flat Victorian tiled floor which, thanks to the cleaning and sealing, was back to looking its best. Another happy customer for the Lancashire Tile Doctor!

Restoring a Victorian Tiled Floor with settlement issues

Resolving Lippage Issues With Uneven Victorian Floor Tiles In Turton Read More »

Shower Cubicle Grout Colouring in Preston After

Grout Cleaning and Colouring Bathroom Wall Tiles in Preston

I recently paid a visit to a customer at a house in the town of Preston to restore the colour of the grout in their bathroom which due to years of using strong cleaning products had bleached the grout of any colour. The tiles themselves were not the issue they seemed fine but the grout was looking Tired; we discussed the options and decided the best course of action would be to apply a grout colourant. Two different colours were chosen, white for the shower area and Sandstone for the toilet area.

WC Grout Colouring in Preston Before Shower Cubicle Grout Colouring in Preston Before

Colouring Wall Grout

Before applying the grout colourant it’s important to give the grout a deep clean using the Pre-Treater that comes with the kit; the solution is sprayed on and scrubbed in by hand before being rinsed off with water.

Once the grout had dried I started to apply the Grout colour which restores the colour and seals the grout as well, thus making it easier to clean afterwards. Grout colouring is fiddly work but you do get the gratification of an instant change. Once done I called the customer in who was delighted with the new effect as Grout colour if used correctly looks very natural and not as if someone has painted the grout making it look false.

WC Grout Colouring in Preston After Shower Cubicle Grout Colouring in Preston After

We discussed using the correct type of cleaning product for aftercare as this seemed to be the issue to start with and I recommended Tile Doctor Aqua-Pro as this can be sprayed onto the Tiles and mopped off which is ideal where a small amount of water is required. For regular cleaning Tile Doctor Neutral cleaner was also mentioned as this is diluted into water where more cleaning is needed and mopped onto the floor area.

Grout Colouring Wall Grout in Lancashire

Grout Cleaning and Colouring Bathroom Wall Tiles in Preston Read More »
Grout colouring Preston Ceramic Wall Tile After

Grout Cleaning and Colouring 25m2 of Tiles in Preston

Oddly Enough I had sold these Ceramic tiles to the customer in Preston when I used to work at a local Tile Shop many years prior. I had also been back to clean and seal the grout on his floor tiles originally in 2007 and then again in January 2010 when we used a Grout Colourant on them. It’s nice to get called back like this as it shows they appreciate the service you provide; for this visit the request was to freshen up the floor tiles and also the Ceramic Kitchen wall tile and Grout which had become ingrained with Grease from the cooker.

Grout colouring Preston Ceramic Wall Tile Before

Cleaning Tile and Grout

The total area was approximately 25m2 and it took me a day and half to give the Tile and Grout a deep clean. For the most part I used Tile Doctor Pro-Clean but for the wall tiles where Grout Colourant has been applied I used Tile Doctor OxyPro which is a ready to use Tile and Grout cleaner that comes in a spray bottle, when applying any liquid to a wall its best to mix it with air in a spray bottle as this makes it lighter and helps it stick and soak into the to the tile and grout as opposed to running down it. It was noticeable that the grout colour was mainly intact and it had just needed a good clean on the whole apart from maybe near the cooker which I topped up with new Grout colour in the original shade.

Applying Grout Colourant

Once everything had been rinsed and the grout had dried I was able to apply the grout colourant using my colour applicator (toothbrush). You have to be fairly methodical doing this so it can take a while, you can remove excess colourant by spraying plain water and scrubbing with a white pad (don’t used a coloured pad as you can transfer the dye from the coloured pad to the surface).

Grout colouring Preston Ceramic Wall Tile After
 

Cleaning and Colouring of Grouts in Lancashire

Grout Cleaning and Colouring 25m2 of Tiles in Preston Read More »
Grout Colouring After

Grout Colouring in Chorley

The surface of grout is porous and as a result it can get so dirty it becomes impossible to clean it successfully, even our most powerful cleaners struggle if it gets to this stage. If you get to this point you could use the flat end of a screwdriver to scrape out the grout and re-grout the whole floor to ensure a consistent colour, naturally this is arduous work and can be time consuming however there is a second option and that is to apply a Grout Colourant instead. The grout colouring products we use not only change the colour but it also provides a protective barrier that seals the grout as well ensuring it keeps it appearance well into the future.

Grout Colouring Before

Preparing the Grout

Before applying a Grout Colour it’s important to ensure the grout is clean of grease and any sealer that may have been applied to the adjacent tile; Tile Doctor Pro-Clean is a strong alkaline cleaner that’s good for this purpose, for best results you should allow the cleaner to dwell for a while and then get into the grout joints by hand with a stiff brush. Last step is to rinse the floor down with clean water to remove any chemical that might upset the colourant, I recommend the use of a wet vacuum at this point to remove liquids from the floor.

Grout Colouring During

Applying the Grout Colour

Once the grout has dried you can start applying the colourant which is a relatively straightforward process of squeezing the product onto a toothbrush and running it onto the grout. Don’t be tempted to use an old toothbrush for this purpose as it may contaminate the colourant leading to discolouration in the finish. The product sets in a couple of hours so I was able to do the whole floor in a day.

Grout Colouring After
 

Colouring Grout in Lancashire

Grout Colouring in Chorley Read More »

=================================

Lancashire Tile Doctor

================================= Read More »

Scroll to Top